License plate illumination is not only a unique type of car tuning, but also a mandatory requirement for road users. According to the law, at night, car license plates must be fully illuminated and be clearly visible from a distance of twenty meters. If there is no lighting or inappropriate lighting devices are installed on the vehicle, the traffic inspector has the right to issue a fine.
If you want your number to be perfectly visible in any weather and in any lighting, then, of course, it is necessary to install additional LED lighting
Additional lighting can only be installed for the rear license plate. In this article, we will consider options for installing lighting devices on the rear license plate, installation methods and their compliance with legal standards.
Tools and materials
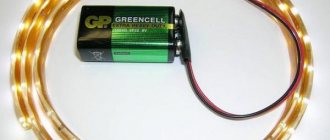
Set of needle files. Small diameter drills (depending on the size of the letters on the nameplate). Drill. Hacksaw blade with jigsaw. Sandpaper. Super glue. Transparencies. Textolite. Protected LED strip in red and white.
We begin work by drilling out the letters in the inscription, followed by cleaning each letter flush. This work should be done slowly, carefully and carefully. It should be remembered that the appearance of the product in the future will depend on the result of this event. The next step is to cover both sides of the inscription with transparent film. This is done so that dirt does not get into the recesses, which will then be difficult to pull out.
Considering that the license plate illumination is planned as an additional brake light, you should choose red LED strips. Pay attention to the performance of these tapes. Most of them are intended for indoor use; we are not interested in them. You should select a moisture-proof tape and appropriate connections to it. The next step is to cut out a window in the frame for future lighting.
Plexiglas is glued into the formed window, followed by the application of red self-adhesive tape.
The part under the letters is illuminated with a white LED strip, and the rest is illuminated in red.
A frame is cut out of plexiglass, which will be located on the rear of the license plate. It is on this glass that the LED strip is placed. The best option for uniform lighting is to place the tape in the shape of an oval.
In the process of installing the frame in its original place, it is necessary to connect the tapes to the corresponding contacts of the brake light.
Of course, you can do more original things, for example, by making a finished profile on a waterjet cutting machine, but this option, although more interesting, will be much more expensive. This option for upgrading the standard lighting will add zest to your car, make it stand out from the crowd of the same type and bring pleasure to the owner.
The requirement of the state traffic inspectorate provides for mandatory illumination of the rear license plate of the car. Doubts may arise as to whether such illumination is really necessary, since road safety does not depend on it? The answer is categorical - it is necessary. This measure is necessary to ensure that the vehicle license plate is clearly visible even in the dark.
The license plate light is an external lighting device, and driving with faulty lighting devices is a violation and is subject to a fine. Partial failure is also a violation.
Justification and amount of the fine
It is worth noting that a fine for the lack of illumination of the rear license plate can be imposed only in the dark, when the license plate becomes unreadable. The sign must be easily readable at a distance of 20 meters, and if one bulb has burned out, but the others provide sufficient illumination of the number, then a fine cannot be imposed.
This violation may, at best, result in a warning from the inspector, or a fine of 500 rubles. Most often, the violator receives only a verbal warning, because it is very difficult to prove that the driver knew about the malfunction before driving. It is also difficult to prove the opposite, so there is no point in taking unnecessary risks.
Types of backlight
Today's cars are equipped with rear license plate lighting already at the production stage, but many are not satisfied with the quality of the lighting. In Soviet-made cars this function is not provided at all. Or maybe there is a simple desire to update the appearance of your car? Then it’s worth familiarizing yourself with the types of lighting in more detail.
Standard lighting is incandescent lamps installed in the ceiling. A modern solution is diodes, LED strips. There is another backlight option - complete with a rear view camera.
How does a license plate light differ from LED lighting?
- The brightness of the lighting is much higher for diode lamps.
- Service life, on average, incandescent lamps last 2-3 times less.
- Color. For diodes, it is possible to set the backlight to any color.
More and more car enthusiasts give preference to diode devices (as in the photo below). Replacing the license plate light bulb with such a device is very simple; just unscrew the lamp and replace one with the other.
DIY installation
How to replace the rear license plate light? Easily! And you don’t even have to contact the service. Let's look at all the necessary manipulations step by step.
- Prepare materials (frame for a car license plate with backlight or separate lighting elements, heat shrink, scissors, silicone sealant, lighter).
- Remove all wires from old parts and remove the old frame.
- All visible joints with lighting elements and seams on the frame must be sealed to prevent possible contact with water. If this is not done, the backlight will last a maximum of 4-5 months, the contacts will rust, and the entire frame will have to be replaced.
- Twist the wires previously freed from the insulator on the frame and on the trunk of the car. To prevent short circuits, insulate them with heat shrink.
- Screw the frame onto the existing space on the back of the car.
- Put the number in place.
This procedure will take a little time. If you plan to install the lighting fixtures yourself, it will take a little time to attach the diodes to the frame.
An illuminated license plate frame can be designed similar to speaker lighting, from the inside. To do this, you will need a frame, a piece of plexiglass the size of the frame, 3 mm thick, LEDs from 8 pcs., foil. It will take a little more time, but the result will be more interesting.
- Grind the diodes down to glass size.
- Cover the back and end of the glass with foil.
- Connect the light elements to the glass, point them at the corners, and fill them with sealant.
- Take the wires out of the frame and connect to the car.
- Screw on the number, which in turn will hold the glass and diodes.
You need to carefully seal all connections and wires with silicone so that you do not have to disassemble the structure every 2-3 months.
You will find detailed instructions on how to install the backlight yourself in this video:
Illuminated license plate frame
Some people prefer to make a backlit frame on their own, while others prefer mass producers. And if the choice remains outside the ready-made framework, then you need to identify several criteria for choosing products:
- durability - accidents on the roads happen quite often. The frame must be durable so as not to break in a minor accident, and also withstand temperature changes from summer to winter;
- size accuracy - in most cases, all frames are of a standard size, but it’s still worth checking;
- brightness and serviceability of the backlight - it is better to check the performance of all lighting elements when purchasing.
Modern frames can accommodate not only a license plate, but also additional inscriptions, where the manufacturer, at the buyer’s request, will indicate any information.
Colored backlight
You can also highlight your car, make it brighter and more original in the dark by illuminating the rear license plate using colored diodes or tape.
There are a lot of different colors, and such devices are not difficult to install. There is only one drawback - the installation of such devices does not comply with GOST, which means it is an offense. GOST 8769-75 speaks of the need to install one or more rear license plate lights, which should emit white or white-yellow color.
Why such requirements for a small car part? The use of additional lighting colors may distract the attention of other drivers and thereby provoke an accident. The desire to stand out may cost a 100 ruble fine or a warning in accordance with the Code of Administrative Offenses 12.5 Part 1. Do not forget that a car is, first and foremost, a vehicle.
Bottom line
What is worth learning and remembering after reading all of the above:
- The license plate number of the vehicle must be illuminated at the rear.
- Failure to illuminate will result in a verbal warning from a traffic police officer or a fine of 500 rubles.
- Replacing or installing light elements for license plate lighting yourself is easy and quick.
- The use of any other colors other than white or white-yellow is prohibited and may result in a fine of 100 rubles.
Do not neglect the installation of this lighting element. Yes, after installation, the car number will be clearly visible, and in case of violation, the inspector can easily read and write it down. But even in the event of a car theft, the availability of the number will only be beneficial, and may affect the speed of searches.
Be attentive to the external lighting of your car and good luck on the roads.
User Drugg posted his new Nissan creation in one of the communities. The idea is good and seems promising to me. To tune the license frame, he needed:
- LED strips in red and white.
- Oracal film, red
- Wires
- Plexiglas
- Transparent glue
- Tool
The list of materials used is available to everyone.
Further actions are described in the order of their execution. And the first stage is cutting out the logo. Why apply the logo according to the template using a stationery knife or draw it with a pencil. As a result, the contours of the logo are visible. We drill holes with a drill and bring the letters to perfection with files or needle files.
At the back of the license frame, a cut is made in the form of a rectangle, slightly larger than the logo. Next, a rectangle of plexiglass is cut out slightly wider than the cut in the frame and glued in with transparent glue.
We cut out a rectangle the size of the slot from the red Oracle film and glue it in so that there is no gap in the white LEDs.
Now the area for illuminating the logo is ready; white LED strips will be located here.
The front side will look like this
From the back it looks like this
Now we cut out a podium from plexiglass for the entire frame with a small protrusion so that the glow is noticeable and solder an oval from a red strip of LEDs along the entire diameter of the podium, and solder the logo backlight there too.
We glue all the parts together and get an LED frame for the license plate with the Nissan logo.
The author of the idea connected the backlight of the license plate frame to the brake light, but it seems to me that it would be more aesthetically pleasing to connect it to the dimensions. You can also experiment with the colors of the LEDs. Let's look at the final result:
I’ve been carrying around in my head for a long time the idea of making a license plate backlight. And as they say, in order to kill two birds with one stone, that is, not to make an additional stop sign, and therefore I decided to make the license plate illuminated in red. And following the old scheme, I decided to highlight the Nissan inscription itself (to do this, this inscription needs to be covered with transparent film on both sides), I already have such experience. Many will say that it was possible to come up with something more original, but I made it from what was, as they say, at hand, as well as what goes with the nameplate. I started work by cutting out the letters in the frame (I cut out the letters with a small file, Oh, and this turned out to be a tedious task).
I decided to place strips of white LED light under the letters, and I will place a red LED strip under the rest of the frame. Then you need to cut a frame out of plexiglass; it will be located on the back side of the license plate. We will place an LED strip on the cut-out plexiglass, we will place it in the shape of an oval, so the light will evenly illuminate the frame. Next, everything needs to be soldered, glued and then connected.
After this comes the installation itself. The frame needs to be attached to the stop and then it will light up when you press the pedal. That's all, you must agree, it looks impressive and incredibly beautiful.
Today, probably, almost every car owner strives to make his own car as beautiful and attractive as possible. Naturally, you want the car to stand out in everything, and this especially applies to the license plate. Many people think that a license plate cannot be modernized. But in fact, this is far from the case, since now there is everything to make a small but effective tuning of the number.
Now let's talk about installing LED license plate lights. This solution not only looks very beautiful and attractive, but also significantly helps the vehicle owner to significantly save energy - this is especially true for classic models with their weak generators.
Anikeev's blog
The car I bought had a completely ordinary license plate frame with backlighting on the sides. But it didn't work. I bought a new frame with overhead lamps, installed it and was happy for about a month, and then one lamp burned out. I had to buy another frame and remove the light bulb from it to replace it. The light bulb burned out again...
Isn't it too much to replace frames, light bulbs, etc.? I decided it was too much. Therefore, instead of ordinary light bulbs, I decided to use LEDs. Make your own frame for a license plate with LED backlight, do it once and for all. Therefore, the frame from which I pulled out the light bulbs lay on the laboratory table and underwent a complete dissection.
The lampshade can be easily unscrewed and removed. Inside are two contacts and a lamp. By the way, the contacts are initially fixed to the lampshade, but due to heat from the lamp they peel off and the lamp in the lampshade begins to dangle.
The standard lampshade includes two pieces of LED strip. The inside of the lampshade has a smooth side and the side with the reflector is ribbed. It is important to glue the tape correctly on the smooth side so that it shines on the diffuser.
We solder two pieces of tape in series, observing the polarity: plus to plus, minus to minus. It is convenient for these purposes to prepare wires of different lengths: short for internal contacts, long for external ones.
The LED strip is polarity sensitive, so I use a marked cable to connect it. We glue the tape into the lampshade opposite the reflector. Standard glue is quite enough; there is no need to glue anything additional.
The initial tightness of the frame was a very big question - in the very first frame with side lighting, the contacts under the lamp were in terrible condition: something between rust and rot. For my LED license plate illumination frame, I solved this issue using the MOMENT Germent sanitary sealant, because I had it on hand. Place your finger in a plastic bag and use it as a protective glove.
We seal the seat of the lampshade. Disassembling it after this may not be easy, but we are also assembling a timeless, maintenance-free structure.
We install the lampshade and seal it again.
I also covered the screws that secure the lampshade with sealant - they rust, look ugly, and are difficult to unscrew. The lampshade itself is held in place by a plastic cover of an irregular shape, and between them there are “designer” recesses into which water can get clogged. Therefore, we do not skimp on sealant.
Initially, the electrical wiring was made entirely using strands, and the wires were laid in special channels and fixed with hot-melt adhesive.
This method does not suit us. We will leave the laying in the channels and fixing with hot glue. And we will connect the wires in the entire form: with soldering, using heat-shrink tubing and a clever method of sealing the heat-shrink with hot glue.
The result was a frame with normal, even illumination. It has been working for over a year and a half without any problems.
Unlike purchased LED frames, mine produces soft and diffused light, has protection against power surges and does not burn out.
Installation process
After using the vehicle for quite a long time, the main backlight lamps on the license plate burn out - at the same time, car owners quite often continue to encounter similar problems. The room is illuminated thanks to two lampshades, which are located at the bottom of the trunk itself. And at such a moment, many car owners ask themselves the question: how to change the license plate light bulb? From the beginning they are being dismantled. At the same time, this process can hardly be called very labor-intensive and complex. To completely dismantle them, you will need an ordinary screwdriver that has a flat blade.
First, the trunk opens to make everything as convenient as possible. After this, the lampshade is pryed off from the left with a screwdriver so that it simply releases from the main latch.
After this, we press on it on the right side, and also try to move it a little to the left, and after that it should immediately come out.
After this, it is necessary to pull it out a little together with the main power wires directly for more convenient operation when replacing lighting lamps.
After this, you also need to lift the main plastic clamp up a little, and also remove the power plug itself.
With all this, it is possible to remove the base itself together with the main light bulb by turning the base of the white housing counterclockwise.
At the same time, the light bulb is removed relatively simply - to do this, you will need to grab it and also pull it to the side, and after that it is removed directly from the base itself.
After the main license plate illumination lamps are replaced directly with a new one, after which everything is installed in the reverse order on your own car. As you can see, all this is done elementary, quickly and extremely simply.
Number frames, their types (for beginners)
Hello gentlemen and ladies!
Even after purchasing the car, I wanted to replace the license plate frames, because the ones that were installed were obviously cheap, made of hard plastic, and even with the Chevrolet inscription and emblem. I even purchased gaskets under VAG number KEA075004
so that the frame and number do not knock on the body. They are made of foam material and are soft to the touch. This is a very good thing and all car manufacturers should install this!
There are several main types of frames:
1. Metal frame with a thickening at the bottom.
These frames begin to bloom soon after installation if the price is low.
They are also quite noisy and scratch/rub the paintwork if you do not use a soft pad. Example: Airline AFC-13
,
Dollex SPL-23
,
LS-Car AB-027
.
2. Frames made of ABS plastic with thickening at the bottom.
They also scratch metal and make noise because the plastic is very hard.
There are a lot of them sold, much more than metal ones. Also available with a metal base. Example: Airline AFC-03
,
AVS A78487S
,
ARS RNC-01
.
3. Silicone frames, both with and without thickening at the bottom.
The most preferable option, as they do not make noise, do not scratch the body, and look aesthetically pleasing and neat.
They come in both completely silicone and with a plastic backing to keep their shape. Example: RCS 4627082280036
,
Dollex SPL-70
,
SDS AOU10002RDX
.
4. There are also license plates with a built-in rear view camera, reflector or backlight
, but they are also made of plastic or metal.
Example: AutoExpert VC-204
,
Swat VDC-006
,
Mega AB-009-B
.
After weighing these, I ordered myself a pair of frames made of silicone. I bought these because they will not damage the paintwork on the trunk lid. There are also no advertisements on them and the frames around the number are thin and identical on all sides.
Source
Main room illumination
It is important to note that a frame for a backlit license plate can be made from the most ordinary license plate, and at the same time, it is not difficult to carry out this work. To tune the license plate itself, you will definitely need:
- LED strips available in white and red colors.
- Oracle film, red in color.
- Plexiglas
- Wires
- Tool
- Transparent glue
Further actions are described in the order of their execution. But the very first step is cutting out the logo itself. To do this, the logo is applied according to a standard template with a stationery knife or drawn with a pencil. Ultimately, the main outlines of the logo itself are visible. Holes are drilled using a drill and the letters are brought to perfection using a file or needle file.
After this, a podium is cut out of the main plexiglass for the base of the entire frame, with a small protrusion so that the glow itself is also noticeable, and we also solder an oval from the main red LED strip along the overall diameter of the podium itself and the illumination of your car logo is already soldered in there. All the main parts are glued together to create an LED frame for the license plate along with the main logo. It is important to consider that connecting the license plate frame illumination to the brake light, but many argue that it would be much more aesthetically pleasing to reconnect the license plate illumination directly to the dimensions. In addition, you can experiment with LED color schemes.
In this case, replacing the license plate light bulb on the network is possible both on the front license plate and on the rear license plate. At the same time, it should be taken into account that now the backlighting of the rear license plate is carried out as quickly as possible and much easier. One should especially take into account the fact that not every car owner can carry out a replacement in the rear.
One should especially take into account the fact that the rear view camera for license plate illumination can be made in several basic types - closed, transparent and open. Each of the options is universal and at the same time, almost each of the options is the most suitable option and at the same time, they do not have any special differences. That is why almost everyone can afford to install license plate lights with their own hands.
Useful tips
- Operate the vehicle only if the vehicle optics are in good working order. You can only install additional lighting on the rear of the car yourself.
- By law, every car must be equipped with rear license plate lights. White and pale yellow lanterns are permitted. It is prohibited to use red, blue, orange and other colors of illumination, which are often used by motorists to improve their vehicle. This may result in penalties.
- An exception to the rule are cars that are not equipped with standard rear license plate lights. If this fact is indicated in the technical documentation, then penalties for the lack of lighting do not apply to the car owner.
- Inappropriate illumination of the front sign threatens to deprive your license for a period of six months to a year. For the same violation regarding the rear number plate, a financial penalty will be imposed.
Spending time and money
At the same time, some time after installation, many people ask themselves the following question: how to replace the license plate light bulb. In fact, all this can be done in just a few minutes - 15-25 minutes. To do this, using a similar scheme, you simply need to disassemble the number itself and replace the backlight itself. It should be taken into account that today, almost everyone can afford to install this upgrade on their license plate. At the same time, the need for replacement occurs quite rarely - once or twice a year - everything directly depends on the frequency of use, on their power, the serviceability of the electrical wiring and, of course, on the quality of the LEDs themselves.
As a result, I would like to note that the overall quality of the investment takes about 700 - 1000 rubles - in most cases it turns out cheaper, since a lot depends on the length of the LED strip itself, brands, volume of the strip, intensity, and so on.
What the rules say
The traffic rules state that the owner of the car is obliged to ensure that the state license plate is legible. In this case, rear license plate illumination is required at night - it is not needed in front. White or yellow light must be used for lighting - blue backlighting of the license plate is not allowed.
The license plate illumination must be sufficient to ensure its clearest visibility at night.
The readability of license plates is explained as an opportunity for a traffic police inspector to view them from a distance of 20 meters. It is believed that a broken light bulb or incorrect lighting does not provide this opportunity. The reason for the fine for “unreadability” may be one of the following factors:
- The number plate light does not light up;
- blue number plate illumination;
- use of means to impair the readability of license plates.
If the license plate light on your car does not light up, and you were stopped by the traffic police, you can claim that you left with an illuminated license plate, but a breakdown occurred along the way.
In the case where the license plate illumination does not work, a fine will be issued if the police can prove that you knew about it when leaving the garage.
If you managed to convince the inspector that the breakdown occurred on the road, no fine will be charged for the lack of rear license plate illumination. In this case, you will be given a warning and will be required to fix the problem within 24 hours.
The color of the license plate illumination is either white or pale yellow
Denim photo frame
A creative youth photo frame can be made from old jeans. As a base, take a thick sheet of plywood or a rectangular wooden board. Draw the outlines of the future photo on it.
Prepare the decor - cut denim ribbons of the same width, but different lengths, so that the finished rounds are of different sizes. Lubricate each tape with glue on one side and twist it. When you have collected a lot of these “details”, cover the frame with them.
After complete drying, it is necessary to carefully trim the bottoms of the outer rounds from the inside, as well as the sides of the cardboard protruding from the sides. Now you can place your favorite photo here!
Wall-mounted key holder for the hallway: 10 beautiful ideas
Let's sum it up
LED license plate illumination is no longer just a fashionable feature that young car tuning enthusiasts are keen on. This is a convenient and cost-effective way to comply with legislation that requires your vehicle's license plate to be clearly visible under all conditions and at any time of the day. Properly selected LED lighting will serve you well and make your car more stylish - both day and night.
According to current legislation, license plates of all vehicles, tractors, special equipment and other machines must be legible even in the dark - for this purpose, rear license plate lights are installed on the equipment, which are described in detail in this article.
Assembling the flashlight body
When all the frames are painted, aged and have a binding on the glass, you can assemble the flashlight body. The frames must be glued together so that their long sides touch each other. Glue them carefully, carefully joining all the edges. The resulting body will be hollow, without a top or bottom.
And outside the window is a glacier: an architectural studio has built a group of buildings with a gorgeous view
Jessica Chastain will solve a crime in a new psychological thriller
I am preparing chocolate manna with halva and prunes
Cover assembly
The cover of the decorative lantern will be removable. It consists of three parts - large, medium and small, folded like a pyramid. Apply glue to one side of the middle board and center it on the large base. Glue a small board on top. Let the glue dry.
Paint the finished lid and the part for decorating the bottom with white paint. Rub off the dry paint a little around the edges using sandpaper.
If you have a piece of copper pipe, then use it. If you do not have such material, then you can use a regular PVC pipe, which is used for water supply. To make the piece stand out and complement the lantern, paint it with copper-colored paint. For this purpose, you can use nail polish of a suitable shade. Pre-treat the PVC pipe with a degreaser.
After the restrictions were lifted, Russians rushed to buy trips to the south
Blue "alien". The guy found a beautiful creature on the beach and picked it up
No need for muscles, add color: scientists have found what exactly attracts women
Glue the blank in the center of the top piece. Thread a piece of thick rope into the pipe and glue its ends together. Pull the rope ring through the pipe so that the glued section remains inside and is not visible.
Conditions of fines
A certain car model has its own list of external lighting devices. Therefore, penalties for malfunctioning or illegibility of a sign differ. In accordance with clause 3, part 3 of the general list of faults, driving with a switched off or faulty lighting device is punishable by a fine. Even if the lighting works, but is splashed with dirt and does not perform its functions efficiently, this violation is also punishable by a fine.
brand-detail-img-title">According to the standards, the registration plate illumination is also an external lighting element
According to the standards, the backlight of the registration plate is also an external lighting element, and its malfunction or any defect necessarily entails punishment.
There is an important point in operating a road vehicle using lighting. If the backlight does not light up at all, and the car owner drives such a car, this may be regarded as an obstacle to the work of the traffic inspector. However, the convention applies only to night time. If this happened during the day, then there are no fines or punishments for this offense. During daylight hours, the cleanliness of the license plate is important.
There are cases that for some reason or due to external factors, even one light bulb in the lighting device does not work, and this does not make it possible to read at least part of the number; this is also punishable by a monetary penalty. The amount of such a fine in 2022 is 500 rubles.
But there are several “saving” points in which no fine will be charged:
- If one light bulb in the device does not work, but the second is located in such a way that the license plate number can be read, then there is no fine for illuminating the rear license plate. In this case, you can get by with a warning from the inspector. But it is precisely for the non-working condition that they can still be fined.
- If the lack of sufficient lighting is detected by the driver at the time the inspector stops, then in this case a verbal warning will also be issued. But it is necessary to provide evidence that the driver was not aware of the breakdown.
- If the technical design of the car does not have a backlight or a place for it and the driver has a corresponding note in the technical ticket, then this also exempts him from paying a fine.
brand-detail-img-title">The amount of such a fine in 2022 is 500 rubles
If it is daytime, then the current regulations do not indicate a fine for non-lit license plate lights. It only says that both numbers must be clearly read - front and rear. In the dark, a mandatory norm is a working light on the rear panel. There is also a rule stipulated by the traffic rules about the unreadability of even one character in the license plate, regardless of the time of day from 20 meters. This fact is also a violation, and you can get a fine for it.
For any motorist, fines and warnings entered into the protocol are morally unpleasant; they can ruin the reputation of an exemplary driver, but they also affect the motorist’s wallet. To avoid this, you should carefully inspect your vehicle before driving it and repair any breakdowns in a timely manner. In this case, you can avoid “ugly” marks on your license, including a fine for the lack of rear license plate illumination. This is such a small thing that is easy to track on your own.
About the intensity of the backlight and the permitted colors of LEDs
According to GOST, the light of rear registration plates must be white or yellow, or shades thereof. Thus, any other color of lighting may be regarded as a violation and subject to a corresponding fine of 3,000 rubles, since colored LEDs can confuse drivers following and provoke a traffic accident.
Taking into account the standards, it is possible to change the tonality and saturation of the lighting. However, this must be done without attracting the inspector’s attention by using too bright a light, which leaves a mark on the road surface, as well as using excessive amounts of license plate lighting of other colors.
Penalties for violating the rules on license plates
The law talks about liability for failure to comply with the rules regarding registration plates:
- driving a car with license plates that are unidentifiable, non-standard or placed without complying with the requirements of state standards entails a fine of five rubles or a warning;
- the absence of state signs on a car, placement in places not provided for by the rules and the presence of means that make their identification difficult, entails a fine of 5 thousand rubles or deprivation of the right to drive a car for a period of one to three months;
Installation of knowingly false government signs involves the following fines:
- 2500 rubles for individuals;
- from 15,000 to 20,000 rubles for officials;
- from 400,000 to 500,000 rubles for legal entities.
Rear license plate illumination is a mandatory attribute of every car. For keeping this external light device in a faulty condition or in a condition that does not comply with the law, several types of administrative penalties are provided: warning, fine, deprivation of rights. This article will tell you what a rear license plate light should be like, how to modernize it and what rules should be followed.
Cardboard photo frame
The simplest and at the same time not devoid of originality photo frame can be made from cardboard. Even a child can handle this kind of work!
On one sheet of cardboard, cut out a rectangular center, which should be slightly smaller than the photo. Separately, prepare a cardboard rectangle larger than the photograph. If you plan to put the photo frame on a leg, prepare it too using the template. For a wall item, don’t forget to glue the string.
Then everything is simple - we put a photo on the back side of the “window” and fix it with a rectangle greased with glue, attach the leg.
Such a frame in itself will not have decorative value, so it needs to be decorated. Use colored paper, magazine clippings or gift wrapping.
Final assembly
Glue the finished body and the bottom of the decorative lantern using a hot glue gun. When the glue is completely dry, place the lid on top.
The decorative lantern is ready. You can use it at your discretion - place moss and decorative figures inside, plant small succulents, put an artificial candle inside. This decorative lantern cannot be placed outdoors, and it is not recommended to place or light real candles inside it.
Found a violation? Report content
Circuit assembly
Using a drill, holes are made in the frame in order to pass the wires inside the case. Then the “native” wires of the LED strip are soldered off, leaving only two power wires.
The tape is secured to the inner wall of the frame. “Plus” and “Minus” are brought inward through drilled holes.
A photoresistor is installed in the frame cover and contacts are removed from it. Then the entire circuit is soldered, according to the figure presented above. The Arduino is attached inside the frame with double-sided tape.
In order to assemble the circuit and connect the Arduino platform to control the LED strip, you need to flash the board.
On the Internet there are a large number of firmware for LED strips with different glow modes. Using them, you can control each LED in the strip individually, which allows you to create linear and circular indicators.
After downloading the firmware to your computer, install it on the Arduino. You can check the correct installation by connecting the board to an external power source, as well as to a computer via a USB cable, as shown in the diagram above.
First, connect the charger, and then the USB port of the board. Connecting an Arduino to a USB port without an external power source is a risky operation. The port may not be able to handle the large number of LEDs in the strip and may burn out.
Source
Characteristics and features of using license plate lights
The characteristics, features and procedure for using FONZ, as well as other external lighting and signaling devices of the vehicle, are regulated by domestic and international standards. These devices of all mechanical vehicles operated in Russia must meet the requirements of GOST R 41.48-2004 (common for all lighting and signaling devices), partially GOST 8769-75 (common for lighting devices of cars, tractors, trolleybuses and trailers/semi-trailers), GOST R 50577-93 (regulates license plates) and, most importantly, GOST R 41.4-99 (UNECE Rules No. 4, applies to cars and other equipment) and GOST R 41.50-99 (applies to motor vehicles), establishing requirements specifically for devices for illuminating rear license plates.
In accordance with the standards, devices for lighting the location of the rear license plate must meet the following requirements:
- Installation is required;
- The color of fire is only white (colorless);
- Light intensity is such that the number is visible at a distance of up to 20 meters;
- Any number of lanterns;
- Turning on the lights - it is necessary to turn on this light simultaneously with the front and rear marker lights (as well as with the side marker and contour lights, if any).
FONZ must be installed on both passenger cars and trucks, as well as on tractors, special equipment, trailers, semi-trailers and other equipment. Modern legislation establishes the presence of these devices on motorcycles, scooters and other motor vehicles.
We especially point out that, according to paragraph 3.6 of the “List of faults and conditions under which the operation of the vehicle is prohibited”, the absence of FONZ, or the presence of lighting devices of this type with any color other than white, are the reason for the prohibition of the operation of the vehicle and the imposition of a fine. So if the flashlight breaks down, it must be replaced or repaired as soon as possible.
Lighting Retrofit Attributes
The spiral number illumination used in factory flashlights can be replaced with similar LED bulbs of a more powerful spectrum. The standard size of the LED for a light bulb with a standard base ranges from SMD5050 to COB matrices. The main positive quality of such light bulbs is their compatibility with the on-board computer (BC), that is, it will not generate errors when installing LEDs. Lamp prices depend both on the desired power and on the manufacturer. On average, a set of LED devices consisting of two lamps can be purchased for around 300-400 rubles.
For illumination of registration symbols with an LED module, the vehicle owner will have to pay at least 600-800 rubles. But such an LED device also has an advantage: their geometric dimensions exactly repeat the standard lampshades, i.e. no need to redo the fastenings.
A budget-friendly way to solve the problem of license plate illumination is to stick an LED strip above the number or around the perimeter. It is important to remember that it can only be glued to a place that is free of dirt and oil, otherwise the durability of the tape is not guaranteed.
In conclusion, I would like to say that you should strictly adhere to the rules for operating the car and treat the car's lighting fixtures properly. Before leaving, always check that the headlights are working properly so that both the rear and front license plate lights are functioning - this will ensure easy readability of the license plates. Take prompt action to correct any problems.
According to traffic regulations, a vehicle must have high-quality license plate illumination at night - cars that do not have it can be stopped by a traffic police inspector. The rules say that only rear license plate illumination is needed - it is not necessary to illuminate the front license plate.
Let's take a closer look at what the license plate illumination on a car should look like. Being informed will allow you to avoid fines for rear license plate illumination and be aware of how you can resolve a misunderstanding with the traffic police if the license plate illumination is not on.
Country style frame made of yarn
To make a cute frame in which a family or children's photo will look great, you can use knitting threads. You will need 70-80g of yarn of one or more colors (at your discretion) and two cardboard frames.
Each of the bases must be tightly wrapped with thread, passing twice so that there are no voids left. Now cover the photograph with two of these wrapped frames and once again pass the thread through the entire product, fixing it in this way.
During the winding process, you can string multi-colored beads, buttons onto threads, or decorate a ready-made photo frame with artificial flowers.
Source