Buttons are an essential component of many knitted items. In addition, such items are often used in scrapbooking and other types of handicrafts. The need for such products may arise at any time. Each craftswoman probably has an impressive number of such items that are not suitable in size or color, or have an unsightly and completely unfashionable appearance. In this case, many people prefer to purchase ready-made products, which are presented in assortment in sewing accessories stores. But their quality often leaves much to be desired. In addition, in some cases you may need an item of a non-standard size or shape, which may be difficult to find on sale. Therefore, sometimes it is advisable to try to make such things yourself.
Paintings from buttons: master classes, photos
This is the first thing that comes to mind when talking about button crafts. This homemade panel will serve as an excellent interior decoration. In addition, creating one will be a great way to spend time with your child: the baby will learn to use various things like glue and develop his imagination.
For the simplest picture you will need:
- Multi-colored buttons
- Glue
- Regular pencil
- Paints, a brush and a jar of water for washing the brush
- Cardboard or plywood
IMPORTANT: You should choose thin plywood, while cardboard, on the contrary, should be thick.
The cardboard for making panels from buttons should be dense - it is great, for example, cardboard for scrapbooking.
How to create panels?
- First of all, you should prepare the canvas - paint it in the desired shade. It is unlikely that the natural color of plywood or cardboard will look aesthetically pleasing in the context of the picture.
- The canvas must dry.
- Next, the outlines of the planned plot are carefully drawn with a pencil.
- Now comes the most interesting part - decorating with buttons ! They are attached with glue. If you successfully combine buttons not only by color, but also by size, you can get an interesting relief. Lots of buttons in white or any other neutral shade can help decorate the background.
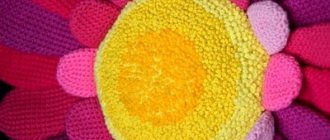
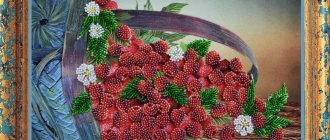
A panel of buttons in the form of a vase with flowers.
You can also create an unusual key holder or hanger for clothes and accessories, which, in addition to its functionality, will serve as a beautiful panel . To make the front garden panel you will need:
- The base - it can be, as in the previous case, cardboard or plywood. You can also look for a special metal base that can withstand a certain weight
- Glue
IMPORTANT: It is recommended to choose Moment-Crystal glue, since no traces remain after its use.
- Buttons
- Cardboard from which you can make a fence for the front garden. Popsicle sticks look good as an alternative.
- Gold and brown acrylic paints. However, if desired, you can include other shades in the palette.
- Brush, sponge for washing dishes
- Simple pencil
- Hooks
- Decoupage napkin - optional
Decoupage napkin and blanks for a fence for a picture hanger with buttons
Having collected everything you need, you can start making:
- A sketch never hurts. Therefore, it is worthwhile to schematically draw the future panel on a separate piece of paper in advance.
- Next comes the background design . It all depends on personal preferences - you can paint it, stick on some beautiful paper like wrapping paper, or attach a decoupage picture. In the latter case, the napkin is divided into layers, of which the top one with the image is glued.
IMPORTANT: If you want to use a decoupage napkin, the surface of the base under the hanger should be pre-treated with a primer.
- Now it’s time to cut out and glue together the parts for the fence.
- The fence is glued at the bottom center.
- Now you can start gluing buttons - they will act as flowers in the front garden. It is preferable to degrease them before gluing.
This is what a blank for a picture hanger with buttons might look like
- You can, of course, leave the panel in this condition. Or you can continue with the design. To do this, both the buttons and the fence are covered with brown acrylic paint. Both a brush and a sponge are used - the latter is easier to cover large areas.
IMPORTANT: It is recommended to place the brush in a jar of water during breaks between dyeing. The fact is that frozen acrylic paint is very difficult to remove from a brush.
This is how you get a blank for a picture-hanger made of buttons
- As soon as the brown acrylic has hardened on the panel, you need to squeeze golden acrylic paint . Use a sponge to cover the buttons and the fence. And in such a way that the brown paint shows through.
This is what the brown and gold buttons for the panel look like
- All that remains is to attach the hooks - and the panel hanger is ready!
This is what a panel hanger with buttons looks like
Wedding frame for text
This beautiful frame for wedding initials features an elegant design and a transparent background.
Required items:
- white metallized paper;
- crumpled blue or cyan paper;
- paper strips of different colors and sizes (3, 7 and 10 mm).
Work algorithm:
- Designing the central part of the frame is the main task. In the future, the center is used for various congratulatory or symbolic inscriptions. Backgrounds are chosen taking into account the color and style of the letters, because readability of the text is required. The frame will be a significant part, so the design will need some work.
- Initially, prepare a base of white metallized paper. Cut out a large rectangle and fold it in half. A rectangle of blue crumpled paper is pasted onto the front side, with an oval cut out inside. The base for the frame is ready.
The color filling will be any. The wedding frame will be transformed by using flowers. It is recommended to use paper roses, chrysanthemums with and without core, and daisies.
Paper roses for wedding photo frame
The flowers are carefully glued to the lower left corner. Flowers can be glued to the top right side, but in smaller quantities. Each part is created separately and then glued to the workpiece.
Stylish wedding frames with a transparent background are created taking into account the features of the composition. At the same time, the existing background is suitable for writing beautiful texts that differ in the original outlines of the letters.
The lower left corner is usually filled more than the right to create a visual representation of a static composition. Such wedding frames for text decoration will emphasize the solemnity of the atmosphere and event, and will become a symbol of a long stage in life.
Wedding frame with transparent background
Beautiful frames for text design are suitable for decorating a celebration and creating a memorable attribute for future life together.
Bowl made of buttons: master class and photo
Continuing the theme of functional crafts, it’s worth remembering a bowl made entirely of buttons. What will be needed to create such a miracle?
- Actually, the buttons themselves
- Balloon
- PVA, which can be diluted with a small amount of water if necessary
- Brush
- Scissors
- Jar
Procedure:
- First you need to inflate the balloon. The size depends on what diameter you want the bowl to be.
- Now you need to fix it. This is where the jar comes in handy.
IMPORTANT: The ball must be installed with the tail down.
- Now the top of the ball should be coated with glue. It is preferable to wait until the glue dries. This dried glue will serve as a kind of barrier between the ball and the buttons.
- After the first layer has dried, the second is applied. This time you shouldn’t wait for it to harden – you need to glue the buttons carefully and quickly. The buttons should fit snugly against each other.
- leave the workpiece alone for several hours - it should dry.
- You can apply a little more glue, and then you should untie the ball and let the air out of it.
- The resulting craft is cleaned of excess glue - in this case, scissors can help. The bowl is ready!
This is how it is done and this is how a bowl of buttons turns out
Christmas decorations
Older children enjoy making Christmas tree decorations; they are made like this:
- Buttons of different sizes are placed on a wire pin. By alternating large and small ones you can make a pyramid in the shape of a Christmas tree.
- A cone is cut out of polystyrene foam and painted green. The fittings are attached using colored pins or buttons. Start working from the bottom row.
- Using a thick thread, build a garland. They are made flat, the buttons touch only the edges. It is more convenient to work with products that have 4 holes. The fittings can be attached to both edges at once, resulting in a double-sided garland.
- It is convenient to make Christmas balls on balloons. They are installed first with the tail down; for this it is convenient to use a roll of tape. After the top has dried, the bottom is decorated. Leave a hole for fastening. A match with a ribbon tied in the middle is inserted inside. The unbreakable ball is ready.
- The buttons are glued onto artificial branches, strings are tied to them - the decoration is ready.
Bouquet of buttons: photo, master class
You can use buttons to create an original and cute bouquet as a gift for someone or just for room decor. To do this you will need to stock up on:
- With the buttons themselves
- Felt
- Pliers
- Wire
IMPORTANT: Wire that is too thick will not work - you need to take into account that it must fit into the holes of the buttons.
- After these simple preparations, you can start tinkering:
- First you need to string the button onto the wire.
- To secure, the second end of the wire must be threaded through another hole.
- This way you need to work on all the buttons.
- cut out petals, stems, leaves from felt in general, anything your heart desires to decorate a bouquet with. This beauty is strung on a wire.
- All components come together in the form of a bouquet. A few decorative elements depending on your mood - and the craft is ready!
A bouquet of buttons is cute and unusual
Interior items
With the help of buttons you can transform boring vases, flower pots, spice jars, turn plastic containers into an original box, etc.
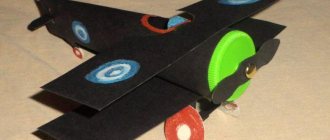
Cars made from buttons: photographs, master class
Kids will definitely like these miniature cars. And here's what they can be made from:
- Large diameter buttons
IMPORTANT: And the same size - this is very important, otherwise the cars will turn out crooked.
- Regular wooden clothespins
- Wire
- Glue
Here's what you need to create cars from buttons.
The procedure is as follows:
- The wire is threaded through one button, and then through the second
- Must be recorded
- The second pair of wheels is created in the same way
- Now all that remains is to glue them to the clothespin
- The car is already ready for racing. decorate it in some interesting way.
These are the kind of button cars you can end up with:
From cardboard you can build racing slides like these for button cars - kids will certainly be delighted
Bracelet
Creating a cute bracelet will require:
- chains;
- fasteners;
- buttons;
- connecting rings;
- round nose pliers
Sequencing
- Measure out a piece of chain of the required length, wrapping it around your wrist;
- Attach the fastener with round nose pliers.
- Insert the ring into the button and secure it on the chain. This is done with all the details.
- The bracelet is ready.
Now, having huge button supplies, you don’t need to think about what you can make from buttons. These elements are suitable for almost everything: games with children, fashion jewelry, interior decor, etc. Application is not limited
Globe for school made of buttons: photo, master class
If you need to make a craft for school, you can make a globe from buttons. The following will be useful for him:
- Cube and ball made of foam plastic
IMPORTANT: The cube will be a stand, and the ball will, accordingly, be the globe itself. It is necessary to correctly calculate the dimensions of the workpieces so that the cube, for example, is not too small.
- Aluminum plate
- Medium size and round buttons
- Acrylic paints in blue and green colors
- Simple pencil
- Tassels
- Toothpicks
You can start making the globe:
- To begin with, the ball is attached to the cube . This is easy to do - toothpicks will help. It's better to take several pieces.
- Now the boundaries of the continents are outlined with a simple pencil.
- Next, the continents are drawn with green acrylic paint . The remaining part should be painted blue.
The button globe is first coated with acrylic paint.
- buttons of the corresponding colors are attached to the continents and oceans with glue .
The globe is covered with buttons
- Now the globe is installed on the plate.
IMPORTANT: Of course, the skewers that attach the ball to the cube are removed in advance.
- All that remains is to paint the cube with brown paint to create an imitation of wood. The craft for school is ready!
This is how a globe is made from buttons
DIY photo frame from scrap materials: simple instructions
You will need:
- 2 sheets of thick paper measuring 30 by 35 cm;
- Old glossy magazine;
- PVA glue, a piece of cardboard;
- Multi-colored threads, colorless nail polish;
- Stationery knife.
This photo frame will be quite affordable.
How to do:
- Stepping back from the edges of the sheet, measure 5 cm. Draw lines along the marked points. Cut the resulting rectangle from the middle of the paper sheet. The result is the base of a photo frame.
- Roll one magazine page tightly into a tube and secure the edges with glue.
- Wrap thread around the curled page, securing the ends of the threads at the bottom.
- Make several of these tubes.
- Glue each piece to the base starting from the inner corners of the product. To give the effect of a volumetric bend, bend the tube at the corners.
- Glue three sides of the second sheet of paper to the inside of the frame. The fourth side is necessary for placing photographs into the product.
- We form the frame leg from a piece of cardboard.
Decorative pillow with buttons: master class and photos
To create a cute pillow with buttons you will need:
- Fabric – it is recommended to choose cotton, linen
- A piece of black color for a future figurine-patch
- Buttons
- Scissors, thread
- Overlock
- A pillow that will need to be upholstered. The approximate size is 40x40 cm. But, of course, if you wish, you can choose a larger or smaller pillow
IMPORTANT: The main thing is to coordinate the fabric parameters for the pillowcase with this size.
Here's what you'll need to create a pillow with buttons
. Procedure:
- So, the first step is to prepare patterns for the future pillowcase. Whatever its size, you need to leave space on each side for allowances.
- Now you can start sketching the applique. In this case, there will be a funny little sheep on the pillow.
- The drawing with it is cut out and transferred to a black piece of paper.
- Now are cut out from the flap . A little trick: if the flap itself is not dense, you should glue it to a thin non-woven fabric.
This cute little lamb will be displayed on a pillow with buttons
- The sheep is basted to the fabric and stitched with a zigzag.
- The basting can be removed.
IMPORTANT: The sheep must be ironed.
- Now the buttons are sewn on . They need to be attached according to the silhouette of the sheep. Of course, you can go beyond the edges, because the sheep has wavy, beautiful fur. The main thing is to fasten the thread on the wrong side after each button.
This cute little lamb will be displayed on a pillow with buttons
- Next, the sides of the future pillowcase are placed right sides together and swept away.
- And then they are stitched on a typewriter. Of course, one side should remain untouched - a pillow will fit through it into the pillowcase. You can also overlock frayed edges.
Attaching the sides of a pillowcase with buttons
- Now the pillowcase is turned right sides out. to iron it around the seams.
This is what an ironed pillowcase with buttons for a pillow looks like
- All that remains is to put the pillowcase on the pillow and sew the remaining untouched side of the pillowcase.
IMPORTANT: But if you plan to wash the pillow in the future, it is better to sew in a beautiful zipper instead of the usual thread fastening.
It turns out this beautiful decorative pillow with buttons
Vintage necklace
A scattering of buttons, thick fabric, (felt, leather) lock, wire cutters will allow you to become the owner of a chic necklace that will not cost anything.
Instructions
- First get rid of the legs with buttons.
- Lay out the elements, figuring out how they will be arranged. Take a photo or sketch the resulting pattern.
- A rectangle is cut out of the fabric, having calculated in advance how much will be needed for the base of the necklace. Prepare the ribbon by cutting it off so as to tie the ends, burn it at both ends, and glue it to the back side of the cut.
- Glue the buttons in the intended order onto the fabric.
- Having fixed the details, they take on the beads so that there are no empty spaces.
- Using a cutting tool, carefully trim the buttons along the edge.
- The product is burned upward to prevent the ribbon from unraveling.
- Now there is something to diversify the dress.
Frame with buttons for photos: step-by-step master class, photographs
The most ordinary photo frame, decorated with buttons, will definitely be transformed. What should you stock up on for such a purpose?
- The most ordinary photo frame without decoration
- Buttons in any quantity, as well as any size and color
- Lace, the length of which depends on the perimeter of the frame
- Fabric or paper flowers
- Acrylic paint metal-silver
- Bitumen varnish
- Cotton pads
- Liquid intended for nail polish remover
- Foam sponge and clamp for it
- Tassels
- Glue gun
- PVA glue
IMPORTANT: It is preferable to choose adhesive for carpentry work.
This frame is suitable for decorating with buttons.
You can start handicrafts:
- Each side of the frame is treated with glue.
- then attached to each side with wood glue.
Gluing a future frame with buttons with lace
- Next you need to let the workpiece dry.
The future frame with buttons is drying
- Now you can attach the buttons with glue . It is preferable to place large ones in the corners, and small ones on the sides.
- Flowers and other decorative elements are also It is recommended to glue both them and buttons with a gun.
- It is preferable to glue the frame onto a stand if it does not exist initially.
This is what a photo frame with buttons looks like at this stage
- At this stage, you can leave the frame as it is - maybe the needlewoman will like the multi-colored decor. But you can paint the entire frame along with the decor with acrylic paint.
This is what a painted frame with buttons looks like
IMPORTANT: If you want to create an antique effect, it is recommended to apply bitumen varnish with a sponge.
This is such a beautiful frame with buttons in the end
DIY photo frames
Photos in frames can be placed on the table or hung on the wall vertically, horizontally, or collect several large and small photos, placing them in the most random order.
Yvonne Schroeder came up with a very interesting solution for decorating the interior and exterior corners of rooms with both color and black and white photographs. Take it into service! (Photo above)
Popular articles Grif
If you have ready-made frames, albeit of different sizes and colors, made from different materials, completely outdated and unsightly, then this is exactly what we need!
Let's paint all the frames in one bright color - that's the new look of our interior!
If there are no frames, we will make them ourselves.
What can you make a photo frame from?
Suitable materials include plywood, fiberboard or cardboard. I don’t know if there’s a piece of plywood or fiberboard at home, but it’s probably easy to find cardboard, because we often have boxes of shoes and household appliances left over. Well, if you don’t have any old boxes, because you’re a neat freak and immediately throw away everything you don’t need, then you’ll have to buy the material in the store.
How to make a photo frame with your own hands
Nothing could be easier! From plywood, fiberboard, cardboard and paper, we cut out the back part of the frame of the size we need and horizontal and vertical strips that need to be glued around the perimeter of the back part of the frame (do not forget to leave the top part unglued so that you can insert a photo). The front side of the cardboard photo frame can be cut out as one piece.
A detailed master class can be viewed here>>.
A frame with a photo can be hung on the wall using a loop, bracket, or hook that needs to be glued to the back of the frame. Another fastening option is twine or braid glued between the back and front sides of the frame.
We decorate the front side of the frame, and here we give free rein to our imagination.
How to decorate a photo frame
Photo frames can be made from any available materials: decoupage or paste over with leftover wallpaper, decorate with buttons, bows, flowers, lace and beads, shells and even wood cuts.
I have collected several creative ideas for decorating photo frames with your own hands from various Internet sources.
DIY photo frames - design ideas
I love all these original photo frames, and most of all the frames decorated with lentils painted in different colors. In this way, you can decorate photo frames with your own hands and coffee beans, corn, and buckwheat. You need to apply glue to the frame in parts so that it does not dry out, and pour grains onto the surface coated with glue, pressing them with your fingers.
Frames decorated with pieces of old CDs look very interesting. (source - https://www.bloglovin.com/).
Make photo frames for children together with your kids, for example, from Legos. And how cute does a child’s photo frame look, inserted into a child’s drawing!
The photo frame was made from pencils, of course, by an adult. First, we cut the pencils to the desired size, sharpen them and glue them to the front side of a cardboard photo frame (source - https://www.alittletipsy.com/)
Old wooden frames can also be updated, not only by painting: wrapped with twine or thread, covered with burlap or wrapped in... a card! (source - https://alyssabyoung.com/).
Especially lately I like different crafts made from twine. Recently I knitted a box for small items from twine.
Another interesting idea is a photo panel made from matchboxes!
You will need quite a lot of boxes. The inner parts of the boxes need to be glued together in rows, in the outer rows the boxes must be glued completely.
Then cut out the walls of individual boxes. Glue the structure onto a sheet of cardboard. Paint the upper front part, after drying, decorate with lace and flowers (source - delatsami.com/masterilka).
This is how easy it is to make interesting photo frames with your own hands.
Such frames can be used not only for photographs, but also for various panels. For example, placing lace napkins in them is a very interesting trend in modern interior decor.
Author Olga Smirnova
More interesting ideas for the interior:
- DIY lampshades. 24 photos for inspiration
- DIY modular paintings
- Stylish things from old jeans
- Elegant decor from old tulle
- Beautiful and unusual spring compositions of fresh flowers
- Fluttering butterflies in the interior: original compositions
- 25 ideas for decorating flower pots with your own hands: photo and video master classes
And a wonderful melody for the mood.
Crafts from buttons: ideas, photos
We present to our readers a selection of photographs of crafts made from buttons. Maybe some of them will inspire your own creativity:
Candlestick and stand for pencils, button tassels
Bright pencil holder made from buttons
Cute picture with a button elephant
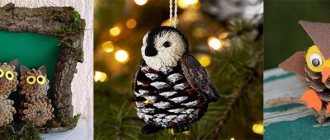
A napkin stand with buttons that lifts the dining mood You can use buttons to create such picture masterpieces A cute button fox will decorate any panel A cute button fox will decorate any panel Crafts from buttons can also be made on a wooden base - for example, such an owl
A card with buttons is a very cute gift.
Button tree - an unusual desktop decoration
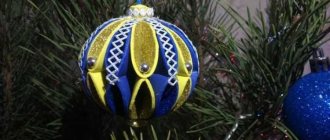
New Year's decorations made from buttons will definitely please your household.
An ordinary frame, burlap and buttons - and now another masterpiece for the interior is ready
You can make unusual and bright decorations from buttons
Owning a unique item is something everyone wants. And accessories such as regular buttons can help with this. In addition, they create a feeling of comfort, something homely.
Masterpieces of button art from famous masters
There are artists in various countries who are famous throughout the world and they gained this fame thanks to their works made from buttons. The whole world admires them!
Augusto Esquivel
Augusto Esquivel is an Argentinean artist who works with buttons of various colors and creates delightful installations from them. These are, without exaggeration, real works of art!
Button art for Augusto began with a box of buttons found in the attic. They were quite ordinary, but there was a whole box. Augusto began to create three-dimensional images from buttons and fishing line, coupled with his spatial imagination. He stretches fishing line or threads between two surfaces and places buttons on them according to design. As a rule, string-button garlands are attached to the ceiling.
His most famous work is the black piano (“Upright Piano”), which he created from 30 thousand buttons. This sculpture weighs 20 kilograms. Augusto created his masterpiece over the course of two months.
Besides the piano, other musical instruments were created from simple clasps.
Augusto is also capable of creating portraits of famous people.
World map.
Prancing horse.
A bunch of balloons.
Sarah Jane Connors
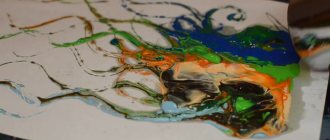
Sarah Jane Connors is an artist who creates paintings from buttons and beads. Her childhood hobby grew into art; Sarah began to create magnificent paintings, which were exhibited at various exhibitions.
It takes the artist 1-2 months to produce one painting. Each bead and button is attached to the fabric with glue.
Sarah finds materials for her works at flea markets, flea markets, and charity shops. The artist pays a lot of attention to detail, so she carefully selects materials according to shape, color and size.
In her works, the artist conveys the inner beauty of nature and every creature.
The background of the paintings is created with no less diligence and care.
The paintings of Sarah Jane Connors are undoubtedly a striking example of recreating beauty!
Consumables and tools
It’s very convenient when everything you need is at hand; you don’t have to stop in the middle of an exciting process to find a pencil or, for example, a ruler. What you can't do without:
- cheap plastic buttons with a tight fit;
- scraps of cotton fabric (or the one from which you sew the outfit);
- ruler or measuring tape (there are also special rulers that resemble calipers);
- fabric marker, washable ink pen, or tailor's chalk;
- scissors;
- glue stick.