The men's holiday is approaching and I want to please the stronger sex with pleasant surprises and gifts. Crafts for February 23rd are an opportunity to show your imagination and please your loved ones. Involve your child in creativity, make a gift for dad or grandfather with your own hands. Any father would appreciate a touching craft or a children's card from his son or daughter.
TO
getting a gift for February 23rd in a store is not a big problem. Each store puts out the appropriate products before the holidays. It seems to us that a gift made with your own hands will be much nicer and more memorable than just a purchase. And your men, be it dad, husband, brother, will definitely appreciate the efforts of you and your child.
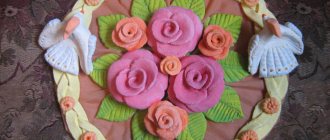
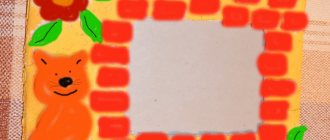
It's a good idea to give dad a photo frame as a gift on February 23rd. Only one child cannot cope with this work. If you take part in creativity, it will work out.
To work you will need:
- Colored cardboard.
- Thicker cardboard (you can take any color).
- Colored applique paper or colored cardboard.
- Scissors.
- PVA glue.
- Ruler.
Take green cardboard, step back 4-5 cm from the edge with a ruler and draw a photo frame with a pencil. First, we figure out which photo will fit here; all our calculations depend on this. Drew it and attached a photo. If everything works out, carefully cut out the frame.
We cut out the details to decorate the frame, drawing them by hand or printing them on a printer.
We glue the colored applique to the frame and begin to make the frame itself. We cut out a rectangle from thick cardboard, the area equal to the frame, to form the back part of the product. Glue two pieces of cardboard and glue the leg for stability. The gift is ready.
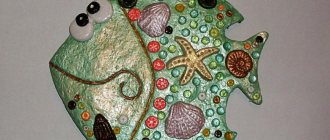
You can decorate the frame by gluing a shell, a beaded fish, an anchor, a steering wheel - on the theme of the sea.
If you don’t know what to give a young man on February 23, there is a good option, here’s a tank:
It is assembled from corrugated paper, double-sided tape or glue.
This makes for an interesting gift:
Another tank, but with different “contents”.
The same materials are used, only here there is more sweetness.
The result was an original gift:
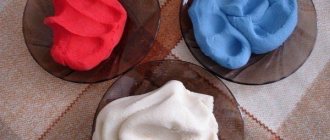
Crafts made from salt dough, made together with a child on February 23, can be presented at home and at work, at school and in kindergarten. These gifts do not require large expenses, but will delight you with care and attention.
Salt dough is easy to prepare. You can use the dough to make a figurine, a keychain, or a refrigerator magnet.
One of many salt dough recipes:
- Flour - 300 grams.
- Regular salt, coarse - 300 grams.
- Water - 200 grams.
- Vegetable oil - 1 tbsp. spoon.
Knead the dough, adding water gradually. When it’s ready, roll it out on the table and squeeze out the parts using molds. Even small children can cope with such simple work. Dry the pieces in the oven. You can paint with food grade paints or acrylic paints. It's up to you to decide whether you give for food or for beauty.
Our next craft for February 23rd is a keychain made from salt dough. We make it for fathers, grandfathers, brothers and mothers (after all, there are military mothers).
We collect all sorts of little things: coins, nuts, buttons, screws, nails - all this will be useful to us for working with the dough.
We cut out letters from cardboard: “P”, “M” or the initial letter of the name, for example, Sasha. Make a hole in the corner with a hole punch or scissors.
Place the “sausage” of dough onto the cardboard, distributing it evenly over the surface of the letter.
Use an awl or scissors to make a through hole for the ring.
We paint the keychain in any color, preferably with acrylic paints. If the paint is not waterproof, coat the top of the keychain with varnish (you can use nail polish).
Leave to dry or dry in the oven. When it dries, we put the ring through the hole and you can give it as a gift.
We have created an original keychain in the steampunk style. What is "steampunk"? Science fiction and mechanics, a very interesting style.
IN
First, let's come up with the design of our paper postcard. It will be simple to implement or complex - you decide. The main thing is that it should be a beautiful congratulation on February 23rd.
Volumetric postcards in kindergarten and school:
Let's start with an original postcard on which we will write congratulations and wishes. We will make postcards using different techniques. You can make a card like this using the origami technique. For the postcard you will need a rectangular sheet of colored paper. Take plain A4 size paper for testing, fold it according to the instructions, you will understand which sheet size is most suitable.
Fold the rectangle in half along the sheet. The paper folds like a book, there is nothing complicated in the work.
Unfold the sheet and fold it again, from the sides to the center.
We have a rectangle: on one side there is a sheet, and on the other there is a vest.
The photo shows that you need to bend it inward, this is a mistake. Bend the corners outward so that the corners protrude slightly beyond the fold. We made “sleeves”, turn the work over and bend it 2 cm in the opposite direction.
This is how the “collar” turns out; we will direct the square of the shirt into the corners of the collar.
A tie or bow tie can be cut out and glued to the “shirt”, or you can make a tie, as in the video.
Don't forget to write congratulations and wishes inside the sheet. We hope that your man will be satisfied. And if you add a small gift (for his hobby), it will be just wonderful.
This is an interesting card you can make together with your child. A very interesting technique that requires only perseverance and patience.
To work you will need:
- A set of paper ribbons (you can cut it yourself).
- Cardboard.
- PVA glue.
- Tweezers.
- Scissors.
A special tool for twisting ribbons (you can make it yourself). How to make a twisting tool: insert a needle with a large eye into a wooden stick (pencil, art brush stick) and bite the eye in half.
Scheme of working on a postcard:
Cut out the base from cardboard, cut thin strips, winding them onto the tool, fix the edges, and then glue them to the base.
Any CDs are also suitable for postcards. For this card, cut out a star from red cardboard, paste a CD on top of the star and add inscriptions and clippings from magazines or drawings.
Victory Day is very soon, which means it’s time to prepare original congratulations and gifts for dear veterans. Do-it-yourself children's crafts for May 9 are the best way to express gratitude to the winning heroes, as well as explain the value of their feat to the younger generation, talk about the history and significance of this holiday.
Gifts for veterans, which children make on their own and together with adults - parents or educators, will help the younger generation better understand information about the Second World War and develop an interest in the history of their native country. There are a lot of techniques and materials that are used to make holiday crafts with your own hands, so adults can choose exactly those that best suit the age and skills of the child.
Children's crafts for May 9 made from paper
This is a universal material; paper crafts for May 9 can be created by children of any age at home, in kindergarten or elementary school. It is better to master more complex techniques such as origami or quilling together with adults, using ready-made templates, diagrams, and master classes.
From paper you can make:
When making three-dimensional compositions, it is better to use ready-made templates that are printed in advance, and the kids just have to cut out the shape, fold it, glue it, and paint it.
It is best to use colored paper, double-sided, corrugated, designer cardboard, and ordinary napkins. Even old matchboxes and toilet paper rolls will come in handy to make tanks or airplanes.
Paper crafts are bright, can be stored for a long time, and do not require large expenses or special skills.
This method of working with paper is suitable not only for making holiday panels or voluminous cards. You can make absolutely any figures, for example, an airplane or a tank. To do the latter, you need:
Children's crafts for May 9 have the right to be simple, unpretentious, but the soul is put into them, and this is already worth a lot. To make figures of a soldier and a nurse, you will need the remaining cardboard rolls from toilet paper. These figures can be used to complement the festive compositions used to decorate a group in a kindergarten.
Children over 3 years old can handle the work. The process itself is very simple:
Application "Festive fireworks"
Children of almost any age can master the voluminous application. The finished painting with fireworks can be placed in a cardboard frame and presented to veterans along with congratulations.
For production you need:
- Colored corrugated paper.
- Colored paper and cardboard.
- PVA glue.
- Scissors, pencil, ruler, stapler.
The process itself will not cause difficulties:
The more colors of crepe paper used, the brighter the fireworks. The size of the circles can also be changed, giving the composition volume and perspective.
Salt salute
- Fireworks lights can be made not from paper, but by drawing outlines using a glue stick.
- Immediately sprinkle the picture with regular salt, wait for the glue to dry and shake off the remaining residue.
- Drop paints diluted in water onto the salt (using a brush), giving it different shades.
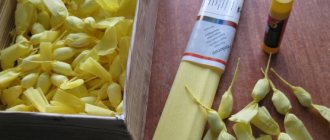
Paper carnations
Artificial flowers will preserve the memory of the holiday for a long time; you can use them to decorate cards, compositions, and bouquets. The symbol of May 9 is a red carnation. It's quite easy to do, you'll need:
- Red and green corrugated paper.
- Floral wire (green).
- Scissors and PVA glue.
The process itself is as follows:
- Cut the red paper into equal rectangles - 6 per flower. Place the blanks for each in a pile.
- Collect a stack of paper with an accordion (short side), wrapping them in the middle with wire, without overtightening.
- On each side of the paper accordion, cut off the corners to create pointed edges.
- Lift each layer of petals one by one, giving them volume. Fluff all the flowers in this way.
- Cut out leaves from green paper and glue them to a wire stem.
Not only red, but also pink carnations, as well as white flowers, the edges of the petals painted with a blue, pink or yellow felt-tip pen, look impressive. In the latter case, carnation petals can be made from a regular napkin. If you don’t have floral wire, you can replace it with regular wire by covering it with green paper.
Dove - a symbol of peace
Volumetric paper doves are a symbol of peace.
Features of working with salt dough
Anyone can make crafts from this material - a small child who is starting to practice the art of modeling, and an adult who has mastered the process in kindergarten. To prevent the sculpted product from deteriorating, you need to do everything correctly - prepare the mass for modeling directly and dry the figures. Coloring also has its secrets, which you will definitely learn about.
- How to prepare salted play dough
The consistency is easy to work with, but for a successful craft, proper mixing is necessary. If you correctly follow all the proportions indicated in the master classes, you can make a pliable material. Figures made from it retain their original appearance. There are two popular salt dough recipes that are successfully practiced among homemade hand-made lovers.
Recipe No. 1
- wheat flour (WS) – 500 g;
- water (necessarily cold) – 200 ml;
- “Extra” salt – 200 g.
According to this recipe, the mass turns out to be of high quality, plastic and edible (which is important). All components of the material are edible, so it is great for teaching young children during developmental activities. If a child eats a finished craft, it will not cause harm to his own health. Products made from safe materials are the best choice for a curious baby.
Recipe No. 2
It is also suitable for sculpting with kids, because the consistency is plastic and you can sculpt anything. During the game, the child must be closely monitored so that the mass is not eaten. To prepare, you need to stock up on the following ingredients:
- premium white flour – 500 g;
- water (cold) – 200 ml;
- PVA glue – 2 tbsp.
The adhesive component in the composition guarantees the stability of the product made from the mass. This composition can be easily tinted and painted, and in addition, has a long hardening period (it is easy to correct minor defects in the finished craft). Try both recipes to find the best one for your needs (depending on age, skill, etc.).
- How to dry crafts made from salt dough
– an obligatory stage in creating crafts from salt dough, thanks to which the products acquire strength. The drying process requires certain conditions, because at room temperature the figurine will not reach the desired condition, because in twenty-four hours it will dry out by only one millimeter. In the summer you can try to put it in the air, but this will not give much results. It is best to use an oven:
- At a temperature of 75°C, drying time will be an hour.
- At a temperature of 100°C – an hour.
- At a temperature of 120°C – half an hour.
- At a temperature of 150°C – half an hour.
Large items should be dried longer, but for small crafts the time can be reduced. To prevent the dough from sticking, cover the baking dish with foil. Decor in the form of beads, rhinestones, and beads should be dried at a temperature not exceeding 120 °C. You should not use a microwave oven or place crafts on a hot radiator, otherwise they may immediately become deformed and crack. From time to time you need to turn the figures over in the oven so that they are evenly baked on all sides.
- How to color dough products
The created and dried figurine can be painted in any of your favorite colors. The best choice for these purposes would be acrylic paint or gouache. The painted product must be coated with colorless nail polish so that the paint lasts a long time and does not lose its richness and brightness over time. You can make a colored mass by adding the desired tone (it is better to use food coloring) while kneading the flour.
Salt dough recipe for crafts - video
Red Star
One of the main symbols of victory is the red star of the Soviet army. Compositions with it are very easy to make from salt dough; even children 2–3 years old can cope with this task. All you need:
- Flour and fine salt (2:1).
- Vegetable oil (optional).
- Paints (gouache or acrylic).
- Brush.
- Rolling pin.
The process itself is extremely simple:
Eternal flame
- Cut out 2-3 stars of different sizes from the rolled out dough, place them on top of each other, making a depression in the last one.
- Roll several thin sausages, bend them slightly and secure them in the recess.
- Dry the craft in the oven and then paint it. It is advisable to cover the base with silver or golden paint, and the flames with yellow, orange, red.
Dough medals
If you dry such a blank in the air, and not in the oven, then before gluing the sausage to the round base, you can place a cut out circle of paper with a pre-printed congratulation or thematic image between them.
Dough modeling is a fun way to spend time with children. After all, they not only sculpt, but also cook: they can experiment with the flour mixture in the process of measuring and mixing ingredients, and then observe the metamorphoses that occur with the finished product when temperatures change during the drying process.
In addition, crafts made from salt dough are harmless to children, they do not contain allergens and can be safely tasted.
Figures made from homemade flour mixture are harder and preserve better than plasticine.
Making a magnet with a cat
Making a cat magnet from salt dough is not that difficult. For this you will need: salt dough, glue, paints, cardboard, magnet.
Step by step:
- Using a method already known to you, we make a figurine of a cat.
- We color it at our discretion.
- Place the dried figure on cardboard and outline the base.
- We cut out the base along the drawn outline.
- Glue the cardboard to the figure.
- We attach a flat magnet to the cardboard.
In the form of a magnet, you can make characters from famous cartoons: Leopold, Basilio, Tom.
Dough preparation method
The dough is prepared in the following order:
- Mix flour with salt and citric acid and pour this mixture into a saucepan;
- Place the pan over moderate heat and gradually add water, stirring constantly, until the dough comes away from the pan and can be rolled into a ball.
- Remove from heat and knead the dough with your hands.
Food coloring or gouache must be diluted in water, which is added before kneading the dough.
During operation, depending on the required consistency, the salt-flour mixture can be further diluted with water or oil, or flour can be added for hardness.
It is better to prepare the dough in small portions if possible, right before starting to model, and store it only in a tightly closed container or cling film.
How to dry salt dough?
There are two most common ways to dry salt dough. The first method: the finished craft will dry on its own. The main thing is that it should not be exposed to direct sunlight, otherwise it will crack. The craft can be placed on a flat surface and wait a few days. Second method: dry the finished craft in the oven for 3 to 6 hours (depending on the size of the craft). Drying occurs in batches with breaks. One approach is 1-2 hours. For quick drying in one go, set the oven to 75-100 degrees, and then the craft will dry in an hour. At a temperature of 120 degrees, the craft will dry in 30 minutes, but it is better to dry it naturally.
Drying salt dough crafts
In order for handmade salt dough crafts to retain their shape and not break or crack, you need to choose the correct drying mode. You can simply leave the figures to dry naturally in the air, or you can place them in the oven.
There are two different methods for oven drying. The first is to preheat the oven, then turn it off and place the figures in the heated space. You can also bake the products at 100 degrees, making sure that there is no burning.
A master class on making dough crafts involves, first of all, experimenting with the material: the composition of the dough and its drying mode, so failures in this process are inevitable.
Helpful advice: When starting sculpting with children, you need to set them up so that the first success, after many not entirely aesthetic attempts, becomes a real miracle for them.
It is better to start with simple and uniform shapes, such as round beads of various colors and sizes. You can use them to make garlands to decorate your room.
Then you can master more complex silhouettes - stars, hearts, and three-dimensional figures - New Year's snowflakes, Christmas trees, Easter eggs with patterns, egg coasters, chickens.
You can time the production of figurines to coincide with the holidays, or choose more neutral motifs for all occasions, making souvenirs and gifts in the form of stylized horseshoes, suns, stars, airplanes and funny faces.
During modeling, you can use special molds for modeling and baking, and other things, according to the prompting of your imagination: garlic crush - for making thin ropes from dough, bottle caps - for cutting out circles, plastic toy parts - for making prints, almost everything Whatever you have on hand, from toothpicks to toy car wheels, can become a tool for modeling dough.
Note!
It is easy to make holes in the salt dough, both decorative and for hanging on threads. Holes on flat figures retain their shape when dry.
But when making more voluminous parts, such as spherical balls, in order to create a hole for the thread, you need to pierce the figure with a toothpick or other sharp instrument made of wood or plastic and do not remove it until the product dries.
Helpful tip: To glue the dough elements, just wet the individual sections and place them next to each other.
You can make garlands, keychains, medals and pendants from voluminous and flat figures. You can fashion chests and cups for storing jewelry, small treasures and pencils.
Creating figures step by step
The process of making a cat is quite labor-intensive and will require you to have free time and patience. The finished product will gradually dry over at least two weeks.
The procedure is as follows:
- Roll out the finished dough until it is 0.5 cm thick.
- From it we cut out a circle with zigzag edges and transfer it to a napkin.
- Using a cocktail straw, make two holes at the top.
- Cut out the details of the kitten's body.
- Lubricate the middle of the base with water (for a stronger connection of the dough) and attach the body.
- Roll a ball and make a cat's head.
- Take a little more dough and make ears.
- Wet the base with water and attach the parts.
- Take flat pieces of dough and form cheeks.
- Using a sharp knife, cut out the antennae. We attach the finished parts to the head.
- Using the pen shaft we make the eyes, nose and tongue of the future cat.
- We make the legs and attach them to the sides of the workpiece.
- We make claws with a knife.
- Roll the dough and form a tail.
- Attach the cat's legs to the bottom.
- You can add molded sausages or sausage to the finished product and attach them to the paws.
- Let the craft dry.
- After that, color the cat. There are no restrictions in this matter and everyone chooses their own color and shade.
Often some inscription is added to the base. After final drying, the product is varnished.
Volumetric figurines of animals
Three-dimensional figurines of animals are especially popular among children; they can be made in accordance with popular step-by-step instructions, which are intended for plasticine and clay crafts.
Note!
You can sculpt from dough without dyes, then paint the finished figurine and, after drying, coat it with varnish.
You can also cut out various figures: having made a model of them from cardboard, place it on a smooth dough previously rolled out with a rolling pin and carefully cut out along the edges. Then you can paint the figurine, add the necessary texture - roughness, strokes, make eyes, a nose or decorations from beads.
A wonderful homemade gift could be a photo frame or a unique candlestick.
Making panels that combine elements of mosaic, applique and modeling can captivate both children and adults. For the little ones, simple drawings are suitable: you first need to draw a silhouette on parchment, then carefully fill it with dough along the lines.
You can also conceive and implement more complex ideas using beads, mosaics of cereals, dried flowers, etc.
Note!
Painting with a cat figurine
From the dough you can not only create a separate figurine of a cat, but also make a whole picture. Step-by-step process of creating a painting:
- We take white cardboard and put a drawing of an animal on it.
- We sculpt individual parts from the prepared dough. Their size and shape must match those drawn.
- We attach the finished parts to the cardboard using glue.
- When the cat is sculpted and glued to the cardboard, we decorate the background of the picture. To do this, draw the patterns, shapes and silhouettes you like in the free space.
- We color the cat himself.
- We cover the picture with colorless varnish.
- After drying, insert the product into a frame and hang it on the wall.
Tank T-34
By May 9, you must definitely learn how to sculpt a T-34 tank
made of plasticine, because this is one of the most important serial units of wartime. Back in 1940, it was created by Soviet designers and put into mass production. Indeed, without such a tank it would have been more difficult to win the Great Victory. And this legend in many Russian cities decorates pedestals in the form of a monument, where people bring flowers and wreaths.
Model T-34
is a traditional combat vehicle that consists of main parts, along with other tanks. These include a wide, thickly armored hull and a low turret with a muzzle, an additional machine-gun compartment with a long-barreled cannon, and tracks with wheels. The T-34 is the most recognizable wartime vehicle. All the boys are interested in technology, which means they will be happy to repeat the modeling lesson in order to get their own copy.
The master class was prepared by Elena Nikolaeva.
To sculpt a tank you must have:
- green (dark and light), black plasticine;
- a thin stick for the muzzle;
- stack.
How to make a T-34 tank from plasticine, step by step
1. Let's start modeling by creating tracked structures, so that we can then try on the future hull. Oddly enough, but at the first stage you should prepare a thin long sausage from green plasticine.
2. Cut the prepared sausage into segments. All segments must be the same length. In total you will need 10 of these parts.
3. Press each segment with your fingers on all sides to create a smooth cylindrical shape. These will be identical blanks for 10 wheels of a caterpillar structure - 5 on each side. And you also need to add 4 small wheels, using the same method, but from a sausage with a smaller diameter.
4. Knead the black block. First stretch it into a thin sausage. Then, using your fingers on both sides, create a thin cake. These will be blanks for the ladder - its surface does not have to be perfectly flat.
5. Place the black caterpillar ladder on the board, place 5 identical wheels on top, and one small wheel on both sides.
6. Wrap the tape on top, join the two ends, trim off the excess with a stack. Make 2 identical track parts with wheels.
7. Place a light green dot in the center of each wheel.
8. Using a stack, apply longitudinal stripes to the black ladder tapes. Prepare two green ribbons of the same size, and the width should match the width of the caterpillars.
9. Glue the green parts on top.
10. Prepare a rectangular block and an elongated green piece.
11. Stick a long piece as an axle onto the bottom of the body.
12. Glue the wheel to the axle on both sides.
13. Attach a low diamond-shaped tower on top, cylindrical blanks on the sides.
14. Insert the barrel, sticking plasticine onto the stick, as well as a double hatch cover.
15. Add a red star to the side to indicate that the unit is wartime. And don’t forget to add a small machine gun barrel in front.
Tank T-34
– legend of the Great Patriotic War – ready. All veterans remember it; not all were tank crews, but everyone knows the model of the combat vehicle. School-age children can master this type of modeling.
Salt dough apple
You will need:
Master Class
- Make half an apple, make the inside flat, pressing it onto a flat surface.
- Make a thin flat center and glue it to the main part.
- Roll 6 seeds and a stick, then glue to the apple.
- Blind the leaves, then glue them.
- Dry the craft.
- Apply varnish and wait until completely dry.
The salted dough apple is ready!
Plasticine tank
A tank is a powerful military weapon. The bulky structure looks terrifying and causes great destruction, like everything else associated with war. However, a tank is a defender if it operates on the side of its soldiers. It is difficult to imagine how difficult it would have been for the soldiers of the Red Army to win back in 1945 if the famous tanks had not been in the arsenal of the brave military. As a result of the selfless work of ordinary soldiers and people working in the rear, we won victory and today we live in peace.
The winning tanks that have survived from those times can be found on pedestals in many cities; they represent peace, the strength of the army, and victory over the fascist invaders. We will also make a small figurine of a tank from plasticine, and it will be an excellent craft for Victory Day.
To create a children's craft, you need to prepare:
- green, brown, black and gray colors of plasticine from the set;
- pen rod;
- stack;
- a long thin stick skewer.
How to make a tank from plasticine - step-by-step instructions
- To create a large combat vehicle, you need to make your own mixture of colors of green, brown, black and others. This will be an ideal option for simulating the nondescript color of a tank. Take soft pieces and mix them well, you don’t need to achieve homogeneity.
- Make a center block. Start pressing soft plasticine onto a hard surface with your palm, turning it over on all sides. You need to get a blank that resembles a matchbox. Press down the narrower side on one side with your finger, simulating a tilt. Smooth the surface of the plasticine with your fingers.
- Prepare another piece of clay to create the top as well as the side track structures.
- Create small black wheels that resemble activated carbon tablets. Make long gray ribbons, as well as flat bars for the wings, from the plasticine mixture obtained earlier. You can use not only your hands, but also your stack.
- Press 6 (or so) wheels onto the side of the case. Push the central part of each of them with a rod. Glue gray ribbons to the sides and bottom. Make notches with a stack. The resulting 2 running gears should be symmetrically located on both sides of the body.
- Mask the wheels with prepared wings on top. Lower the front of the pieces down and round them.
- Continue working on creating the tank turret and additional parts. The tank's turret may be shaped like half a walnut. Also make cylinders and thin bars for additional details.
- At the front of the turret, fix the long barrel. To do this, use a thin skewer and a small portion of plasticine. Glue the lid, machine and additional small parts on top.
- Assemble the structure. Place a turret on top, and add special parts on the sides and back in the form of fuel tanks and boxes of ammunition.
- A formidable powerful plasticine tank is ready. We received the craft by May 9th with our own hands. Now you can place your tank on a makeshift pedestal.
Ideas for life
Perhaps you're adapting to a new location or looking to add (or maybe update) your cleaning kit. We have put together all the necessary devices and prepared a list of 10 things that are definitely needed in the house.
1. Good sponge
The selection of sponges is really large. The first thing you will need is a classic sponge with an abrasive on the back for scrubbing a particularly dirty surface.
But if you want to try something new, buy a special sponge cloth that will be something between a sponge and a towel. Spaghetti sponges will also come in handy; this material does not require soap. Don't forget the Scrub Daddy sponges, which change texture depending on the temperature, and silicone sponges that require virtually no refilling.
2. White towels
A pack of white towels always comes in handy. You can buy them anywhere, even at a hardware store. They will find a use, and the white color allows you to quickly determine that it is time to replace the old towel with a clean new one. If you're looking for an eco-friendly option, try cutting up old white T-shirts and using fabric as an alternative to store-bought ones.
3. Microfiber products
Just like white towels, a few microfiber cloths will energize you for cleaning and boost your household skills. Microfiber usually copes with cleaning the surface without any additional means - just add a little water, there is no need to scrub the surface leaving scratches. By the way, this material is a must-have for cleaning windows.
4. Rubber scraper
These little devices are what you need to protect your shower from drops and mold. They're also great for windows if you want to make that task easier too. Don't forget to keep an eye on your device. If, after using it, streaks remain on the surface or you notice that the device has become worse, this is a sign that it is time to update it by replacing the blade.
5. Bucket
A properly sized bucket will not only hold all of your cleaning supplies, but will also come in handy for mopping floors or doing other chores around the house. The thing is really necessary. You can buy it online or grab it at any hardware store.
6. Spray bottle
Keep spray bottles handy. They come in handy if you need to quickly rinse something or make your own cleaning mixture. Glass bottles can withstand any liquid inside. You can save a lot of money by buying a set of these.
7. Scraper or stiff brush
A cleaning sponge or rag won't always do the job when it comes to old stains. Therefore, do not forget a scraper brush to easily wipe tiles, bathtubs, lamps, and remove dried stains. You can use a dish brush that has already served its purpose in the kitchen. Or you can purchase a special scraper.
8. Toothbrush
If you need to handle smaller parts that cannot be reached with a regular sponge, a toothbrush will do the job perfectly. Disinfect old toothbrushes and use them to remove plaque, sink parts, crevices and nooks throughout the house. You can even boil old brushes in water to bend them so you can get to hard-to-reach places with ease.
Popular articles Wonderful verse for March 8
If you don't have an unnecessary toothbrush, buy a special brush that performs the same functions. It might even be more convenient.
9. Broom, dustpan and mop
If you have hard floor surfaces such as wood, tile or linoleum, you will need tools to clean them. Each type of floor surface has its own instructions, but a broom and dustpan and mop will work in any case. If you have children or pets, you will also need a wet mop. Blotting up spilled liquid and scrubbing stains from the floor will be no problem.
For those whose apartment is small and does not accommodate all the accessories, and the mess does not have time to build up, you can purchase a mini set of hand brushes and dustpans.
10. Vacuum cleaner
Whether it's a round robot vacuum, a standard long-brush unit, or that old workhorse you inherited, you'll need one of these machines to keep your floors clean and dust allergies at bay.
Plasticine fighter plane
Fighters
played a very important role during the Second World War. It was these machines that shot down enemy warplanes and destroyed their bases on the ground. On the eve of the great holiday, we suggest making a fighter plane from plasticine. Master class by Maria Klimova.
Materials and tools:
- Plasticine green, blue and gray;
- Knife for modeling from plasticine.
How to make an airplane, step by step
First you need to sculpt the body
for an airplane.
Typically, fighter jets have a color that helps them camouflage themselves in the air. Therefore, most often they are not monochromatic, but have spots that look like stains. To achieve this effect, you need to mix green (dark) plasticine with blue or blue
. But there is no need to mix completely. We need to get an uneven color. Now roll the resulting plasticine into a sausage, sharpening it at one end. This will be the nose of the plane. Photo 1
Now we need blue plasticine. We will make cockpit glass
. To do this, you need to make an oval and cut it in half. One of the halves needs to be stuck closer to the sharp end. Photo 2
Now we need to make wings
. They have the shape of a triangle with one acute corner. You need to try to keep the details as similar as possible. The wings must be glued strictly symmetrically. Photo 3
Now let's design the tail of the plane
. The tail parts need to be made in the appropriate shape. They are similar to a trapezoid, but without one side. The back of the plane needs to be slightly flattened. Photo 4
Now let's mold the upper parts of the tail, which help the car when flying. Photo 5, 6
Fighter
- an aircraft primarily aimed at destroying enemy air vehicles, so each of them has
shells for combat
. To make shells, you need to take gray plasticine and roll it into 3 small sausages, slightly pointed at the end. Photo 7
Next, we glue these shells under the wings of the aircraft. On the second side we do exactly the same. Now you need to make 2 more shells and glue them under the tail. These parts do not need to be sharpened; we will make them in the shape of a cylinder. We wrap the nose of the fighter aircraft with gray plasticine. Now you need to inspect the fighter again and smooth out all the bumps and cracks so that the resulting product is smooth and beautiful. Photo 8
The military plane is ready!
Salt dough caterpillar
You will need:
colored dough, knife, pva glue, toothpick, pendant, clear manicure polish.
Master Class
- Roll out the sausage.
- Cut it into 6 equal parts.
- Roll into balls.
- Glue 5 balls together.
- Glue the head.
- Make a nose and eyes, then glue them on.
- Poke a toothpick into the hanging area.
- Dry the craft.
- Attach the pendant.
The salt dough caterpillar is ready!
Plasticine soldier
Soon, all of Russia will gather in the main squares of its vast country to pay tribute to veterans and honor the memory of those who gave their lives for the victory. Victory Day is one of the most respected and revered days of the calendar. And today we are blinding in plasticine overcoats
.
Materials and tools:
- Plasticine is gray, as well as white, yellow, beige, brown, reddish brown and black;
- Stationery knife.
First, let's prepare gray plasticine. From it you need to form two large pieces and two small ones. Photo 1
Now we take a larger piece and form a body from it. That is, the hem of the overcoat. Photo 2
From a smaller piece we mold exactly the same part, only smaller in size. These parts need to be connected. Photo 3
Next we will make the sleeves. Use gray plasticine to roll two identical sausages and glue them to the sides of the overcoat. Photo 4
Now let's prepare plasticine for other parts. Roll out a long flat strip from gray plasticine. Roll out a flagellum from dark brown plasticine. And we also need reddish-brown plasticine. Roll it into a small ball. You will need it to make a plaque for the belt. Photo 5
From the gray strip you need to form a collar. Photo 6
We wrap the overcoat with a brown flagellum, forming a belt. We cut out a rectangle from a reddish-brown ball and glue it in place of the belt plaque. Photo 7
We roll two identical sausages from black plasticine and bend them at the bottom. These are boots. Photo 8
We will make shoulder straps from brown plasticine. Just cut out two rectangles. Photo 9
Glue the yellow balls. They will imitate stars. We will also glue the stripes. Photo 10
We will make hands from beige plasticine. Photo 11
Roll up a ball of skin-colored plasticine and glue it onto the collar, pressing down. This is the head. To make a hat with earflaps, we will again need gray plasticine. You need to roll it into an oval. It needs to be slightly flattened. And then you need to make a flat strip and, as it were, wrap it around an oval.
Photo 12
We make a cockade from reddish-brown and yellow plasticine.
Photo 13
Now we need to make two identical flat circles and glue them in place of the eyes. We will make pupils from very small black dots. Next, take some beige plasticine and mold the soldier’s nose and ears. You don't have to do your hair. This is the kind of soldier we can make from plasticine!
More interesting:
Economic cat
Using this master class as an example, you will learn how to sculpt a cat from salt dough. Photos with instructions will not let you make mistakes.
Step 1. Step by step we create a sketch. On plain paper, draw the figure of a cat. You can draw it yourself or transfer the drawing you like using tracing paper. Don't be afraid if the drawing turns out to be uneven, because all the unevenness and roughness will be hidden under the dough.
Step 2. You should start sculpting the cat from its paws. Taking a piece of dough, form it into 2 small sausages. Form an oval from the sausages, give it the shape of paws and place it on the drawing in the place where the paws are drawn. Using a stack, draw toes and claws on the paws.
Step 3. Again we sculpt two sausages and, giving them the shape of legs, stick them to the paws according to the pattern. For better adhesion, all parts must first be moistened with water.
Step 4. Having formed the cat's tail, we adjust it to the drawing. To make the cat's body, take a piece of dough and cut it into a ball shape. The ball should subsequently be flattened, giving it the shape of a cat's belly. Before applying the resulting belly to the remaining parts, the places where they come into contact should be moistened with water.
Step 5. Using a stack, we make small marks on the cat’s tummy, shaping them in the form of fur. We take small pieces of dough and form them into fish and other bag fillers if desired.
Step 6. We form ropes from the dough and mold them in the shape of baskets. You need two baskets. We overlap them on the products.
Step 7. Form the dough into a sausage, slightly flattening the end and forming fingers. You need to make two of these parts. We place the prepared hands on the body and the basket, after moistening them with water.
Step 8. Form a ball of dough, use your palms to shape it into the shape of a head and place it on the drawing in the place where the head is drawn. The place where the eyes will be should be slightly flattened, and the place of the muzzle should be highlighted. Next, take two small dough balls and form them into ears. Glue the ears to the head and use a stack to decorate them.
Step 9. Using a stack, form the fur on the head and ears.
Step 10. Form two small cakes and glue them to the head, these are the cat's cheeks. Use a toothpick to make holes on the cheeks for future mustaches. Using a stack, form a muzzle. Make two eyes and a cat's nose from the dough. Stick them by moistening them with water.
Step 11. Make sausages to decorate the cat's neck and basket. Cut off excess paper from the finished product and place in a warm oven to dry for several hours. The readiness of the craft is determined by the degree of its hardness. The finished product should be cooled at room temperature.
Step 12. Now let's start painting. First, our product must be primed with white paint. After the paint has dried, use a thin brush and soft blue paint to paint on the cat's fur. Next, you need to let the product dry again. And only after that, using dark blue paint, paint the second layer of wool.
Step 13. The cat's fur looks like this after coloring.
Step 14. Paint the nose, sausages and other products in the baskets. Coat the finished product with varnish.
Step 15. The finishing touch - place the craft in the finished frame. That's all, our craft is ready.
Send your photos
Do you also make beautiful crafts?
Send photos of your work. We will publish the best photos and send you a certificate of participation in the competition. Alina Rudenko
Modeling from salt dough (for children of the middle group)
What you need for work:
Glue, modeling board or working cardboard, colored cardboard (blue or blue), stacks, a little cotton wool for decorating the craft, a cap from a large diameter felt-tip pen and a soldier’s star for making an impression, scissors.
I glued stars to bottle caps to make them easy for the kids to use.
Salt dough recipe:
1 tbsp. fine salt
1 tbsp. flour
1 tbsp. spoon of vegetable oil
0.5 tbsp. water
Salt dough pencil
You will need:
water, flour, extra salt, cardboard jar for the frame, PVA glue, scissors, a piece of decorative rope or corrugated paper, gouache, brush, button, stacks, acrylic varnish for crafts, toothbrush.
Master Class
- Knead the salted dough in this way: add a glass of flour, a glass of salt, add water, then knead until the desired consistency of the dough. Separate part of the dough, add beige gouache, then knead.
- Roll out the cake to a thickness of 10-15 mm.
- Apply PVA glue to the outer rim of the jar and wrap it with dough. Cut off the excess with a stack and smooth the joints with a damp brush.
- Create a small dotted texture with a toothbrush on the surface of the dough.
- Knead the brown dough, roll it into a flat cake 10-15mm thick.
- Cut a 5cm wide strip of brown pastry and glue it to the bottom of the jar.
- Make 2 large owl eye bases from white dough, then glue them on.
- Make a beak out of brown dough and glue it on.
- Make eyes from turquoise dough and glue them on.
- Roll out 8 strips of pink dough, twist them into 4 flagella and make a bow, then leave it to dry for 2 hours.
- Make droplet-shaped owl wings using brown dough, then glue them on.
- Weave ropes of beige dough and glue them onto the neck of the jar.
- Roll out a sausage from white dough, draw the texture of the lace with a stack and glue it as a collar under the beak.
- Place the craft in a warm place for a day.
- Paint the bottom and wings with brown gouache and decorate with white dots.
- Draw the pupils and eyelashes with black gouache, wait until the paint dries, then paint white highlights on the eyes.
- Glue a pink bow above the wing.
- Glue a button with a bow from a corrugated strip onto the lace.
- Cover the craft with varnish and wait until it dries completely.
The salt dough pencil is ready!
Lesson notes on testoplasty “Tank”
Tatyana Korepanova
Lesson notes on testoplasty “Tank”
Lesson notes on testoplasty “Tank”
Program tasks
A: introduce children to the traditions of Russian festive culture, continue to teach children basic modeling techniques, the ability to pinch off small pieces, mold them to a base, and the ability to work with two types of colored dough.
R: develop fine motor skills of the hands, a sense of form, the ability to answer questions; develop and enrich children's vocabulary.
B: cultivate accuracy, independence, interest in working with dough; evoke a positive, emotional attitude from the results of your work.
Materials and equipment
• Pictures depicting an armored personnel carrier, submarine, helicopter, tank
• Magnets and magnetic board (magnetic side of the easel)
• Green and red dough
• White sheets of paper
1. Q: - Hello, guys! Today we will talk about the holiday of all men - February 23 and we will prepare a gift for our dads.
On February 23, our country celebrates a holiday - Defender of the Fatherland Day. On this day, it is customary to congratulate all men: fathers, grandfathers, brothers, and even uncles can be congratulated. You can also congratulate the boys - after all, they are future defenders!
What should male defenders be like? ( Children's answers
)
Right. They are strong, brave, brave, courageous...
Only such men can defend our Motherland. And for this you need special transport.
Guys, what is transport? ( Children's answers
)
So what special transport is needed to protect the Motherland? Let's look at the pictures. What's this? ( That's right, helicopter
) He can defend from the air.
And for protection from the water you need a submarine. And this is an armored personnel carrier and a tank. They move on the ground. ( The teacher shows the pictures and attaches them to the magnetic board, simultaneously asking some questions about them, for example: what color is the tank, how did you guess that it is a helicopter and not a plane, etc.
)
2. Q: - Indeed, only strong and brave men can drive such transport. Just like your dads. And today we will make a tank for dads. There is dough in my magic basket. What color is it? ( Answer
) And so that our fingers can work well, let's stretch them.
Tanks came out for parade, “walking” their fingers on the table
They lined up exactly in a row. Palms pressed together.
One, two, three, four, five - connect the fingers of both hands in pairs.
It's very easy to count them!
3. Q: - Well done! Now let's sculpt. ( The teacher distributes pieces of dough, sheets on which to place the tank and, explaining and showing, makes the tank together with the children.
)
Video
There are an unlimited number of ideas for creating crafts from salt dough. There are a lot of master classes that help you get trained, and then make a memorable gift from the miracle material, for example, for a birthday. Beginning craftsmen who want to turn a simple hobby of crafts into a favorite hobby will be helped by a video that shows step by step what can be made from salted play dough.
The origins of dough modeling go back a long way. There is a legend that it was invented by Slavic cooks who were bored and had fun by creating interesting, edible figures from dough. In addition, this material is one of the cheapest and available to everyone. That’s why this type of creativity is popular in our time; everyone has flour, water and salt in their home. So, here are some interesting DIY salt dough crafts, with photos and step-by-step instructions.