Home » Basics » Beading Basics - A Guide for Beginners
Basics
Irina Vyshivaikina 06/26/2019
0
Beadwork became one of the main creative directions. It is practiced by people of all ages, from young to old. This is a great way to spend time with your child or create extra income for yourself. Handmade products are a trend of the 21st century. Many modern designers use beads in their works. This material produces unique products that cost a lot of money in the markets, because individuality is highly valued.
History of origin
It is not surprising that many are interested in the world of beadwork and wonder how to weave beads beautifully and how to start their creative journey. At the beginning of the journey, you need to study the foundation and basic skills, choose the most suitable technique for yourself and create your own masterpieces.
Bead weaving has been known since ancient times. There is no exact description of the appearance of beads, but there are many legends associated with the appearance of glass. And the first beads were created precisely from this material. Egypt is considered the main country for beads. Afterwards, the technology was transferred to Byzantium, and from there to the island of Murano. It was there that the famous Murano glass appeared.
People were so amazed by these sparkling beads that they decorated their clothes, shoes, bags and utensils with them. Not a single fashionista could do without such jewelry.
There have been several attempts to “root” beadwork in our country. But then jewelry made of pearls, silver and other precious materials flourished. Venetian glassmakers visited Russia for the first time in 1676. But the business lasted less than thirty years. There was another attempt to create a glass business, but it was also unsuccessful. And only in 1754 the first factory was opened, which brought beads to the people. Russian fashionistas tried out products made from this material and many began to create jewelry themselves.
Craftswomen of different classes created:
- clothes;
- furniture;
- paintings;
- icons;
- pano;
- beads;
- souvenirs;
- accessories.
Until the 20th century, the shine and shimmer of beads delighted women, but then the war happened. But the craftswomen retained their technologies, and already at the end of the 20th century, beads again began to show off on display in souvenir shops and expensive boutiques.
This material has not lost its glory, and in the modern world they decorate with it:
- costume jewelry;
- handbags;
- wallets;
- collars;
- clothes;
- belts
Necklace-harness
A strand of beads is a fairly versatile accessory that can highlight an image; the main thing is to skillfully and tastefully choose a pattern and color scheme.
When weaving strand necklaces, you can bring your wildest ideas to life!
The easiest way to make a beaded rope for beginners is to weave a beaded fabric, roll it into a tube and sew the edges. However, you can do without stitching if you know a few secrets of weaving a single piece. Let's look at them using the example of a regular mosaic strand.
You need to start weaving it with an odd number of beads: the fewer there are, the more accurate the decoration will be. It is necessary to weave with the same line tension so that the product is dense and at the same time remains plastic.
The operating algorithm is as follows:
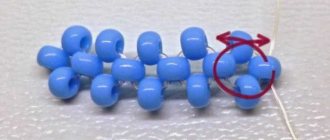
- We string an odd number of beads onto the fishing line, for example, 7 pieces. We make a ring out of them by threading the fishing line through the first bead. At the base we leave a free end of the fishing line (about 15 cm) to secure the harness.
- We weave the 2nd row according to the mosaic principle: we string the beads and pass the fishing line through the 1st, 3rd, 5th and 7th beads of the first row.
- We weave the 3rd row by analogy with the 2nd, connecting it with the beads of the second row, but skipping each bead.
- Using this technique, we weave a tourniquet of the required length.
- Attach the clasp.
Basic techniques
It is very difficult for beginners to understand all the techniques, so we have collected all the methods in one place and will briefly talk about each.
Looped
The finished elements look like loops, which is why this technique got its name. For work, beads, thread or wire are used. Using this technology, additional elements are created for the craft, but sometimes you can find a product made entirely of loops. You can use loops to create flowers and trees. This is a great technique for beginners.
Photo source: https://rukodelnichaem.ru/bis/hrizantema_bisera.php
Circular (French)
This technique is also known under the names: French and arc. The elements are woven using wire in arcs around a central axis. Used to create leaves, petals and flowers.
It looks very impressive and neat, and has several varieties:
- toothed;
- elongated;
- shamrock;
- rounded.
Mosaic
The finished product is similar to brick technology, only unwrapped. The craft turns out dense, each bead is adjacent to each other, creating a bright, unusual carpet. For work, we use high-quality beads from Japanese manufacturers, fishing line or thread.
There are several subspecies:
- circular;
- cylindrical.
Brick
The brick technique is ideal for flat and shaped crafts. It got its name because of its resemblance to brick lining. The beads are arranged in rows and with each subsequent row they move to the left. It is best to use even beads of the same size. To connect the material, use thread or fishing line.
Parallel
It is best to start your creative journey with a flat parallel stitch. This is one of the easiest techniques and is perfect even for children. Created using beads and wire. The finished product consists of parallel rows, each of them sequentially drawn onto the wire.
Monastyrskaya
This may seem like the most complicated way of weaving, but in practice it’s not at all like that. The products consist of repeating crosses, which is why the technique is sometimes called “cross stitch”. Monastic weaving is used to create both flat and three-dimensional figures. The technology is very diverse and has many areas of application.
Needle
The finished elements resemble beaded needles. They are used as additional decoration. But sometimes you can find a craft completely created using this technique. For example, a Christmas tree or an exotic tree.
Mesh
Used for braiding objects:
- Easter eggs;
- vases;
- groceries;
- Christmas balls.
Looks like a mesh. This technique is also called openwork. To create the product, fishing line or wire is used.
Volumetric weaving
This method is very similar to parallel flat weaving, but the rows are not located next to each other, but on top. Most often animals are woven using this method, but other products can also be found. This technique has several varieties. The most common is weaving at both ends. Experienced needlewomen use several pieces of wire or fishing line for crafts.
How to make a butterfly?
A colorful butterfly can be turned into an unusual brooch, hair clip, or included in the interior of the room. Weaving butterflies from beads can be done using three-dimensional, mosaic or parallel work techniques.
There are many simple templates for beginning needlewomen that can help you accurately reproduce these original decorations. They amaze with their diversity and similarity to natural specimens.
After mastering the simple technology, you can experiment with combinations of beads and glass beads, sequins, and semi-precious stones.
Note!
Do-it-yourself bead brooch: photos of the best options, step-by-step master class on how to create it yourself, weaving patterns
- Do-it-yourself felt toys - TOP-120 photos of toy ideas, do-it-yourself instructions for making them for beginners
How to make a lapbook with your own hands: a detailed master class on how to make it yourself, reviews of lapbook elements
If you attach a clasp to the finished butterfly, you will get an original brooch, and small insects, attached to elastic bands or hair clips, will delight girls with their lively beauty and difference from factory jewelry. A beaded butterfly placed on a curtain or lamp in a nursery will help create a fairy-tale atmosphere for a child.
In addition to the practical side, beadwork is credited with a beneficial calming role on the nervous system, along with the restoration of positive energy and vitality.
Workplace organization
It is very important to properly organize your work area. Only in an organized space can you completely relax and focus on your hobby.
We offer some tips for organizing your workplace:
- the table should be well lit;
- arrange the beads by color and manufacturer;
- the working surface must be flat;
- put the diagrams on the left side;
- Lay a white cloth on the table so that the beads do not slip and can be easily found;
- pour the required amount of beads onto the table or into jars with low walls;
- prepare all tools and materials in advance;
- create a sketch of the future product;
- think over color relationships in advance;
- take breaks between work.
Wedding necklace
The choice of a wedding necklace depends primarily on the image of the future bride and the style of the dress. In terms of colors, the most suitable beads and beads are white, artificial pearls, beige, pearlescent muted tones. The beauty of a deep neckline will be emphasized with an elegant V-shaped necklace.
An openwork airy round necklace will help complete the bride’s delicate look.
Let's take a step-by-step look at how to make a wedding necklace with your own hands.
For work you will need the following materials:
- beads (6 mm);
- beads No. 15;
- beads No. 11;
- transparent thin fishing line.
We do the weaving as follows:
- We string 16 beads No. 11 onto a monofilament thread and close them with a ring.
- Next, add 1 more of the same bead and 1 bead, thread the fishing line back into the bead and through the 2 closest beads. We continue weaving in this way around the entire circumference of the ring.
- We braid the beads with small beads No. 15.
- We use the same beads to make a finishing row and get a beautiful flower.
- We weave several of these flowers and collect them into a beautiful necklace.
Wedding decoration can be made even according to the simplest pattern of rings, weaving mother-of-pearl beads into them and decorating them with rock crystal pendants.
If the wedding dress itself is already embroidered with a large number of beads, beads, and also richly decorated with other elements, you should not choose too ornate patterns for weaving a necklace. The image will be too pretentious. In this case, you should adhere to minimalism in decorations.
You can also make 3-5 threads of different lengths by stringing white beads onto each of them, and then tie them together, aligned from the shortest (top) to the longest (bottom). Thin elegant threads can be decorated by attaching a beaded flower or a beautiful stone bordered with a beaded openwork frame to the side.
An airy necklace will look unusual and very beautiful, in which beads and beads of different sizes are appropriately combined.
For those who already have experience in weaving using various techniques, you can come up with a necklace pattern yourself. This will definitely guarantee that the product will be exclusive.
Storage tips
Every needlewoman faces the problem of storing her material. Although the beads are small, they take up a lot of space, because they need to be distributed according to color, size and texture.
We offer some tips from experienced craftswomen:
- purchase a special box with holes for beads, threads and other tools;
- you can find suitable jars at home, it is best if they are transparent;
- even if the beads are the same color, place them in different jars according to size and texture - this will make the work easier;
- all tools (threads, scissors, fishing line, wire, needles) should be nearby;
- buy a large box where you put all the jars with beads and other materials;
- Unopened sachets can be stored in packages.
Another important question is where to store the beads. The most important thing is that this place should be:
- safe - especially for homes with children;
- far from sunlight - any, even the highest quality beads can fade over time;
- at hand - all materials should be close to the needlewoman, it is not wise to put them on a closet or under the bed;
- compact - many boxes on the table look sloppy, it is best to put everything in one large box;
- beautiful in appearance – even in boxes creativity should be expressed. Opening a black box containing beads will be less pleasant than opening a pink or yellow one.
Types of beads
Modern beads come not only from glass, but also from plastic, wood and stone, even from precious stones. The most common bead shapes:
Round - a ball slightly flattened at the edges with a hole in the middle.
A bugle is a piece of glass tube. It comes in different lengths - from a few millimeters to tens of centimeters.
The cut looks like a very short glass bead. Unlike a round one, the edge on the hole side is not rounded.
Drops are drop-shaped beads with a hole closer to the thin part.
Charlotte is a round bead with one side, somewhat reminiscent of a signet ring.
Figured beads - can be of any shape, for example, cubic, tetrahedron, star or heart.
The size of the beads is indicated on the package - the number shows how many beads can be placed on one inch. The larger the number, the smaller the beads. Since inches are not the most convenient measure, you can use a table to determine the physical size of one bead.
Choose beads for work
Tools and materials for needlework
Beads
The appearance of the product depends on the quality of the beads, so you should not skimp on it. The main steel producers are Japan, the Czech Republic and China. In Russia, small workshops produce beads, but there is no mass production in our country.
Japanese material is made using the latest technologies and high-quality equipment. The beads have the same size and structure. Due to their high quality, Japanese beads have the highest price in the markets, but this does not frighten experienced craftswomen, because such a product is valued and sells quickly. And the process itself is much more enjoyable.
Czech beads are distinguished by their huge color palette. Coatings come in both basic colors and rare and experimental ones. Any idea can be realized using this material. The beads are not as smooth as Japanese ones, but if you buy from the same batch, you may not notice the difference. Its price is average, which is why it is in great demand among creative individuals.
The cheapest option is produced in China. Of course, it is not suitable for jewelry, but beginners can safely get acquainted with all the techniques using Chinese beads. The color palette is also varied and there is plenty to choose from.
Needle
For beads, special needles are used; they are much thinner than usual. Due to the fact that needles tend to break, it is better that you always have spare ones.
Also, when weaving beads according to patterns, you will need the following tools for weaving:
- scissors;
- wire cutters;
- fishing line;
- wire.
Scythe
To make a braid necklace, you just need to put beads on long pieces of fishing line, and then intertwine the resulting threads together.
A necklace made of strands using the braid technique looks very stylish.
Use Cases
Now that you are familiar with the theory, you probably want to start practicing as soon as possible, and the question arises - what can be woven from beads.
There are a huge number of options, it could be:
- bracelet;
- necklace;
- animal figurine;
- earrings;
- a bouquet of roses or other flowers;
- painting;
- icon;
- clothing decoration;
- brooch.
This is not the entire list of bead weaving. There are no limits to your imagination, so feel free to experiment and create your own masterpieces.
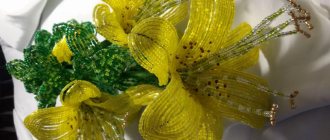
But since there are a lot of ideas, we suggest starting with the simplest thing - weaving a flower from beads according to the pattern:
- take beads of three colors (white, yellow and green);
- cut the fishing line to the required length;
- Using the parallel weaving technique, make petals, a center and two leaves;
- for the petal, thread the fishing line through one bead;
- then make 6 rows of 2 beads each;
- the petal should be closed by one bead;
- Now, in the opposite direction, pass the fishing line through each bead;
- Using the same technology, the yellow center and leaves are created.
Photo source: https://yellowhome.ru/wp-content/uploads/2018/04/3-6.jpg
Now you know what can be made from beads, which means this will be your first step into the wonderful world of beadwork. The beauty and brilliance of this material leaves no one indifferent.
Easter theme in beadwork
Craftswomen, of course, cannot ignore the traditional holiday attributes in the form of Easter eggs. In addition, such souvenirs have no expiration dates and are distinguished by their elegance, originality and sophistication. It’s not for nothing that Easter bead weaving patterns are among the most popular and chosen by needlewomen for this type of needlework.
Here you may need:
- blanks for the egg base made of plastic, foam, wood or papier-mâché;
- special color schemes;
- monofilament, wire, suitable fishing line;
- beads (No. 8, 10), matte, transparent and metallic options;
- tools: awl, tweezers, scissors, needles (No. 12 and No. 13);
- PVA glue with a brush;
- rhinestones, optional.
Important advice: you should start with a wooden base 8-10 cm high, a 2-3 color pattern on the fishing line (for better rigidity).
Note!
Ideas for LD (a girl’s personal diary): step-by-step instructions for making it yourself, photo reviews of the best options
- Educational soft books made of felt: materials for making, detailed instructions + reviews of plots for books (100 photos)
Original do-it-yourself valentines - design options, necessary materials, master class for DIY work
To braid an egg with beads, it will be easier to start with spirals, and using a snake with sequins and sparkles is considered a more complicated version of the work.
There is also the possibility of decorating an egg using a hook and small beads, a mesh or checkered technique, a double-sided weaving method, and mosaic technologies.
Beginner mistakes
- Working with low-quality beads.
- Surface wire selection.
- Work without a sketch.
- Wrong choice of beading needles.
- Insufficient attention to workplace organization.
- Start by making complex crafts.
- Broken thread after weaving.
- Raw edges.
- Ignore the reverse side of the product.
- Using improvised tools for work instead of professional ones.
- A thread that is tightly stretched when weaving.
- Using beads of different sizes for one product.
- Saving on materials.
- Threads are a different color from beads.
Irina Vyshivaikina
Professional skills: Clothing designer; Artist
Brief biography and personal achievements: “I am inspired by the things that are around us.” Since childhood, I was interested in art and crafts, so I decided to devote my life to it. She received a higher education in design and released a collection of designer jewelry made from simple materials that can be found at home from any needlewoman. Afterwards, I decided to conduct master classes on creating similar accessories for everyone. She became a blogger and the author of the website domigolki.ru.
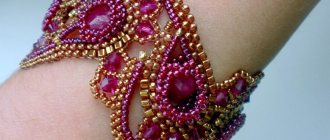
Weaving a bracelet
At the beginning of the bracelet, make a loop so that the strung beads do not fall off. Now start assembling the bracelet, coming up with different combinations and playing with colors.
If you are a beginner, then start with simple patterns and use larger beads. Also, if you are a beginner, then choose beads made in China, they are cheaper. Although its quality is not very good, this way you can get better. And it’s not a pity for children’s creativity.
Brooches
So, let's start with brooches - this accessory has been firmly established in the fashion industry since Soviet times and is currently particularly popular.
Beaded brooches are the most popular now. This decoration can complement any look and add some zest to it.
Brooches come in a wide variety of forms: both in the form of animals and birds, and in the form of flowers and leaves. Brooches look perfect when paired with a formal business suit, slightly diluting the look and adding a touch of grace and sophistication.
Thanks to the presence of beads of all colors and shades, when making an accessory you can work out every detail to the smallest detail. A fairy tale theme is also appropriate.
A brooch in the shape of a dragon or unicorn will perfectly complement any look and add self-confidence to its owner.
Keychain
A child can make a beautiful keychain that resembles a watermelon slice on his own using parallel weaving technology.
Required material:
- flexible wire about 50 cm long;
- round beads in black, scarlet, green, white (use a different color if desired);
- ring for keychain.
Step by step execution:
- Apply the wire folded in half to the ring and thread both free ends through the loop, fixing them firmly.
- String a scarlet bead onto one end of the wire. The second end is passed through the hole, securing the 1st row.
- Then they pick up scarlet, black, scarlet on one side, and with the other end of the wire they pass through all the beads of the 2nd row.
- For the 3rd row you will need black and 4 scarlet beads.
- The next 4th row consists of scarlet, black and 5 scarlet beads.
- To create the 5th row you need to string black, 3 scarlet, black, 4 scarlet beads.
- Form the 6th row of 11 white beads.
- For the final row you will need to string 13 green seed beads.
The ends are secured by weaving them among the beads.
Good for children
We must not forget to invite young craftsmen to express themselves through handicrafts; all acquired skills will definitely be useful in life. Perseverance will not be easy at first, but with the help of parents, the process can become so exciting that the hours will fly by.
Various animals and toys can attract a child’s attention just like an interesting and exciting cartoon; you just need to help turn on the child’s imagination. Fine motor skills of the hands develop well during the weaving process.
Combining colors with the help of elders will provide a good basis for further independent choice of clothing. And if the product is placed in a frame, it will remind you of a pleasant time spent for many years.
Tips for working and choosing materials
Everything comes with experience, but sometimes you shouldn’t beat yourself up, but just listen to the advice of experienced needlewomen:
- Don't skimp on beads. The quality of the material is 80% of successful work. Beads are available in every city. It can be purchased at any craft store. There is a large palette of colors, and everyone will choose the most suitable shade for themselves. Good beads will retain their brightness for many years.
- Choose the right fabric. It should not be too light, since beads are not a light material. But it shouldn’t be dense, because beading needles are very thin. Canvas would be the ideal choice.
- Choose your canvas carefully. The size of the cage must match the size of the bead.
- Use a hoop, especially for large embroidery projects. Rectangular ones are considered the most convenient. It is unacceptable to attach a hoop to an already embroidered pattern. Therefore, select the size according to the future product.
- Use special needles for bead embroidery. They are much thinner than usual and more convenient to work with. But since they break quickly, it is better to always have a spare package.
- Pay attention to the threads. They must be durable. Choose transparent ones or ones that match the main color of the product. To avoid twisting the thread, pass it through the wax.
- Don't forget to secure the thread well. Beads are quite heavy material and must be firmly secured.
- Pay attention to the wrong side. Carefully trim any remaining thread or fishing line.
- Watch the lighting. It is best to work with beads during the daytime. But if you sit down to work on the product in the evening, use a bright lamp.
- Do not mix shades of beads. It is best to separate the jars and distribute the beads by color and manufacturer.
- Decorate embroidered paintings in a baguette. This will enrich your work and make it more effective. Give it to a professional workshop for registration
Sources:
- https://domigolki.ru/osnovy/osnovy-biseropletenija-posobie-dlja-nachinajushhih/
- https://miazar.ru/biseropletenie/sxemy-pleteniya-iz-bisera-dlya-nachinayushhix-prostye-texniki-posledovatelnost-dejstvij-i-sovety/
- https://handmadebase.com/beading-core-technology-uvl/?getoriginal_lang=translate
- https://kaksdelat.guru/sxemy-pleteniya-iz-bisera/
- https://embcentre.ru/base/kak-vybrat-kachestvennyy-biser/
- https://izbiserka.ru/pletenie-iz-bisera-dlya-nachinayushhix/
- https://masterbisera.com/braslety/fenechki-iz-bisera/
- https://tkani1.ru/info/biseropletenie-dlya-nachinayushhih-poshagovo-s-foto-shemy-i-opisanie-czvety-braslety-zhivotnye
- https://tytpodelki.ru/biseropletenie-dlya-nachinayushhix/
- https://nauchitsya-sdelat.ru/biseropletenie-dlya-samyx-samyx-nachinayushhix/
- https://jamaster.ru/sxemy-pleteniya-iz-bisera-dlya-nachinayushhix/
- https://domigolki.ru/osnovy/prostye-shemy-po-biseropleteniju-dlja-nachinajushhih-i-detej/
Chain
Children are invited to weave a beautiful chain in two rows, focusing on a simple and accessible pattern.
Required material:
- silk thread;
- round beads of golden, pearl or silver color;
- thin needle.
Step by step execution:
- Use a needle to hook 2 beads and move them closer to the end of the thread. The ends are tied with a knot so that the holes are located along the thread.
- Pass the needle from below through the hole of the left bead.
- String 2 pieces and pass the needle from above through the right one, and then from below through the left and 3rd beads. A square is formed.
- Again, pick up 2 beads with a needle and direct them from above through the hole of the 4th bead, and then from the bottom of the 3rd bead.
Weaving is carried out in the same sequence until the chain reaches the desired length. Fixed on the edges of the fastener. If you wish, you can simply connect the opposite ends and sew.
Interesting beadwork is one of the types of creativity available to children. Simple schemes are selected for them that allow them to build motivation for interesting activities that develop perseverance, attention, and fine motor skills.
