Hobbies are an integral part of our life. They help put your nerves in order, calm down and relax after a hard day. Some people play the guitar, others read books or paint pictures. Someone chooses knitting - one of the most popular leisure activities in the world.
In this article we will tell you:
- How to choose the right knitting needles?
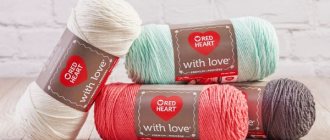
- How to choose yarn for knitting?
- Types of knitting
- How to make a set of stitches with knitting needles?
- How to knit knit and purl stitches with knitting needles?
- How to knit an elastic band with knitting needles?
- Decreasing and adding stitches in knitting
- How to properly close loops when knitting?
- 8 steps to help you knit your first project
How to make a set of stitches with knitting needles?
It is with a set of loops that any knitting begins. Here we will look at the simplest and most universal method, while more complex and elegant options are best studied with professionals.
The order of casting on loops when knitting
How to cast on stitches on knitting needles, a simplified method
1) Place the thread across the middle of the palm, leaving the “tail” on the left and the ball on the right. 2) We wrap the upper part around the thumb from right to left and lead it to the index finger, grabbing it from behind. 3) We pass the yarn between the second and third fingers, place it on the palm, holding the two ends formed with the middle, ring and little fingers. 4) We connect 2 knitting needles together and use them to pick up the loop on the thumb from top to bottom. 5) We continue moving towards the thread on the index finger, prying it from top to bottom, and again thread the ends into the first loop. 6) Remove the thumb while simultaneously tightening the knot on the right needle. 7) Holding the resulting loop on the knitting needle with the index finger of your right hand, lower them down towards you. We use knitting needles to hook the thread on the thumb from the bottom up from the side of the palm and again pull it into the loop on the index finger.
Determining the size of the future sweater
The size of the product will dictate to us the number of loops that need to be cast on and the total amount of work on individual parts of the sweater. The size of the sweater is determined based on the measurement - chest circumference.
How to measure chest circumference
- To measure we will need a measuring tape. If there is no such thing, then you can take the braid, take measurements, and then attach it to a ruler or tape measure.
- You can take measurements yourself, but then you need to be very careful that the tape does not slip off your back. It is better to ask someone for help in this matter, so the results will be more accurate.
- For women, it is better to take measurements in a bra, since the finished product will be worn exactly on it.
- Wrap the measuring tape around your chest so that it goes under your armpits and is horizontal to the floor. The tape should be positioned so that the starting point begins in the center of the chest, and it covers the widest part of it.
- Do not puff out your chest or take a deep breath or exhale. Remember to ensure that the tape does not twist. All this can distort the measurement results.
Converting bust size to product size
- XS (extra small): 81 cm
- S (small): 91 cm
- M (medium): 102 cm
- L (large): 112 cm
- XL (extra large): 122 cm
- XXL (super large): 132 cm
How to knit knit and purl stitches with knitting needles?
All knitting is based on the front and back loops, and depending on the pattern you will only have to change their number. There are two main ways to knit knit stitches.
Method one. We always keep the thread behind the product. The free knitting needle must be inserted into the middle of the loop and the thread should be pulled out from the back wall, grasping it with the knitting needle from top to bottom. Then you need to drop the loop from the left needle.
Method two. The pattern remains the same, only now we wrap the working thread from the front wall of the loop.
Purl stitch, first method. We hold the yarn in front of the product, insert the free knitting needle behind the front wall of the loop and throw the working thread under the knitting needle in the right hand and pull the captured thread into the loop.
Second way. We insert the free knitting needle behind the front wall of the loop and move the knitting needle to the right so that the satin stitch is under it.
DIY comfort - knitted sofa pillow
An original pillow that will become a bright accent in your home interior is another product that a beginning craftswoman can add to her collection of knitted items. It is knitted very simply, no pattern is required for this, since there are no complicated patterns.
Necessary materials:
- “grass” yarn, 4 colors (100 g of each color);
- knitting needles on fishing line.
Step-by-step description of the process:
- To get a standard size pillow, you need to cast on 80 loops (if you want to make it larger or smaller, then reduce or increase their number).
- Knit everything with knit or purl stitches, changing the color of the thread every 4 rows.
- When finishing the work, knit 10 cm of fabric with smooth yarn (or tie the pillow to the end with grass).
- Close the loops.
- Stuff the pillow with pieces of foam rubber and sew it together.
How to knit an elastic band with knitting needles?
This is the most popular type of knitting, without which no job can be completed. It involves alternating two types of knitting: front and back, 1, 2, or 3 loops of each option. It is used to process necklines and sleeves.
We cast on the number of loops we need, as we learned to do earlier, slip the first loop without knitting onto a free knitting needle, and with the second loop we knit two knit stitches, then two purl stitches and continue alternating them until the end of the row, the last stitch is always a purl stitch, regardless of the pattern.
Video
Not everyone has the finances to buy new things for their children, but anyone can learn to knit. The main thing is to have desire and patience. It is very convenient to learn the basics of knitting using video tutorials. It will become easier and more accessible for children to knit their first products. Experienced knitters will also benefit from watching them and learning some knitting techniques. Check out other knitting ideas for newborns as well.
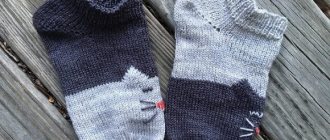
Booties for newborns
I really want to give the baby a piece of my tenderness and love. It should be remembered that all products intended for babies are knitted with the seams facing out. The number of seams should be kept to a minimum and they should be carefully processed. Knitted or crocheted booties must fit the size of the feet very accurately to make the baby comfortable. Thanks to the presented video, knitting your baby’s first shoes will be easy and simple.
Knitting. Booties for newborns /// Knitting. Boots boots for babies
Learning to knit a sleeveless vest from scratch
A sleeveless vest is a very comfortable garment, suitable for any occasion. This product will diversify the wardrobe of a little fashionista and will become her favorite thing. You can decorate the product with bright, cheerful details and drawings, using other types of needlework: embroidery, crocheting, applique, macrame. A sleeveless vest for a girl will be made in a couple of evenings with a video that shows in detail the procedure.
Vest for girls. Part 1
Decreasing and adding stitches in knitting
This technique is used when the fabric of the product needs to be slightly enlarged or reduced.
Decrease stitches with a slant to the right. Having knitted the fabric to the place of the intended decrease, insert the right knitting needle into two loops on the left knitting needle behind the front wall
Using a knitting needle, grab the working thread and pull it into a loop.
By following the described sequence of steps, you will get decreasing loops with a slope to the right. Using this technique, you can knit an inconspicuous decrease when making a V-shaped neckline.
Decrease by knitting two stitches together. After knitting to the place where the stitches decrease, remove the last loop onto the right knitting needle without knitting. Knit the next stitch. Then pull the knitted loop through the removed one.
Adding loops. When the product is already knitted before the loops increase, you should use a working knitting needle to pull out the thread that is between the loops, the so-called broach.
We throw the drawn thread or broach onto the knitting needle on the left. And only then can it be knitted with a front loop, using only its back wall.
Strokes
A fashionable and stylish pattern that can be used for knitting a jacket, cardigan or sweater. As a backlog, it is necessary to cast on the rod a composition of loops that is a multiple of twelve, as well as six symmetrical and 2 edge loops.
Step by step guide:
- The 1st, third, seventh and ninth lines are created only with the help of front buttonholes.
- Even lines, starting from the second, are performed according to the general image. This means that you need to make stitches exactly as they are located on the tool.
- The fifth parallel is knitted by alternating reverse and front stitches, starting from the first. You need to take six pieces.
- The eleventh line also alternates, but now from the front loops.
- The process ends on the thirteenth chain, after which the entire procedure is repeated according to the same layout.
How to properly close loops when knitting?
When the work is almost finished, you need to close the loops correctly so that the fabric does not come apart when removed from the knitting needles. To do this, we need to knit the first 2 loops, eventually getting one, then we throw it onto the knitting needle.
Next, we need to repeat this movement, only using the resulting loop. After 2 loops we pull the thread and get a loop again, throw it onto the knitting needle and continue like this until the end of the row until all the loops are finished. We knit the last one, take out the knitting needle and tighten the thread.
As you can see, everything is really simpler than it seems at first glance. A competent selection of tools and materials for knitting, a few minutes to master basic knitting skills - and now you can please your loved one with a handmade scarf or even open your own store of knitted designer items.
Try, knit and you will succeed!
Step-by-step learning to knit children's clothes for beginners
Knitting children's clothes gives a special pleasure:
- you can work with threads of bright colors;
- realize your creative potential;
- products knit quickly;
- To make them, you can dissolve any unnecessary thing.
Knitting mittens
Children's mittens are an indispensable accessory in winter. Although they are inexpensive and presented in a wide range in stores, a child will especially love mittens that are hand-knitted taking into account his preferences.
Mittens can be knitted on two or five knitting needles. The work is divided into four stages:
- Knit from cuff to thumb;
- Knitting a hole for the thumb;
- Knitting a toe product;
- Thumb knitting.
Children's vest
Vest - very comfortable clothing for a child
- The most convenient way to start is by creating a life-size pattern. This stage will simplify all subsequent ones and eliminate bandaging of an almost finished product.
- A children's vest can be knitted on two knitting needles - then you will have to sew the side seams. If you knit on five knitting needles or on circular ones, the product will be seamless. Only the shoulder seams will remain.
- The next stage is choosing the pattern with which the product will be knitted. If there are several patterns used, it is necessary to draw up a knitting pattern for each part of the product. This will help you avoid annoying mistakes.
Learn how to knit a blouse for a newborn.
Scarf hats
A hat-scarf is an analogue of a snood. The main difference from it is that it no longer wraps around the neck several times. Knitting this product is very simple. The best choice of technique would be knitting on circular or five knitting needles. This article describes in detail how to knit this accessory.
The size of the hat should be perfect. If it is small, it will be uncomfortable to wear; if it is large, it will not protect against wind and frost. Wide models will also not protect against the cold, and this should be kept in mind when choosing a model. A drawstring knitted from the same threads as the hat will provide a tighter fit to the neck.
Headband
Dimensions: 52cm by 8cm.
We will need:
- yarn consisting of 50% polyamide, 25% wool, 25% acrylic (50g by 66m) – 50g;
- knitting needles No. 5.5 and No. 6;
- hook No.5.
Patterns:
- elastic band: 1l.x1i.;
- fantasy pattern: we carry out according to the pattern.
Density: Fant. pattern with knitting needles No. 6 18p. for 25 rub. equal respectively 7cm by 10cm.
Description
Using knitting needles No. 6, cast on 18 stitches. and knit a fantasy pattern to a height of 45cm. Closed P.
To insert using knitting needles No. 5.5, cast on 17 sts. and knit an elastic band, starting and ending with the 1st and all odd rows (i.e., front rows) 2l. Knitting 8cm, closed. P.
Assembly and finishing
We crochet the edges of the strip 1 p. single crochet, then - 1p. "crawfish" step. Sew the insert along the edges of the bandage.
Volumetric blankets for beds
Knitted capes and bedspreads look much better than textile models. The only downside is that they are heavy. Therefore, making the bed is not so easy; the blanket has to be rolled up and then unfolded.
It is important! There is no point in knitting blankets that are too large and bulky for a sofa bed or folding chair. A large blanket is difficult to wash. Absorbing water during washing and rinsing makes it even heavier.
These products are washed and drained in the bathtub. After this, the blanket is washed, drained and finally spun in a centrifuge.
Models with large patterns, braids and braids look beautiful. These are the so-called “Aran” weaving patterns, which are very popular in outerwear. It is better to clarify all the nuances of making labor-intensive products by watching a master class on how to weave a blanket with your own hands.
Sources
- https://gidrukodeliya.ru/kak-svyazat-pokryvalo
- https://podelunchik.ru/kak-svyazat-pled
- https://dnevnikmastera.ru/kak-svyazat-pokryvalo-spicami-i-kryuchkom
- https://berkem.ru/drugoe/kak-svyazat-pokryvalo-na-krovat-kryuchkom/
- https://mydizajn.ru/vyazhem-krasivye-pledy-spiczami-luchshie-idei-s-opisaniem-i-shemami/
- https://jamaster.ru/kak-svyazat-pled-spicami-svoimi-rukami/
- https://vjazanie.info/spicami/dlya-doma-1/vyazanoe-pokryvalo.html
- https://mirdizajna.ru/vyazani-pled-cpichani-proctie-i-krasivie-chemi/
- https://knitka.ru/39495/pokryvalo-spicami-podborka-sxem-i-opsianij.html
- https://vsesamodelki.ru/kak-svyazat-pokryvalo/
- https://comfort-myhouse.ru/rukodelie/pledyi-i-pokryivala/krasivyie-pledyi-spitsami.html/
- https://vsesvoimirykami.ru/kak-svyazat-neobychnye-vyazanye-pledy-i-pokryvala-svoimi-rukami-kryuchkom/
- https://mirrukodelija.ru/kak-svyazat-pokryvalo/
- https://ars.ru/vyazanye-pledy-i-pokryvala-svoimi-rukami-neobychnye/
- https://podelochkin.ru/kak-svyazat-pled
- https://kru4ok.ru/pokryvalo-kryuchkom/
- https://urokirukodelie.ru/kak-svyazat-pokryvalo/
- https://mblx.ru/kojka/aksessuary/918-vazanye-pokryvala-na-krovat.html
Decorative lampshade for table lamp
Dimensions: diameter 20cm, height 15cm.
We will need:
- yarn consisting of 50% polyamide, 25% wool, 25% acrylic (50g by 66m) – 100g;
- knitting needles No. 5.5;
- add. knitting needle for braids
Patterns:
- fantasy pattern: see diagram.
Density: on the main pattern using knitting needles No. 5.5 17p. for 25 rub. equal to 10 cm by 10 cm.
Description
We dial 114p. and knit a fantasy pattern, repeating the repeat of 16 stitches 7 times. We complete row 2. At a height of 15 cm it is freely closed. loops.
Assembly and finishing
We make a seam. We stretch it onto the lampshade and secure it with double-sided tape (1 tape at the top, 1 tape at the bottom). If necessary, you can change the diameter of the product, adjusting it to a specific lampshade.
The unfolded length is calculated using the formula: lampshade diameter X 3.14.
Scythe
To knit a braid pattern, use an additional knitting needle. This type of ornament is considered complex compared to other techniques. But if you practice a little, the pattern knits easily and turns out even. In this work you will have to master moving a large number of loops. For diagrams of braid, braid and similar patterns, the designation of an additional knitting needle is given before work or after work, accompanied by other signs.
To knit a simple but beautiful braid, you need to start the process with the following steps:
- Cast on the number of stitches in multiples of 10.
- The first sequence consists of p3, k3, p1, k3.
- Next, purl 3, knit 1, purl 3, knit 3.
- In the third line, 3 purl stitches, remove the front unknitted loop, 2 knit stitches, 1 purl stitch, 2 knit stitches, remove the same way.
- Remove one piece unknitted purlwise, purl 2, p, 1 dc, purl 2, also remove one loop, knit 3.
- 3 purl stitches, a loop from an additional knitting needle before work, knit after two purl loops located in the previous row, 2 knit stitches, 1 purl stitch, remove one knit stitch from the additional tool, 1 knit stitch.
- Repeat from the first point.
The fabric is knitted with thick textured yarn. The product is dense and warm. Wet heat treatment is carried out according to the recommendations indicated on the yarn label.
Free mobile apps
There are not many high-quality and worthy products among smartphone applications. Most often they are a simple set of knitting patterns or images. But there are several interesting programs that are worthy of your attention.
“Knitted amigurumi toys” from Hobby4Fun
– the application contains detailed master classes on knitting toys for beginners. Stunning toys will be a wonderful decoration for the home or a gift that will delight not only a child, but also an adult. And many free knitting patterns, updated every week, will allow you to find and create the toy you dream of.
169 knitting patterns
is the most popular knitting app on the Android platform, which contains detailed lessons and patterns for knitting bracelets, baby clothes, toys, socks, booties, slippers, hats and much more. Install the application and create your own models based on existing patterns and styles.
These sites and applications will subsequently become an excellent source for you of diagrams and ideas for your own work, where you can always find excellent models and detailed instructions for creating them yourself. Seeing other people's work will motivate you to go all the way from start to finish and create similar things with your own hands.
What is the advantage of knitted blankets?
There are more advantages than disadvantages. Look here:
- Natural
- Hypoallergenic, does not harm the skin
- You can do it yourself
- Different in shape, thickness, relief
- Have no limits in fantasy
- Can be double sided
- Made to fit your bed or other furniture
- Have a rich and wide selection of threads, colors
Scottish plaids are masterpieces of design art if they are made by hand. Imagine how beautifully a plaid can be decorated with various accessories: embroidery, buttons, lace, fringe, etc.
Disadvantages include long knitting time, requires a lot of thread, collects dust and requires proper washing/drying.
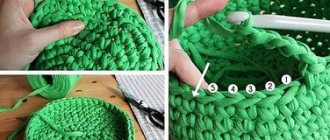
We continue to work with crochet number 5
It is necessary to complete the braid in the first row.
To do this, from the back side of the bottom, insert a hook into the last loop of the row, and pull the thread through it.
The first row of binding is completed.
Let's move on to the 2nd row. To do this, on the back side of the bottom we find a place with a gap in the yarn, remember it, and on the front side of the bottom we insert a hook and pull out a loop.
Next, you need to knit a series of connecting posts through the holes. Also without connecting the last loop to the first.
The next step is to pull the thread through the last loop.
And now, we will beautifully connect the pigtail of the second row of the binding. To do this, insert the hook under the first pigtail of the second row and pull out the thread.
Then, from the back of the bottom, insert the hook through the last braid of the second row and pull out the thread.
The second row of binding is ready.
Let's proceed to the final stage of our work - row 3 of the strapping. To do this, from the bottom to the bottom, insert the hook behind the bow of the first loop of the second row of the binding (as shown in the photo) and pull out the thread.
What tools will those who want to learn how to knit need?
Types of knitting needles
Each type is designed for a specific knitting technique.
Straight knitting needles
Paired knitting needles for knitting straight fabric, such as a scarf. They can be purchased by those who are just trying to learn how to knit.
- Straight metal knitting needles, 350 rubles
- Straight bamboo knitting needles, 294 rubles
- Straight knitting needles made of plastic, 444 rubles
Circular knitting needles
Two knitting needles connected by fishing line or flexible cord. The name accurately reflects their purpose: knitting circular items, such as hats.
- Circular knitting needles on metal fishing line, 250 rubles
- Circular knitting needles, 199 rubles
- Circular knitting needles on cables, 400 rubles
Stocking needles
Five double-edged knitting needles. They are used to knit stockings, mittens, mittens, and round openwork napkins.
- Stainless steel knitting needles, 675 rubles
- Aluminum knitting needles, 525 rubles
Auxiliary knitting needles
Curly knitting needles with a bend in the middle. Needed for knitting details, such as the thumb on a glove or a braid pattern.
- Set of auxiliary knitting needles for knitting braids, 4 pcs., 195 rubles
- Set of auxiliary knitting needles made of aluminum with fishing line, 2 pcs., 199 rubles
- Set of auxiliary knitting needles, 5 pcs., 849 rubles
What else will help you choose knitting needles?
An important characteristic of the knitting needles is the number. It denotes the diameter of the tool in millimeters and ranges from 1.2 mm to 25 mm. The diameter of the knitting needles should be one millimeter larger than the thickness of the yarn. For example, 1 mm yarn and number 2 knitting needles are a great combination. For yarn with pile, fluff and sequins, use knitting needles 2–3 millimeters thicker. It sounds complicated, but there is always a cheat sheet - a description for the model, which indicates the number of knitting needles and the characteristics of the yarn.
The next selection parameter is material.
- Wooden knitting needles . The loops do not slip on them, but such knitting needles break faster than metal and plastic ones.
- Plastic knitting needles. The exact opposite of steel - flexible and lightweight. Thin plastic products are fragile, but large-diameter knitting needles will last a long time. They are good for knitting bulky fabrics from fluffy yarn.
- Steel spokes . Durable, strong, moderately slippery, but heavy. It is better to choose thin steel knitting needles, because large-diameter tools can tire your hands.
- Aluminum spokes. Lightweight and inexpensive, they bend and break, so it is better to choose thick knitting needles from this material. And with Teflon coating: when pure aluminum oxidizes, it stains light-colored yarn and hands.
- Knitting needles made of other metals. Suitable for knitting from wool and wool mixtures because they do not split thick yarn into several threads. Disadvantage for beginners: metal knitting needles are smooth and sometimes loops fly off them.
Types of crochet hooks
There are only two types of hook.
Standard hooks
They are universal and can be used to create any product or pattern.
- Crochet hook made of steel, 275 rubles
- Bamboo crochet hook, 147 rubles
- Crochet hook with plastic handle, 105 rubles
Long hooks
Required only for Tunisian knitting. When crocheted with regular crochet, there are two to four working loops on it. The completed loops hang under the hook. With Tunisian crochet, all the loops of the row remain on the hook. Therefore, tools for Tunisian knitting resemble knitting needles and are almost twice as long as standard hooks - up to forty centimeters in length! Tunisian hooks may also have a fishing line - the canvas is moved onto it.
- Set of bamboo hooks for Tunisian crochet, 14 pcs., 989 rubles
- Tunisian crochet hook made of metal on a fishing line, 279 rubles
- Hook for Tunisian crochet made of acrylic, 400 rubles
What else will help you choose a hook?
Like knitting needles, hooks vary in number, from 0.05 to 20 mm. Here the number does not indicate the diameter, but the size of the beard, the part with which the thread is caught and a loop is formed. The rule is the same as for knitting needles: the hook barb is one or two millimeters larger than the thickness of the yarn. Hooks No. 0.5 are used to knit lace collars and napkins, and No. 20 is used to create rugs.
Hooks are made of steel, plastic, bamboo, bone.
- Steel hook. It can be combined with any yarn, loops glide through it well, and it is almost indestructible.
- Plastic hook . Inexpensive and lightweight, but quickly breaks down. The thread begins to cling to the notches, tools with a small number quickly break. The hook also creaks if you knit it with tight loops.
- Aluminum hook . Lightweight, does not electrify the yarn. May bend if knitted too tightly. Aluminum without Teflon coating oxidizes and stains light-colored threads and fingers.
- Wooden hook (bamboo or birch). Lightweight, pleasant to hold in your hands. Of the minuses: nicks form on the wood, it is less durable than steel.
In the description of a knitted item, the number of knitting needles or hook must be indicated. The recommendations should be followed so that the size and density of the finished item corresponds to the planned model.
Openwork scarf
Dimensions: width 40cm, length 190cm.
We will need:
- yarn, 100% cotton (50g per 121m) – 400g;
- knitting needles No. 3 and No. 3.5;
- markers.
Patterns:
- elastic band: 3l.x3i.;
- shawl rice-ok: all p. in all p. – facial;
- persons Ch.: in facial r. - faces, purl R. - purl stitches;
- openwork pattern alternating diagonally: patterns No1 and No2;
- “Grid” pattern: scheme No.3;
- openwork inserts: pattern No. 4;
- pattern “Apple Tree Leaves”: scheme No.5.
Density:
- gum sp. No3 27p. for 32r. equal to 10cm by 10cm;
- shawl rice-ok sp. No3.5 20p. for 34r. equal to 10cm by 10cm;
- openwork pattern diagonally sp. No3.5 20p. for 28 rub. equal to 10cm by 10cm;
- pattern "Grid" sp. No3.5 22p. for 32r. will be 10cm by 10cm;
- openwork inserts connected sp. No3.5 22p. for 27r. will be 10cm by 10cm;
- pattern “Apple tree leaves” sp. No3 23p. for 31r. will be 10cm by 10cm.
Patchwork style blanket
As a rule, the mosaic technique is considered to be a canvas consisting of multi-colored motifs. Such products have an unusual and interesting appearance. By combining different colors, patterns and motifs, a unique canvas is obtained.
For patchwork sewing, many patches (aka motifs) are woven in a certain way:
- net;
- triangles;
- diamonds;
- hexagons.
There are two ways to weave motifs:
- Unbreakable. The motives come one after another, as a whole. Having finished one patch, start knitting another. It is recommended to draw a sketch in advance and be guided by it during the work process.
- Mosaic. First, the required number of motifs is applied, and only at the final stages of work do they come together.
The most popular motifs are the corner square for a blanket, granny square and others.
LiveInternetLiveInternet
—Tags
—Categories
- Cooking (65)
- Hats (57)
- Soft toys (38)
- Knitting (36)
- Primitive toys (35)
- Animals (29)
- Scarves, shawls, stoles (28)
- Soap (24)
- Mittens, gloves, mittens, sleeves (12)
- Socks, knee socks, leg warmers (11)
- For kids (8)
- For home (7)
- New Year (6)
- Miscellaneous (6)