The advantages of knitting
Knitting originated in China. After which Europe began to actively recreate things with this material. This type of yarn is called ribbon yarn, because it resembles a ribbon. Here are its positive characteristics:
- You can buy threads without damaging your wallet. They are quite common in the commodity market. If desired and the required amount of time, the threads are created independently. Everyone chooses the width of the threads based on the future item;
- Knitting with knitwear does not take much time. In addition, working with threads is easy, even beginners can cope with this activity. Thick threads are designed to speed up the knitting process;
- Thanks to knitted crochet, the product is endowed with softness;
- Knitwear looks very presentable;
- Things turn out to be durable.
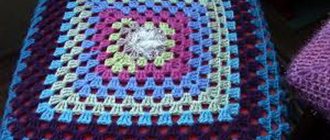
How to knit a rug from knitted yarn, diagram with description
Rugs are back in trend these days. This stylish decorative element will decorate any room, especially if made by yourself. To knit the rug we offer, you will need two skeins of yarn of different colors and the thickest hook you have, because the thickness of the hook determines the ease of knitting and the density of the future product.
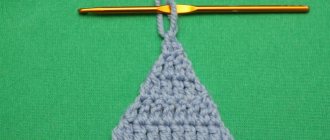
Crocheting is not at all difficult, however, for those who are just mastering this type of skill, something may not be clear to them. To do this, we suggest you visually familiarize yourself with the basic and simplest elements of knitting.
This is how the air loop is knitted.
Basic techniques
Before any work you need to prepare your tools. In this case, select a hook. A number is stamped on the product. The optimal size recommended is 10, it will provide effective crochet from knitted yarn.
Once you gain experience, switch to your preferred diameter. It is important that your hands can get used to this activity. Tight knitting is useless. This will complicate knitting, the hook will have difficulty creating loops. Place the thread on the finger of your left hand, and place the hook itself on your right hand.
Materials and tools for converting a T-shirt into a top
The most popular among beginning needlewomen are tops that can be formed with just scissors:
Don’t be afraid to experiment, learn to think creatively, if you have good ideas, implement them.
Don’t rush to start work if you don’t have what you need at hand:
We wrap it around the bottles and sew it with thread. We sew round pieces of foam rubber on the top and bottom of the structure.
Thanks to the careful workmanship, beautiful materials for upholstery and decor, it is unlikely that anyone will guess that it is made from recycled materials.
You simply glue the bottles together in accordance with the intended design, and then cut out parts of the desired size and shape from cardboard, foam rubber and upholstery fabric. Now your ottoman is ready!
Column without throwing
The NSS is called a low column. The yarn should be pulled out from under the loop of the previous row. Two loops should form. Pass the thread through them. In diagrams it is often written as a plus.
Double crochet
The CCH is very easy to make. The number of yarn overs in the name of the method is silent. A thread is placed on the thread and then a new loop is pulled out. It turns out that a yarn over and two loops are formed.
Using a crochet hook, pull the yarn out of the loop and yarn over. Now knit the 2 loops that remain. If you need to create a stitch with 2-3 crochets, follow the same analogy.
You can understand how many yarn overs need to be made by the number of crossed out T’s in the pattern. They are an abbreviation for double crochet.
Crochet clutch made from knitted yarn, diagram with step-by-step instructions
The work progress will be as follows:
- We crochet a chain of eighteen chain stitches and tie it with single crochets. We make three loops along the edge of the knitting.
- Now you need to create a pattern. To do this, we will alternate a simple stitch and a stitch going through the loop of the previous row.
- We knit in the circle until the desired height of the product.
- We strengthen the last row with connecting posts and design the joint.
There is quite a bit of work left - you need to decorate the inside of the clutch. - We measure the dimensions of the bag and cut out a rectangle of the appropriate size from the lining fabric. We measure along.
- Then across. We sew a decoration into the lower corner of our product.
- From non-woven fabric you need to cut the same rectangle, equal in size to the bag.
- If desired, you can make internal pockets by sewing them to the lining. You can sew a zipper to the pockets.
- Now we sew the lining on the inside along the base; you can do this using a sewing machine or carefully sew it by hand.
- We sew in a zipper and sew rings for the strap on the sides.
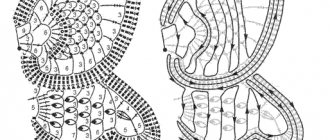
- All that remains is to build a strap. According to the diagram below, we weave a strap.
- We weave the strap with the chain, hiding the remaining ends of the threads.
- We attach a carabiner to the chain. This is what our strap should look like.
- Fasten the strap to the bag and off you go!
Increases in fabric
The increase is created by knitting one loop and inserting two subsequent loops into its base. The number of stitches varies depending on the stitches added to the row. Often these additions are made to make the product larger.
Use a larger hook. The technique is ideal for creating dresses or other massive items. Are you planning to make pillows or ottomans? Use regular stitch additions.
Decreases
Decreases, or as they are usually meant in UB diagrams, are done in this way: A tool is inserted into the base of the loop and it pulls the yarn out. The same action is carried out on other loops. There are 3 loops on the hook. They need to be knitted together.
If a craftsman needs to reduce the size of a knitted item, the diagrams talk about skipping a loop.
If knitted tightly, these gaps will appear as holes. Visually it looks ridiculous.
Bassinet made of knitted fabric, diagram with step-by-step instructions
For stability, you will need to put some kind of sealant on the bottom, for example, thick cardboard or thin plywood. And in order for the entire structure to hold its shape well, it will need to be strengthened by knitting several times around the perimeter with connecting loops.
First we knit an oval bottom, consisting of a circle divided into two parts, into which a rectangle is inscribed. We calculate the dimensions as follows. Our height = 30 cm, length = 70 cm. The height on one side is 15 cm and on the other - 15 cm. So in the middle: 70 cm - 15 cm - 15 cm = 40 cm.
We start knitting with air loops that we count. As many as we counted, we then knit the same amount with a single crochet on both sides. Corner loops - three single crochets. We knit the walls one to one, i.e. along the oval without increments. We should get these smooth walls. When introducing a new thread, place it on your finger (behind the finger we have a long working thread). Next, we tie these threads - the one that was cut and the new one - they should not be visible from the outside. We knit, as usual, in a tick. For the pattern, we place the hook lower on the row, and not on the previous one. We knit elongated loops into the base of the tick of the previous row. Now let's figure out how to knit this edge. Next, we'll work on strengthening the edge. We pass the thread behind the leg of the loop, as shown in the photo below. This way we get a good, very tight edge without holes or other flaws. To make handles, without knitting two rows of the wall, we knit air loops on one side. Having made a circle, we duplicate them, respectively, on the other side, after which we tie them with a single crochet. We tie the circle and, when we already begin to knit the lid, we tie our handles with a regular semi-post. Now we need to calculate the roof of the cradle. We turn the cradle over and count on the front side so that the loops are clearly visible, this will make it clearer. First, let's count how many loops went into a semicircle. We count the rows (the bases of the semicircle) and multiply them by three, because the semicircle consists of three wedges. We counted twelve rows. So 12*3 =36. Now you need to decide where to knit the roof. In this case, we start from the handle, from the sixth stripe. Using the edge loops, we count how many there are in total, then subtract from the resulting number 36 loops of the circle, which will ultimately turn into only three, and divide into two sides. That is, these two sides will not decrease, but will remain until the end. And 36 will end up going to just 3.
Then we knit seven stitches for the visor. We reduce the first four rows by one and a half loops. Let's do it this way. We reduce the first row by one stitch in the middle. We reduce the second row of the roof on the sides by two.
The third - again on one, somewhere on the side, for example on the left. The fourth is two.
The fifth row on the right side is again one.
We reduce the sixth and seventh rows, as well as the next ones to the end, by three loops until nothing remains on the visor, i.e. seven-three-seven. We connect seven on the sides from the wrong side and begin tying. We tie the cradle with connecting loops around the perimeter. We make a half-column on the visor and also tie it around the perimeter with connecting loops. That's all. The cradle is ready for use.
Magic loop
Another name is amigurumi ring or KA. The thread must be from the master. This ring was intended to create a loop through it. It is necessary to fix the areas where the yarn intersects with your hands.
Proceed to form the required number of loops. Next, you should pull the thread and tighten the loops. The final touch is a loop to connect the circle. The amigurumi ring is designed for knitting carpets.
Items using knitting method
Knitting baskets from knitted yarn is chosen by most knitting enthusiasts.
- Baskets for storing various paraphernalia will fit perfectly into the interior. They are endowed with the necessary functionality and uniqueness;
- Rugs for the living room or bedroom will never be superfluous;
- Furniture defects can be easily minimized with covers for chairs or armchairs. In addition, the product will protect objects from dirt;
- Knitted pillows will help add coziness to the room. They can be placed on sofas and beds;
- Not enough seating? Knit comfortable ottomans;
- Treat your pet to a warm, personal place;
- A knitted house is suitable for a cat;
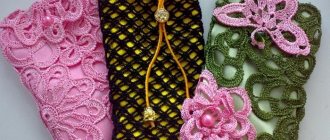
- Knitted bags for girls are in fashion. The wardrobe will have a zest thanks to these decorations;
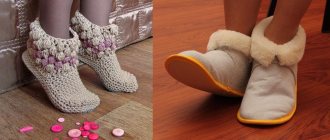
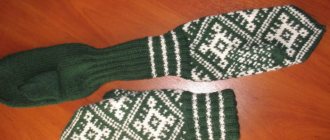
- In cold times, yarn slippers are optimal. They will keep your feet warm;
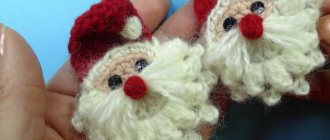
- Girls often create jewelry for ready-made looks. These could be: brooches, rings or earrings.
How nice it will be to wear something made with your own hands! Seeing beautiful things on girls, other ladies also want to wear interesting things. Now you can find a huge number of patterns and models of knitted items.
Pay attention to your own needs, and then things will become your favorites in your wardrobe. Get inspired by knitting patterns using knitted yarn and get creative.
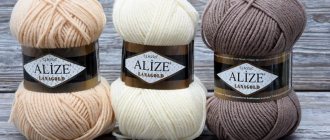
Where to buy giant yarn
But soon I began to come across posts on foreign blogs about hand knitting. Shtoa?! With your hands? So it is possible?
Ooooh, that was the hardest question. I tormented the search engine with this question and for a long time could not find a normal answer. Everything was terribly confusing. Somewhere yarn was measured by weight, somewhere in meters, somewhere in balls. Mom dear!
This is exactly what was needed. It's decorative, so I place it at the foot of the bed.
You can make a good stylish bath mat yourself from sea or river pebbles. Glue the sea pebbles with super glue onto a solid base - and your original massage mat is ready.
A shaggy rug can be made by sewing row after row of narrow strips of fabric onto a base.
Weaving from cord or ropes also allows you to create original rugs with your own hands. Beautiful floor decor is made using the macrame technique.