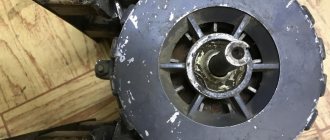
I'm tired of stuffing minced meat through a meat grinder; the auger is ruining everything. Needed a syringe. I looked at the prices, even from the Chinese, the toad doesn’t allow it. I found a design online using a sealant gun, which is for “sausage” sealant, and a 100mm chimney pipe, I liked the idea and implemented it. I report on the results. It was used: a sealant gun, stainless steel pipe F 100mm wall 0.5mm chimney, gray sewer inspection 2pcs, aquarium sealant, 16mm plywood, tools. The most difficult thing was to find a suitable stainless steel pipe for sale. The vast majority are made with an “overlapping” seam; you get a side along the seam, a step, whatever you like, but such a pipe does not fit. In short, in half a day I found on some remains one meter-long pipe with a butt seam, just what I needed. Issue price 600 rub. We arm ourselves with a pipe and go looking for revisions. We impudently unscrew the inspection lid on the counter and, with an unwavering face, shove our stainless steel pipe into the hole, while the seller wonders what’s going on. In fact, I came across two different sizes of revisions, in one the stainless steel pipe dangles a little, the gap is literally 1mm around the circumference, and the second size is significantly larger, it dangles completely, probably 5 millimeters in diameter more. I took the smaller size, two pieces. The issue price is about 300 rubles, I don’t remember exactly. There is a gun for sealant at home, as well as aquarium silicone, although both together would cost about another thousand. All you need from the gun is a feed mechanism and a rod. We disassemble the rear part, remove the mechanism, remove the rod completely, unscrew the piston from it. We cut out a circle from plywood with a diameter slightly smaller than the inner diameter of the stainless steel pipe. In the center we drill a hole equal to the diameter of the rod. We select a bolt about 50mm in length and diameter as a rod and nut, clamp the plywood with a bolt and nut, and clamp the bolt into a drill. Drill with clamps to the table, turn on. Using a grinder with a grinding wheel, we give the plywood the desired shape. I made the diameter approximately 8mm smaller than the internal diameter of the stainless steel pipe. We remove the bolt and tighten the plywood onto the rod, tighten it tightly.
Making a mold for the piston. Here you can dodge in different ways. I did this, the stainless steel pipe has two edges, a thicker bell and an edge with a small “skirt”, I peeled off this edge along the “skirt”, I got a scrap of stainless steel about 80mm, and used it for the mold. Rubbed it inside with a candle. The rod was inserted into a block that had been previously drilled strictly vertically, as can be seen in the photo above. This is to set the shape coaxially with the rod. I installed the stainless steel mold on the block, centered it, and pressed it with clamps into the block a couple of mm, obtaining the only position of the mold relative to the rod. Next, I coated the back of the future piston (plywood) with silicone, without fanaticism, since there will be no contact with the minced meat, but I coated it completely so that it would be easier to clean later and the plywood would not “booze” from water. then I generously coated the ends of the plywood with silicone. When installing the mold on the piston, the piston should “sink” in the mold a couple of mm in the peak part (and this is the nut), so we set the desired height in advance. Then carefully place the mold on top of the piston, generously coat the top with sealant and a mound, cover with a sheet of paper and smooth it out from the center with a rolling pin. Then I covered it with a board and clamped it with a clamp.
Left it to dry for a couple of days. I disassembled and removed the form without much effort.
The excess silicone was cut off. This was the most labor intensive. Even a schoolboy can handle this. We cut off the threads from the revisions, clean the cuts, it’s convenient to just scrape off the burrs with a knife, the plastic is soft. Be sure to chamfer at 45 degrees inside the plastic thread on the side of the lid. There we will flare the stainless steel pipe into this chamfer. We throw out the rubber bands from the lids, they are not needed. We cut off the stainless steel pipe so that the piston reaches the end of the pipe exactly and does not squeeze out the front cover. This is where roulette comes in handy.
We lubricate the threads inside with sealant and put them on and glue them to both ends of the stainless steel pipe. We clean the chamfer from the sealant while it is fresh. When the sealant has dried, we flare the stainless steel pipe around the edges. In one of the revision covers we make a hole in the center for attaching the handle-mechanism from the pistol, in the second cover there is a hole for the nozzle. I used meat grinder attachments since I already have them.
Read also: How to make an Easter basket out of paper (cardboard) with your own hands
Where the nozzle is placed in the lid, you will also need a pressure washer so that the nozzle does not dangle. The washer should press the nozzle, and the washer itself should be pressed by the lid to the pipe. We cut the puck out of any plastic, I cut it out of a disposable bucket, in which berries or something else are packaged in stores. Wash everything thoroughly with dishwashing detergent. Before use, lubricate the side of the silicone piston with vegetable oil. We assemble the back of the gun, set the piston to the desired depth and fill it with minced meat. We tighten the front part with the nozzle. Ready.
The photo shows the smallest attachment from a meat grinder; the minced meat goes through without much effort. I'm as pleased with the result as an elephant. I’ll make some sausage, it will wilt by the end of summer, and I’ll put pictures of the cut here with stuffing with a meat grinder and a syringe for clarity.
Who among us doesn’t like to enjoy the taste of homemade sausage? After all, such a product cannot be compared with store-bought sausage. However, to make homemade products, you need a special device - a sausage stuffer, and we will dwell in detail on how to make it yourself with step-by-step instructions and photo examples.
A simple homemade syringe for stuffing homemade sausages
If you have decided to start producing homemade sausages, you have probably wondered how to make it faster and easier. A syringe for stuffing homemade sausages will help you with this. The problem that you may encounter is the price of the device; for a start-up production, it is not always pleasant. Of course, if you are sure that you will be doing this kind of work for a long time, then it is worth buying a professional device.
But for those who are just starting out and don’t fully understand whether they should continue making homemade sausages, we suggest reading this article. In it you will learn how to assemble a sausage syringe with your own hands.
So, to assemble the syringe you will need the following parts:
Let's move on to the assembly:
Step 2 . Cylinder. The first stage in the manufacture of a cylinder is the selection of a pipe (you can take a pipe for a chimney) made of stainless steel; you will also need revisions, with such a radius of the internal threaded part that it is close to the radius of the pipe.
Using a grinder, we cut off the threaded part of the revisions. Next, we screw the sections onto the lids and grind them down from the cut side to the size of the height of the lid. We cut one end from the pipe at the top of the convex part (or slightly below the top). We shorten the other end to the size required for you (rod size, or size for the required volume).
The next step is to install the revision thread on the pipe. To do this, lay a wire into the gap between the outer radius of the revision and the inner radius of the thread to seal the structure. We start collecting from the flared part of the pipe. After screwing the thread onto the pipe, use a flat object to push the wire into the slot. Leave some space for the sealant.
Install the thread on the second side of the pipe in the same way. Fill the voids between the threads and the pipe with sealant. Leave for a day to dry.
Step 3 . The last part of the syringe. Cut a hole in the middle of one of the lids. We attach a gasket for the heating element to it, with the thin side facing out.
Next you need to assemble a clamp for different attachments. From 3mm food grade plastic, cut out a disk with a radius similar to the radius of the threaded lid. We make a 50mm hole in the center. Then, we cut out a ring from metal or plastic that is needed to balance the pressure. Make 3 to 6 identical holes in the plane of the ring.
Connect the parts with sealant (they will need to be degreased in advance), or using M4 screws. Place the assembled part into the threaded cap.
We screw everything we collected onto the cylinder. We disassemble the sealant and pull out its rod. Make a hole in the center of the remaining lid, depending on the radius of the ring, from the sealant. Assemble the stem and threaded cap. Screw the finished part onto the cylinder.
The syringe for homemade sausages is ready.
Source
The process of making the nozzle, the necessary tools
Depending on the size of the shell, it is necessary to consider the type of bottle neck. Some craftsmen advise cutting it to a “skirt”. The material in this place is very hard, so neither a knife nor scissors will take it. Here you can use a hacksaw. However, it will be faster to use a hacksaw for a miter box with a fine tooth and little or no setting.
PHOTO: YouTube.com Some people advise cutting off the neck of the bottle along the skirt
How to cut a bottle correctly
In order not to cut off excess, you first need to measure the required part. To do this, you need to put a meat grinder nut on the bottle, which secures the mesh. You can already draw a line along it.
PHOTO: YouTube.com Using the nut from the meat grinder, we measure the place where the bottle will be cut
Now you can cut off the bottle using a regular knife. The lower part is not needed, it can be thrown away, but the upper part still needs a little work.
PHOTO: YouTube.com The knife easily cuts a plastic bottle along the marked line
Adjusting the funnel to the diameter of the meat grinder nut
After the bottle is cut, it will have to be slightly adjusted to size. It is better to use scissors for this. The plastic should be trimmed little by little so as not to remove excess. As a result, the resulting funnel should fit tightly into the nut. After the nut is tightened, the plastic funnel should be fixed tightly to the meat grinder and not loose.
PHOTO: YouTube.com The funnel is installed, the fixation is tight, which means you can continue working
There is quite a bit of plastic left inside the nut. The main thing here is that when rotating the meat grinder handle, the auger does not squeeze out the resulting funnel along with the meat being driven through.
PHOTO: YouTube.com Very little plastic remains inside
How the syringe works and what it consists of
The main elements of a sausage stuffer are a body, a piston with a rod and a nozzle. The operation of such devices is quite simple and boils down to placing prepared minced meat into the cylinder and then pushing the contents through the nozzle into the put-on intestine or sausage casing. Factory-made syringes come in horizontal and vertical versions. Homemade devices are often made with a horizontal arrangement.
The sausage stuffer functions as follows:
Is it possible to cook sausage at home?
The answer to this question is yes. If you have an attachment for a meat grinder for sausage, you can create a real gastronomic masterpiece with your own hands! The taste of the finished product will pleasantly surprise you. The ratio of ingredients is chosen by the hostess independently. She also decides what components will be included in the composition.
It is enough that you have a meat grinder and equipment for making sausages. You control the process completely, no preservatives, dyes or other artificial ingredients! Cooking takes minimal time. As a result, you will be able to treat your family members to a delicious dish. If you stock up on it for future use, you won’t be afraid of unexpected guests.
When you have a sausage grinder attachment at home, you can prepare different versions of this product with your own hands. You are allowed to take any minced meat, use your favorite seasonings and spices. To give the product certain taste qualities, lard is also included in the composition. The factory attachment allows you to stuff sausage using a meat grinder.
DIY sausage stuffing syringe
Cheap ham maker
Buy a ham maker for 690 rubles Buy nitrite salt for sausage Buy natural casings for sausage Buy a sausage attachment
Buy a set of sausage attachments
Buy Crystallut for sausages and hams
Buy molding mesh 100 mm
Packages for salting meat 30x40 cm
Oven thermometer
Twine for tying sausages
Meat thermometer with probe
Selected alder wood chips for smoking
Buy pork casings 32/34 mm
Buy protein casing for sausage 45 mm
Attachment for meat grinder with seat ring 5.8 cm
Buy lamb casings 20/22 mm for sausages
If you decide to start producing homemade sausages on an ongoing basis, then you will be interested in such a kitchen device as a syringe for stuffing sausage casings.
Sausage stuffers are used in catering establishments and in meat shops for the production of sausages, sausages and other products.
This is an indispensable tool for cafes, beer pubs and taverns, where the menu is based on branded sausages.
What types of syringes are there for making sausages, and how to choose one?
Many users of meat grinders with attachments know that, for example, large pieces of meat for the production of dry-cured sausages and other meat products that require cutting the meat rather than grinding it into minced meat clog the holes of the attachments.
As a result, the meat is heavily crushed, loses juice, and you often have to disassemble the knots to remove stuck pieces. Which takes a lot of time.
Using a sausage press, stuffing several kilograms of meat takes just a few minutes.
How to use the nozzle correctly?
So, you finally have a sausage grinder attachment at your disposal. You start preparing your favorite product with your own hands, but you are not sure if you are doing everything correctly. The algorithm of actions should be as follows.
- Attach existing equipment to the meat grinder. Pay attention to the area where the knives are. They should be removed. A tube is fixed in their place. All ingredients will pass through it.
- Place the film at the end of the nozzle. You can also buy a special intestine. It is strung along the entire length. One of the ends is tied with thread.
- The prepared minced meat is placed in the hole located on top.
- Passing through the tarsus (as the nozzles are also called), it takes on the shape of a sausage.
- The sizes are determined independently. For example, it is possible to create portions 10 cm long.
As you can see, when you have a sausage grinder attachment at your disposal, you can always prepare fresh and tasty products with your own hands. There are quite a few recipes available for use with the specified equipment.
Reviews of sausage stuffers:
1. The process of preparing sausage with such equipment turns into a real pleasure.
2. Unlike a meat grinder with attachments, the syringes never get clogged.
3. Work much faster
4. Sausages prepared using them turn out to be of very high quality - dense, appetizing and without voids.
The main disadvantage of a homemade meat syringe is its size; it takes up a lot of space.
Video review of a sausage stuffer for home
Options for homemade sausage stuffers
Self-made syringes can come in different variations. Let's look at the simplest designs that can be made quickly and inexpensively.
From a sealant gun
You can purchase such a gun at a hardware store where all kinds of sealants are located.
The advantages of using such a tool for making homemade sausage:
- a budget option. Having completed minimal modifications to the mechanism, the pistol turns into a compact syringe;
- thanks to the presence of a piston, minced meat is served more technologically, unlike a meat grinder;
- small volume of the instrument (about 0.6 l);
- a homemade sausage stuffer is suitable for preparing a small amount of meat product.
In particular, a syringe from a pistol is suitable for those who like to experiment, because in this case large volumes are not required.
However, it was not without its drawbacks:
- inconvenient operation. This is explained by the fact that you have to hold the syringe itself in one hand and act on the piston, and remove the sausage with the other;
- Not suitable for stuffing large diameter sausages. On average, about 25 mm.
Step-by-step instructions for independently modifying a pistol are as follows:
- Let's disassemble the gun. Then, from a medical syringe that matches the diameter of the hole in the gun nozzle, remove the piston and cut off part of the body on the side where the needle is installed.
- After cutting, we get a tube, to the diameter of which we cut the tip itself, which comes with the gun, and insert the tube into the tip. The parts must fit tightly to each other.
- We assemble the gun, put the casing on the nozzle and start making sausages.
How does a sausage stuffer work?
The principle of operation of these mechanisms is quite simple: pre-prepared minced meat is placed in the cylinder of the device, a special piston pushes the product to a funnel on which an intestine or other sausage casing is placed.
Depending on the location in space, you can choose a horizontal or vertical sausage stuffer. Vertical models take up less space, but they are usually a little more expensive than horizontal ones.
Sausage stuffer horizontal
Sausage stuffer vertical
Syringes are manual and hydraulic (vacuum).
For large enterprises and sausage shops, a vacuum sausage stuffer is suitable.
This type of equipment significantly reduces the number of defects. In addition, the vacuum pump gives better density of the minced meat in the casing.
The manual homemade sausage stuffer is suitable for small sausage production. Its flask can have a volume of 1.5 liters.
The most popular culinary syringe for sausage at home is a 3-liter one.
Watch the video, a three-liter horizontal sausage syringe in action:
1. Pieces of beef, lamb or pork are simply twisted in a meat grinder and stuffed into the chamber (more tightly).
2. Next, a suitable nozzle is attached to the cylinder bell.
For beef and pork sausage, thick is usually used, for lamb - thin.
3. After this, a thoroughly washed intestine is put on the nozzle. You need to pull it along its entire length at once, folding it like an accordion.
4. After this, you should turn the handle on the frame a little so that the minced meat passes into the nozzle.
5. Then the edge of the intestine is pulled forward a little and tied into a knot. You can also use lace or thick thread.
What types of nozzles are there?
Perhaps, once you prepare sausage at home, you will once and for all stop buying it in the store. At a minimum, you will do this less often, because you will notice a huge difference in taste and aroma. Handmade products are of higher quality. Plus, you will never have to worry about who touched the product and how clean their hands were at that moment.
The constant availability of fresh product with the best taste is what the homemade sausage attachment guarantees. The types in which this equipment is presented include 2 modifications. One of them allows you to cook according to a classic recipe. The other is designed for products that are hollow inside. The last of these varieties has not become widespread in Russia.
How much does a sausage stuffer cost?
The price of a food syringe for homemade sausage depends mainly on its dimensions.
Models with a volumetric chamber, designed for a large amount of minced meat, are more expensive.
Manual sausage syringe 3 liters or 5 - cheaper. In general, the price for such models ranges from 9-12 thousand rubles.
Compared to electric models, this cost may not be considered particularly high. Even not too large structures operating from the network cost from 150 thousand rubles.
If someone finds a real manual syringe for stuffing sausages on a stand too expensive, you can purchase a small filler of a simple design instead.
Such equipment costs only about 2000-3000 rubles.
Buy a sausage stuffer for sausage at home
The cylinder in mini-models is mounted horizontally on a small metal stand, and the handle is located on the chamber lid.
Attachments for mini-syringes are usually made not of stainless steel, but of food-grade plastic.
Of course, such a model will not differ in too much productivity.
The chamber of mini-syringes is most often designed to hold no more than 1.5 kg.
However, for home use, a model of this type can still be a very good option.
There are many manufacturers of sausage stuffers, here are some popular companies among users: Sirman, Kocateq, Apach, Hakka Brothers, Biowin and others.
Thus, a meat syringe designed for making sausages can be considered a very convenient and useful piece of equipment. They are extremely easy to use.
And for those who want to cook sausages, frankfurters and sausages at home more often and comfortably, it’s still worth considering purchasing a syringe.
Source
What types of sausage grinders are there?
To produce homemade sausages, use a sausage attachment on a meat grinder. The meat grinder itself can be of different designs, with its own advantages and disadvantages.
The main difference is the type of energy used:
- Mechanical, powered by human muscle power. Devices of an old design that require significant physical effort to operate. The main advantage is the lower price. Very reliable at work.
- Electric meat grinders. More modern devices that do not require physical effort during operation. More expensive than mechanical devices, they can fail if overloaded, but this is compensated by higher productivity and ease of operation.
Electric meat grinders, in turn, are divided according to the place of use:
- Household. They are assembled in a plastic case and have smaller dimensions, power and performance compared to professional devices. Despite this, the device, manufactured by well-known companies, will work in the home kitchen for many years.
- Professional. Used in cafes, restaurants and canteens. They have a metal body and a high-power electric motor. They have increased productivity and are more expensive than household ones. It is not suitable for use as a home meat grinder.
Meat grinders may have additional features:
- Material of the body and working elements. Almost all household devices have a plastic body, but the working elements must be metal. This material is stronger and washes better.
- Reverse. When winding cores around a knife, the usual device must be disassembled, but in a reverse one it is enough to turn on the rotation in the opposite direction. This is a convenient function, but with a well-sharpened knife and grate it is of little demand. Dull elements can be sharpened in a specialized workshop. This is usually done by key cutting shops.
- Additional attachments. In addition to the main task - preparing minced meat, attachments allow you to form cookies, cut food into cubes and fill the casing of sausages and sausages.
Sausage attachment
This nozzle has the shape of a cone, with a piece of tube instead of the top. The prepared intestine is placed on this tube with an accordion. During operation, minced meat is fed into it, which fills the shell and pulls it off the nozzle. Periodically, the grinder must be stopped and the sausages tied or twisted to separate the continuous sausage into pieces of the required length.
A special ring has been added to the base, with which the attachment is secured in the meat grinder. This device is made of food-grade plastic and can be purchased additionally. Raw smoked sausage prepared using such a device at home will not be inferior in taste to factory-made sausages.
DIY sausage stuffer
Now experienced sausage makers will throw stones at me and do the right thing. Of course, such devices will not replace a normal sausage stuffer. However, many people want delicious homemade sausage, but not everyone is ready to buy a syringe for $100 just to try to “sausage.” Therefore, I hasten to inform beginners that in addition to buying a sausage stuffer, there are two options for replacing it , which can be used for stuffing sausages.
Any of these devices is enough to try. And if you decide to continue to sausage, then you will choose a more professional assistant. Let me start with the second option, since it is still a small syringe.
Materials
There are two options:
A metal meat grinder attachment is often included with household appliances. It is an oblong tube in the shape of a cone.
Both materials are easy to use. Metal products will require additional care, as rust often forms on them. For preventive purposes, do not leave the nozzle wet. Once you wash it, wipe the surface dry.
Plastic products allow you to cook various meat products: sausages, sausages, etc. The only negative is lower strength. The diameter of the holes can be selected depending on your needs.
DIY sausage stuffer from a mounting gun
Such guns are usually sold in the same places where there are various sealants and foams. Its cost is slightly more than the cost of a meat grinder attachment. I bought it for 680 rubles (2018, a dollar cost about 63 rubles). Here's what it looks like disassembled.
Mounting gun
What are the advantages of this solution:
Disadvantages of this design:
Future sausage syringe and tube from a medical syringe
Processing a funnel from a plastic bottle
The place where the thread was located was sawed off, which means the edge of the plastic here remained sharp, there are burrs on it. They must be removed. Otherwise, they will tear the intestine, preventing it from expanding as it fills with meat. With work like this, you can't hope for any results. However, removing these burrs is extremely easy. This can be done using sandpaper. Some people advise additionally melting the neck a little with a flame from a match or lighter.
Meat grinder as a syringe
As for the option with a meat grinder. Metal and plastic attachments are suitable for both manual (mechanical) and electric meat grinders. This is the most budget-friendly option for transforming your meat grinder into a device for stuffing sausage casings.
Meat grinder with attachment as a sausage stuffer
This is where the advantages of this solution end. But the disadvantages begin, because a meat grinder is still NOT a SYRINGE! In short, the screw feed injures and “chews” the minced meat. The minced meat becomes pasty , and if it contains fat, it also becomes greasy . These factors negatively affect the structure of the sausage. This is discussed in more detail in the article 5 secrets of minced meat for dry-cured sausage. Therefore, if you experiment with a meat grinder, then keep in mind that the quality of the sausage will be worse as a result than if you made it using a sausage stuffer. How much worse? It depends on the experience of the sausage maker and on the minced meat. You can achieve almost identical quality, or it may turn out that the results will be completely disastrous.
Thank you for paying attention to our ideas. If you have your own thoughts on how to make minced sausage with your own hands, or have any questions, write in the comments.
Source
What can you use to make a meat grinder attachment for stuffing sausages?
In fact, such devices can be ordered from Chinese resources - their cost is low. However, the problem here is delivery times - the package can take a very long time. But making such a nozzle with your own hands will not take much time. Moreover, to complete this work you will need a minimum of tools and material.
The main material for making a meat grinder attachment for various sausages can be an ordinary plastic drink bottle, 0.5 liter in volume, preferably with a long neck. It is advisable to use a mechanical meat grinder. By the way, no matter how crazy it may sound, there are many people among today’s youth who don’t even know what they look like. And if you show them a mechanical meat grinder that is attached to the table with a screw, they will not even be able to imagine what this “gadget” is intended for.
Progress:
1) cut the napkin into eight equal parts of a rectangular shape (the size of the finished part is approximately 9*14 cm)
;
2) fold the rectangle in half lengthwise;
3) use white thread to stitch the workpiece along the long side;
4) turn the workpiece to the right side;
5) we tighten and secure the left edge of the workpiece with a thread;
6) tightly stuff the workpiece with padding polyester;
7) using a white thread and a needle, we tighten and secure the right edge of the workpiece;
The sausages look like real ones and children really like them. If desired, you can change the size of the blank rectangles and sew smaller sausages You can connect the sausages together , making a bunch, and use it in the role-playing game “Shop”.
If necessary, the toys can easily be washed in a washing machine.
Attributes made from viscose napkins for the role-playing game “In the Cafe” As you know, play is the leading activity of a child of any preschool age. Children especially love to play role-playing games. Summary of the plot-role-playing game "Cafe" in the preparatory group The plot-role-playing game "Cafe" Purpose: To develop communicative and creative abilities in children, interest in the plot-role-playing game. Learn correctly.
How to make a choice?
The smooth surface of the accessory is of great importance. This ensures optimal passage of the minced meat through the tube. In addition, the presence of roughness sometimes leads to the fact that the film used as a casing for the sausage breaks.
The diameter of the hole is not a fundamental criterion. It depends on what kind of product you are going to create with your own hands.
As for manufacturers, both foreign and domestic companies are popular. Experts recommend avoiding little-known companies that set minimum prices for their equipment. The use of such attachments usually ends in disappointment.
Remember! Finished products should be stored frozen or boiled. You can keep fried and baked sausage in the refrigerator for two days. Although it is unlikely to spoil, because by this time they will probably already have time to eat it.