Nowadays, handmade knitted items are especially popular, and patterns designed for crocheting amaze with their beauty and diversity. Today our article is devoted to patterns for beginning craftsmen.
Can you crochet? Publish your work on kru4ok.ru
If you decide to try yourself as a needlewoman, before you start knitting patterns, a novice knitter needs to do some preparation:
- First of all, you need to learn how to knit the basic elements (double crochet, single crochet, chain and loop). On the Internet you can find many training videos for beginners.
- Secondly, you should understand the basic symbols used in knitting patterns for beginners.
- Thirdly, it is necessary to select the appropriate material and tools.
Let's focus on the latter.
Crochet secrets for beginners. The perfect edge of the canvas!
The video should load here, please wait or refresh the page.
Knitting in the round without a seam is an easy way. Invisible crochet for beginners
The video should load here, please wait or refresh the page.
Selection of yarn for beginners
Beginning knitters need to “get their teeth into” and therefore it is better to choose a pliable, well-twisted thread of good quality, so as not to encounter tears and knots that will be distracting. It is recommended to use medium thickness thread. It is also better not to choose synthetics (they are unpleasant to use).
Don't choose fluffy or plush threads like mohair or angora. Knitting with them is quite difficult, since the pattern and stitches are difficult to see, and the mistakes made will not be visible on the finished product.
For beginners, children's knitting yarn is suitable. It is soft, pleasant to the touch and, as a rule, has a good composition.
Let's decide on a hook
If you are a beginner needlewoman, choosing a crochet hook is a very important aspect. The range of hooks in craft stores is very diverse.
Based on the material, hooks are divided into:
- Steel
- Aluminum
- Wooden
- Plastic
For beginner knitters, however, it is recommended to use steel hooks. They are practical and most durable.
In addition to the material, when choosing a hook, you should pay attention to its head. The rounded element should not be too sharp, otherwise you risk damaging your hand.
The hook number is selected based on the recommendations on the label of the yarn you purchased. In addition, you should take into account the features of the chosen pattern and how dense the product you want to get.
Determining the size of the future sweater
The size of the product will dictate to us the number of loops that need to be cast on and the total amount of work on individual parts of the sweater. The size of the sweater is determined based on the measurement - chest circumference.
How to measure chest circumference
- To measure we will need a measuring tape. If there is no such thing, then you can take the braid, take measurements, and then attach it to a ruler or tape measure.
- You can take measurements yourself, but then you need to be very careful that the tape does not slip off your back. It is better to ask someone for help in this matter, so the results will be more accurate.
- For women, it is better to take measurements in a bra, since the finished product will be worn exactly on it.
- Wrap the measuring tape around your chest so that it goes under your armpits and is horizontal to the floor. The tape should be positioned so that the starting point begins in the center of the chest, and it covers the widest part of it.
- Do not puff out your chest or take a deep breath or exhale. Remember to ensure that the tape does not twist. All this can distort the measurement results.
Converting bust size to product size
- XS (extra small): 81 cm
- S (small): 91 cm
- M (medium): 102 cm
- L (large): 112 cm
- XL (extra large): 122 cm
- XXL (super large): 132 cm
Lessons on creating MK in Word
Using this lesson, you can record your own MK in 5 days. [/dropshadowbox]
- Lesson 1. We design the text (styles, headings, text shift, etc.).
- Lesson 2. Photo processing in Word (brightness, contrast, cropping and other features).
- Lesson 3. Cover, table of contents and other design elements of MK.
- Lesson 4. 3D box (book) for MK.
- Lesson 5. Links in the text, accepting payments.
Good luck completing the mini-course!
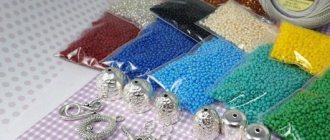
Required tools and materials
- Yarn - here it is important to correctly determine the number of skeins required to make the product. The amount of yarn is determined based on the size of the intended sweater.
XS: 3 skeins
S: 4 skeins
M: 4 skeins
L: 5 skeins
XL: 5 skeins
XXL: 5 skeins;
- Knitting needles - everything is simple here, you need to choose the right size knitting needles for the product you are going to knit;
- Scissors;
- Yarn needle with a blunt tip and a wide eye;
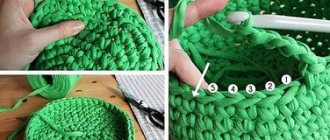
- A row counter is an indispensable thing for a beginner, because in the first couples it is difficult not only to distinguish rows, but also to simply knit stitches;
- Pins for locking loops are a necessary thing if, during the knitting process, it becomes necessary to close loops in vulnerable areas of the product. If you cover such places with an additional knitting needle, it can simply fly off and add a lot of trouble to the needlewoman.
What you need
If you have never held knitting needles or a crochet hook in your hands, then you should start by purchasing these tools.
There are knitting needles:
- Straight (A). There is usually a cap at one end to prevent the loops from falling off.
- Circular (B). They are connected to each other with a fishing line.
- Hosiery (B). Double-edged, usually sold in sets of five.
- For knitting plaits and braids (D). They are distinguished by a bend in the middle.
casejustin / Shutterstock
They can be made of metal, plastic, wood or bone. To master the basics, you will need ordinary knitting needles. Steel ones are best, since aluminum ones can stain light-colored yarn, wooden ones cling to fluffy threads, and plastic ones often break.
Hooks are made from the same materials. There are models with handles and cheeks for holding.
junpinzon/Shutterstock
Knitting needles and hooks differ in numbers. The number is the diameter in millimeters. It is usually indicated on the instruments themselves. The larger it is, the thicker the yarn should be. The material of the knitting needles or hook plays an important role. For example, a steel hook No. 1 will be slightly different from the same plastic one.
Metric systems for knitting needles and hooks vary by country. Keep this in mind if in the future you decide to knit using English or Chinese patterns, of which there are so many on the Internet.
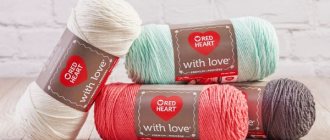
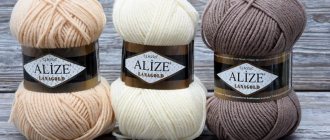
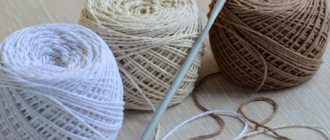
Yarn can be natural (wool, angora, cashmere, mohair, cotton, linen), synthetic (acrylic, viscose, polyester and others) and mixed (for example, 25% mohair and 75% acrylic). For your first stitches, it is better to use synthetic or mixed yarn. She is smoother and more obedient.
Its label will help you select knitting needles or a hook for the yarn.
Manufacturers usually indicate the meter and weight of the skein, the composition of the threads and the recommended number of knitting needles or hook. It is better to save yarn labels.
In addition to yarn, knitting needles or a crochet hook, colored paper clips, pins, scissors, and a tailor's tape measure will also come in handy.
Loop calculation
To calculate the density, you need to knit a small piece of the pattern that you have chosen for the sweater, measuring 10x10 cm. Thus, we get a sample that needs to be steamed with an iron or washed and dried in order to understand the final shape and appearance of the product. Then you need to measure how many loops/rows you get in 1 cm of the sample. Based on these data, it is already possible to calculate the number of loops for a product of a certain width.
On the website of the fair of masters - https://www.livemaster.ru/ we found another interesting formula for calculating loops for a sweater, published by the user ODemi - handmade with Soul.
- The craftswoman suggests knitting a small sample (10x10 cm or less).
- She counts how many loops there are in 1 cm and 5 cm.
- Based on the obtained numbers, using proportions, she calculates how many loops need to be cast on for a product with a width of 55 cm. Thus, 2 values are obtained.
- It is also calculated how many loops are contained in 1 cm and 5 cm. But this calculation differs in that the craftswoman stretches the product a little, exactly in the way it will be worn. There is a slight tension in the threads of a sweater when we put it on.
In this case, it is important not to overdo it with stretching the sample. Just imagine how the threads of the product will be stretched when it is put on a person.
- Based on the obtained values, using the proportion, she calculates how many loops need to be cast on, for example, for a work with a width of 55 cm. Again, 2 values are obtained.
- It calculates the arithmetic mean between the 4 obtained values.
(110 + 99 + 83 + 77) : 4 = 92 p.
- The resulting number is slightly adjusted: for example, 92 stitches + 2 edge stitches.
This is a scientific approach to knitting. Share in the comments, did you manage to calculate the required number of loops this way?
Lesson three: learning to cast on loops
How to measure the length of a thread
Every knitting project starts with a cast on stitches. Today we will learn how to make a set in a basic way that is suitable for almost any knitted item. This edge is quite dense, but remains elastic. The disadvantage of this method is that when casting on a large number of loops, it can sometimes be difficult to determine in advance what length of yarn to leave. Alas, if there is not enough thread, you will have to unravel the row, unwind more thread and cast on the loops again.
The approximate length of the thread can be calculated as follows: take the thread and one knitting needle on which you are going to knit, loosely wrap the thread around it 10 times and get the segment that will be needed to cast on 10 loops (1 loop = 1 set of thread). Set aside a number of pieces proportional to the required number of loops +/- at least 15-20 cm for every 10 loops.
Casting on loops
Having measured the required length of the free edge of the thread, we clamp it using the thumb and index finger of the right hand as shown in the photo below. The free tail is located in the direction away from you.
We place the tip of the thread that comes from the skein on the left palm, and pass the thread between the index and middle fingers of the left hand.
Note! The end of the thread must be positioned exactly in the direction “away from you”, otherwise the set of loops will not come from the skein, as we need, but from the free edge of the thread that we measured earlier. It simply may not be enough.
Next, you need to throw the thread over your index finger and wrap it around the thumb of your left hand from bottom to top, as a result of which a loop should form. The ends of the threads, folded together, are held in the palm of your hand using the ring finger and little finger.
We insert two knitting needles folded together into the loop formed on the thumb in the direction from bottom to top, like this:
We insert two knitting needles folded together into the loop on the thumb from bottom to top.
Picking up the thread located on the index finger, pull it into a loop, as shown below:
Next, we need to move the threads apart using our thumb and forefinger - so we have tightened the loop on the knitting needles! It should fit snugly on the instrument, but not tightly (this is done so that the loops do not slip off, but can still be pulled over the knitting needles).
We collect loops to the required number according to the above scheme.
https://youtu.be/awp0Y95D17g
Pattern selection
Before you start knitting, you need to choose a pattern for the future product. Beginners are not recommended to rush headlong into the pool and try to master the most complex and technical patterns. It's worth starting with garter stitch, which is knitted with facial stitches.
Video tutorial on garter stitch
Here are a few variations of simple patterns that will definitely suit beginner needlewomen.
Checkers pattern
The most popular and universal pattern.
Knitting pattern for the "Checkers" pattern
Legend:
+ Edge loop
⬤ Face loop
☐ Purl type loop
Pattern "Spikelets"
Due to the specific pattern, the items will look narrow and may even be a little tight.
Knitting pattern for the “Spikelets” pattern
Legend:
+ Edge loop
⬤ Face loop
☐ Purl type loop
"Rhombus" pattern
At first glance it may seem quite complicated, but in reality this pattern uses a knit and purl variation. Traditionally used for knitting men's clothing.
Knitting pattern for the "Rhombus" pattern
Legend:
+ Edge loop
⬤ Face loop
☐ Purl type loop
Lightning Pattern
The difficulty with this pattern lies in the transfer of the knit stitches, so a small step is needed to shift the pattern.
Knitting pattern for the "Lightning" pattern
Legend:
l – front
- - purl
"Rice" pattern
An alternative name for the pattern is “tangle” or “pearl”. Below is a diagram of a small pattern.
Knitting pattern for the “Rice” pattern with symbols
Elastic band 1x1
The video explains in detail how the process of creating a 1x1 elastic band occurs. Which we will need in one of the sweater knitting patterns.
Video tutorial on knitting elastic 1x1
How to learn to crochet
The crochet hook can be held like a pencil (left) or like a knife (right).
Iryna Kalamurza / lcrms / Shutterstock
Try it this way and that way and decide which is more convenient for you. After this, you can begin to master the basic loops. In crocheting, these are air loops and double crochets.
Chain of air loops
In crocheting, any fabric begins with the first loop and a chain of air loops coming from it. You can make the first loop in different ways. Their diversity is presented in this video.
Single crochet
Another basic element in crochet is the single crochet. Here's how it fits.
But crocheted loops also have front and back walls. Depending on which of them you hook and pull the thread, the pattern of the fabric will change.
Double crochet
The key to knitting is practice. The more you knit, the better it will get. Having perfected the single crochet stitches, you can move on to a more complex element - single crochet stitches.
Simple patterns for knitting sweaters
We have selected two simple schemes for you. The first is a simple oversized women's sweater, the second is a simple men's sweater that every novice needlewoman can handle.
Simple oversized women's sweater
Women's sweater without knitting the armhole. Source
Tools and materials
- Bulky yarn
- Knitting needles number 6 or 7
Pattern for a women's sweater
Knitting the back
It is better to start knitting a women's sweater from the back. If you make a mistake with the size, and the risk is high, if you are a beginner, then the front part can be made a little wider for the chest.
- Cast on 52 loops on the knitting needles - 50 loops will go into the fabric, and 2 loops are edge loops, which are never included in the calculations of knitting the fabric with knitting needles.
- Knit the first row with a 1x1 elastic band (knit 1 loop, purl 1 loop). Continue in this alternating manner to the end of the row.
- Turn the product over and continue knitting the elastic using the “pattern” method. If you have an even number of loops, you will end up with the second row starting with a purl stitch. Knit 7-9 rows with an elastic band.
- Start knitting the main fabric from the front row - the front row “looks” at you. Start knitting the back to the height of the shoulder line (not reaching 3 cm), only with knit stitches - this is how you get a garter stitch.
- Beginning needlewomen should not spend a lot of time knitting armholes - this will make it difficult and a little confusing. Make your first sweater by knitting with the sleeves dropped.
- Having reached the shoulder line, start knitting the neckline. To do this, knit 15 loops on the front side with knit stitches, bind off 20 loops, knit the remaining 15 loops. Now you will knit the shoulders separately, but do not slip the stitches on the auxiliary needles. Turn the work over, knit 12 loops - the last 3 are “removed” by knitting 2 loops together according to the pattern. Turn the work over again and knit another row of 12 loops. Close the loops if you already have 3 cm for the neck. Attach the thread to the edge of the second shoulder and make a symmetrical decrease, bind off the loops, tear off the thread.
Knitting before
If necessary, the front can be made slightly wider than the back (if the chest size is greater than 3). Knitting should begin in the same way as the back, but 5 cm is not knitted to the edge of the shoulders - so that you can knit the neck.
Changes in loop calculations
- Knit 19 stitches, cast off 12 stitches, knit the remaining 19 stitches.
- Turn the work over and knit a row with 15 loops.
- Turn the work over again, bind off 3 loops, knit 12 loops - so knit 5 cm of the neckline.
- Similarly, symmetrically tie the second part of the front.
Knitting a sleeve
This model is knitted without knitting the armhole, due to which the sleeves are lowered and the style resembles oversized clothing. In this option, after finishing knitting, you just need to close the loops.
Subsequence
- Cast on 24 loops and knit the same 7 or 9 rows with a 1x1 elastic band.
- Now move on to the main knitting, increasing the loops in every 4th row - increase in the front rows to make the increases unnoticeable.
- It is better to increase by pulling an additional loop from the previous row. You can use other methods of adding loops, but it is better to do it unnoticed.
- The main pattern will have to knit approximately 30 rows. Taking into account the addition of loops after and before the edge stitch, the result should be 38-42 loops.
- Close the loops.
- Knit the second sleeve in the same way.
Assembly and strapping
Take your time to connect the sweater pieces together. To begin with, it is recommended to soak them in water, and then dry them on a towel. Then the parts can be sewn together in any convenient way.
- The shoulder seams are sewn first.
- Then the sleeves are sewn on.
- Next, the side seams are made.
- At the end, all seams must be ironed.
If the sweater is the size you originally intended (this pattern is designed for clothing size 46), then it’s time to start tying the neckline.
- Using circular knitting needles, begin pulling the sweater neck loops from the middle of the back.
- Gently pull the stitches onto the needles. Make sure there are an even number of them.
- Knit the binding with a 1x1 elastic band (7-9 rows will be required).
- When knitting the neckline, there is no need to reduce the number of loops - the elastic band is elastic, so the collar zone bandage will fit properly on the neck.
Simple men's sweater
Men's striped sweater. Source
Sweater sizes
48/50 (52/54) 56/58
Tools and materials
- Yarn (100% section-dyed sheep wool; 100 m/50 g) 650 (700) 750 g;
- Knitting needles No. 5;
- Circular knitting needles No. 5, 50 cm long.
Basic pattern
Alternately - 4 knits, 2 purls.
Knitting density
16 p. x 22 r. = 10 x 10 cm.
Pattern for a men's sweater
Knitting the back
- Cast on 90 (96) 102 stitches on knitting needles and knit as follows: edge, 1 purl, 14 (15) 16 x 6 stitches each with the main pattern, 1 purl, edge.
- After 45 (46) 47 cm = 98 (100) 102 r. from the initial row, close on both sides for armholes 2 (3) 4 p., then in every 2nd p. 1 x 2 p. and 3 (4) 6 x 1 p. = 76 (80) 84 p.
- At armhole height 21 (22) 23 cm = 46 (48) 50 r. close for shoulder bevel in every 2nd r. 2 x 6 (7) 8 p.
- Simultaneously with the first decrease for the shoulder bevel, close off the middle 32 stitches for the neckline, then knit both sides separately.
- Along the inner edge for further rounding, close in every 2nd r. 3 x 1 p., then bind off the remaining 7 p.
- Finish the other side in a mirror image.
Knitting before
- Cast on 90 (96) 102 stitches on knitting needles and knit as follows: edge, 1 purl, 14 (15) 16 x 6 stitches each with the main pattern, 1 purl, edge. Next, knit like the back, but with a deeper neckline.
- To do this, at an armhole height of 17 cm = 38 r. bind off the middle 26 sts, then knit both sides separately.
- Close along the inner edge for rounding in every 2nd r. 6 x 1 p.
- Start performing the shoulder bevel at the same height as on the back.
- Finish the other side in a mirror image.
Knitting sleeves
- Cast on 42 (48) 54 stitches on the knitting needles for each sleeve and knit as follows: edge stitch, purl 2, 6 (7) 8 x 6 stitches each with the main pattern, purl 2, edge stitch.
- For bevels, add on both sides every 6th r. 5 x 1 p., in every 8th r. 5 x 1 p. = 62 (68) 74 p. Include increases on both sides in the pattern.
- After 47 (48) 49 cm = 104 (106) 108 r. from the initial row, close the sleeves on both sides for piping 2 (3) 4 p., then in every 2nd p. 1 x 2 p., 4 x 1 p., 1 (2) 3 x 2 p., 2 x 3 p. and 2 x 4 p.
- In the next row, bind off the remaining 14 sts.
Assembly and strapping
- Moisten the parts, stretch them according to the dimensions indicated in the pattern, pin them onto the pattern and leave until completely dry.
- Sew shoulder seams.
- Using circular knitting needles, cast on 74 (80) 86 stitches along the edge of the neckline and knit with the main pattern 20 (21) 22 cm = 44 (46) 48 stitches, close the loops loosely.
- Sew side seams and sleeve seams, sew in sleeves.
Share in the comments, did you manage to knit your first sweater following the recommendations from our article? Did you like the knitting patterns we have selected here? Or maybe you are interested in a specific sweater model, but you didn’t find it on our website? Then definitely leave your wishes in the comments, and we will try to find the right scheme for you.
Footnotes
- https://raikovstudio.ru[]
- https://mysekret.ru[]
Lesson seven: crossed loops, increases, yarn overs
Crossed loops
Classic crossed stitches will not be an obstacle even for beginner knitters. Essentially, they look like this:
In the picture you see a regular loop, slightly to the right crossed left and right. If you want to cross a classic loop, knit it through the back wall, and if it’s inverted, through the front wall.
The knitted one is knitted behind the back. Art. In the process of knitting classic. the loop turns and crosses:
To knit a purl crossed stitch, we pick up the loop at the back. Art. and knit classic. way.
Capes
Yarn overs can be straight or reverse. To form the first, grab the thread with the tip of the right knitting needle towards you, like this:
Reverse yarn overs are knitted by grabbing the yarn away from you:
Most often, yarn overs are knitted using the first method, so we suggest you practice doing it correctly.
To begin with, we dial 30 p., perform 4 p. hosiery viscous, after which we mark the middle with a marker.
We will focus on those loops that are located adjacent to the marker: to the left and to the right of it. We perform straight yarn overs in each. persons R.
Inside out R. first ac. we knit the front wall purlwise. loop.
Second nak. we tie it at the back. wall: insert the knitting needle behind the back wall in the direction from left to right.
On the right sp. we knit the nak. cross. inside out P.
To the left. sp. perform cross. Yarn over until knitting. We knit several rows, making classic and crossed yarn overs.
Choose the right music
When choosing musical accompaniment, it is worth remembering two points. Firstly, the music should be neutral. Secondly, you cannot copy the first track you like from the Internet.
This copyright violation may result in a warning from YouTube and blocking of the channel. If your video with pirated music gets a lot of views, then all royalties from advertising will not go to you, but to the wallet of the author of the composition. Therefore, read our article, where we tell you in detail where to get music for your videos and use it for free without any problems.