Master class “Mobile “Winter”
Zoya Vekshina
Master class “Mobile “Winter”
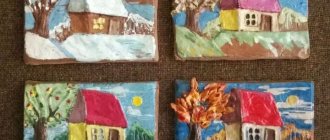
winter has begun , the first snow has fallen. I decided to clearly show and tell my 2-3 year old kids what winter ! To do this, I made this winter mobile !
For this work I needed: a hoop, foil, cotton pads, silver ribbons, a stapler, white paper, scissors.
I cut out snowflakes, Christmas trees and ballerinas, my hoop was yellow, so I decided to wrap it in foil. Here's what I got.
First I strung it on a thread (using a needle)
cotton pads, snowflakes. I didn't really like it that way.
But then I decided to buy a thin silver tape and attached everything with a stapler. It turned out much more impressive with the tape!
I prepared such a large and beautiful snowflake for the center of my winter mobile
In the end, I got this beauty!
The kids in our group were very happy! The kids like to play with the mobile . Our winter mobile can be lowered lower, or vice versa raised higher! They stand under it and blow, either slowly or harder, on snowflakes or ballerinas or Christmas trees, which in turn move as if they are dancing! A fun and funny game! mobile also helps us study the seasons!
I want to prepare a new colorful spring mobile ! I wish you all creative success!
"Sea Mobile". Master class Greetings to all guests of my page! Introducing another mobile that I made for my kids! Material used: * colored. Application “Winter-Winter” Master class using the paper-plastic technique This type of paper-plastic is accessible to children and interesting to adults. The essence of the technique is that a decorative element is created using manufacturing. Master class for teachers “Developmental mobile “Travelers”. The idea to create an educational mobile “Travelers” came to me after a conversation with children about where they vacationed in the summer, how they got to. Master class: mobile “Autumn” Good evening, dear colleagues, guests of my page! Today I want to present to your attention a master class on making a hanging mobile. Master class Mobile “Autumn Fantasy” The wonderful time of year has come - autumn! Our fertile land has produced a rich harvest of vegetables, fruits and forest products. Together with the children. Master class “Mobile “Snowman” Good day, dear colleagues! December has arrived, and with it we begin to create a New Year's mood) Competitions are just around the corner. Master class suspended mobile “Spring rain drip-drip” “Rain” Boris Zakhoder The rain sings a song: Drip, drip... Only who will understand it - Drip, drip? Neither I nor you will understand, But flowers will understand, And spring. Mobile “Butterflies” master class using origami technique Hello, my dear friends and colleagues! I am very glad to meet you! I worked at the rehabilitation center in Omsk, where I received treatment.
Winter hanging mobile for group decoration
Lyudmila Dudoladova
Winter hanging mobile for group decoration
Good day to all, dear colleagues.
In our groups we try to create a fabulous atmosphere for children.
Today I want to share with you our winter mobile .
We fasten the thread and hang it from the ceiling
This seasonal decoration looks beautiful hanging from the ceiling as it slowly rotates.
The kids really like it.
I would be very glad if someone finds this idea useful, creating a suspended winter mobile .
After all, it is very simple and affordable to implement. I am sure your imagination and hard work will help you.
And now we will have these birds with us all winter, but we will not forget about those who stayed with us for the winter and they need our help.
Summer carousel of flowers for kindergarten decoration. Hanging mobile I present to your attention a hanging mobile, of course there are a great many of them on the Internet, but each is individual in its own way. his. Master Class. Making a hanging flower garland to decorate a group The arrival of spring is always a long-awaited event, both for children and adults. After a long, cold, gray and gloomy winter, I want more. Master class suspended mobile “Spring rain drip-drip” “Rain” Boris Zakhoder The rain sings a song: Drip, drip... Only who will understand it - Drip, drip? Neither I nor you will understand, But flowers will understand, And spring. Mobile “Autumn” for decorating the group To decorate the group, I decided to make a mobile “Autumn”. I hung the mobile in the group in the ecological corner. It turned out bright and attracts attention. New Year's mobile for group decoration. You always want to surprise and delight your children with something new and interesting. On the eve of the New Year holidays, create a festive mood.
Source
DIY crafts for the New Year. Mobile “Merry Round Dance” (step by step instructions)
Various mobiles can be a very interesting interior decoration. Let's make a mobile of snowmen who will spin in a cheerful round dance under a snow cloud.
To make a New Year's mobile you need:
❆ thick colored paper,
❆ paints or markers,
Making a New Year's mobile
1. We will need 4 sheets of thick colored paper measuring 40x18cm. We will bend each sheet in half and transfer the pattern onto it.
2. Cut with scissors. We do not cut the fold line. We should get 4 clouds with a fold in the middle.
3. Open the cloud and coat its left side with PVA glue.
4. Glue another part, folded in half, to the first part of the cloud, and glue a long narrow ribbon in the center. Then we again smear the left side with glue and glue the next part, and so on all four parts. We glue the last, fourth, part with the first part.
5. This will create a four-sided cloud, on which we will draw snowflakes on all sides.
6. We will also transfer the snowmen onto a sheet of thick paper, folded in half.
7. Cut with scissors, and you will get two parts for each snowman.
8. Color both outer parts of the snowman with paints or felt-tip pens or use the applique technique.
9. Glue both parts of the snowman together, not forgetting to insert a thick thread or ribbon inside.
10. In the middle we will attach a large snowman to the cloud, and along the edges on the four sides of the cloud we will make holes and secure four small snowmen on narrow ribbons.
Let's attach the mobile to the chandelier. And now, from the slight movement of air, the snowmen will spin in an amazing round dance along with the snowflakes.
A festive composition will look very beautiful in your home New Year's interior .
Grandma's old recipes come to life or wonderful DIY children's mobiles
After we bought a mobile for the cradle, I fell in love with toys suspended on strings and that sway even when the door is closed.
This brings joy to the child and greatly influences the comfort of the children's room, at least it seems so to me. I have collected options for children's mobiles, after looking at which each of you can find a suitable solution for yourself and make a pleasant gift for your baby.
What cool variety of mobile phones! My eyes are wide open! I believe that not only children, but also adults will be delighted with such mobiles. Where can I see a description of the assembly of these models?
Things made with your own hands always carry more love and warmth. And creating for children is doubly pleasant. Great ideas and solutions for children's mobiles made from affordable materials!
Products created with your own hands, especially those created with love and care, are always more beautiful and “more soulful” than those purchased! And the process of making them, in my opinion, gives those who do it a lot of positive emotions. And the fact that these things are intended for children increases these advantages many times over!
We are pleased to welcome you to our Design Museum portal! Furniture, interiors, lighting, decor, interior shows and famous designers - our best collection.
Master class “New Year's mobile”
Tatyana Kotlyarova
Master class “New Year's mobile”
Master class for teachers.
Kotlyarova Tatyana Pavlovna.
Mobile " New Year "
.
We are approaching a wonderful New Year holiday.
To decorate the group, I decided to make a festive New Year's mobile . The mobile turned out to be bright and beautiful.
To make a New Year's mobile you will need :
— Felt (white, red, blue)
;
- padding polyester (for stuffing figures)
;
- large beads (for eyes)
;
New Year's mobile consists of figures:
Mobiles with Angels
Christmas mobiles cannot do without figures of light and airy Angels. We cut them out of white paper, sew them from felt, and crochet them. .
We offer several templates for cutting out an Angel from paper.
drivehelp.ru
I would be glad if someone uses my idea!
Various mobiles can be a very interesting interior decoration. Let's make a mobile of snowmen who will spin in a cheerful round dance under a snow cloud.
To make a New Year's mobile you need:
❆ thick colored paper,
❆ paints or markers,
Making a New Year's mobile
1. We will need 4 sheets of thick colored paper measuring 40x18cm. We will bend each sheet in half and transfer the pattern onto it.
2. Cut with scissors. We do not cut the fold line. We should get 4 clouds with a fold in the middle.
3. Open the cloud and coat its left side with PVA glue.
4. Glue another part, folded in half, to the first part of the cloud, and glue a long narrow ribbon in the center. Then we again smear the left side with glue and glue the next part, and so on all four parts. We glue the last, fourth, part with the first part.
5. This will create a four-sided cloud, on which we will draw snowflakes on all sides.
6. We will also transfer the snowmen onto a sheet of thick paper, folded in half.
7. Cut with scissors, and you will get two parts for each snowman.
8. Color both outer parts of the snowman with paints or felt-tip pens or use the applique technique.
9. Glue both parts of the snowman together, not forgetting to insert a thick thread or ribbon inside.
10. In the middle we will attach a large snowman to the cloud, and along the edges on the four sides of the cloud we will make holes and secure four small snowmen on narrow ribbons.
Let's attach the mobile to the chandelier. And now, from the slight movement of air, the snowmen will spin in an amazing round dance along with the snowflakes.
"Mobile - Christmas tree"
When the first snow falls outside, we all, without exception, remember the festive feelings associated with the New Year, the smell of tangerines, congratulations, gifts, Santa Claus and his granddaughter, snowmen and snowflakes. And when the month of December is approaching, the thought appears in your head about when to put up a Christmas tree, how interesting it can be decorated. I suggest you make an unusual New Year’s mobile with your own hands, literally from scrap materials (creative people have a huge amount of them). Here is the New Year's mobile that I got.
So, the materials we need:
1. scraps of cardboard of different colors (necessarily green and preferably larger) 2. colored paper 3. scissors 4. ruler (preferably with a round hole, the diameter of which is 3 cm, if there is none, then you will need a compass) 5. a simple pencil and an eraser 6 . glue (instead of glue, you can use thin double-sided tape) 7. thin decorative wire (I took green) 8. needle (with red thread, so as not to get lost) 9. figured hole punches (you can take others, or use ready-made cuttings. I have ready-made flowers and snowflakes that will be useful to me).
The first step is to draw a diagram of our holiday mobile (Remember geometry!): an isosceles triangle with a base of 9 cm and a height of 12 cm. It needs to be divided into 3 equal parts in height (as shown in the diagram). This is the Christmas tree itself. Next is an isosceles trapezoid with bases of 4 and 6 cm. This will be our vase for the beautiful Christmas tree. And 2 circles, each with a diameter of 3 cm (eyes).
If you don’t want to waste time on the diagram, then I suggest immediately drawing similar figures on the back side of colored cardboard (triangle on green, trapezoid on red, circles on blue).
The next step is to cut out flowers, stars or snowflakes with a shaped hole punch from colored paper.
Then we put the blanks aside and proceed to the wire. We cut 5 pieces of 5 cm, 1 - 18 cm, and 1 - 9 cm. The longest one will go on the loop for which we will hang the Christmas tree decoration. Using short ones, we connect the top of the tree with the middle part, the eyes and the flowerpot with the bottom of the tree. Use a middle wire to connect the lower part of the tree to the middle part. Let's turn all the parts over and mark with dots the places where we will make holes with a needle (as shown in the photo). We pierce these holes.
The moment comes when you need to do the most difficult and painstaking work - connect all the parts with wire in the right places (two short wires will connect the top and middle parts of the tree, hang the eyes on the middle part with two short wires, screw the lower part of the tree to the middle and the flowerpot to the lower part ) and twist it on each side. Then we decorate the tree with cuttings as much as our imagination allows.
At the top we fasten the longest part of the wire into a loop.
The festive mobile “New Year’s Tree” is ready!
New Year's coffee owl
Another wonderful master class by Irina Ledovskaya on sewing a coffee toy “New Year's Owl” (so.
The benefits of a children's mobile
Bright figures attract the baby, teach him to concentrate his gaze and maintain attention, recognize objects, and distinguish colors. Smooth rocking and spinning of toys to music calms the nervous system and develops the ability to find the source of sound. While the baby is busy looking at it in the crib, parents have time to do their own thing.
Whether there is any benefit to vision is a controversial issue. There is a common myth that a mobile phone can lead to strabismus due to the fact that the child’s eye apparatus has not yet formed. However, this has not been confirmed by research. It is believed that if the figures hang over the middle of the crib, when the baby can look into the distance, and not lower than 25 cm, then the eye muscles develop faster. The colors of the toy should be bright and clean. Pastel colors are not perceived by infants. A child is interested in looking at moving objects from about 2-3 months; until this age there will be no benefit or harm to the baby.
Instructions
To begin, take the stencils you like and apply them to the felt. Draw a drawing on the material using a marker in duplicate.
- To do this, fold sheets of felt together and trace a stencil.
- Then they fasten the material with pins and cut out the design.
- After this, take threads that match the color and sew the product.
- But in such a way as to leave room for the filler.
- Don’t forget to sew a ring at the top of the future toy, which will serve as a holder between the thread and the crib mount.
For stitching, it is better to use a loop stitch, but it looks most advantageous on the product. Fill the toy with padding polyester and sew it together completely.
Advice! The ring is sewn 1 cm from the edge of the toy. If necessary, use up to 3 rings. It depends on the size of the mobile toy. To connect the ring to the toy, use regular sewing, threading a needle and thread through the ring and securing the pair with stitches.
As for filling the product, this is done as carefully as possible, without leaving voids in the toy. Otherwise, during washing a number of problems will arise associated with deformation of the product.
For stuffing, use a regular pencil or pen, some even use a cotton swab. Again, as a filling material, it is better to use synthetic winterizer than other material. Since the first option dries quickly and does not deform when washed.
- Next they move on to hanging the toy. To do this, take a fishing line, approximately 40-50 cm in five copies.
- This will make it possible to hang up to 5 toys, which is standard for a mobile.
- A bracelet lock is tied to each cut line.
- As a rule, a piece of fishing line remains sticking out, so a bead is attached to it using a glue gun. This will give aesthetics to the homemade product.
- Then tie a free piece of fishing line to the base of the mobile, doing the same with all the prepared fishing line. In this case, the fishing line can be fixed at different heights.
And the last step of this needlework will be attaching a felt toy to a fishing line with a lock. Here you need to use all your imagination. As a rule, the largest products are attached in the middle, and the small ones at the edges. All! So quickly and simply, every parent can please their beloved baby.