Today, the phenomenon of selfie - self-portrait photography - is very popular. In order to take a selfie, you need to extend your arm with the phone to its full length and take a photo of yourself. However, sometimes you want to fit more into a photo than your own face, but your arms are not long enough. In these cases, a selfie stick helps, which allows you to take pictures at a distance of up to one and a half meters. In another way it is called a monopod. These gadgets are not cheap, so let’s look at a few examples of how to make a selfie stick with your own hands.
Selfie stick made of plastic pipe
The most practical, but at the same time, the most labor-intensive option.
To create a selfie stick you will need:
- plastic pipe with a diameter of 2 cm;
- drill or screwdriver, 6 mm bolt;
- foam;
- clamp;
- thermoplastic adhesive;
- stationery knife.
The procedure for making a selfie stick with your own hands will be as follows:
- To begin, heat one end of the pipe with a hair dryer until soft. After this, you need to compress it with a clamp and wait for it to cool. As a result, one of the ends will have a flat shape.
- After this, you need to heat this end again and bend it so that the angle of inclination matches your height and preferences - it is individual for everyone.
- After cooling, the part must be carefully processed with a knife.
- Using a drill or screwdriver, make a hole in the flat part of the pipe.
- Now you need to make the handle of the future monopod. To do this, we wrap the second side of the pipe with foam rubber using hot glue.
- The camera is attached using a bolt.
A practical monopod is ready!
Important! The only significant drawback of such a homemade product is that it is not compact, so taking it on the road will not be particularly convenient. Otherwise, this is a good budget option that will appeal to those who like to do everything with their own hands.
Areas of application
Naturally, you can always stop passers-by and ask them to take a photo. However, in nature or in the wilderness this becomes impossible. Moreover, in some situations it is necessary to take a photo at a height where not every person would agree to climb.
Selfie sticks are in particular demand among smartphone owners who are keen on posting their own pictures on social networks. The invention is an indispensable tool for extreme athletes who perform breathtaking stunts and want to capture themselves in the process. A factory-made product or a self-made selfie stick can bring invaluable benefits to hikers who prefer to travel alone.
Bamboo selfie stick
If the first method is too difficult for you, here is another tip on how to make a selfie stick at home.
For this you will need:
- bamboo stem;
- car holder for smartphone;
- Bluetooth remote control;
- a pair of magnets 30x5 mm;
- twine or any strong thread;
- glue and epoxy resin.
To take a selfie stick:
- You need to cut the bamboo stick to the required length, then cut it in half lengthwise using a hacksaw. Each end must be sanded.
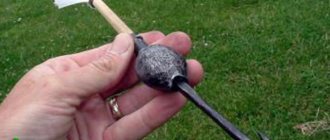
- Magnets must be glued to one end of each stick using epoxy resin.
- Next, we’ll make a handle: lubricate the part from the free end of one of the sticks with glue and tightly wrap the twine on top (if you don’t have any, you can use a thick thread). Tie a Bluetooth remote control to the end of the twine.
- Attach a phone holder to the free edge of the other stick. You use epoxy resin.
Important! This selfie stick has an advantage over the first one in terms of compactness, however, it is inferior in strength, because with bad magnets it can fall apart, and your phone will have a hard time. However, as a monopod for travel it’s perfect.
Unusual budget selfie sticks
If you only have tape on hand or you don’t want to spend a lot of time making this device, here are some unusual tips for creating a monopod in just a couple of seconds from scrap materials.
Slingshot stick
The simplest and at the same time not particularly obvious solution is to make a monopod from a tree branch, preferably shaped like a slingshot. You just need to carefully wrap the phone with tape, and that’s it - the budget selfie stick is ready!
Selfie mop
Not just a branch - any long object can be turned into a monopod if desired. The main thing is to stock up on tape.
Monopod for a rainy day
If you have an umbrella with a twisted handle, you can place your phone in it. True, for this the phone must be at least approximately suitable in size.
Important! Remember that when using any monopod - homemade or purchased, it is better that the phone is suitable and has.
Shortening the telescopic tube
Our tube is too long, so it needs to be shortened. We will cut the tube on both sides.
You can mark with a scriber or a thin marker. To avoid damaging the paint when cutting, the cut area can be wrapped with electrical tape or thick paper. We will cut with a regular hacksaw for metal. The blade should be positioned so that the teeth are directed away from you, and you need to cut only towards yourself. This will complicate the task, but will allow you to get a smoother cut. Final finishing can be done with sandpaper.
We buy a ready-made gadget and fix it if it breaks
But let’s say that you want to buy a normal monopod and don’t know what to choose from. Let's say you already have one, but for some reason it stopped working. Now you will learn what types of monopods there are, how to fix a selfie stick and much more.
Choosing the right device
The first thing you should pay attention to when buying a device is how different types of selfie sticks differ from each other. They can be classified as follows:
- Selfie stick with built-in button. It is considered the most optimal and most convenient option, since there is no need to use a timer on the camera or additional Bluetooth remote controls. One press of the button and the photo is ready!
- Monopod with Bluetooth remote control included. A less convenient option is a stick, since you will end up with both hands occupied (unless you ask one of your friends to hold the remote control). Otherwise, it’s a pretty practical option.
- Bulky and inconvenient, but the cheapest monopod without a button. The main disadvantage is that you will either have to look for a Bluetooth remote control somewhere yourself, or set a timer on your phone, which is not particularly convenient.
- Wired model. Unlike other monopods that require recharging, selfie sticks of this model are connected by wire to the phone via the headphone jack and do not require additional charging. Plus, the stick has a button located on the handle for convenient use and a mirror for the rear camera.
- Tripods with reliable camera mount. The most durable and safe option, however, such a monopod is not cheap. This unit weighs up to two kilograms, with dimensions up to two meters.
Important! If you decide to purchase a finished product, use the information from our special review.
With the advent of gadgets, young people have a new hobby - selfies. Likewise, the selfie stick has become a new trend. At a public event you can now meet people walking around with this accessory and taking wonderful photos. We bring to your attention an interesting solution on how you can save money and make such a stick yourself.
To make this homemade product you will need the following materials:
Materials
Bamboo stick Neodymium magnets size 30 * 5 mm, 2 pcs. Smartphone holder (car) Epoxy resin Bluetooth remote control; Rope (twine) Glue Hacksaw Sandpaper
Step-by-step making of homemade products
Step 1
. Take a bamboo stick and cut the required length. After this, the cut piece must be cut into two parts. In order for the cut edges to be smooth and without burrs, it is worth sanding them with sandpaper
Step 2.
Take neodymium magnets and use epoxy resin to glue them to the ends of a bamboo stick.
Step 3.
Now you need to wrap one end of the stick with twine, after lubricating the base with glue. The turns of twine should be made very tight.
Step 4.
Take the Bluetooth remote control and attach, or rather tie it to the handle
Step 5.
After this, you should attach the smartphone holder to the second side of the stick.
Adjust the parts to size. For reliability, all parts of the holder should be sealed with epoxy resin. This way you will be sure that the phone and the holder will not fall at a critical moment. That's all, the unique selfie stick is ready.
This know-how folds up very easily and fits into a backpack or purse. Due to the fact that neodymium magnets are installed on the stick, it is very easy to assemble; all you have to do is wave your hand. With the advent of a good front camera on a smartphone, it has become widespread. In order to take a beautiful photo without anyone’s help, a selfie stick was invented, thanks to which you can capture not only your face, but also the surrounding landscapes. It is important to know how to use a selfie stick, as there are a number of interesting nuances.
Simple tripod holders using bolts and glue
Before moving on to more complex designs, review the requirements to ensure that the rack and mount you create does not become unusable.
Requirements for a homemade camera tripod
Working height of a homemade tripod
It is good if it is adjustable over a wide range. But for a homemade tripod it is difficult to ensure that the minimum height is 20-30 cm and the maximum is 1.5 meters.
Reasonable limits are from 50-80 cm to 1.5 meters. This is enough for both shooting objects on a table, for example, and for shooting “full-length” without distorting the picture.
Stability, reliability
– the tripod must support the weight of the camera and not fall at the slightest vibration of the floor or wind.
Carving is important to know!
For homemade tripods, this characteristic is important, since you will have to select bolts for mounting.
So, there are two main standards for fastening threads. These are 1/4" and 1/8". Check the threads of your devices and use bolts of the appropriate sizes.
Tripod made from a plastic bottle
The difficulty is not high:
- drill a hole in the lid;
- insert the bolt and strengthen it with glue;
- fill the bottle with water for stability;
- close the cover and place a gasket on the bolt;
- attach a camera or phone mount.
Do-it-yourself stable tripod tripod made from razor blade
The idea is not mine, I saw it on the Internet!
Three plastic razors will serve you as tripod legs.
By attaching them with glue or screws to the triangular base, you get an almost finished tripod.
Before attaching the razors to the base, you need to drill a hole in it, insert a bolt of the appropriate diameter for attaching a camera or phone holder - and the tripod is ready for use.
A problem may arise with the base - you will either have to cut it out of wood or look for a triangular object of acceptable size.
For reliability, it is better to strengthen the bolt with glue (moment, epoxy) and use a rubber gasket so that the camera is attached more tightly and does not rotate during shooting.
The spool is small, but expensive, isn’t it? Why not replace Chinese “octopuses” on the table?
What does a selfie stick look like?
The correct name for this device is “monopod” or “tripod”. It looks like an assembled fishing rod, and on one end there is a rubberized handle, and on the other there is a smartphone mount that rotates 360°. If you are interested in how to choose a selfie stick, it is worth pointing out that some models have a loop on the handle for ease of transportation. It may have a trigger button to take pictures, but it may also be removable.
It is important to know not only how to use a selfie stick, but also how to choose the right device:
- Inspect the device from all sides to make sure that the material is of high quality, there are no scratches, glue residues, and so on. It is best to choose devices whose holder is made of metal. Be sure to appreciate the phone locking mechanism, which should hold the smartphone well so that it does not fall.
- If you plan to use a monopod with different smartphones, then the best solution is a device whose holder will expand and adapt to different models. For people who plan to take pictures with the main camera, selfie sticks with a holder are suitable. Another useful bonus is the rotation of the mount, thanks to which you can choose the optimal angle for good shots.
- If you don’t want to think about how to use a selfie stick with a short handle, then be sure to check its length. For the widest shooting angle, you need options from 90 cm, and for portraits 30-40 cm will be enough. Please note that the longer the stick, the stronger the mount should be.
How does a selfie stick work?
To understand how to use a monopod, note that in addition to the button for taking photographs, there may be additional keys on the body for focusing, zooming, and activating additional modes. When describing how a selfie stick works, it is worth pointing out that it comes in two types: wireless, which works via Bluetooth, and wired, which connects to the phone using a wire. It is important to make sure that it is compatible with your smartphone before purchasing a device.
We should also highlight a selfie stick without a button, which is called a “tripod”. It is used extremely rarely, since it cannot be called convenient. Using such a selfie stick is very simple: you need to install your smartphone and set a timer on it. After the photo is taken, you will have to turn on the timer again and so on. Such devices are cheap, but even this does not make them popular, since they are completely inconvenient to use.
How does a wireless selfie stick work?
This option is more popular and is based on transmitting a signal to a smartphone from a monopod. It’s easy to guess how a selfie stick works via Bluetooth, as it connects to the phone like a headset. In this case, no wires are used and after a simple connection you can immediately start taking photos. The disadvantage of this option is that such a gadget requires a power source, so the design requires a battery.
How does a selfie stick with a wire work?
Devices in this group have a more complex design, since you not only need to install the phone, but also insert the existing wire into the headphone jack. When talking about how a selfie stick works, it is worth pointing out that after connecting the smartphone, it will receive a signal when you press a button, indicating that you need to take a photo.
How to connect a selfie stick?
At first glance, everything looks simple: you make a connection and you can take photos for your pleasure, but this is not so. It is important to know how to connect a selfie stick to your phone and make settings. It is worth considering that different models of monopods have their own characteristics, which can be read about in the attached instructions. Another important point worth highlighting is that each operating system has its own characteristics.
How to connect a selfie stick to iPhone?
If the device has a wire, then the process of connecting the device is very simple. You just need to insert it and that’s it, the iPhone will do the setup itself and you don’t need to make any additional changes. If you are interested in how to use a monopod via Bluetooth, then the connection process is identical to other operating systems and it has the following stages: turning on the power of the selfie stick, searching and pairing devices. All you have to do is go to the standard Camera application and start shooting.
How to connect a selfie stick to Windows Phone?
You can use the monopod with a wired or wireless connection. In the first case, there should be no problems, but if the connection is not made, then check the charging of the device and the serviceability of the plug. It's important to figure out how to connect a selfie stick to your phone via Bluetooth. Here you will need to install a special application, and this is explained by the fact that with standard Windows Phone firmware the connection will be interrupted.
Understanding the topic - how to use a selfie stick correctly, it is worth noting that starting from version 8.1, a special program is available in the operating system for properly working with a selfie stick, and it is called Lumia Camera 5. You can also use a program such as Lumia Selfie, which not only helps to perform synchronization, but also has the ability to add various effects.
How to connect a selfie stick to an Android phone?
In order to use the monopod, you need to reconfigure some button functions. For this purpose, follow the instructions describing how to use a selfie stick:
- Turn on the Camera app on your phone. Go to general settings, where you need to find the “Volume key settings” sub-item.
- Change the settings based on how the monopod works.
- It is worth considering that not all devices have the ability to customize control keys. The best solution in this case is to use third-party applications. Camera FV-5 has a paid and free version. Thanks to the numerous settings of the application, you can take high-quality pictures, just like on a DSLR. Go to “Options” and make all the necessary changes there.
When figuring out how to connect a selfie stick to Lenovo and other phones, it’s worth considering the main applications available in the Play Market:
- SelfieShop Camera.
The application not only simplifies shooting, but also helps eliminate some problems, for example, the lack of connection between the monopod and the smartphone. You cannot shoot videos or edit photos using this app. - Retrica.
Many people like this application due to the large number of filters that can be applied in real time.
How to set up a selfie stick?
If after connecting the monopod you cannot use it, then you need to look for the reason. There are several recommendations on how to set up a selfie stick on your phone:
- If the button does not respond to pressing, then this may indicate a lack of signal. It is recommended to install a special application for the monopod or SelfieShop Camera. The application has a “Device Testing” item and after selecting it, click the photo button, which will help the application record the device.
- If the device is correctly connected and initialized, but you still can’t take photos, then you should go to the settings of the camera itself. Select an item there that may be called “Shoot key action”, there set the following order: shooting, shutter and photo.
- The problem may lie in the smartphone itself, for example, the version of the operating system may not be suitable, so before purchasing it is important to check that the device is compatible with the mobile phone OS. Another reason is due to the lack of the desired trigger. This may be a mistake by the manufacturer.
Features of operation
How to use a monopod correctly? Taking pictures using a telescopic device is not that difficult. It is enough to securely fix the smartphone in the mount, extend the cane to the required length and activate the camera by pressing a special button. This concludes the preparation of the device. Then you can freely use it for shooting at non-standard angles, fixing objects that are located in hard-to-reach places or located at a considerable height.
How to use a monopod correctly?
First, you need to check the charging of the selfie stick; if it is not enough, the indicator connected to the USB connector will blink red. On average, charging time is about an hour. To start shooting, you need to fix the smartphone, for which you place it in a special stand. If the phone is too wide, then the upper part of the clamp should be pulled out and placed between the rubber pads.
Narrow devices simply need to be inserted into the mount. It’s better to first check in the store whether the phone fits the stand or not. The rules regarding how to use a selfie stick correctly have their own characteristics, depending on the wired or wireless connection. There are a lot of tips on how to choose a good angle to get great photos, but that's another story.
How to use a selfie stick with a wire?
For owners of such a product, the following tips will be useful.
- The instructions on how to use the selfie monopod indicate that after installing the smartphone in the mount, you must insert the plug into the headphone input.
- After this, a special headset icon will appear at the top of the phone screen.
- The next step is to open the Camera application and press the button to connect.
- All you have to do is choose a timer, take a beautiful pose and start taking selfies.
How to use a selfie stick with Bluetooth?
More convenient to use are monopods, which do not require any wires to connect. If you are interested in how to take pictures with a selfie stick, then consider the following rules:
- Turn on the device by pressing the button, and after that you will see a blue indicator on it.
- After that, go to settings on your phone, open the Bluetooth section there and turn it on.
- Activate “Search for devices” and find the selfie stick, which will be identified by the keyboard icon and the manufacturer’s name.
- The next step in the instructions is how to use a selfie stick, as follows: click on the dropped name to connect, and after synchronization the indicator will flash quickly and then go out.
- All that remains is to set the timer on the camera and you can start taking photos.
Nowadays, not only self-photography has become a very popular hobby among young people thanks to shooting with a mobile phone camera. People have adapted to record not only themselves, but also a whole host of interesting and various factors from everyday life. The only problem with such shooting is the small viewing angle and capturing the surroundings. That's why the developers came up with such a miracle device called a selfie stick (monopod).
The selfie stick, the so-called device, has a telescopic operating principle, which helps to take photos with greater artistic value. However, there is no need at all to buy such a device in factory-assembled stores. Therefore, we will tell you how to make a selfie stick with your own hands for phones based on Android.
So what is a selfie stick?
Simply put, this is a handle made of durable plastic or other materials with the function of extending to a certain length. On one side of the monopod there are mounts for a mobile phone, on the other there is a rubberized handle for fixing in the hand.
The device has a button to activate the mobile camera, which is built into the handle. New devices are equipped with a remote control key fob. The monopod also needs to be configured with the phone using the Bluetooh channel.
DIY selfie stick - what do we need?
To make a selfie stick at home, we need the following list of tools and materials.
- construction hair dryer;
- drill and drill bits;
- Polypropylene tube with a diameter of about 20 mm;
- a vice for fixing or a machine for securing the base of the product;
- foam rubber or rubber for making the handle;
- glue gun or similar.
The process of manual production of a monopod for a telephone involves performing work in the following order:
1. Heat the end of the polypropylene tube using a hair dryer until the end becomes plastic, then clamp it tightly in a vice (flatten it). 2. After the tube has cooled and taken shape, remove it from the vice and begin to heat the base completely. We do this in order to give the structure an inclination angle that is optimal for shooting. This parameter is selected individually for each user to ensure ease of use. 3. Using a utility knife, we remove any unevenness and smooth out the edges of our selfie stick. 4. Once you have completed the steps above, you can begin installing the fasteners. Using a drill, we drill holes in the compressed part and install the fastening system using washers and bolts. 5. We treat the handle with glue and fix a rubber or foam rubber handle on it. You can also drill a hole and make a lanyard to prevent the monopod from falling out during use. 6. Finally, all that remains is to fix the camera or phone on the homemade device and take a selfie)
A selfie stick (monopod) is a modern accessory that can be universal or created for a specific gadget manufacturer. However, owners of smartphones with the Android operating system very often have problems - in standard mode the Bluetooth button does not function, the volume is added instead of taking photographs, there is photo sound, but there is no photograph. For every problem that arises, there is a solution.
DIY Tripod Tools
Tools needed to create a tripod
For five-minute tripods, you won’t need any tools, except perhaps scissors, and even then not always.
But for “serious” tripods, which have three legs that change height, more serious tools will be required.
Here's the main list:
- drill;
- hacksaw;
- pliers, wire cutters;
- screwdrivers (screwdrivers).
In addition, scissors, glue and other tools and materials that the Master always has in stock.
Selfie stick and its types
A selfie stick is a modified monopod for a camera, a device for a smartphone that allows you to take selfies at a distance beyond arm's length. What types of this invention exist at the moment?
Classic folding selfie stick
The classic type of monopod was the very first to enter the consumer market. This is explained by the simplicity and accessibility of the device, which expands from 20 centimeters to a meter in length. At the top of the monopod there is a mount for a smartphone.
The classic monopod is easy to use and minimal in its functionality
To take a selfie using this device, you need to install the phone in a special mount, turn on the timer shooting mode, choose a good angle and wait for the shutter button to automatically release. That's it, the selfie is ready! If you purchase a remote control for your phone, you can take a photo using a special button on it.
Monopod connected via headphone jack
The developers of modern phones have provided a camera release function using a cord connected through an audio jack - it was this nuance that was used when creating the next type of monopod.
Wired monopod connects to smartphone via headphone jack
The monopod connects to the phone via a 3.5 mm jack, and no additional steps are required to start using the device. When folded, its length is 20 cm, and when unfolded it is 90 cm. The main advantage of the monopod is the ball mount on the top, which allows you to install the smartphone at any angle or tilt it to the side.
Wireless monopod with button
A wireless device is the most common; it looks like the very first type of monopod, but has several features:
- the presence of a Bluetooth transmitter, thanks to which a wireless connection is carried out;
- fast battery charging;
- An advanced smartphone mount that holds it on both sides.
- smartphone holder,
- handle with control buttons,
- folding stick,
- tripod (tripod) for placing a stick on the surface.
To start a photo shoot, you need to turn on the monopod, establish a connection via Bluetooth, secure the phone, activate the Camera application, select a frame and press a special button on the selfie stick.
The presence of a Bluetooth sensor on the wireless monopod allows you to take selfies without any extra effort
The monopod was invented by the Japanese in 1995, who also considered it the most useless invention. However, in 2014, the selfie stick was recognized as one of the best gadgets.
Multifunctional monopod
It would seem that nothing new can be found, but a multifunctional monopod has appeared that can be installed permanently and also controlled remotely. This device consists of four parts:
The gadget has a Bluetooth transmitter and a built-in battery; on the handle, in addition to the usual “Take a photo” button, there is the ability to control proximity (+/-). The handle with buttons can be used as a telephone remote control.
The smartphone is installed as standard, as on other monopods.
Using the tripod included in the kit, you can install the selfie stick permanently. And you need to control the phone, which is installed on a tripod, with a remote control (handle) at a distance of up to ten meters.
Using the included tripod, you can install the selfie stick permanently
To start taking pictures of yourself using a monopod, you need to turn on Bluetooth on your phone, connect devices wirelessly, install your phone on a special mount, and launch the “Camera” application. And you can start taking selfies.
Connecting a selfie stick to an Android phone
Connecting a selfie stick to your phone varies depending on its type. Wired and wireless monopods have their own connection nuances.
How to connect a wired monopod
To connect a wired selfie stick on Android, you need to change the functionality of the volume buttons:
If the standard photography program does not allow you to change the functionality of the shooting keys, then you need to replace it with others. For example, Camera FV-5 - the application has a large number of settings. But to install the monopod you need to do the following:
As an option, you can also offer SelfiShop Camera - a regular application that will take up a small amount of internal memory. A big plus is the ease of use, you just need to install the application, by default all the keys are configured to take selfies.
Video: how to connect a wired monopod
How to connect a wireless selfie stick
Setting up a wireless monopod is much easier:
It is better to rename the monopod on your phone so that it can be easier to identify later.
Video: how to connect a wireless monopod
Problems during the operation of a monopod and ways to solve them
During the process of connecting and setting up the monopod, as well as during its operation, problems or errors may occur. They are quite easy to eliminate.
Table: possible problems when working with a selfie stick and their solutions
It is worth considering that if, when pairing devices, the message “Invalid PIN code or password entered” is displayed, then the monopod is not suitable for use on your smartphone. The problem rarely occurs, but it is recommended to check the monopod for compatibility with the phone, as the problem can cause OS malfunctions.
Eventually
The only disadvantage of the homemade design of this plan is the monolithic structure. So during operation of the device, some discomfort may arise due to its transportation. Therefore, sometimes it is better not to pursue a significant length, which allows you to capture a wide view, but, on the contrary, to make a monopod that is more convenient to use and compact in size.
Source