A microphone is a device that converts mechanical vibrations in air (that is, sound) into electrical current. The device is used for audio recording, telephone and video communication via the Internet. Microphones that have good sensitivity and transmit sound correctly are expensive. If you don’t have the funds to purchase a device, you can try to make it yourself. Before you make a microphone with your own hands, you need to study the types of devices, their main characteristics, and stock up on the necessary tools and materials.
What can it be used for?
A microphone is used wherever sound transmission is required.
It could be:
- voice recording or radio transmission;
- communication using programs designed for video conferencing;
- negotiations in voice chat of online games.
The device can also be used to record vocals and musical instruments. But the sound quality will not be up to par. A homemade device is not suitable for this. You need at least a capacitor.
Setting up the audio track in the video camera and DVR
Despite a direct wired connection, the microphone will not work without additional manipulation. Open the settings of the video camera, go to the “Video and Audio” tab (different brands of equipment may have a different name) and select the item with video and audio in the “Video type” field. The same should be done when working with a secondary stream, where the settings should be identical.
This will help the camera recognize both data streams, since it was initially designed only for video signals. In the “Audio” tab, you need to select a codec, there you can also enable a noise filter, adjust the volume and separately adjust the bitrate (quality) of the audio stream.
Setting up a microphone in the web interface of a video surveillance camera
After saving the settings, check the functionality of the kit in the viewing tab. The camera must broadcast sound, and there may be slight delays, but without desynchronization with the video.
In the case of a DVR, the procedure is similar: in the settings you should select the video type – “Video and Audio”. But there is a difference: in the list of cameras, additionally select the device that the presets concern. If the gadget does not support a microphone, setting up the audio stream will be impossible.
Features and characteristics of homemade microphones
Homemade devices have worse sound and acoustics than factory ones, because... They have lower dynamic range and sensitivity. However, these disadvantages are compensated by the low cost of assembly materials. The cost for them will be no more than 100 rubles. The price of the simplest factory models starts from 250 rubles.
The characteristics of the device also differ depending on its type. Main – 6.
Directed
Designed for listening or recording sound, the source of which is located at a distance (it should not exceed 100 - 150 m). The minimum required sound intensity should be 45-50 dB. Most often, such devices are used by journalists to record during interviews.
Electret
A type close to capacitor models. Uses an electret (special dielectric) plate as a fixed capacitor plate and a permanent current source.
Studio
Studio microphones are condenser microphones that are designed for sound recording and transmitting sound on television or radio. The main structural element is a capacitor covered with a dielectric film that is sensitive to sound vibrations. When the film catches them, it vibrates. As a result, the capacitance of the capacitor changes, the sound turns into electrical vibrations.
Homemade condenser tube
Similar to the previous option. However, the preamplifier does not use transistors or microcircuits, but tubes. This results in a warmer, more natural sound. Suitable for recording vocal and instrumental parts.
You can make it yourself - from a condenser microphone and a tube preamplifier.
Slotted clamps from transistors
A type of directional microphone. The basis of the design is a tube equipped with slots. When sound waves penetrate there, they enter into antiphase. As a result, you can hear sound even at great distances.
The device itself can be made from clamps from old Soviet transistors.
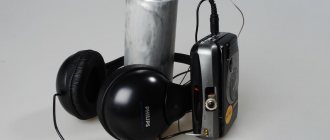
Microphone from headphones
The simplest version of a homemade microphone. A headphone speaker is used to create the membrane. Suitable for online communication. Not suitable for recording - sound quality is insufficient.
Unidirectional type
A “directional microphone” is particularly sensitive to sound that travels in one direction and less so to other types of sound transmission. This classification is characterized by a diagram that is similar to the heart, this is facilitated by its cardioid feature. In the figure below you can see how its effectiveness is achieved along the axial plane, and the minimum susceptibility in the opposite direction. The effective angle of this class of microphone is 130 degrees. Supercardioid pattern. It has a strengthened and more narrowed sound capture zone than the cardioid pattern.
Characteristics characteristic of supercardioid pattern:
- Maximum isolation from the flow of background noise;
- Characterized by minimal sensitivity to the acoustics of the hall.
What tools and materials will be needed for the job?
To make a simple electret mono microphone for a PC without a preamp, you will need the following materials:
- Electret capsule. This part can be pulled out of an old tape recorder with recording capabilities. It can also be purchased separately. It costs only 40-50 rubles.
- Thin wire with two cores. Needed to connect a microphone to a computer.
- Audio plug with a diameter of 3.5 mm. Required to connect the device to the audio input of a PC.
- Frame. A hollow plastic cylinder will do. It can be made from an old thick marker.
- Small office clip. Needed to attach the device to the buttonhole.
Tools and consumables you will need:
- soldering iron;
- rosin and solder;
- insulating tape;
- screw with a wide head.
Parameters of Samson R23S devices
This is a compact and high-quality microphone. According to experts, the model is quite often used by intelligence agencies. The operating humidity of the device is 44%. It is prohibited to use it at temperatures above 45 degrees. The modification's diffuser is of the diode type, and the adapters for it are matched with two contactors. The model has a standard low-frequency filter. The amplifier itself is used with a low-impedance adapter.
The threshold sensitivity parameter reaches a maximum of 4.3 mV. If you believe the arguments of experts, then the model copes remarkably well with wiretapping at a distance of over 150 meters. Amplifier malfunctions are quite rare. The microphone protection system is PP40 class. The price for this model starts from 10 thousand rubles.
Step-by-step instructions and stages of making a microphone for a computer
The manufacturing procedure of the device can be divided into several stages.
Schemes and drawings
Before starting work, it is better to sketch out a drawing of the future product. This will make subsequent assembly easier. Since this is a simple option, no specialized programs are needed. The diagram can be made on paper.
Device power supply
The variant under consideration does not have a preamplifier. Therefore, he does not need additional nutrition.
Microphone mixer
The mixer is a volume control and amplitude-frequency characteristics. The simplest one can be bought for 3000-4000 rubles. If you don’t want to spend money on it, you can use software mixers (for example, VoiceMeeter Banana or similar software). Their capabilities are not inferior to the functionality of “iron” models.
If you don't plan to use the device for recording, the built-in Windows mixer will suffice.
Rack
If you don’t want to use a buttonhole, you can make a stand to fix the microphone. The easiest option is to make an accessory from an old table lamp. To do this, disconnect the lampshade and attach a metal clamp in its place, the diameter of which allows you to fix the body of a homemade microphone.
The advantage of such a stand is that its position can be changed according to the needs of the owner.
Scheme
The circuit is extremely simple, containing only two resistors, two capacitors, a transistor and an electret microphone capsule. The transistor can be used in almost any low-power npn structure, for example, KT3102, BC547, BC337. An electret microphone can be obtained, for example, from a broken headset or handset, or you can buy it at a radio parts store. The sensitivity of the microphone will greatly depend on this element, so it is advisable to take several and check which one is best suited. The advantage of this circuit is that it uses phantom power. Those. The sound signal is transmitted through the same wires as the power supply. If you take a voltmeter and measure the voltage at the microphone input of your computer, it will be about 3-4 volts. When connecting the microphone circuit, this voltage should drop to a level of 0.6-0.7 volts, thus, an external power source will not be needed and there will be no extra wires at the workplace.
Assembly steps
To assemble the device, you will need to perform the following steps:
- cut off the ends of the marker body so that you get a hollow tube;
- solder a two-wire wire to the capsule;
- wrap the capsule with 2-3 turns of electrical tape (this is needed for better fixation in the case) and insert it into the tube so that the wire comes out on the other side;
- Solder the opposite end of the wire to the 3.5 mm plug.
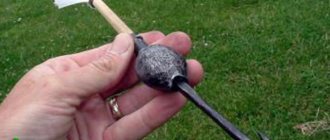
Directional slot stereo microphone made of metal tape.
This is a drawing from which a directional stereo microphone was made from metal tape.
- Screw – M1.6x5.
- Nut – M1.6.
- Clamp – steel, S0.3mm. (tin from a tin can).
- Tape – steel, S0.5x8x50mm.
- Screw – M1.6x5.
- Partition – medical syringe 20g.
- Bushing through passage - rubber Ø11mm.
- Weight – solder Ø2mm.
- Krpus – medical syringe 20g.
This microphone required very few parts.
- Shielded mono cable – Ø2mm.
- Shielded stereo cable – Ø3mm.
- Screw – M1.6x5.
- Bushing through passage - rubber Ø11mm.
- Clamp – steel, S0.3mm. (from a tin can).
- Screw, nut, washer – M1.6.
- Weight – solder Ø2mm.
- Electret microphone capsule – Ø6x6mm.
- Medical syringe 20g.
- Tape – steel, S0.5x8x50mm.
- Heat shrink tube – Ø8mm.
In order not to have to paint, I covered the steel tape with heat-shrink tubing, and then rolled it into a helical spiral, item 1, on the body of a 10-gram syringe.
From the body of a 20-gram syringe I made the microphone body, item 3, and the partition, item 2, from the piston of the same syringe.
At this point, you can drill three holes to attach the tube to the body and cut the threads.
To reduce the length of the unshielded wires going to the microphone capsules, I extended the stereo cord with two small pieces of mono cord. The picture shows how it was done. Thick paper is used as insulation.
The microphone body, as in the previous design, was covered with heat-shrink tubing.
Another picture explaining the assembly procedure.
This is what happened.
| Get the Flash Player to see this player. |
Here's how it works.
Master class on making a paper microphone at home for children
Children also want to play with the microphone. But you shouldn’t trust them with it – they might break it. Therefore, it is better to make an imitation of a paper product.
To do this you need:
- make a tube out of cardboard;
- crumple a ball from sheet A4 and wrap it with colored film or paper;
- stick the ball onto the end of the tube;
- Glue a thick thread simulating wire to the opposite end.
Nuances of making a holder
The simplest holder is a buttonhole. It can be made from a small office clip, which is screwed to the body with a screw with a wide head in the right place.
The second holder option is a stand. Not only an old table lamp is suitable for making it. The accessory can be made from chipboard and aluminum tube.
For this:
- a rectangle is cut out of chipboard;
- a hole is made in it equal to the diameter of the tube;
- the tube is wrapped with electrical tape and inserted into the hole;
- A clamp is attached to the end of the tube.
How to make an amplifier
The simplest unregulated preamplifier can be made using 2 capacitors and 1 BC547 transistor.
To assemble the circuit using the surface-mounting method, you need:
- connect the negative output of the electret capsule directly to the emitter of the transistor, and the negative output to the collector through 2 resistors of 1 kOhm each, connected in series;
- Solder a ceramic capacitor parallel to the positive and negative outputs of the capsule (capacitance is not important);
- parallel to the second resistor and the emitter of the transistor, solder a 47 mF electrolytic capacitor (the minus should be on the emitter);
- Wires leading to the output plug are soldered to the collector and emitter of the transistor.
If you couldn’t find BC547, no problem. It can be replaced by the domestically produced transistor KT3102, which is easier to find.
How to make soundproofing
If you plan to use the microphone to record voice, soundproofing will not hurt. It is made from special foam plates, which can be bought at a hardware store, and plywood.
For this:
- a rectangular box without 1 wall is made from plywood;
- The inside is covered with foam rubber plates.
During recording, the microphone is placed inside the box. A person is also located there. As a result, 80-90% of extraneous sounds do not make it onto the audio track.
If you don’t want to make a box, you can cover one of the corners of the room with foam rubber plates. Sound insulation will be somewhat worse.
Small details.
When testing the first pair of microphone capsules, it turned out that their frequency responses differed too much. In anticipation of market day, I even assembled a small stand for testing microphones without the use of soldering. I bought a few more capsules for $0.4 so that I had plenty to choose from. But the very first pair taken from this purchase turned out to be consistent in frequency response. I didn't experiment anymore.
January 21, 2012 (13:24) in Audio - Video, Budget photography, Do it yourself