Each of us had to weave wreaths from dandelions more than once in childhood, and also treat ourselves to jam. You can also feed them to animals or just take a photo in a beautiful clearing. It’s just a pity that we only see such beauty in the spring. But for many it is a favorite flower. And you can enjoy its flowering only once a year. And in order to remember its flowering and benefits, we recommend making it yourself. It won’t take much time, and the result will exceed all your expectations.
To do this, you and I will need yellow and green paper, scissors, glue, a ruler, and a toothpick. When all the materials are prepared, we get to work.
First, take a lemon leaf, cut it into pieces 30 cm long and approximately 1.5-2 cm wide. For one flower we will use four such pieces.
Then we put all the pieces together, and then we begin to cut very finely, without reaching a little to the edge.
The result should be as shown in the picture.
We do the same with green stripes. The width remains the same, and the length is 12-15 cm. They will serve as an edging.
For easy rolling, we will use a toothpick. Before the actual rolling process, grease one edge with hot glue.
We apply it to the paper and begin to wrap it. We also gradually apply hot glue.
During the folding process, we trim along the top so that the workpiece is even and looks beautiful. This is how we wind all four strips. If you want a smaller size, then use one or two strips less. At the end, we glue the green stripe using the same principle. We try to make it 2-3 mm higher than the previous one.
Everything should turn out like this.
Now use scissors to carefully cut off the toothpick. Let's start creating leaves. To do this, cut out triangles 5 cm wide.
Then carefully make teeth on each one. You cut it all out on three sides, and then just carefully tear them off. There is nothing wrong with them if they are different sizes.
When the leaves are ready, take the bud blank, turn it over, and glue it from the inside out using hot glue. We recommend gluing two leaves, although you can use more. Here everything is done at your discretion.
Then cut out a small circle from the felt and glue it on the back side. It should be of such a size that the defects can be sealed from the back. Press firmly so that everything is even and thoroughly glued. The result should look like in the picture.
Now gently fluff it up. For a natural look, glue a ladybug on top. If you did everything correctly, in the end you will have such beauty ready.
Then you can use it to create an elastic band, a hairpin, a hoop, or an original painting. A few minutes of work, and the result is a real masterpiece.
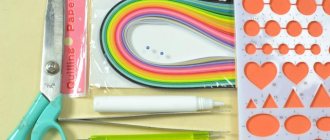
Mastering twisting
Flowering plants are the most popular theme in the quilling technique. Paper rolling allows you to create original compositions in volume and give the appearance as close as possible to the original. The level of complexity is based on the form in which it is intended to be presented: a figurine, a painting, a panel element. Some of them can be done even by children, but there are others that only an experienced master can handle.
This material will provide a lesson with a photo report; you will be able to create both independent elements and part of a paper bouquet.
Craft “Dandelion” from cotton swabs
For pupils of the senior group there is an application made from cotton swabs. To make it you need to take:
- cosmetic sticks, cut in half;
- sets of colored paper and cardboard;
- yellow gouache;
- white and yellow plasticine;
- stem and leaf templates;
- stationery - glue, scissors, pencil.
Step-by-step instructions for creating a Dandelion craft:
- To make a golden bud, children paint cotton wool on sticks with yellow gouache. Leave to dry.
- The second flower head will be white. Therefore, some sticks do not need to be painted.
- Next, the children make small white and yellow plasticine balls. Glue them to a cardboard base.
- Insert sticks of the corresponding color into the white and yellow balls. Dandelion buds are obtained.
- Cut out leaves and stems according to the template. Glue below the buds.
Preparation
It is better to create flowers of this kind from corrugated paper. They will be more voluminous and effective. You only need two segments. It is preferable that the latter be in several shades, but this is not essential. Think about what will become the core. It can be a twisted wire or wooden stick, even a straight branch. Ultimately, it will still need to be wrapped so that the contents are not visible.
Advice! Many beginners, barely noticing that to create a composition they need to make fringe by hand, in most cases abandon the product and give their preference to something else. Yes, this is a time-consuming and tedious process, but it is easy to simplify. It is enough to glue a strip of cardboard, half the width of the strip that is to be decorated, and the scissors will not grab the excess, and the fringe will turn out smooth and attractive.
A fabulous dandelion to decorate your yard using the simplest materials
No one will pass by such a dandelion indifferently! Any garden and local area will be magically transformed into Lewis Carroll's Looking Glass. The bright flower will remain elegant all year round. The materials from which it is made are easy to buy, and the manufacturing process does not require much effort.
Youtube | Family handmade
For the center-base of the flower you need a foam ball with a diameter of about 6 cm. It must be painted green with acrylic paint. This can be done conveniently by placing the ball on a wire or an awl. It will take 2-3 layers for the paint to adhere tightly.
Youtube | Family handmade
The “fluffs” for the flower are made from cocktail tubes. Depending on the color, white or blue, you will get a dandelion or a decorative onion. You will need 400-420 pieces of 3.5 cm each. Next, each piece on one side is cut to the middle into 8 parts. It is convenient to cut it first crosswise, and then into four more parts. Finally, spread and press the cut part to form an “umbrella”.
Youtube | Family handmade
The next step will require an awl, pliers and wire. It is best to use green floral wire with a thickness of 0.8 mm. It needs to be cut into pieces 20 cm long and in quantities equal to the number of plastic umbrellas. You need to make a hole in the bottom of each umbrella, insert the tip of the wire 2 cm into it and twist it. It is convenient to twist and press the tip using pliers.
Youtube | Family handmade
For the dandelion stem, you can use either a ready-made support for green flowers or plastic or metal-plastic pipes with a diameter of 2-3 cm, which will have to be painted. To secure the foam ball-base to the “stem”, you need to screw a self-tapping screw into the lid of the flower support, and make two holes in the plastic pipe at the end, pass a piece of wire through them, twisting its ends up. Next, the lid and self-tapping screw (wire) need to be coated with glue that does not corrode the foam, and the base ball must be installed. After the glue has dried (about 12 hours), you can further strengthen the junction of the ball and the stem using a heat gun.
Youtube | Family handmade
Now all that remains is to assemble the “cap” of the flower. To do this, the base of each “fluff” needs to be greased with glue and inserted into a foam ball. You need to deepen the wire by about 1 cm. Try to place the workpieces evenly, without crowding or bald spots, with an interval of approximately 4-5 mm.
Youtube | Family handmade
When installing a flower, for reliability, it is better to drive a piece of reinforcement into the ground and tighten the stem to it in several places with clamps or wire. Then your flower will withstand even a strong wind.
Youtube | Family handmade
For more details on the process of creating a dandelion, see the video below.
Volumetric paper applique “Tulip”: step-by-step master class with photos
Despite its simple shape, the tulip can be called a very attractive flower. It comes in many colors, including interesting multi-flowered varieties. But at the same time, there are common features of this flower that make it possible to repeat its creation. For example, a tulip can be easily made from paper, following the proposed master class.
To create such a simple tulip we prepared:
- green and red colored paper;
- base cardboard;
- glue;
- toothpick;
- scissors;
- hole puncher;
- pencil.
Almost any child can easily cope with this craft; its creation will not take much time, and the result will delight you. For the tulip itself, you first need to draw a blank on colored paper. It should be taken into account that in the future our flower will have to be folded, so it must be elongated. The dimensions of our flower are about 11 cm in height and 7 cm in width.
We cut out the blank for the paper tulip along the marked line.
Now you can start folding this blank. Starting from the bottom edge, make a fold approximately 2 cm wide.
After this, we continue to fold to the same width.
So we must fold the entire flower like an accordion.
Then we will use a hole punch. Using it, we make a hole in the middle of the folded tulip blank.
For now, let’s put our flower aside and work on the stem. To make it, cut a strip 21 cm long and about 4 cm wide from a sheet of green paper.
It needs to be twisted into a tight tube. To do this, it is better to use a toothpick and start twisting one of the corners of the green rectangle onto it. Upon completion of care, fix the edges of the finished tube with glue.
We insert this green stem into the resulting holes of the flower.
On the wrong side at the top of the tulip, the stem can be fixed with glue.
Let's add leaves to our craft. To do this, cut a strip of green paper, fold it in half, and then make another longitudinal fold. After this, draw the outline of half a leaf and cut it out. We got these 2 leaves.
Glue the leaves to the stem.
Our paper tulip is ready.
You can make a whole bouquet using paper of different colors.
Such a voluminous paper flower can be left as is or glued to a cardboard base.
Other ideas
The growing season of this plant is rich in various images that will not leave anyone indifferent. These flowers symbolize the warmth of the sun, and the white fluff of the seed “parachutes” symbolize lightness and freedom. Easily recognizable flowers are embodied as crafts in any of their states. They can be the center or part of a composition.
Bouquets made by a master cannot be distinguished from real ones.
Cutting templates
To make the work easier, it is recommended to use cutting stencils. They will help reduce time, as well as show your ingenuity and dexterity. Children can get a lot of ideas from looking at ready-made templates.
Stencils are primarily used for making appliques, but you can also create other crafts using them.
Paper dandelions will always find use in any family, especially those with a child. With their help, children develop, their imagination manifests itself, and their worldview expands.
Faded fluffy
White fluffy dandelions are no less entertaining in their creation.
For such a dandelion you will need the following materials and tools:
- baking paper;
- white napkin;
- thick copper-colored paper;
- light green thick paper;
- pin pin with a bead at the end for ease of use;
- Eyebrow Tweezers;
- iodine or brown paint;
- glue;
- scissors.
Related article: Frame for a bouquet of toys and wire: master class with video
Dandelion fluffs are made from white baking paper. The strip is 2.2 cm wide. A fringe with a depth of 0.5-0.7 cm is made on it. Small, 0.5 cm fragments are cut from the strip, which are twisted on a pin, and the fringe at the end is straightened with tweezers.
There is no need to use glue when twisting; your fingers can be moistened with plain water, and the parts will still hold their shape well.
The lower ends are dipped in iodine or paint to form the appearance of a grain.
We twist the dandelion head from a napkin, cut out the basket and stem from paper.
We collect all the details together into a dandelion.
