Most car enthusiasts believe that an oil filter puller is a useless tool that, if anyone should have it, only car service workers should have it. Drivers who have already encountered a problem when changing the engine oil themselves, when it is impossible to unscrew the filter manually, have already acquired a suitable puller. Selecting this tool is not so easy: there are many modifications offered on the market, but not all of them will be suitable for servicing a specific car model.
- 2 Design and method of use of the cup puller
- 3 Details about the universal “crab”
- 4 What do you need to know about other pullers?
- 5 Do-it-yourself belt puller - nothing could be easier
- 6 If the belt option does not justify itself, we make a chain one
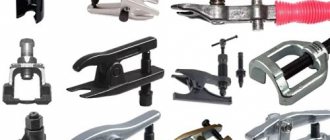
Types of industrially manufactured pullers
Depending on the design features and size of the filter, pullers of one type or another are used to unscrew it. Their body or base is usually made of steel and is protected with a matte or silver chrome finish. A number of products, if provided for by the design, have plastic linings on the handles, which greatly simplifies the work with such a tool.
Oil filter loosening tool
Almost all pullers allow you to unscrew both oil purifiers (hereinafter referred to as cleaners) and oil cups - filter casings with a replaceable insert. All pullers can first of all be divided into universal ones and those designed for unscrewing filters of only one diameter or type.
Among the first, the following main types are distinguished:
- crab;
- belt;
- chain;
- tape;
- sickle-shaped and tick-shaped;
- with 2 adjustable grips.
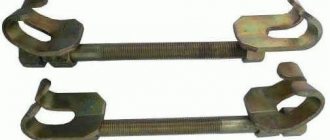
Puller with 2 adjustable jaws
Their versatility is relative - not every filter can be unscrewed with them. Firstly, because they are designed for a certain range of diameters of cleaners, and for some pullers it is quite wide, while for others it is not very wide, and secondly, because of their own design features and dimensions. After all, the location of the filter, as well as the accessibility of the filter, differs on different cars, and therefore it will be easy and simple to work with any tool in one engine compartment, but perhaps completely impossible in another.
Only one type of tool is classified as narrow-profile - cup oil filter pullers. They received this name for their appearance, reminiscent of the kitchen appliance of the same name.
Why change?
Beginners often don’t know why they need to change the filter and why they can’t leave the old one. The fact is that while the engine is running, it forms chips (wear), the working fluid burns, becomes dirty, and particles of debris and dust can get inside. All contaminants settle on the cleaning surface of the filter.
Its function can be compared to the work of the liver, because if it were not there, the service life of the engine would be 5 times less.
After about 10-15 thousand kilometers, the element is almost completely clogged with debris. Replacing the air filter is not so important, but the oil filter must be changed periodically.
If there is a problem with unscrewing, it is important to make sure that the driver is doing it in the right direction.
The filter element must be turned counterclockwise, like most nuts with standard threads. If you can’t unscrew it, you should use special methods.
Design and method of use of the cup puller
This type of puller is available for filters of all sizes, but each individual tool is designed to unscrew filters of only one diameter. Therefore, when buying a cup you need to be especially careful. This key should ideally match the filters installed on the car engine. Even a difference of a few millimeters will turn the cup into a useless accessory.
Auto repair shop owners immediately purchase entire sets of these pullers, including up to 30 wrenches for filters of various diameters. Such sets are supplied with a suitcase in which the cups are conveniently arranged by size numbers.
Set of cup wrenches for removing oil cleaners
The “cup” oil filter pullers have a square hole in their “bottom” for the tip of a socket wrench. Some manufacturers additionally make a hexagonal “bottom” - for a spanning tool. Many pullers, primarily their sets, are supplied with a tip for the “cup” hole, onto which the key is placed, and some are complete with all the necessary tools, including a socket and socket.
The “cup” puller is placed on the ribbed top of the filter with a wide open part, on the inner circumference of which there are edges. They must match in number and size with those available on the purifier. Otherwise, the puller will not fit tightly, and unscrewing the filter will be difficult or impossible. The “cup” is considered the most convenient tool. It itself is compact and, as a rule, it is easier to “crawl” into the filter. Moreover, a correctly selected “cup” never slips relative to the circumference of the filter housing, which sometimes happens with some other types of pullers.
How to unscrew the oil filter without a key
Having decided to change the oil in their car themselves, many car owners are faced with an unexpected obstacle - the oil filter does not want to be unscrewed by hand.
Everything is complicated by the round shape of the filter element housing, which is impossible to grasp properly. It’s good if there is a car store nearby that sells special pullers of different types (they are chain, screw, end, belt, etc.), but what if there is no way to purchase a key, but you desperately need to remove the filter?
In fact, everything is much simpler than it might seem at first glance: there are several simple ways to remove the oil filter without a key . We will talk about them in detail in this article.
Details about the universal “crab”
The “crab” puller consists of two plates, which are the body, and 3 grippers installed between them. There are notches on the working surface of the paws that prevent them from sliding over the surface of the filter. The grips are controlled by a clamping mechanism located in the middle of the crab body and between the rotary mounts of the legs.
The mechanism itself, like the puller as a whole, is activated by a special key supplied - this is one of the design types - or by an end or cap tool, for which a corresponding tip is provided, extending from the body. The scheme of working with the “crab” is identical to the process of unscrewing the filter with a “cup” puller. You must first attach it to the end of the cleaner. It is in this part of the work that the “crab” is fundamentally different from the cup, which makes it universal. In the initial position, its paws are spread apart and are able to cover the filter with the maximum diameter allowed for its design.
Universal “crab” for removing the filter element
After placing the grips on the smaller cleaner, the clamping mechanism is activated. In this case, the “crab” will be able to grab a filter whose diameter corresponds to the minimum allowable for the puller design. After the paws grab the cleaner, you must continue to work with the key placed on the drive of the clamping mechanism. This will unscrew the filter. Moreover, the stronger the applied force, the more reliable the grip of the “crab” paws will be - slippage is excluded.
Depending on the “crab” model, it can be used to remove and install filters with a diameter ranging from 60–125 mm. This puller, like the “cup”, is very good when working in narrow and confined spaces.
Method 3: Using a leather trouser belt
If you don't have an old timing belt at hand, a regular leather belt will do just fine.
- The principle is as follows: the belt is put on in a loop and tightened with force. In this case, the long end of the belt serves as a lever.
Do not forget that the oil filter is unscrewed counterclockwise.
The most important thing is that the filter housing is clean, otherwise the belt will slip. For better contact, the surface of the filter can be slightly sanded.
Method 4: Hammer + chisel.
- Everything is very simple here: a deep notch is made on the filter body on the thread side, then a chisel is inserted into it and the filter is torn off the thread with tangential hammer blows.
- Next, the filter element is unscrewed by hand. This method is rarely used, since the free space around the filter is limited and there is practically no room for such maneuvers.
VIDEO INSTRUCTIONS ” alt=””>
What do you need to know about other pullers?
The chain oil filter puller, depending on the design, allows you to unscrew and tighten filters with diameters ranging from 60–140 mm. It consists of a handle and a chain attached to it at one end, which serves as an adjustable grip. Most pullers are equipped with a single-row chain, but there are also models with a double-row chain. The second end of the grip, depending on the design, can be free or passed through a special groove located in the handle and having a lock.
During the first execution of the puller, before unscrewing the filter, the chain is tightly wound around its body, almost to the end. The remaining section of the grip is attached to the hook on the handle. After this, the puller rests on the filter and acts like a lever. The second version of the tool already has a loop made of chain, which has adjustable dimensions and is immediately thrown onto the filter. After this, pulling the end of the gripper passed through the groove, tighten the loop and press on the tool handle in the desired direction. At the same time, the groove lock securely holds the chain, preventing it from loosening its grip.
Grab with chain loop
Belt pullers have a working diameter range of 25–160 mm. They have a special belt that forms a loop to hold the filter. It can be fixed at both ends in a square steel rod. A belt is wound around it after the loop is thrown over the filter. Then a suitable key is placed on the rod and the cleaner is unscrewed. Another type of puller is similar in design and use to the second type of chain tool.
The operating range of belt filters is one of the narrowest - the difference between the minimum and maximum permissible filter diameters can reach only 30 mm. They use a strip of steel or plastic, fixed at both ends to the handle and forming a loop, the size of which can be slightly adjusted in some designs. After throwing the grip on, force is applied to the handle and it acts like a lever. The tightness of the filter coverage is achieved in some designs by a screw on the handle, and in others - due to natural tension when unscrewing. Most pullers of this type often fail to cope with filters that are too tight.
Belt filter part remover
The tools are sickle-shaped and pliers-shaped and have 2 working curved jaws with notches and 1 or 2 handles. Their working range of grip is also small; in some designs it is adjustable. Work with these pullers as with ordinary pliers - grab the filter, squeeze and unscrew.
A puller with 2 adjustable jaws consists of a thick narrow base plate, a screw and paws with notches on the working part. The threaded ends of the grippers are moved in the longitudinal slots of the base and secured in the desired position with a nut. When you tighten the screw passing along the thread of the hole in the center of the plate, after it is pressed tightly against the filter, the latter is unscrewed.
Reasons why the oil filter is not dismantled
To unscrew the old filter, you need to place the car on a pit or lift the car using a lifting device. Then you need to unscrew the old filter, but difficulties may arise here. If it does not come off, this may be due to its sticking. The motor becomes very hot during operation. Because of this, parts that are not very heat-resistant melt. Such components include a rubber gasket, which is included in the design of the oil filter. It can melt and stick to the engine, especially if oil gets on the gasket.
Problems arise when the filter is twisted too tightly. When changing the filter element, you need to tighten it well so that the rubber band is pressed tightly against the motor. In this case, the oil filter is often screwed on too tightly, especially when using a wrench. If you take into account the melting of the gasket, it becomes clear that unscrewing the filter will be enough.
It is important that the oil filter is not located in the most convenient place, therefore, it becomes impossible to exert maximum effort to unscrew it. In addition, when unscrewing, your hands get dirty with oil and slip.
Do-it-yourself belt puller - nothing could be easier
To make this key with your own hands, you will need a steel hexagon. Its standard size can be 19 or 17 - for the appropriate key, whichever is more convenient for you. We cut a piece approximately 150 mm long or another size from the hexagon rod. This must be determined by trying it on in the engine compartment of your own car, so that the puller made makes it as convenient as possible to unscrew the filter.
Then along the hexagon in the middle we make a cut with a grinder 55–60 mm long and 5–6 mm wide, which should pass through the opposite corners of the section and parallel to the side edges of the rod. After this, we process the workpiece with sandpaper - remove sharp edges and burrs. Taking an old but undamaged car seat belt, cut off a piece of it to the required length, depending on the diameter of the installed filter. The longer the belt section is, the more universal the puller will be, but it will also become less convenient to work with when unscrewing small cleaners. In general, a piece of 500–550 mm is sufficient.
Making a puller from a car seat belt
We insert the belt into the slot of the workpiece, align and center it. Then, on the hexagon opposite the belt, we make markings at equal distances from each other for drilling 3 holes. We remove the belt from the cut. We drill through holes with a diameter of 5.5 mm. After this, on one side we expand the holes to 6.5 mm. Drilling is carried out only up to the slot. In holes with a diameter of 5.5 mm, use a tap to cut an M6 thread.
We melt both ends of the belt with a lighter so that they do not unravel, and then we put them together and thread them into the cut of the hexagonal blank opposite the holes. The result is a loop. The ends of the belt opposite it should protrude from the slot by about 10 mm. We take a nail, or better yet, a steel rod 6 mm in diameter, heat it well and, pushing it alternately through 3 openings of the hexagon, burn holes in the tape with it. It is necessary to burn through, and not make holes, so that the belt in these places does not delaminate and does not fluff.
Steel rod for homemade tools
Carefully, so as not to displace the loop, place the future puller on the anvil and use a hammer to clamp the belt into the slot. Then screw 3 bolts into the hexagon holes. They must have M6 thread. The DIY oil filter belt puller is ready for use. The procedure for using this key is as follows. We put the loop on the filter, and then begin to wind the belt around the hexagon. To unscrew, this should be done counterclockwise. When the belt is completely wound, you need to take a key (17 or 19), throw it on the hexagon and unscrew the filter.
Materials:
The process of making a homemade product is shown in the photo.
From the profile pipe we saw off two identical sections 20 - 30 cm long.
We cut out two rectangular blanks 25 x 50 mm from sheet metal.
Then the cut metal rectangles need to be welded to one profile on both sides.
We clean the welding seams.
We drill holes in the plates.
We insert the second profile and drill a hole through it, the distance between the profiles should be approximately 4 mm.
We take out the profile and cut off the corner.
We fasten the pipe with a bolt and nut.
Insert the timing belt and tighten it.
The result is a universal wrench for unscrewing various parts; using the device is quite simple: put a belt on a nut, tighten the belt, clamp it and unscrew it.
Most car enthusiasts believe that an oil filter puller is a useless tool that, if anyone should have it, only car service workers should have it. Drivers who have already encountered a problem when changing the engine oil themselves, when it is impossible to unscrew the filter manually, have already acquired a suitable puller. Selecting this tool is not so easy: there are many modifications offered on the market, but not all of them will be suitable for servicing a specific car model.
Assembly technology
This process is not particularly difficult. First of all, you need to install a plug on one side of the coupling. You will get something resembling a very ordinary glass. For greater reliability, it is recommended to seal the plug with sealant - no one will remove it in the future.
We place a metal sponge on the bottom of the coupling, without completely filling the cylinder. We drill two holes in the top plug - the diameter is the same as that of the prepared pipes. We process their edges with silicone grease, and then install them in the holes so that when viewed from the inside, one of them is approximately 1 cm shorter than the second. The longer pipe will be used for inlet.
We seal the top cover with a rubber gasket. The assembly of the gas recovery device is complete.
If desired, you can paint the resulting unit and, after waiting for it to dry completely, proceed to installation.
Bicycle chain parts and necessary tools
Chain wear indicator
: A typical chain wear indicator hooks onto a pin in the chain while the other end is inserted between two pins or rollers. The numbers on the tool will show how worn the chain is and whether it is time to change it.
New chain
: The type of chain depends on the number of speeds of the bicycle. So, for example, if the bike is 9-speed, you need to buy a 9-speed chain. More advanced chains include a special coating that will delay the appearance of rust, or they are already made of stainless steel.
Replacing pins or connecting link
: New chains immediately come with a new pin or special link called a connecting link that connects the 2 ends of the chain together. If you are repairing an existing chain, you will need to buy replacement pins or connecting links separately - they must be compatible with the chain speed and brand.
Squeeze
: If you have a standard link chain, you will need a compatible puller that will allow you to easily remove the old pin and install the new one when disconnecting and joining the chain.
Pliers:
If you have a chain that connects to a connecting link, you will need pliers to make the process of disconnecting and connecting the connecting link easier.
Complete set of bicycle repair tools
An avid cyclist will not get by with a standard repair kit. It is necessary to add more tools to the kit, allowing you to completely repair any breakdowns yourself, as well as improve the quality of the bike. Additional tools include:
- extended set of keys;
- pullers;
- mounting blades;
- wire cutters;
- hydraulic set;
- strain gauge;
- caliber;
- stands.
Now in more detail about each element.
Additional keys
If your bike model has ball bearings, cone wrenches will be a must-have. They are needed for timely cleaning of bushings.
To remove the pedal, a specially shaped wrench is used. It is ideal for road bike models with little clearance between pedal and crank.
Flat and Phillips screwdrivers that are universal for various jobs are also useful.
Bicycle pullers
In order to remove the connecting rod, it is worth purchasing a square puller. Before buying a tool, make sure that the connecting rod is attached using the “square” system. Typically, higher-end bikes may have a different mount and not require a special puller.
Carriage pullers are used to remove the cups that secure the carriage to the bike. Depending on the bicycle model, you need to select a carriage puller with a different spline head diameter.
An important purchase will be a ratchet remover. This is a must-have tool, since disconnecting the ratchet using other methods is quite problematic. The tool is a splined head
The tool is a splined head.
There is also a special cassette remover. To make working with it easier, it is recommended to buy a special whip in the kit.
Wire cutters
Wire cutters are used to repair gear shift cables. Wire cutters have a special advantage over a knife or other tools in the set that can be used for this purpose. They can be used to gently cut through the cable without deforming it. The edges will not be fluffy and the cable will last for a long time.
Stands
In order to independently and easily repair bicycles, it is worth acquiring two stands. You need to take care of buying a rack on which you can put the bike
It will also be important to purchase a special small stand for wheels, which is convenient for straightening the spokes
Other replacement options
The men used a variety of available tools instead of the usual wrench.
Pliers
Simple and reliable - tested more than once. Using pliers incorrectly is simply impossible! Grab yourself tightly and twist!
adjustable wrench
Of course, if a master finds himself in such a situation, he may well have an adjustable wrench.
You will only need to adjust it so that the fastener being unscrewed is firmly grasped by the jaws of the key.
Files
Two files will do the job. Their canvases at one edge must be securely secured with wire, tape, a suitable ring, etc.
After this, the files are placed on both sides of the fastener. This is done so that the nut is approximately in the middle of the blades. Holding both handles of the file at the same time, they begin to unscrew.
Small vise
An option familiar to handicraft craftsmen who have small vices. The nut is secured in a vice and then unscrewed.
Calipers
Another alternative option is a caliper. They operate similarly to the options already described.
It is important not to forget about your own safety! If the caliper comes off the fastener, it can cause injury. Sometimes men risk performing the necessary action even with the help of large scissors
They clamp the nut with the handles of scissors
Sometimes men risk performing the necessary action even with the help of large scissors. They clamp the nut with the handles of scissors.
We do not think that this operation should be repeated. Especially if you do not have such experience and you do not feel confident in performing the procedure.
Wooden strip and nylon tape
Not the most traditional way, but why not try it if you don’t have anything more suitable at hand.
A nylon rope (at least 15 cm will be needed) is tied tightly in the middle of the wooden plank. The free edge of the nylon begins to be wound around the nut. Twist the rope until it ends. Now unscrew the bar. Together with it and the nylon, the fasteners will move from place.
Production equipment
Even high-performance equipment designed for producing vegetable oil in industrial conditions is small in size and, accordingly, does not require much space for installation. Modern models are often mini-complexes for the production of vegetable oil, equipped with various working modules, which significantly expands their functionality.
Screw oil press, designed for cold continuous extraction as part of a production line or as an independent device
Thus, a typical sunflower oil production line operates according to the following principle.
- The raw materials must be dried, cleaned of various contaminants, and foreign impurities are removed from them.
- In a special module, the seed kernels are separated from the husks and crushed.
- The crushed seed kernels are steamed, and if we are talking about hot pressing, they are also fried.
- The oil is squeezed out from the prepared mass.
- The oil obtained immediately after pressing goes through a filtration stage, which significantly increases its purity.
- After filtration, the finished oil is poured into containers and sent for storage.
Hot oil extraction line (click to enlarge)
In addition, modern lines for the production of vegetable oil from seeds necessarily contain modules where the finished product is refined and deodorized, which improves its quality characteristics.
And finally, a video with a presentation of a professional screw oil press used in serious production.
Equipment for the production of vegetable oil
The production of vegetable oil at home is limited by financial resources. This type of business is attractive for its flexibility of rapid development. You can start with a minimum set of production workshops, and then expand with additional equipment for the production of by-products. Thus, the range expands, and profits grow progressively. A full-fledged plant for the production of vegetable oil must be WASTE-FREE!
The minimum configuration of the line consists of the following equipment:
- Mini oil press. The power of such an oil press is 2 kW. per hour, 220 V. Capacity = 13 liters per hour. Press weight 45 kg. The average cost is $800.
Food filter. The oil must be cleaned using a special filter with a capacity of 0.5 m2. at one o'clock. Productivity = 5 liters per hour. Filter weight 100 kg. Cost 1100-1300 dollars.
By and large, these two components are already quite enough to produce and sell two products: good sunflower oil and meal. By the way, meal from oilseeds is widely used to feed animals and birds in agriculture. Therefore, it sells much faster than the main product. In addition, there is much more of it at the output of processed raw materials - 65%.
But if you plan to earn more, then you should think about expanding production. Additional technological equipment for the production of vegetable oils allows us to obtain several products from one oil mill at once:
- Sunflower oil, raw.
- Fried sunflower oil.
- Technical drying oil.
- Circles of the crown.
- Shrot.
- Biochar from fuz.
- Biofuel briquettes made from husks.
A creamery, even at home, can produce 7 types of products if the necessary equipment is available. It is worth paying attention to other advantages of business.
Storing vegetable oil in production does not require special conditions. A dry room, protected from sunlight, with an air temperature ranging from +5 to +15 degrees, can store unrefined products for 5 months.
You can use different raw materials to produce vegetable oils. For example, seeds: sunflower, soybean, flax, pumpkin and many other oilseeds. This advantage also has a positive effect on expanding the range and increasing sales. You can repurpose your business for other products without upgrading the line.
How to use a universal wrench and what it can do
The size of the grip of a homemade key can be selected by placing on the tail of the screw the chain link that provides the required size of the grip loop.
This is how the loop turned out to be quite large.
If you hook another link onto the tail of the screw, the loop can be smaller.
As for the possibilities, for our instrument they are almost limitless. For example, they can easily open a stubborn cap on a plastic bottle.
With our wrench you can completely easily rip off a completely round old nozzle that has rusted to the country faucet.
A universal wrench made in this way will allow you to unscrew a rusted bolt of any size.
Our tool is capable of unscrewing the seemingly tightly stuck head of an old faucet.
So, we see that a simply made universal wrench is almost omnipotent. Do you like this thing? Do you want to praise us for reminding you of the existence of a homemade product that has been known for a long time, or does this tool seem unnecessary to you and you want to scold us? Feel free to click here, write about your impressions, and your opinion will be immortalized on the Internet.
Dear visitors of the site “ Samade Friend ”, from the material presented you will learn how to make a universal key yourself from a bicycle chain, a bolt and three nuts with your own hands. Step-by-step photos of assembling the wrench are presented and so off we go... Many of you have probably encountered such a problem... when the edges on a nut or bolt being turned off are a little knocked off and a regular wrench simply turns without performing its function. This can be solved with the help of a homemade chain wrench that works in compression, that is, the stronger the handle of the key, the stronger the chain will be clamped and thereby unscrew even the most eaten nut or bolt.
Read also: Saw calm does not gain momentum
To make a universal key you will need a piece of a bicycle chain, two nuts and a bolt. We screw the nuts onto the bolt and weld a piece of chain to them so that we get a grip and weld it to the other side of the nuts. Next, we put the chain on the nut or bolt that needs to be unscrewed and tighten the bolt, thereby tensioning the chain, everything can be unscrewed)
Materials
Tools
Step-by-step instructions for assembling a universal key with your own hands.
And so, the necessary parts to assemble the key. Two nuts are screwed onto the bolt. We measure the chain, namely how much is needed from nut to nut. We make a mark in the place where the chain should be riveted. We clamp the chain in a vice and cut off the rivets using a grinder. We knock out the rivets. Next, the chain is welded first to one nut. Then it is tensioned and welded on the other side of the nut.
Making vegetable oil at home
A business idea for the production of sunflower oil is based on an oil mill.
From an investment perspective among professionals, the idea has not lost its popularity and is still in demand and profitable. However, for many, the issue of income in this area is quite controversial, which is in vain. Let's take a closer look so as not to rely on the opinions of the majority, but to base our own conclusions on specific numbers and facts.
In this business you won’t be satisfied with just butter. The profit from its sale is hardly enough to reach the cost level. But we must not forget about the additional products obtained from the creamery, which bring a significant net profit.
How to dismantle different types of chains
All instructions on how to remove a chain from a bicycle describe the same procedure. To perform this you will need a standard set of tools:
- wrench for unscrewing the rear wheel;
- pliers, necessary for holding the pin and segments;
- squeezer – a special device for pressing out pins.
Replacing a damaged, sagging, torn or jumping blade requires removing the chain. There are two ways to perform the procedure. The optimal option depends on the type of link fastening.
Rear wheel wrench
Pliers Squeeze
Without a lock with a squeeze
A squeeze tool, which consists of a metal base and a screw-on bolt, will help you perform the procedure correctly. Sometimes this tool is included with a set of hexagons. Experts recommend taking it with you on the road. The chain without a lock is removed in accordance with the instructions:
- First of all, one or more links are selected for opening;
- the cells are placed on the tool so that the pin is located directly in front of the release axis of the device;
- With careful movements, unscrew the screw and pull the axle towards you;
- The axle is put in place by clamping the links and returning the pin to its original position.
Removing a chain from a bicycle without a lock is quite difficult. If you push the pin all the way out, you won’t be able to insert it back on your own. The mechanism cannot be disassembled without special tools, so it is not popular among cycling enthusiasts.
With a lock
The locking leaf is connected by a special device that can be easily disassembled. To find the fastening, you need to carefully inspect the chain from all sides. The split link is usually stamped with the brand name. You can open it using a screwdriver, pliers, a key with notches or any other tool. The procedure consists of several stages:
- you need to find split links, select one of them;
- the cell is clamped with a suitable tool and careful movements are made to the side;
- The part is removed for repair or replacement.
When there is a breakdown on the road, you don’t always have special tools with you. In such a situation, you can remove the chain and lock from the bicycle using only your hands. The procedure is carried out according to the instructions:
the selected cell is clamped with the thumb and forefinger; shift the metal structure to the side (it is convenient to use ordinary thread for this); the thread is carefully hooked to the edge of the fabric in a pre-selected place, then pulled to the side, moving the mechanism; after this, the failed element on a bicycle without speeds is removed for repair or replacement; if replacement is intended, after removing the old one, the new element is carefully inserted into the common fabric.
If there is a chain with a lock, the bicycle can be repaired without squeezing. Emergency repairs are carried out to avoid the part slipping off or breaking. You can do this yourself without resorting to the help of specialists.
Device Description
By dehumidifier we mean a high quality filtration agent. It ensures optimal operating characteristics of the equipment, and also cleans the composition of the air environment that is released by the pneumatic system. Modern compressor models are often supplemented with a panel or oil filter, which thoroughly prepares the working mixture.
This is an important filtration stage for a pneumatic system that maintains oversized tools. Standard models of compressor dehumidifiers are more often used in automotive workshops, as well as on production lines where workers perform a large volume of paint and varnish operations.
As a result of thorough cleaning and reprocessing, the pneumatic system releases air that is free of moisture particles. Due to their properties, moisture separators are used for the proper operation and operation of sandblasting construction equipment.
