Share on social media networks:
Washing floors on all fours with a rag is not very comfortable or convenient. Especially if you remember that this is, after all, the twenty-first century. Of course, we are not talking about an automated scrubber dryer, but we should not neglect such an effective technical tool as a mop. The mop helps to clean the floor quickly enough without applying much effort. In the article we will talk about how to make a mop with your own hands so that it is simple and at the same time effective to use.
Wooden mop for cleaning floors
The simplest device for cleaning floors is an ordinary wooden stick with a crossbar. Making a mop with your own hands from wood is quite simple:
Read also: Back jammed in the lower back
- You need to take 2 wooden slats. Their length will vary depending on your height. The handle can have a size from 80 to 135 cm, try it on to make it comfortable for you. The standard working surface is about 30-40 cm long.
- Sand the surface thoroughly so that there is no risk of getting a splinter when cleaning the house.
- Fasten both parts with screws or nails.
However, it has a number of disadvantages. It is no coincidence that she received the name “lazy woman”. It can only be used to wash the floor in the middle of the room, and in the corners, in narrow passages, near the baseboards, the “lazy one”, alas, is useless. Industrial products equipped with a metal crossbar and a rag clip are no better. In addition, the crossbar in such products often scratches the floor.
A mop in its simplest form is a stick with a crossbar
Details
Washing the floor, climbing on all fours, and moving with a mop, does not suit a resident of the 21st century - the century of technological progress.
It's high time our designers invented a household scrubber dryer.
In the meantime, don’t neglect at least such a technical device as a mop. It allows you to work standing up without getting your knees dirty, without exerting much effort and moving much faster.
Its simplest version - a stick with a crossbar on which a rag is thrown - is popularly called "lazy" . And they call it right.
With this “mechanism” only the middle of the room can be somehow washed. The “lazy one” will not penetrate into corners, narrow walls, or baseboards - its wide crossbar does not allow it.
The mops produced by our industry with a metal bar and a rag clip are no better. In addition, the metal crossbar sometimes scratches the floor.
The most convenient mop is a rope mop, which looks like a huge paint brush. This brush easily penetrates into any place where your hand cannot reach.
Many countries produce such comfortable mops, and no one would think of cleaning the floor while climbing on all fours.
Rope mop - rope brush
You can try to make a similar mop yourself . Of course, this is just simple in words: - a rope brush.
But how do you actually secure a bunch of cotton strings firmly to the end of a stick?
- clip 1
- disc with slots 2
- and clamping bracket 3
A thick bundle of cotton ropes cut into 40-50 cm pieces is placed on the disk - the larger the better, and clamped with a bracket.
That's all..!
This rope mop lasts a very long time, just wash it every time after use in a bucket of soapy water and dry it upside down.
It will last even longer if, instead of ropes, you use old cotton knitwear cut into spiral strips.
There is an easier way to make a rope brush
It does not require metal work, and anyone can handle it.
For this we need:
- round stick,
- two nails or screws 2 - 3 cm long longer than the diameter of the stick,
- a skein of thick cotton rope or knitted strips,
- a piece of wire or strong twine,
- unnecessary rags and... a pair of old small socks.
First, two nails are driven crosswise into the end of the stick, at a distance of 4–5 cm, at a distance of 1–1.5 cm from each other (or screws are screwed in). To prevent the stick from cracking when driving nails, the tip of the nail must first be dulled by tapping it with a hammer.
Why is that? The fact is that a sharp nail pushes apart and separates layers of wood, forming cracks, while a dull nail simply crumbles it.
The heads and ends of nails and screws should protrude outward. They are needed to prevent the bundle of rope from slipping off the stick.
Pull an old sock over the nails and tightly wrap the end of the stick with rags so that the nails cannot be felt under them (Fig. 2, a). Put the second sock on top and tie it tightly (Fig. 2,b).
Simple mop with rag
Of the 7 survey participants, 2 people use the simplest option - wrapping a rag around a mop or floor brush. One friend was lucky to distribute household responsibilities in such a way that her husband got to wash the floors, and he has not yet complained about the not very convenient equipment. And another friend returned to this option because it seemed more reliable to her compared to others:
“I tried to wash the floors with a mop with a self-wringing sponge, but for me personally, this model turned out to be much more inconvenient than it was useful. I also had a very comfortable flat mop with a rectangular microfiber pad. I liked it, but for some reason it quickly broke down. I want to buy the same one, but I can’t get around to it yet. In general, if you pick up a good soft rag and cut a hole in the center of the cloth for putting it on the brush, then it will be quite convenient to wash the floors.” (Elena)
Nozzles
When you visit the hardware department of a supermarket, your eyes will widen. Here are mops for the home of various models and with a variety of attachments. For example, rope or microfiber, in the form of a sponge with a squeeze, while others are squeezed only by hand.
Wooden
Many housewives tried to use another mop, for example, with a sponge. But when it broke, we returned to the classic “grandmother’s” wooden one. It's cheap. You can use it for years. The housewife uses unnecessary cotton items for rags. With such a mop you can wash parquet and tiles, and even with any detergent, from powder to substances containing bleach.
Here the quality depends on whether the rag is suitable for cleaning the house or not. The best ones come from old bath towels or your husband's T-shirts. If you want to properly care for your laminate flooring in your living room, go to the hardware store at the supermarket and buy a microfiber cloth. It does not leave excess moisture on the surface of the laminate, which harms it, even if you wash it with powder. There will be no divorces.
Classic wooden mop
What are the disadvantages of this type of home tool? The fact is that it is not as maneuverable as modern types of mops. It can be difficult to clean under a closet or low sofa or bedside table. The rag can only be wrung out by hand, which many housewives have become tired of after years of wet cleaning. Because. Many people prefer rags with a spin cycle.
With sponge
In the supermarket you will immediately notice it, it is blue. Sold immediately with the roller installed. Over time, it can be replaced with another. There are soft and harder sponges. The sponge easily absorbs water. You quickly wring it out and rinse it under running water.
If you have a cat or dog in your apartment, this sponge is just for you. During shedding, she will easily collect animal hair. But it will leave soapy stains on the floor. In addition, such a mop cannot be inserted into a hard-to-reach place in the room.
Those who have used it say that the water in the sponge is not fully wrung out and it needs to be rinsed with plenty of running water. Before using, you need to soak it for 20 minutes and it will become soft. Those who claim that you need to leave it, for example, in water overnight, are mistaken. Especially in hot weather, there are a lot of germs and cleaning the floors will be questionable.
How to make a wooden mop
Wooden mop Wooden mops are very simple in their design (they consist of two parts) and functionality.
Place a rag on the base and you can get to work. This mop is used mainly for tiles or linoleum. Despite the fact that its cost is quite low, sometimes it is simply more convenient if you make a mop yourself. You will need to prepare the following tools in advance:
- a handle (handle) from any unnecessary garden tools;
- a board 4 cm wide, 2–3 cm thick and about 30–40 cm long;
- sandpaper;
- pencil or chalk for drawing;
- roulette;
- drill with drill bit;
- nails;
- hammer.
If you rely on the standard dimensions of wooden mops, then the handle size is 1.2 m, and the working base is 25 cm. Of course, if you make it yourself, the dimensions can vary based on your own preferences (it may be more comfortable with a longer base or due to your height with a larger handle).
When everything is prepared, you can get down to business. First of all, you will need to deal with the part on which the rag will be hung. Mark the center and, using a drill with a petal drill, drill a hole into which the handle will fit (accordingly, the diameter of the handle is equal to the diameter of the hole). Next, you need to take sandpaper and carefully sand the entire base.
Attention! The cutting most often does not require any work. But it may happen that its original length is longer than necessary, in which case it will need to be sawed off.
Once both parts are prepared, you can begin assembling the mop. The handle is inserted into the hole and then several nails are driven in at the joint to hold the structure in place. The mop is ready for use.
Rope mop
In appearance it resembles a giant paint brush. It easily penetrates into hard-to-reach corners that are difficult to reach with your hand. Such products are on sale, and many have appreciated their convenience. This is much more convenient than making a mop from wood yourself.
You can try to make a rope product yourself. The task is to secure a bundle of lengths of cotton rope to a stick.
Option 1
To bring such an idea to life, you can proceed as follows:
- If you have metal working skills, it is enough to complete three simple parts for the tip of the product:
- Disc with slots.
- Clip.
- Clamp clamp.
- Now cut the cotton rope into pieces of 40-60 cm. The bundle should be quite thick (the more rope pieces, the better).
- Place a bundle of rope on the disk and press it with a metal bracket.
- An even more high-quality and durable product will be obtained if you replace the rope part with old cotton knitwear, cut into strips in a spiral.
Important! This product will last for quite a long time. Caring for such a mop is quite simple: after each use, the ropes are washed in a soapy solution.
Option 2
There is an even easier way to make a mop with your own hands. You won't need any metal work, so almost anyone can handle this task.
- Round wooden stick.
- Screws or nails are 20mm longer than the diameter of the stick.
- Thick cotton rope or knitted strips.
- Twine or wire.
- A pair of old children's socks.
The work order is as follows:
- Stepping back 4-5 cm from the end of the stick, drive two nails crosswise at a distance of 1.0-1.5 cm from each other. The heads of the screws or nails should protrude outward. They are necessary so that the rope bundle does not slip off the stick.
Important! To prevent the wood from cracking, dull the nails or screws slightly by tapping the point with a hammer. A sharpened nail delaminates the wood, causing a crack to form. A nail or screw with a dull end will paint the wood without cracking.
- Pull the sock over the nails and wrap the rags around the end of the stick so that the nails cannot be felt.
- Place another sock on top and tie tightly.
- Cut the rope into 40-50 cm pieces and lay it out in an even layer on the floor.
- Place the prepared stick on top of the ropes so that the toe bandage is in the middle of the rope pieces.
- Tie the lengths of rope around the stick using a piece of twine or wire.
- Before finally tightening the knot, distribute the rope pieces evenly.
- By placing the stick vertically, you will see that a large brush has formed at the end. Trim the ends of the rope evenly.
- Fold the elastic band of the first sock down, placing it over the head of the brush.
- Tie the product with twine over the edge of the sock elastic.
The mop is ready to go!
A rope product will help keep your floors clean.
Important! A good alternative to a rag is a DIY mop head made from microfiber or crocheted from leftover yarn. The microfiber product allows for both wet and dry cleaning. When cleaning without using water or detergents, dust is removed due to the electrostatic effect.
Build process
Place the pieces together with right sides facing inward. Make a seam, retreating 1 cm from the edge. Do not forget to leave an unstitched area (10-15 cm), through which you can turn the product inside out.
Once you have finished sewing the pieces together, tie the knots. Trim off any excess threads. Carefully turn the product inside out and sew up the open area. Place the cover on the mop, overlapping the edges to see where the Velcro should be located. I pinned them in place and then machine stitched them.
And you have a ready-made mop case!
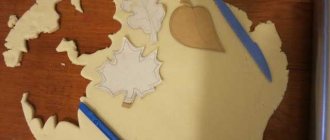
Making a pattern
Place the mop on the paper and trace the base around the perimeter, not forgetting about the allowances. I added about 1 cm.
On the rectangular pattern, mark a section of 7-8 cm - it will remain open. Outline the area with lines, and then extend them up and down beyond the rectangle to create an H-shaped pattern, as shown in the photo.
This H-shaped pattern will be your template for sewing the cover.
Mop with foam sponge
None of my friends use such devices: some tried and came to the conclusion that this option does not suit them - such designs are short-lived, it is inconvenient to wet and rinse a sponge in a simple bucket, and this mop does not collect dirt very well.
How to make a mop with your own hands?
Washing floors on all fours with a rag is not very comfortable or convenient. Especially if you remember that this is, after all, the twenty-first century. Of course, we are not talking about an automated scrubber dryer, but we should not neglect such an effective technical tool as a mop. The mop helps to clean the floor quickly enough without applying much effort. In the article we will talk about how to make a mop with your own hands so that it is simple and at the same time effective to use.
Folding bucket with two compartments
First, by searching for “Cinderella cleaning kit” (as it was written on my mother’s box), I found this device. After reading user reviews on the Internet, I decided that due to its folding design, it is still not very convenient to use. For example, how to move it from place to place when the bucket is filled with water? Fold and unfold every time? You can learn more about this set from the promotional video - perhaps I just couldn’t appreciate this model, but you will really like it:
How to choose a mop for the floor: choosing the most convenient one
The renovation is complete, the floors have been leveled and the finishing floor covering has been laid. The new material looks perfect, and your joy knows no bounds. However, after a couple of weeks, the new coating will be covered with dust and dirt, and stains from spilled tea, ketchup, and dirty shoes will remain on it. You cannot remove such dirt with a regular broom or vacuum cleaner, so you will have to wash the coating.
In this article we will tell you about choosing a mop for cleaning the floor.
Cleaning the floor with a mop
What materials are needed to make a mop?
Of course, this tutorial is about making a wooden mop.
A handle from a garden tool; a slate or board 25 mm thick and approximately 3-4 cm wide; sandpaper; pencil; tape measure; drill; drill bit; nails; hammer.
To connect the parts, and there will be two of them, you can use not only nails. You can also use a wooden dowel and much more, including glue. Decide for yourself what to do.
Of course, this tutorial is about making a wooden mop.
• a handle from a garden tool; • a slate or board 25 mm thick and approximately 3-4 cm wide; • sandpaper; • pencil; • tape measure; • drill; • drill bit; • nails; • hammer.
To connect the parts, and there will be two of them, you can use not only nails. You can also use a wooden dowel and much more, including glue. Decide for yourself what to do.
Now you are convinced that it is not at all necessary to shell out a certain amount of money every couple of months on a new mop or attachment for it. You are quite capable of making such a cleaning tool with your own hands, and you will be confident in its reliability, practicality and convenience.
• a handle from a garden tool; • a slate or board 25 mm thick and approximately 3-4 cm wide; • sandpaper; • pencil; • tape measure; • drill; • drill bit; • nails; • hammer.
Using a mop with a homemade attachment
I like to mop my floors with a little white vinegar and citrus essential oils added to the water. This creates a natural floor cleaner. This keeps my laminate flooring clean and the room smelling nice. Once your removable attachment gets dirty, simply throw it in the wash on a normal cycle and then air dry. And once the case becomes too worn or dirty to use, recycle it.
Found a violation? Report content
Oval bucket with two compartments
All these kits differ from each other in the presence or absence of an automatic rinsing . For example, my mother’s kit does not have this function, and in order to rinse the mop, you need to lower it into the free part of the bucket and swirl it thoroughly in the water. But some models with a manual rotation mechanism are additionally equipped with an automatic rinsing function. It is implemented in the form of a special stand at the bottom of the bucket, on which the mop is placed and quickly washed by lightly pressing the handle, causing it to rapidly rotate in the water.
Source
Flat mop with microfiber pad
Many people like this option, it is convenient and effective to use: the design is flat and easily moves in all directions, with its help you can wash the floor in the most inaccessible corners, and the fluffy microfiber nozzle perfectly collects all the dirt. In addition to my friend Elena, who plans to buy such a mop again, 3 more survey participants constantly use this option.
“After a regular mop and rag, it’s like heaven and earth! The nozzles are comfortable, they collect all the dirt perfectly and glide easily across the floor, so you don’t have to put in much physical effort. Buying a new nozzle is not a problem - they are available in any supermarket. I really like this mop - I think it’s the best option!” (Inna)
How to knit a mop head
Synthetic yarn is suitable for sweeping the floor and collecting dust. Since friction will generate static electricity, which will retain dust, fur and hairs.
To wash the floor, choose yarn made from natural threads that will absorb water well.
To knit a nozzle, you can use yarn obtained from unraveling unnecessary items. This way you will give a second life to old clothes.
We will crochet the nozzle on a fillet mesh. Here are the knitting patterns and symbols for knitting a mop mop.
- The size of the mesh must be larger than the size of the mop platform so that the mop can be secured.
- In the sample I showed how to knit with this pattern.
- First, a fillet mesh of the required size is knitted.
- Then, row by row, voluminous rows are knitted on the grid.
After finishing knitting, I tied the edges with a thin elastic band so that the head would stay on the mop.
This is how the nozzle collects dust and debris.
After practical use, I additionally sewed on an elastic band so that the nozzle would not move when sweeping.
I knitted more mops from a different yarn.
You can also tie a mop head this way.
And here are photos of various attachments that housewives knitted for themselves.
Source: https://domovenokk.ru/uborka-i-chistka/nasadka-na-shvabru-svoimi-rukami
Cutting
You must cut out two pieces in the shape of the letter H - one from cotton, the other from a terry towel. Try to work carefully so that the parts match completely.
A broken nail is no problem: tips for treating nails at home
Only on a soft spot: Russian Domostroy forbade punishing children in any other way
From athletes to Hollywood stars: men Naomi Campbell
Kinds
Mops with microfiber attachments
The market is overflowing with cleaning tools. The following types of mops are popular now:
- rag;
- with sponge attachment;
- butterflies;
- with microfiber;
- rope;
- flat;
- steam.
It is important to know! At home, the easiest way is to make a rag wooden mop or a rope mop.
Tags
make a mop with your own Wooden mop for make a mop make a mop with your own or nails. only nails. driving in nails non-pointed nails pre-ends of nails and pull on top of nails Rope mop making a rope brush Rope mop making a rope mop Rope mop Such a rope mop making a rope brush make a rope bundle Rope mop Rope mop
rope wringer rope screw end fabric bucket brush bundle water cotton one socks important give special twine kits