Penguins, snowmen, snowflakes, clouds with snow, landscapes and Santa Claus are waiting for you. How to make winter crafts for kindergarten?
If you choose the most relevant winter images, then your work will be much more interesting, and winter will seem not such a harsh and boring time of year.
Winter crafts for kindergarten
It’s good if you have the opportunity to share the results of your work with children and teachers in kindergarten - for example, by presenting them at a thematic exhibition. Usually, a child really wants to take any crafts, including winter ones, to kindergarten: with his own hands he managed to create something new and interesting, and he expects that the fruits of his creativity will arouse interest among other children and teachers.
You can also devote a themed activity in kindergarten to creating winter images. It will be more expedient for him to choose crafts that can subsequently form a single composition.
Winter craft “mittens” for kindergarten
The simplest version of the “mitten” craft is applique. We cut the mitten according to the child’s hand. We decorate it with buttons and cotton wool trim.
Mitten applique
The mitten applique can be made from felt. If you attach a thread to it, then we will get an original Christmas tree decoration.
Felt mitten applique
In the form of a mitten, you get a very beautiful winter card. May everyone have happiness this winter!
Winter card in the form of a mitten
Santa Claus's magic mitten can be made from salt dough. Detailed master class on video:
Be sure to add a warm hat to your winter mittens set.
Winter hat with cotton wool applique
You can decorate it with cotton balls, pompoms or stickers with your favorite characters.
Hat and gloves made of paper and cotton balls
LED Christmas crafts
The design of the luminous figure is a steel body wrapped in an LED garland. The use of LEDs ensures its energy efficiency and safe installation in a residential area.
There are two types of luminous figures:
- volumetric - installed on a special base and away from furniture. They are made in the form of fairy-tale characters, animals, sleighs, trees, etc. There are no restrictions on shape and size, it all depends on the imagination and wishes of the master;
- flat - performed on a flat surface or the facade of a building, most often they become pictures from New Year's fairy tales, the personification of children's fantasies.
Selecting a figure
What kind of LED craft to make for the New Year with your own hands? It's up to you to decide. In your work, we recommend using the advice of experienced designers:
- Hanging luminous figures are the easiest to make and are inexpensive, but they can give your home a spectacular look. These can be balls shimmering in different colors, stars, snowflakes, icicles, falling garlands, etc.;
- To decorate your local area, you can use luminous trees , which are made in several ways: a garland covers a living growing plant or a metal frame. If desired, the garlands can be configured so that they are lit alternately, or the trees near the house can be “painted” in different colors;
- It is recommended to supplement the composition with light inscriptions laid out with duralight garlands.
Winter craft “cloud with snow”
As an option for decorating a window, an unusual winter pendant is suitable: for example, in the form of a snow cloud and large falling snowflakes. Both the cloud and the snowflakes are made from cotton balls: by pinching off pieces of cotton wool, we compact them tightly into a fist until the fist is full. Having opened it, we get neat cotton balls. We glue some of it onto the cardboard outline of the cloud, and string some of it on a thread. We fasten the threads with snowflakes on the cloud - you're done!
Cloud of cotton balls
Openwork snowflakes made of white paper look original on pendants.
Cloud with openwork snowflakes
The pendant can also be placed on the wall in a suitable place - for example, in a corner where a future exhibition of winter exhibits is being prepared.
Craft cloud with snow
Look at the video on how to make a fabulous “winter window” craft:
Panel made of threads and small nails
Even a schoolchild can make such a panel, because no special knowledge or skills are required for this. You just need to create a sketch or print a ready-made one on a printer.
Having a picture with a New Year's motif on hand, it is worth preparing the base - a cut of a wide tree or a board that has been cleaned, polished to a shine, coated with varnish or acrylic paint. Sometimes it is covered with cloth.
Tools required for work:
- small nails, their number is selected depending on the complexity and size of the panel;
- hammer;
- multi-colored threads;
- fabric when used as the main background;
- thin-nose pliers for holding nails;
- scissors.
Stages of work:
- The layout is placed on the base, the outline of the drawing should not go beyond its limits. Nails are driven along the line to ½ length. To avoid hitting your fingers with a hammer, you need to use thin-nose pliers when working.
- The remaining nails are driven in in increments of 5–10 mm until the outline of the pattern is completely filled.
- The paper with the layout is removed - torn off at the edges.
- The center of the picture is filled with threads. To do this, one end is tied to the cap, then the thread is randomly wound around the remaining studs with movements along the contour, then to the opposite caps. This is done until all the light spots between the threads are smoothed out. The panel for the holiday is ready, it is decorated with colored scales, beads, etc.
Advice! By diluting acrylic varnish with glitter and carefully covering the canvas with threads with the mixture, you can get an elegant design with small lights flickering in different colors.
Performing a contour drawing, a complex pattern
Contour drawings also look unusual - when the thread fills only the background, and the center of the panel is left empty.
To make it yourself you will need similar materials. In the obligatory case, a wooden frame is made, small nails are hammered along the outline of the substrate, and then along the border of the selected pattern.
The thread is attached to the nails located along the edges and stretched to the caps that form the border of the design. The result is a beautiful, unique pattern.
A New Year's wall panel can be made without a layout. To do this, take a dark base and a bright thread. The nails are attached only along the edge of the backing, the thread is pulled to the opposite edge, carefully wrapped around the head, returned and attached to the nearest nail. This must be continued until all the space inside is hidden. The result is an original, spiral-shaped figure. Using the technique described above, complex designs with a three-dimensional effect are created.
Select a pattern
Without much experience, it is better to select a simple and small sketch of a multifaceted or round shape for the panel. Having mastered the technique, you can move on to making more complex paintings, where the threads are arranged according to a certain pattern.
From the outside, such crafts look luxurious; they can become an exquisite decoration of any modern interior. Using multi-colored threads in the work and placing them at different heights, it is possible to obtain a 3D effect, externally similar to a tapestry.
As a New Year's plot you can use:
- Christmas tree;
- Santa Claus;
- asterisk;
- snowflake;
- bells;
- fairy-tale characters or animals, etc.
Beautiful panels made of threads
Tips from experienced craftsmen
- When you use small nails in your work, the hammer must be of the appropriate size.
- The foam backing must be covered with glue or acrylic varnish - this will prevent the balls from crumbling.
- If you are making a large panel on the wall, then you first need to make the main silhouette from threads - this will greatly facilitate further work.
- It is better to use beads, rhinestones, broken Christmas tree decorations, etc. as small decorative elements.
Winter craft “snowman”
The most popular winter exhibit will, of course, be the snowman. It can be created from a variety of materials. For example, by filling half a transparent plastic bottle with cotton balls, we get the head of a snowman. Let's glue on toy eyes, a felt triangular carrot nose, draw out the contours of the mouth with black circles and coals - and now the face is ready. Let's put a hat made of a warm white sock and a felt scarf on his head - and our snowman is ready to take a place at the exhibition.
Craft a snowman from a transparent jar
Snowmen made from cardboard toilet paper rolls are suitable as table souvenirs. Let's paint them white, glue on buttons, toy eyes and small felt noses - carrots, tie scarves from braid - and now the snowmen take on a characteristic appearance. The highlight for them will be hats - headphones made of fluffy pompoms and pieces of chenille (fluffy) wire.
Snowmen made from toilet rolls
Snowmen made from cardboard rolls look very interesting.
Snowmen made from cardboard rolls
With a few popcorn cups and disposable plastic spoons, you can make a whole family of snowmen.
Snowmen made from disposable spoons
You can make snowmen in a more traditional way - for example, in the form of appliqué. A beautiful applique can be made from ordinary cotton pads.
Snowman applique made from cotton pads
Use cotton balls and pieces of felt for your work - and the applique will turn out original and interesting.
Craft a snowman from cotton wool
The applique can be supplemented with glue snowflakes.
Snowman applique made of cotton wool
A snowman in a winter forest can be made from natural materials, as well as cotton pads and sequins.
“Snowman” applique made of cotton pads and natural materials
You can make a beautiful three-dimensional snowman from cotton wool and transparent cells for the testicles. Cut three sections from the transparent testicle tray. We make two such blanks. Glue them together, filling the gap between them with cotton wool. Glue on the hat, scarf, buttons and stick handles. We will get a very original winter decoration.
Snowman made of cotton wool and trays
Watch the video on how to make a luxurious snowman from cotton wool:
If you still have unpaired white socks, make a snowman out of them. We stuff the sock with rice and tie it at the top. We tie the sock in the middle part and close the elastic band with a scarf ribbon. We make a hat for a snowman from a blue sock.
Winter craft snowman from a sock
The adorable snowman is based on foam balls. It is covered with a thin layer of wool on top.
We cover the foam blank with wool
We attach handles to the snowman, glue on a nose, eyes, a scarf, buttons and a hat.
Snowman made of wool
A snowman can be made from colored paper and disposable plates.
Snowman made of colored paper and disposable plates
A charming Christmas tree decoration “snowman” is made from an ordinary light bulb. We paint the light bulb, glue twig handles and a ribbon bow onto it.
Light bulb snowman
You can make a snowman from plasticine.
Snowman made of plasticine
Beads
This is a beautiful, exquisite decorative material. Many beautiful compositions are made from it, including wall panels. As an example, we’ll tell you what New Year’s decorations you can make with beads on your own.
Christmas tree ball
You will need: white, dark green, burgundy beads, wire, multi-colored rain.
The work is performed in the following sequence:
- Prepare four pieces of wire of the same length.
- Connect 2 segments in the center to make 4 rays.
- The remaining pieces of wire are added to the structure.
- The pearls are strung one at a time, leaving the ends of the wire free.
- When all the beads are used up, the ends are joined and twisted.
- The workpiece is formed into a round shape and hung on a spruce tree.
The decoration is ready. Before starting work, we recommend that you watch the video:
DIY. DIY beaded Christmas ball.
Dog paw
Prepare black and beige beads, thick paper, felt, pencil, fishing line, needle, sharp scissors.
Master Class:
- The sketch of a dog's paw is pre-printed and transferred to soft fabric.
- A thin fishing line is threaded into a needle and the end is tied into a knot.
- The needle is threaded so that it comes out on the outer outline of the design and is strung on beige beads.
- The pearl is caught with a stitch, the needle goes back and is threaded one more time.
- In this way, the 1st row of the pattern (the outline of the foot) is performed.
- The 2nd row is stitched with black beads in a similar way.
- The outline of the outer finger is made with beige pearls, and the inside is filled with black ones.
- Excess felt is cut off with scissors.
- The foot is glued to thick paper and carefully cut out along the contour.
- Both sides are covered with felt, the edges of each stitch are decorated with beige pearls.
A dog's paw can be used to decorate a Christmas tree, New Year's costume, etc. Choose the appropriate pattern, color, foot shape, bead color and create unique New Year's masterpieces.
Christmas decorations . Beading. Bell made of 8mm and 3mm stone
Christmas tree ball made of beads and thin wire
For work, prepare: an inflatable rubber ball, multi-colored pearls, wire, beads.
Master Class:
- Inflate the balloon to the desired size.
- On a wire about a meter long, string beads and seed beads one by one.
- Randomly wrap the ball with wire.
- Make a small loop for hanging from a wall or ceiling chandelier.
- Pierce and remove the ball.
The New Year's decoration is ready. To make your own, we recommend watching the video:
DIY: Beaded Angel for Beginners
Beaded snowflakes
New Year is celebrated with snow. Snowflakes are an integral attribute of the holiday. They enchant with their regular shape and unusual beauty, filling the room with a magical atmosphere.
Anyone can make such a holiday decoration. Stick to the plan, we have no doubt, everything will work out for you.
Snowflake From Beads! We are preparing for the new year!
Salt dough snowman (video):
A real winter picture of a “family of snowmen” comes from white gloves. We cut out the fingers from the gloves and glue them to the main background - we will get little snowmen. We decorate snowmen with ribbons - scarves. Glue on the eyes and noses.
Painting "snowmen" made from gloves
You can make very beautiful snowmen from plastic bottles to decorate the kindergarten premises. These snowmen-lamp are illuminated using a garland.
Snowmen lanterns
And my favorite thing is that you can simply draw a cute snowman with a gift. The drawing was made with pencil and paints.
Snowman - drawing
Winter sports crafts. Pieces of cotton wool can be used to lay out the base for any craft - for example, an impromptu skating rink. Add a couple of paper Christmas trees and a paper figure skater girl to it - and you’ll get a complete winter composition.
Craft nature in winter
A very natural skating rink can be made from foil and cotton wool.
DIY skating rink
Paper and wooden popsicle sticks make adorable ice skates.
Craft “skates”
Application “Rowan with first snow”. The last autumn leaves are made using the technique of drawing and appliqué. The twig is real, and the rowan is made from lumps of crumpled paper. The light first snow is made of cotton wool. The craft emanates the romance of the first light snow.
Application “Rowan with first snow”
How to make a beautiful panel?
The most organic way to decorate the French village style is using the decoupage technique. It is used to decorate dishes and vases, create wall panels, and restore old furniture carefully collected in Provence interiors.
Making panels with your own hands using the decoupage technique is inexpensive and easy. All you need is patience, accuracy, as well as tools and materials:
- Fibreboard, cut to the shape of a panel;
- napkins or rice paper with a suitable pattern;
- eggshell;
- primer;
- acrylic paints;
- decoupage glue or PVA;
- brushes, sponge, file.
When everything is prepared, you can start working
Napkins are a very thin material, so each action is carried out slowly, with extreme caution.
A primer is applied to the base (fibreboard) and allowed to dry. Then they lay out a thin layer of broken eggshells (peeled from the film), creating a crackle effect (pattern of cracks). This technique makes the panel voluminous and creates the appearance of an antique product, which is important for the Provence style. After the glue has dried, the surface with the eggshell is primed and allowed to dry again. The rice paper with the pattern is placed face down on the file and the back side is carefully moistened with water with a brush. The drawing is placed on the prepared background, with the back side facing the primed surface, leveled and the file carefully removed, and allowed to dry. You can use acrylic paint to refine the contours of the design, but this is not necessary. Completely dried work is covered with decoupage glue or acrylic varnish.
Winter craft "penguin"
No less popular than the snowman, another winter character is the penguin. A penguin can be made from egg cartons.
Cardboard penguin
A cute soft penguin can be made using the applique technique using paper and cotton wool.
Winter applique "penguin"
An adorable little penguin can be made from a painted walnut.
Walnut penguin
From a paper plate you can make a craft in the form of a sports cap with a pompom. We cut off half of the plate, decorate it with snowflakes and other suitable ornaments, and form a pompom from cotton balls - ready!
Craft winter hat
Idea 5. Snow globe... or rather a jar
Now we propose to make a real souvenir with your own hands - a variation of a snow globe. True, it will be made from an ordinary glass jar. The child can give the craft to a loved one, present it at a winter crafts competition, or simply leave it on the shelf for beauty.
What you need:
- Glass jar with lid;
- A piece of foam;
- Glue (hot or “Moment”);
- Acrylic paint for decorating the lid (optional);
- Artificial snow or just sea salt, sugar, finely grated white soap or polyethylene foam;
- Figurines that will be placed in a jar;
- Foam balls or any white beads;
- Fishing line;
- Needle.
How to do it:
Step 1: Repaint the lid the desired color and leave to dry. In this project, spray paint was used to remake the lid.
Step 2. While the paint is drying, let's make a “snowfall”. To do this, you need to string several foam balls onto a fishing line threaded into a needle. Use tape to attach the snowflakes to the jar.
Step 3. Trace the bottom of the jar directly onto the foam, then use a knife to cut the resulting circle out of it. This circle will become the basis for the figures.
Step 4. Glue your figures to the foam circle, then glue the resulting composition to the bottom of the jar.
Step 5. Pour artificial or homemade snow into the jar, close it with a lid with snowflakes and enjoy the view of a winter fairy tale.
Winter craft “Polar Bear”
The polar bear is another popular winter craft character. You can make a charming “polar bear” pendant from felt.
Felt polar bear
An original way to make a polar bear is to make it from pompoms.
White bear made from pompoms
Skilled needlewomen can sew a beautiful polar bear. How to do this, watch the video:
Making your own panels on the wall: preparation
To figure out how to make a wallpaper panel on a wall, you should start by preparing the wall surface and the necessary materials. First you need to level the surface of the wall, peel off the old wallpaper and remove traces of dampness and defects.
The next step is to select pieces of wallpaper of different patterns, where the main criterion is their uniformity and harmonious combination. Here are some nuances to consider:
- for the center of the composition, it is better to take a large drawing with perspective, for example, an image of the sea, a natural landscape or flying birds;
- The wallpaper panel in the bedroom interior should contain a calm, peaceful image (park, sea, etc.)
- if the interior of the room is planned in a classical style, then it is better to choose an image similar to frescoes, paintings or engravings.
Winter crafts from pine cones
An interesting winter craft - a skier made from a pine cone. To make it, we will need a pine cone painted white, pieces of felt from which we will make mittens, a scarf and a hat, as well as a felt ball (can be replaced with foam, wood or made of any other material).
Snowman made of pine cones, felt and felt
Wool, felt and pine cones make an excellent polar owl.
Owl made of pine cones, wool and felt
A glued cardboard cone becomes a good basis for a winter beauty - a Christmas tree.
Christmas tree made of pine cones
A very bright, cozy craft - a New Year's basket made of pine cones.
New Year's basket of pine cones
Panel for children's room
Figures made from pieces of wallpaper will look great in the interior of a baby’s room. This will help you decorate the room in an original way with animal figures, colorful balls, letters or numbers, and plants.
This option resembles an applique, but its fragments should be selected according to color and harmonious combination. You can use fairy-tale characters or images from movies and cartoons.
Some recommendations for choosing fragments and material:
- in a children's room it is better to use washable wallpaper so as not to waste time erasing “children's works”;
- It is better to make the choice of drawings together with the child;
- do not use easily torn fragments or decorative elements;
- It is better to place the drawings in such a place that the baby cannot reach them.
DIY winter Christmas tree craft
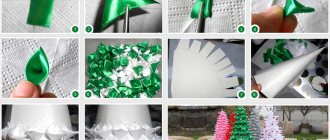
A very beautiful Christmas tree is made from foamiran. To make such a Christmas tree, cut the foamiran into strips and make cuts along one edge. We heat the strips on the iron - they will bend slightly. We glue the curved strips onto the cardboard cone using a glue gun.
Christmas tree made of foamiran
The Christmas tree can be made from ribbons or organza. The result will be a very impressive winter craft.
Winter tree made of organza
You can sew a charming winter Christmas tree from felt.
Winter felt Christmas tree
A white and fluffy Christmas tree can be made from cotton pads.
Christmas tree made of cotton pads
DIY fabric Christmas tree. We make a Christmas tree from thin strips of fabric on a paper cone.
Christmas tree made of fabric
You can glue green pasta onto a cardboard cone. We decorate the ends with sparkles and glue on bells and ribbon bows. We will get a very original New Year tree.
Christmas tree made from pasta
A very beautiful winter souvenir is a topiary herringbone. This craft is based on foam plastic, which we wrap in foil and pierce with copper wire. Wrap the cone in yarn and decorate with beads. We glue two strips of double-sided tape to the cone - it will fix the threads.
Winter craft “herringbone topiary”
You can make a postcard with a Christmas tree from strips of foamiran.
Volumetric New Year card with Christmas tree
Paper woven panel
It’s easy to make such a paper composition; from the outside it looks luxurious and interesting. To do this, two New Year-themed images are selected so that one provides a general background, the other is more graphic (black and white) or contrasting.
Materials and tools required for work:
- steel ruler;
- pencil;
- sharp knife, scissors;
- cutting pad;
- PVA glue;
- images of the same size that you want to print with margins.
Making wall crafts is done in stages:
- The pictures are lined into strips about 10 mm wide, one horizontally, the other vertically. To avoid confusion, they should be numbered with a pencil and cut along the lines with scissors. In this case, you need to leave a small indentation from the edges, the result should be a “fringe”.
- Weaving is done by alternately placing one strip on top of another, the ends are bent, cut, and connected with glue. The panel is decorated with a baguette or photo frame.
Winter crafts snowflakes
Very interesting snowflakes are made from thin strips of plasticine.
Plasticine snowflake
A very beautiful and delicate snowflake can be made using a glue gun. We will need a snowflake pattern on paper on which we will apply hot glue. When the glue hardens, we will paint the snowflake white and sprinkle it with glitter.
Hot glue snowflake
A very beautiful New Year's snowflake can be glued from pasta. The snowflake is painted white and sprinkled with semolina.
Winter craft snowflake made from pasta
A delicate winter craft of amazing beauty is a ballerina snowflake. We cut out an ordinary snowflake from paper and put it on the paper silhouette of a ballerina. We tie a thread to the ballerina's handle and hang an elegant winter decoration on a chandelier, Christmas tree or window.
Winter decoration snowflake ballerina
Look at the video on how to make a garland of ballerina snowflakes:
A beautiful snowflake can also be made from felt and tulle. Detailed master class in the article “snowflake-ballerina“.
Winter snowflake made of felt and tulle
You can make a luxurious large snowflake out of paper. A detailed master class in the article “Volume snowflake made of paper“.
Volumetric paper snowflake
Watch the video on how to make a 3D paper snowflake:
Using another technique, we can make three-dimensional 3D snowflakes:
Volumetric 3D snowflake
And here is a blue snowflake-star, using a similar technique.
Blue volumetric snowflake
You can also watch the technique of making snowflakes in the video:
This snowflake is made from cut up paper towel rolls. Inside there are curled colored strips of paper.
Snowflake made from strips of paper and cardboard rolls
Branches
Festive decorations for the New Year and Christmas can also be made from twigs of various sizes, decorating them with dried leaves, chestnuts, dry moss, dried fruits, twine, silk ribbon, and paper.
So, we prepare pruners (scissors), glue, thread with a needle and a wide brush and get down to creative work.
Wicker panel
Let's start by decorating the front door. The lattice is made of branches, cut 40 centimeters each.
The rods are connected with yarn or bast. The structure is randomly wrapped with wire, thereby achieving the visual effect of a “wicker plane”.
Branches of juniper or cypress are placed inside, berries, ribbon bows, sweets in bright wrappers, etc. are glued onto them.
Wreath
The hallway will greet long-awaited guests with a wicker Christmas wreath. It is made from flexible twigs of birch or grapevine, decorated with dry moss and decorative paper, carefully attached to the wall, after which Christmas tree branches are attached to it with wire.
The craft is decorated with bright satin bows, balls, figures of angels, and spray-painted with gold and silver paint.
Light, airy mobiles over the New Year's table
Making them is not difficult. To do this, several thin birch branches are connected with a satin ribbon, gilded cord or beads. Animal figures, fairy-tale birds, multi-colored feathers, and openwork glass garlands are attached to the structure.
Such an airy craft can be given an external resemblance to a bell, a bird's nest, a cloud, or a chandelier.
DIY foamiran snowflake
Light, delicate and beautiful snowflake made of foamiran.
DIY foamiran snowflake
Foamiran and fluffy balls make an interesting Christmas tree toy.
Christmas tree toy made of foamiran
If you want to bring a little magic to your room, then ordinary paper snowflakes make a lovely New Year's pattern for the window.
Window pattern made of paper snowflakes
Another craft that will surely come in handy in winter is a Christmas angel. Such an angel can be easily made from an openwork napkin or just beautiful white paper. We make the head from a bead.
Christmas angel made of napkin and beads
Look at the video on how to make a beautiful angel out of paper:
Twigs in the snow
Twigs in the snow are a great idea for a winter-themed craft. This craft is suitable both for exhibition at school and as home decor. To create this craft plan with your own hands, you only need to prepare polystyrene foam, PVA glue and tree branches, maybe bushes.
First you need to disassemble the foam into grains. Trim the branches so that they are the same length; do not take too large ones. Dip the twig in glue, so that about 5-8 cm are unaffected, and then in grains of polystyrene foam. After drying, you can place the branches in the snow in a vase.
Winter craft “Bullfinch”
One of the most favorite winter crafts is the bullfinch bird. The bullfinch stays with us during the harsh winter and inspires us with its bright plumage. The easiest way to make a beautiful bullfinch is using the applique technique.
Winter applique "Bullfinch"
The bullfinch applique for kindergarten and primary school will allow you to master the skills of cutting, appliqué and drawing.
Application "Bullfinch"
A very impressive winter craft “Bullfinch” can be made from colored yarn.
Winter craft “Bullfinch made of threads”
And here is another application with winter birds. The details cut out from newspaper add a special charm to this craft.
Application “wintering birds”
Crafts for elementary school students
Children, as a rule, do winter crafts for school for a craft lesson or for a school exhibition. Naturally, there is a desire to make the most beautiful and unusual craft. Schoolchildren are already using many more techniques and different materials to create children's crafts on the theme of winter.
Popular ideas for winter crafts for school:
- voluminous snowflakes;
- volumetric applications;
- DIY Christmas tree decorations;
- winter compositions from scrap materials;
- making themed figures: Christmas tree, snowman from disposable glasses;
- New Year's masks using the papa-mâché technique.
Winter houses and cities
You can make a very effective composition on the theme of winter. All elements of the composition are mounted on a cardboard base. The house is made from milk cartons. Figures made of papier-mâché and cotton wool.
Composition “Winter's Tale”
Look at the video on how to make a beautiful winter house from a plastic bottle:
You can make a magical New Year's star from a plastic bottle.
Star made from a plastic bottle and tinsel
The top of a plastic bottle makes a lovely New Year's bell.
New Year's bell from a bottle
Magic New Year's stars can be made from jute, which are wrapped around a cardboard base. Next, the craft is decorated with snowflakes, beads, bows or small New Year’s compositions.
New Year's decorations made of jute
See how to make another version of the jute star decoration:
Hair decorations using the kanzashi technique
The Japanese traditional hair decoration kanzashi has been known since the 17th century. Kanzashi are made from varnished wood, precious metals, turtle shells, and silk. Creating real kanzashi is a labor-intensive, jewelry work that only professionals can do.
Many mothers, while on maternity leave, create kanzashi-style hair jewelry
In amateur handicrafts, kanzashi refers to the creation of hairpins decorated with fabric flowers.
There are only two elements in kanzashi - a narrow petal and a round petal. Petals can be voluminous or flat. Both are rolled from a square blank and glued together.
Experienced craftswomen advise melting the prepared squares immediately on a candle or with a lighter. Or immediately cut the parts with a soldering iron or wood burning device.
Santa Claus - winter crafts with a magical grandfather
One of the most beloved winter characters is Grandfather Frost. The easiest way to make a magical grandfather is to make him out of accordion-folded paper.
Santa Claus made of paper
Using different sized pieces of paper you can glue together a multilayer winter card. Nice pictures and surprises will be glued inside each spread.
Winter multi-layer card
Idea 6. New Year card
There are never enough New Year cards, so we suggest making a few together with your child.
What you need:
- A sheet of white paper;
- A sheet of colored paper;
- Scissors;
- Glue stick;
- Markers.
How to do it:
Step 1. Fold a sheet of white accordion paper three times so that each top accordion layer is smaller in width than the previous one.
Step 2. Straighten your accordion, cut the sheet diagonally and slightly in waves as shown in the photo above, then assemble the accordion again. You have the slope of a snow-covered mountain.
Step 3. Now take a sheet of colored paper, glue the blank onto it and cut off the excess. Hooray! The postcard is almost ready.
Step 4. Decorate the mountain with Christmas trees, draw snowmen and skiers and finally sign the card.
Using the same principle, but using larger paper, you can make a winter craft for kindergarten.
In order to make a winter panel with your own hands for a kindergarten, you will need to use a hardboard backing removed from the frame. A white fabric, preferably thick, should be glued onto the backing, which will become a kind of canvas for the picture.
The formation of the panel with your own hands is carried out from the background in order to gradually build up the motif and ultimately create an original winter panel for the kindergarten. You need to remove strands from ribbons prepared in advance and cover the background of the sky with them. This way, you can mix the paints manually and make a smooth transition.
- Initially, a background with snowdrifts is laid out, and it is important to pay attention to the thickness of the cotton wool, which will primarily affect the appearance of the canvas.
- It will not be possible to lay out a strand of cotton wool in long fibers and therefore they need to be cut into small pieces, in particular for the fence.
- Using tweezers, you can tear the wool into neat scraps and form them into a house, smoke on a chimney, and even some small silhouettes of people in the distance.
- It is worth remembering that the design of the panel must be done in a certain winter style, which means that snow must be present on every part of the picture.
- In order for the roof on the house not to merge with the overall picture, it is worth adding dry paint or the most ordinary gouache to the fluff, but only so that the fluff retains its fluffiness.
- It is fashionable to use colored wool to decorate doors and windows on a house, which will add originality to it.
- You should use your fingers to twist the wool of a darker type, then place a tree trunk next to the house and use green wool to decorate the leaves.
- If you apply maximum imagination and creativity, you will be able to make a tedico panel for kindergartens that will be so original that not only the child but also the child’s teachers will be surprised. Namely, using tweezers and bright yarn, you should lay out various plantings in the form of Christmas trees around the house, and depending on the scale of the canvas, you can add decorations to the Christmas trees to create an interesting New Year’s motif. The trees must also be immersed in snow, otherwise you won’t get a real winter picture.
- Naturally, the moon should be present in the winter night sky, bright and beautiful, which can be done by twisting yellow wool.
- The moon ring is laid out on the background and filled with white wool. And in the foreground in front of the moon you need to plant a snow-covered tree, which slightly covers the moon. It is much better to make a large-scale product so that you have room to roam around when completing it.
- If you start finely cutting the wool above the picture, you will be able to make artificial snowfall.
After this, the picture, without turning over, is placed under the glass and you need to remove any remaining wool that may stick out on the sides so as not to spoil the view. Such a landscape would be an excellent option for giving it as a gift for a kindergarten anniversary or simply decorating a panel in a kindergarten with a winter theme.
Winter drawings for kindergarten
The most popular winter design is snowflakes.
Winter snowflake pattern
How to draw some beautiful snowflakes, see our article “snowflake drawing“.
Snowflakes with pencil and paints
Drawings using unusual techniques are the perfect idea for winter crafts. For example, children really like to draw pictures with white crayons and then show the contours with watercolors. This way you can create winter landscapes or characters - for example, snowmen. Winter landscapes made in chalk and developed in watercolor turn out to be very beautiful.
Winter landscape with chalks
A lovely snowflake design is obtained using the technique of spraying paint onto a stencil.
Snowflake drawing using spraying technique
Gouache drawing - New Year's snowman friends look very festive and fun. This picture, simple at first glance, reflects the most important New Year and winter attributes: a decorated Christmas tree, bullfinches, a magical Christmas night and, of course, two snowman friends.
Gouache drawing “Winter snowmen”
And this magical snowman in a ball is made in watercolor.
Drawing “Snowman in a ball”
Another gentle drawing of a snowman in watercolor. A snowman stands in the middle of a winter snowfall with a broom.
Watercolor drawing “Snowman with a broom”
And here is another winter drawing of a snowman. This drawing was made in pencil, then painted with delicate watercolors.
Drawing “Snowman with a broom and a gift”
Surely many people will want to draw the magical beauty of winter!
Drawing "Winter"
We draw snowfall with splashes.
Winter drawing
A handsome bullfinch can be drawn on a winter landscape or postcard.
Drawing "Bullfinch"
We carefully draw all the details of the bird and rowan berries.
Rowan berries in a winter drawing
The most relevant winter drawing will be the fairy-tale wizard - Santa Claus. A detailed master class in the article “Drawing of Santa Claus“.
Winter drawing of Santa Claus
And this wonderful, kind Santa Claus was painted in gouache.
Gouache drawing “Santa Claus”
By implementing several of the listed ideas, it’s easy to turn any room into a real winter kingdom.
Night winter landscape
If you have coped with the previous works, then drawing this winter landscape for 8-year-old children will not be difficult. We will work with gouache, since with this paint it is easy to smooth out color transitions and you can correct any flaws that may arise.
Let's start the creative process:
- We take purple gouache and paint over the top of the sheet. Add a little black and paint over the top of the first layer. We continue to paint the background with dark blue paint. Right under the blue color, add another layer of purple and make a smooth transition of shades.
- Paint the bottom of the sheet with a light blue tint. Using black gouache we draw the silhouette of the first Christmas tree. Starting from the top, the Christmas tree expands and becomes larger. On both sides of the first tree we draw another Christmas tree in a similar way.
- The bottom of the tree is tinted with purple paint. Using the same color we show the shadows coming from the trees in the snow. We wash the brush, add white and draw a circle in the sky, this will be the moon. We add more white and draw a snowball on the trees.
- Add another layer to clarify the snow on the Christmas trees. We draw stars in the sky and put many dots of different sizes. We add dots and shadows on the snow.
The picture is ready. You will spend a little time on the work, but as a result you will get a beautiful drawing.
You can draw a squirrel under the trees.
Crafts with the symbol of 2022 Tiger
One of the most popular crafts in 2022 is a jute tiger.
Winter craft Tiger made of jute
Another simple and very relevant winter decoration for 2022 is a tiger on a ball of solidified mass.
Tiger on the ball
You can cut a tiger cub in a mitten from foamiran.
Tiger cub in a mitten
