11/12/2017 Pet supplies Share
We bring to your attention DIY cat toys. They will help your cat spend a couple of hours a day playing. True, if you don’t like noise, then place them where it won’t disturb you. Homemade toys from scrap materials are a good opportunity to please and entertain your kitten or seals.
Top ideas
Toys can be simple to make, such as balls or pencils on strings, or complex. For example, you can create an interactive toy with your own hands that will not only allow your cat to enjoy outdoor games, but also develop its intellectual abilities.
A variety of soft toys, rattles and mazes will also delight the playful hunter, brightening up her leisure time. In addition, the pet needs to relax somewhere, because it can start playing with your hands. Making them is not at all difficult; any kind of improvised materials will do.
Soft
Many pussies love soft toys for the reason that they can be easily grabbed by releasing their claws when playing. Cats especially like to cling to a toy by catching it, because this is what imitates their hunting in the wild. Let's consider several options for creating soft toys with your own hands. By the way, a soft house with your own hands is an excellent and simple solution.
How to sew a mouse (with a pattern)?
To create a mouse, you will need a special template, according to which you need to cut a pattern from the fabric. If you choose fabric of different textures and colors, it will be much more interesting for the animal.
- Tail. Cut out a bunch of fabric measuring 2.5 x 10 cm. Or use a simple piece of lace.
- Ears. Cut a small piece of fabric into a triangular shape, then pin the side corners together.
- Corpuscle. We sew two pieces of fabric from the templates along the edge, stuffing cotton wool or synthetic padding inside. Any soft filler will do. Sew up the rest of the template.
- Completion. When all the parts are ready, all that remains is to assemble the toy by sewing on the necessary parts. For the eyes, you can use regular beads and glue them in place. Tie the ponytail with a knot at the end for beauty. The mouse toy is ready!
Puppet toy
An easy to make but interesting puppet toy is another entertainment option for your pet. To make it you will need a regular toy with filling, a stick and glue.
If the toy is ready, then it is enough to slightly cut the edge of the toy, insert a stick there, and securely glue the ends of the material to the stick. It is important that the filler does not come out of the toy. At the same time, its excess, if any, should be removed.
Pompom for a kitten
This entertainment option is ideal for kittens of any age.
To make a pompom you will need: fabric, string, scissors. Take two small pieces of fabric of different colors. Cut them into strips of equal size. Gather them into a bun and fold them several times. Tie tightly with a string in the middle and secure with a knot. Spread the strips in different directions. Tie a long string or strip of fabric to the finished product to play with the kitten.
Scented toy
A fragrant toy is another fun option for your pet. The special aroma of catnip will attract her to the product. Consumables:
- Textile
- Scissors
- Needle and thread
- Cat mint
- Packet scraps
The toy can have absolutely any shape, for example in the form of a cube, a mouse or a fish. Sew a pattern from the desired template. Place some rustling material inside, such as torn pieces of bags.
Place catnip inside and sew up the finished product. It is important that the cutting area is not visible; it is best to use internal stitches, otherwise the animal will tear the toy apart in search of a tasty smell.
It should be noted that fragrances for cats are a separate topic. Properly used scents can help teach your cat to go to the toilet where it is supposed to - more details here.
Rattles
In nature, cats rely heavily on sound.
That is why creating a rattle toy will be a good fun option for your pet. You will need any small plastic container. Beads and other sound-producing objects, tape or glue, lid. Place bells and other small parts inside a clean plastic container. If there are labels on it, they should be removed. The surface of the toy must be smooth and clean.
Cover the top with a lid or other object and glue tightly or wrap with tape. You can paint the item in a bright color so that it attracts the animal's attention. The rattle is ready!
Interactive toys: what are they?
Interactive toys for pets have become especially popular recently. They represent a kind of puzzle that the cat must solve in order to receive a treat. They look different, in the form of all possible labyrinths or traps, tubes or boxes with holes.
Their only task is to force the cat to solve the problem in a logical way. This is presented in the form of a fun game. Since cats are inquisitive and inquisitive animals, they happily take on a new task. You can buy such a toy at a pet store or make it yourself using your imagination.
Labyrinth - a homemade simple option
One of the popular types of interactive toys is a labyrinth. To create it you will need all the available tools that can serve as an obstacle for the cat, as well as tape to connect them together.
It is most convenient to use pieces of plywood and planks, large cardboard boxes. A treat hidden in an egg container, a plastic cup or other small container is suitable as bait.
From pipes
If you still have plumbing pipes after repairs, then there is no need to throw them away; they will be an ideal solution for creating an interactive toy for your pet.
To create, you will need four plastic pipe bends and a drill with a special attachment. By closing the pieces of pipes, you will get a closed circle. Using a drill, you need to make small holes where only the cat's paw can fit. Launch a rolling ringing object, a ball, into the maze. The edges of the pipe holes must be processed so that the cat does not get hurt when sticking its paw through.
Openwork beauty
If you want to update your interior and surprise your household. Make a new shade for your table lamp. You will need:
- cotton threads;
- PVA glue;
- scissors;
- balloon.
To get started, inflate a balloon of a size suitable for the lampshade. Coat the surface of the ball with glue. Wrap the ball with thread in all directions. Try not to have any gaps. Apply glue again and leave the workpiece to dry.
Carefully make a hole to insert the cartridge. Don’t forget that regular light bulbs get very hot, so use energy-saving ones for this type of lampshade.
This technique can be used not only for lamps, use this technique when making baskets. To make an openwork basket, wrap the ball not completely, but halfway, and also let the product dry.
Popular articles Booties “Marshmallows”
A vase made of threads will look unusual in the interior. Wrap the vase with threads, let the glue dry and carefully cut in the middle. Take out the vase and glue the blank. And now the new piece of furniture is ready.
The threads left over from embroidery can be turned into beautiful flowers. The principle of making flowers is similar to making a lampshade.
Make a blank for the bud from half a Kinder Surprise box. Wind the threads around the workpiece and let the glue dry. Remove the future flower and use scissors to make petals. If you glue wire onto the petals, the bud will have a more natural look.
Pass the wire through the bud and secure. Wrap the future stem with green thread. Assemble a flower arrangement of flowers of different shapes and colors.
Flowers made of wire and thread
This product will require concentrated and time-consuming work. But your efforts will be rewarded with excellent results.
For work, prepare soft wire, floss and decorations.
The creation of flowers occurs in several stages:
- Let's start by preparing the petals themselves. Wind the wire tightly onto a thin knitting needle, you should get a spiral. Take out the spiral and connect the ends to each other by twisting them tightly. Wrap the threads around the spiral, passing the threads through the turns. Try to wind the threads tightly without gaps. When the petal is ready, pass the thread through the center, thereby forming the vein of the petal. To form a flower you will need 5-7 petals.
- Twist them together and decorate with a bead. You will get a very delicate flower that will delight you and will not wither for a long time.
With imagination and patience, you can make wonderful crafts from leftover threads and yarn. After all, these crafts do not require large material costs, and the materials can be found in every home. Involve your household in creativity and this will be a great opportunity to do something together.
Simple options
Sometimes there are no available materials nearby to create complex entertainment for the amusement of a cat. What to do then? The simplest, most common materials that can be found in any home are suitable for creating toys. Making simple toys does not require much time or expense, but it brings a lot of joy.
Corks, balls, balls, made of fabric
For playful cats, any objects that roll and attract the attention of predators are suitable.
Ordinary corks, small ping pong balls, and various balls, both ringing and soft, may be useful. And of course, a ball of thread is one of the most fun things for a cat. In this case, the end of the ball must be tightly secured so that it does not roll out throughout the house. Fun fun will keep your pet busy for a long time.
From paper, bags
Plain paper can serve as a toy for your cat. You just need to crumple it up and tie it with a string, crushing it in the middle. The cat will be happy to chase a new toy. Large paper bags are also a favorite place for pet ponytails. If you throw some toy into them, then the pussy's delight will know no bounds. We recommend learning how you can make a paper house - here.
Paper cat
The ancient Chinese art of origami is still popular today. Its essence is to create real works of art from paper without using glue. In the video you can see examples of making cat crafts using plain paper.
For beginners and children, it won’t be too difficult to make a cat’s face out of paper - making it in full size is somewhat difficult, you can get confused. But a cute cat’s face can become a decoration for a postcard or just a pleasant surprise for parents.
- We take colored paper of any size, square shape. It's easy to make from a simple rectangular sheet by bending it diagonally and cutting off the excess strip. Bend the resulting square with the colored side facing out to form a triangle.
- Fold the resulting triangle in half and straighten it to create a vertical fold line.
- Place the triangle in front of you so that one vertex is at the top. Bend it in such a way as to “connect” the two lower vertices with the upper one - you should get a small rhombus. Bend it back into a triangle to maintain the fold line.
- Bend the “triangles” obtained from the last step so that both vertices are outside the edges of the main triangle. In appearance it should look like a tulip, but in fact, these are the ears of our future cat. Bend the third, middle, peak towards you so as to make the head of an animal. You can even apply a little glue to make everything stick better.
- Turn your workpiece over. The cat’s face is ready - all that’s left is to decorate it: draw the eyes and mouth, glue on the antennae, etc.
Safety
When you get carried away with the game, you can easily forget about safety. When creating toys, it is important to remember that if there is active contact with the part, the cat can get hurt, so there should not be any sharp corners or objects, and the stuffing should not stick out from the toy.
Also, the toy cannot be coated with chemically active compounds, since the animal is likely to put it in its mouth and try to chew it. All threads and seams must be created in such a way that the cat cannot tear them.
With some toys it is better not to leave the pet alone, using only group games with the owner from which the pussy will be delighted.
Chicken - a simple diagram with a description for beginners
Use hook No. 2, yarn of yellow, orange, blue, lilac colors.
To crochet toys, you must follow the description and diagrams.
Head (yellow threads):
- 1st row – amigurumi ring of 6 loops;
- 2nd row - 6 inc (12);
- 3rd row - (1 sc, inc) * 6 (18);
- 4 row - (2 sc, inc) * 6 (24);
- 5th row - (3 sc, inc) * 6 (30);
- Row 6 - (4 sc, inc) * 6 (36);
- Row 7 - (5 sc, inc) * 6 (42);
- 8-13 row - 42 sc;
- Row 14 - 7 sbn, (1 sbn, inc)*3, 15 sbn, (1 sbn, inc)*3, 8 sbn (48);
- 15 row - 7 sbn, (2 sbn, inc) * 3, 15 sbn, (2 sbn, inc) * 3, 8 sbn (54);
- 16-18 row - 54 sc;
- Then there will be a decrease, so between the 14th and 15th rows sew on the button eyes;
- Row 19 - (7 sc, dec) * 6 (48);
- 20 row - (6 sc, dec) * 6 (42);
- 21 row - (5 sc, dec) * 6 (36);
- 22 row - (4 sc, dec) * 6 (30);
- 23 row - (3 sc, dec) * 6 (24);
- 24 row - (2 sc, dec) * 6 (18);
- 25 row - (2 sc, dec) * 6 (12);
- Row 26 - 6 dec (6).
Stuff the body with holofiber and tighten the thread.
Beak - orange thread:
- 1st row - 5 sc in amigurumi ring;
- 2nd row - (1 sc, inc)*2, 1 sc (7);
- 3rd row - 7 sc;
- 4 row - (2 sbn, inc) * 2, 1 sbn (9).
Sew the beak between 16 and 20 rows, filling as you sew. Embroider eyebrows and eyelashes with black thread. Next, depending on your imagination, make a forelock and tint your cheeks.
Body – yellow thread:
- Fill with holofiber as you knit.
- 1st row - 6 sc in amigurumi ring;
- 2nd row - 6 inc (12);
- 3rd row - (1 sc, inc) * 6 (18);
- 4 row - (2 sc, inc) * 6 (24);
- 5th row - (3 sc, inc) * 6 (30);
- Row 6 - (4 sc, inc) * 6 (36);
- Row 7 - (5 sc, inc) * 6 (42);
- 8 row - (6 sc, inc) * 6 (48);
- Row 9 - (7 sc, inc) * 6 (54);
- 10 row - (8 sc, inc) * 6 (60);
- 11-18 row - 60 sc:
- Row 19 - (8 sc, dec) * 6 (54)
- 20-21 row - 54 sc;
- 22 row - (7 sc, dec) * 6 (48)
- 23-24 row - 48 sc;
- 25 row - (6 sc, dec) * 6 (42);
- 26 row - (5 sc, dec) * 6 (36);
- 27 row - (4 sc, dec) * 6 (30);
- 28 row - (3 sc, dec) * 6 (24);
- 29 row - (2 sc, dec) * 6 (18);
- 30 row - 18 sc.
Leave the thread and sew the head to the body.
Tail:
- Yellow threads, does not fill
- 1st row - 4 sc in amigurumi ring;
- 2nd row - 4 inc (8);
- 3rd row - 8 sc;
- 4th row - (1 sc, inc) * 4 (12);
- 5 row - 12 sc;
- 6th row - (2 sc, inc) * 4 (16);
Fold and connect sc. Sew to the body at the level of the 8th row.
Wings – yellow thread, do not fill:
- 1st row - 6 sc in amigurumi ring;
- 2nd row - 6 inc (12);
- 3rd row - 12 sc;
- 4 row - (1 sc, inc) * 6 (18);
- 5-16 row - 18 sc.
- Fold and connect sc. Knit two parts. Sew at the level of the 24th row.
Legs – orange thread:
- Feet. Fill as you knit.
- 1st row - 6 sc in k.a.;
- 2-4 row - 6 sc.
- Cut the thread. Knit three parts. It turned out to be fingers.
- To connect, knit 2 sc on the first finger, knit the 3rd stitch of the first finger and the 1st stitch of the second finger together with a single crochet (i.e. we make a decrease), 1 sc, 3rd stitch of the second finger and 1st stitch knit the third finger together, 4 sc, knit the 6th stitch of the third finger and the 4th stitch of the second finger together, 1 sc, knit the 6th stitch of the second finger and the 4th stitch of the third finger together, 2 sc. You will get 14 columns.
- 6th row - (5 sc, dec)*2 (12);
- Row 7 - (2 sc, dec)*3 (9);
- Row 8 - (1 sc, dec)*3 (6).
- Close the hole and hide the thread. Knit two parts.
Next, knit the leg itself:
- 1st row - 6 sc in k.a.;
- Row 2 - (1 sc, inc)*3 (9);
- 3-14 row - 9 sc.
Fold and connect the edges of the sc. We knit two parts. Sew the foot to the leg. Use the edge that was connected to the sc to sew the legs to the body.
Easter egg - blue yarn:
- 1st row - 6 sc in k.a.;
- 2nd row - 6 inc (12);
- 3rd row - (1 sc, inc) * 6 (18);
- 4 row - (2 sc, inc) * 6 (24);
- 5th row - (3 sc, inc) * 6 (30);
- Row 6 - (4 sc, inc) * 6 (36);
- Row 7 - (5 sc, inc) * 6 (42);
- 8-16 row - 42 sc;
- 17th row - (5 sc, dec) * 6 (36);
- 18 row - 36 sc;
- 19 row - (4 sc, dec) * 6 (30);
- 20 row - 30 sc;
- 21 row - (3 sc, dec) * 6 (24);
- 22 row - 24 sc;
- 23 row - (2 sc, dec) * 6 (18);
- 24 row - (2 sc, dec) * 6 (12);
- Row 25 - 6 dec (6).
Popular articles Clawed monster
Close the hole and hide the thread. Cut the tape and glue it to the testicle. Tie a flower. Sew a bead to the flower and glue it to the egg.
Pipe
So, what kind of design is this? This cat toy is a type of educational toy; it is a closed tube with holes the size of tennis balls. There are several of the same balls inside. The cat enjoys playing with them, rolling them around and trying to catch them out of the pipe.
Making a toy
You need four plastic sewer pipes, more precisely, pipe corners with a diameter of about 20 cm, as well as a flexible plastic tube (cambric type) to secure the cut holes and improve them.
Wrap two or three turns of electrical tape around the narrower edge of the pipe. Cut two holes in each corner. We connect the pipes, tightly fitting each other into a single structure.
On the cambric we make a cut lengthwise and tighten each hole, we get holes that are safe for the cat, into which you can climb with your paw and play.
You can also put crumpled paper candy wrappers into the toy; tailed pets play with them with pleasure. True, you will have to collect garbage around the apartment more often. Such a toy for a cat can be bought ready-made in a store, but its cost will be more than 10 times more expensive than one made by yourself.
Homemade cat toy. Cheap and easy homemade cat toy
Scented toy is not for everyone
Making such a tasty-smelling toy is a good chance to arouse the kitten’s interest in a new item. In this case, it is enough to have at home:
- sewing supplies;
- small pieces of relatively dense fabric (linen, cotton);
- polyethylene, “able” to rustle;
- dried catnip (catnip);
- decorative elements - ribbons, pompoms, cords.
First, make a drawing of the future bag (square, rectangle, oval).
- The pattern is transferred to the fabric, then a sachet is cut out from it, leaving seam allowances: 2 parts are cut out, they must be absolutely identical.
- The blanks are placed face to face, stitched manually or on a sewing machine, and a small hole is left.
- After turning the product inside out, pieces of polyethylene and catnip are placed in it, and the hole is sewn up.
- Decorate the toy at your discretion - with pompoms, ribbons or laces.
An easier way is to use finished products left without a pair as a bag - children's mittens or socks. In this case, you only need to tighten the open edge with a strong thread and tie it in a knot. The easiest option without sewing is a knot with grass; in this case, no manipulations other than tying are required at all.
It should be noted that there are some “wrong” creatures in the world from the family of feline predators. They don't react to this plant at all. If the owners “caught” such a kitten, then there is a high probability of completely ignoring this fragrant toy.
Mazes and puzzles
Flickr.com Educational toys are becoming increasingly popular among cat lovers.
These are labyrinths and puzzles with balls hidden inside, multi-level tracks, at the end of which the animal expects a prize: a mouse, a catnip ball, or some other thing. Such toys can occupy a cat's attention for a long time. This is a great way to entertain the animal while the owner is at work. But here, too, an important condition must be met - production must eventually become available.
The option with labyrinths and puzzles, in which the ball is locked tightly and the cat can only chase it inside without a chance to get it, is harmful to the mental health of the pet.
By the way, you can make such attractive toys yourself. For example, from cardboard boxes, cutting several holes in them into which a paw can fit. And cut plastic bottles connected with tape make an excellent labyrinth.
Crocheted toys with patterns and descriptions for beginners
First, you need to decide what you will knit. To do this, you can look at different schemes on the Internet or choose one of those that we provide below. If there are a lot of different options from which you must choose the one you like. Finding them on the Internet is quite easy, so if you want to find such a section, it is on almost every website about knitting.
Most often, beginners are offered to knit a toy - a house, since it is the easiest to knit, and they need to get their hands full before doing complex work! You need to knit 6 side faces of the house (6 squares of the same size as high as you like), make a roof and sew all these parts into 1. Fill with synthetic padding or filler, then decorate the walls: make a door where guard dogs can sit, flowers in windows, curtains and so on. The knitted house is ready! This is such a master class!
We crochet toys: step-by-step master class with photos
When we crochet toys, it is very convenient to work with diagrams and simple descriptions. We will tell you how to create a beautiful knitted monkey, which can later be used as a brooch or a keychain, or sewn on somewhere. For it you will need: brown and beige yarn, a hook, a needle, black thread and beads for the eyes. If you want to make a brooch out of it, then take a brooch mechanism. This crochet master class can be interpreted in different ways.
So, what follows is a description of the first 6 rows:
- 6 S.B.N. in an amigurumi ring or in V.P.
- ETC. = 6 times
- S.B.N., P.R. = 6 reps
- 2 S.B.N., P.R. = 6 reps
- 3 S.B.N., P.R. the same as in the paragraph above
- 5 S.B.N. Next, change the thread to a lighter one to make the ears: 8 S.S.N. in the 3rd loop from the working loop. With a dark thread we knit 10 S.B.N. (also in the 3rd loop from the hook), with a light thread 8 S.S.N. (in 3 loops), dark color – 5 S.B.N. (in 3rd loop)
- The front of the monkey is ready!
Now let's proceed step by step to preparing the rear part. It is done in exactly the same way as the front one, only you don’t need to change the thread! To knit the muzzle, take a thinner thread and use a thin hook so that it is not bulky.
4 V.P., 2 S.B.N. in the 2nd loop, 1 S.B.N., in the last loop 3 S.B.N.
The next step is to knit from the reverse side of the chain: 1 S.B.N. + 1 more in the first stitch.
- ETC. 2 times, 1 S.B.N., P.R. 3 times, 1 S.B.N. and P.R.
- 1 S.B.N. and P.R. – 2 times, 1 S.B.N., 1 S.B.N. and P.R. – 3 times, 2 S.B.N. and P.R. At this stage there should be 20 loops.
- 20 S.B.N.
- 4 connecting posts, 8 V.P. through two loops S.S., 8 V.P., through 2 loops 11 S.S.
We do not cut the thread, because... we need to start designing the front part, to which we sew the muzzle itself. Don't forget to fill the toy. Sew on the eyes, nose, mouth and decorate with a flower.
We crochet toys for kids
Kids like bright soft toys that they can touch and pull on the tail (if they have one). A good choice would be a monkey, sheep or bunny. Also suitable are a Teddy bear, a giraffe, a bear, a mouse, a fox and a mother - a fox, a butterfly with colored wings, Pinocchio, a Minion (described below in the article), a penguin, an elephant, kittens - whoever modern knitters knit! You can come up with small animals on sticks for a puppet theater: easy crafts will not leave anyone indifferent. By the way, this could be Smeshariki or the popular Luntik.
With the help of such toys, you can teach your child about various animals, show how they differ, especially since tactile sensations for children are very good. The child will be able to learn to distinguish animals much earlier. You can also make something like educational games with your child using such toys.
And for newborn babies, you can knit small toys for a children's mobile. Let funny hares, puppies and birds help your child fall asleep better!
Master class on creating this cutest kitten. You can not only sew it on your mobile, but also make a keychain out of it, sew it on a backpack, create unusual brooches, or attach it to a cap or jacket.
You can, in addition to knitting such a kitty, also make a Hello Kitty hat (or other cool models) for a girl:
Cat and mouse - game under the sofa
Cats love to play - everyone knows that. DIY cat toys are a good idea. One of their favorite games is to push a ping pong ball under the sofa and try to fish it out from all angles. So the idea arose - why not make such a toy - a cat and a mouse (game under the sofa).
There was only one question - how to make sure that the toy could be returned from under the sofa. After all, the balls roll very far and eventually get lost. There was one more question: to make your own “sofa” for a cat, which, while playing, clings to the fabric with its claws (and, accordingly, spoils the sofa itself).
A toy mouse and a return mechanism are used as a running mouse. The return mechanism is a metal tape measure, it can be bought for 100 rubles. at any newsstand. Do-it-yourself interactive cat toys in pet stores cost the same as toys for children (a lot). We will do no worse.
Pompom - a light toy for kittens
Pom-poms are classic cat toys.
Pompoms on a string are the favorite toy of many cats, which they do not get tired of for a long time. Ready-made toys can be hung on the doorknob so that the cat tries to get them.
Pompoms on the door are very attractive to cats.
Another option for a soft toy for a kitten or adult cat is a pompom.
It’s even easier to make than a mouse or a fish.
- Gather fabric strips of equal length.
- Fold the resulting bundle in half and tie it tightly in the center.
- Cut strips on the fold.
- Distribute the ponytails evenly.
This completes the pompom for the cat.
All that remains is to cut at the fold
Miniature rattle
The next cat toy idea is to create a rattle.
The sound-making beads inside will attract the pussy's attention.
The cat will chase her like prey and try to catch her.
To create a toy you will need:
- medicine bottle;
- beads or other elements that will rattle inside;
- cover and/or tape.
Wash the empty jar; if there is a label, remove it.
Then place the beads inside.
Alternatively, you can use any small items such as seeds or bells.
The toy must be tightly closed so that the cat cannot reach the contents.
If the lid is not tight enough, you can wrap the neck with regular tape.
Play complexes made from scrap materials
Some owners create complex play complexes for their pets with their own hands. For such structures, cardboard, plywood, plastic pipes, and hoses are used, which can be purchased at the plumbing department. Any man can bring such a project to life. It will require the following materials:
- plastic corners – 4 pcs.;
- pieces of plastic pipes (diameter 110 mm) – 4 pcs.;
- ping pong balls.
The sections must be connected using corners into a closed square, 8 holes with a radius of about 40 mm must be cut in the pipes so that the cat can freely enter the maze. The balls need to be placed in the pipes. The cat will try to get into the pipe to get them.
Soft toy for cat
Pet owners should remember that cats need attention and care. Original and exciting mouse toys will delight any cat. You can make such toys yourself from scrap materials. Moreover, if you choose colorful and bright materials, then such toys will be able to overcome the apathetic mood of even the most boring and clumsy cat. After all, if the cat is bored, and at the same time she is an active lady, then she will try to bite you once again on the hand or leg, and run around the entire apartment. Such toys will help solve the problem of boredom for a long time.
In this case, it is completely useless to purchase expensive toys; as practice shows, most often expensive toys only last for two to three days. Therefore, you can make many similar toys, diversifying them with your imagination.
For work you will need the following materials:
- beads for eyes
- pattern
- cotton wool or padding polyester
- the fabric is varied, preferably bright, it can be cotton, wool, etc.
- needle
- threads
- laces
- iron
- scissors
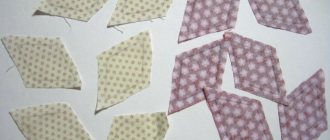
We cut out a pattern from a piece of fabric according to the template.
First you need to cut out one side part, and therefore one bottom part. The fabric can be chosen in different colors and textures, so the side can be one color and the bottom another. Then we can turn the template over and cut out the remaining parts.
For the ponytail, we need to outline a rectangle on fabric measuring 2.5x10 cm and cut it out; you can also use a simple lace for the ponytail.
Now you need to make the ears, cut them out of the fabric and apply the two parts for the ears to each other with the wrong side.
If we make the tail from fabric, then you need to fold the rectangle in half lengthwise and fasten it with a seam, leaving an allowance of 5 mm. The ends of the strip should not be sewn together to turn the tail out. Now you can start sewing together all the parts for the mouse body. We attach the parts to each other and stitch them, do not forget that you need to fold them right sides together, with an allowance of 5 mm, then leave a hole on the back so that you can then stuff the toy with padding polyester. We turn it inside out and stuff it with padding polyester, insert the tail into the hole, sew everything tightly with a hidden seam and tie the tip of the tail with a knot.
We take the ears, fold the parts for them in half and sew them to the body with small stitches. It is recommended to make the eyes with a line stitch, but you can also sew on beads, but it is worth remembering that these are small parts and they must be sewn securely; if you are not sure, then just make a line stitch. Now the mouse toy is ready.
HAND MADE Mouse for cat
Simple DIY cat toys are a good idea. In order to please and entertain your cat, you don’t have to spend money; we’ll show you how to make a heart-shaped mouse stuffed with catnip and other toys for your pet from available materials. To prevent your cat from getting bored and spoiling his home environment, make several toys for him with your own hands.
Cat made of cones
Cat crafts made from cones are especially beautiful - such a natural material is very popular in kindergartens and schools in the fall, when kids are asked to make any craft from fir cones, all they need is their imagination!
You will need:
- Fir and pine cones of different sizes,
- PVA glue,
- And also long pine needles,
- A little pink plasticine
- And two peas of black pepper.
Progress:
- To begin with, we will need a small pine cone, to which we will glue two spruce scales - in this way we will make ears on the top of our cat’s head. We use PVA glue for fastening, glue on eyes from black peppercorns, and also make mustaches from pine needles. The nose can be made from pink plasticine.
- The largest fir cone should be oblong - this will be the body of the cat. Using PVA glue we glue the finished head to it.
- You can make a cat’s tail from a spruce cone, which looks fuller - let the animal’s tail be fluffy. For better visualization, you can carefully peel back the scales to create a “fluffy” feeling. We also glue it with PVA glue.
- We make the paws from fir cones, approximately the same size, so that our cat stands firmly on her paws.
Simple options
Sometimes there are no available materials nearby to create complex entertainment for the amusement of a cat. What to do then? The simplest, most common materials that can be found in any home are suitable for creating toys. Making simple toys does not require much time or expense, but it brings a lot of joy.
Corks, balls, balls, made of fabric
For playful cats, any objects that roll and attract the attention of predators are suitable. Ordinary corks, small ping pong balls, and various balls, both ringing and soft, may be useful. And of course, a ball of thread is one of the most fun things for a cat. In this case, the end of the ball must be tightly secured so that it does not roll out throughout the house. Fun fun will keep your pet busy for a long time.
From paper, bags
Plain paper can serve as a toy for your cat. You just need to crumple it up and tie it with a string, crushing it in the middle. The cat will be happy to chase a new toy. Large paper bags are also a favorite place for pet ponytails. If you throw some toy into them, then the pussy's delight will know no bounds. We recommend learning how you can make a paper house - here.
Sunny Bunnies - a simple interactive game
One of the most fun activities is available in summer, in sunny weather. All you have to do is take a small mirror and point it at the window. A bright highlight will appear on the wall - a sunbeam.
Point the mirror in different directions and the cat will chase it with delight. Despite the prostate, this interactive game allows the animal to develop its hunting skills and logic.
Meter tape
If you have a regular measuring tape on hand, then you can safely pick it up. Cats love to play, chasing her throughout the apartment, putting on a whole show for their owners.
From the box
Large boxes are a great place for felines to play. Not only do they love to sleep in them, but they can also frolic very well, especially if you make holes in the box and throw a small rolling and ringing ball into it. It’s just as easy to build a cardboard house as this toy.
Pencils
An ordinary set of pencils can serve as a reason for active and fun fun. You just have to break off the leads before use so that your pussy doesn’t get hurt accidentally while playing. Throw pencils to your cat and watch him chase them, or tie a pencil on a string for some exciting fun.
Programs about animals, birds (with video!)
Many pet owners think that animals do not like to watch TV and do not take the images on it seriously. However, it is not. Experiment and turn on a program for your pussy about its closest relatives from the world of wildlife, and watch how it watches with surprise and delight what is happening on the monitor screen. Below you can find a video that you can play for your pet.
Why is it necessary to play with a cat?
Each cat has its own habits, habits and character. Therefore, owners have to take into account the wishes of their pets and be able to cope with communication problems. To solve these issues, toys exist.
- Hyperactive people need to be able to calm down. Melancholic people, on the contrary, are forced to run, jump, and move as much as possible. It is useful for both to engage in active games at least 20 minutes a day.
- The opinion that if several animals live in a house, then they are not bored, is fundamentally wrong. Not everything is so simple - civil strife and aggression begin.
- Games help cats realize their hunting instincts.
- Kittens, while playing, strengthen their muscles, develop dexterity and reaction speed. This is the only way a strong, healthy animal grows.
- If your pet's leisure time is properly planned and he has enough entertainment, this will help preserve the furniture.
- People love to play too, so why not do this important activity together?
A little about the herb catnip (catnip)
Why do most cats love catnip grass so much? Veterinarians say that catnip is a cat's cure for stress. Now many products are produced for cats using this plant: various sticks, balls, toys. There are even drops that are used to drip onto the scratching post - this is how the cat gets used to sharpening its claws and not damaging the furniture.
If the cat has no appetite, catnip is recommended as a food supplement. Add a pinch of dried or fresh herbs. Catnip is also an anthelmintic. Catnip is sold at any pet store; you can plant it at home in a pot. At the same time, you need to make sure that the cat does not eat it all at once, and there is no doubt that he will like it.
On video: why cats love catnip.
Mouse is a number one hit
There is no need to even mention how popular this couple is - a cat and a mouse, so such a toy is an almost obligatory accessory. If the housewife knows how and loves to knit, then a rodent can be knitted, but products made from thick textiles are no less attractive to kittens and cats. The range of candidates for the role of a mouse is large. This:
- drape;
- suede (artificial);
- fur;
- felt;
- fleece
In addition to the fabric, you need to prepare:
- sewing supplies;
- holofiber, cotton wool or foam rubber; their replacement is leftover yarn.
The operation will not take much effort or much time.
- First, a triangle is cut out from the selected material, then its two sides are sewn together.
- One or more fillers are tightly stuffed into the resulting bag. The edge is basted, then the seam is pulled together and the thread is tied.
- Ears and a tail are cut out of the fabric, and these elements are sewn on very securely.
It is better to draw the eyes of the mouse, since the sewn beads will become a big threat to the baby. They can be replaced with small buttons, but only if it will be very difficult for the “naturalist” to get to the threads holding them in place.
A soft toy can be more than just a mouse, although ears and a tail make for an exciting journey through the rooms with the prey. With the same success they sew fish, birds, tigers or piglets. Small balls sewn together and yarn are used to make insects with legs, such as caterpillars.
Cat fishing rod
DIY cat fishing rod.
A thin wooden stick, strong thread and strips of thin fabric are all you need to make a cat fishing rod. Fold the fabric overlapping and use a needle to thread the thread through the strips. Tie the free end of the thread around the stick.
When the issue of entertaining cats is resolved, a lot of free time is freed up. Why not spend it on improving the interior of your home? For example, check out 15 tricks that will turn a nursery into a child’s dream room.
Felt mouse
Schemes, patterns and just cool ideas for sewing felt mice
“Incredibly cute little mice”: templates and assembly diagram
Difficulty level for beginners ( See diagrams of simpler and more complex mice below
)
To work you will need
Materials
- Felt in two colors: for the body and tummy. The belly can be made from a material of a different color and texture, most often it turns out even more interesting.
- Threads: for sewing parts and for embroidering the mouse's whiskers and nose.
- Stuffing: holofiber, padding polyester, cotton wool - at your discretion.
- Pattern (you will find it immediately below the list of tools and materials).
Tools
- Scissors.
- Needles.
- Chalk for marking. Pink chalk or pencil for tinting the ears of a felt mouse (see instructions for details).
- A knitting needle or wooden stick for distributing the stuffing.
- Pins.
Mouse pattern on A4 sheet. Just right-click and save the image on your computer or send it directly to print
Please note that some details need to be made in duplicate
Step-by-step instructions on how to sew a felt mouse
1. Transfer the pieces from the pattern onto the felt and cut them out. 2. Mark the points indicated on the sidewalls on the material. These are the places where the ears and tail will be. 3-4. Place the sides together and start stitching - from the nose to the lower abdomen, as in the picture. Make the seam approximately 3 millimeters from the edge.
5. Use wax pencil, crayon or pastel to mark the pink center of each ear (you can skip this step if you wish). 6. Move the sewn halves of the side panels apart. 7-8. Attach the back parts to them. The upper part of this part has a sharp tip. Photo #7 shows how the bottom is fixed. Sew the back from the top - from the tip of the nose, where the sides are already sewn. On this seam, also step back from the edge by about 3 mm.
9. Stop at the pre-marked point. It's time to work on the ears of our adorable felt mouse. 10. Fold the ear in half, pink side inward. 11. Insert the folded ear piece between the back and side pieces. The part should be positioned so that its bottom edge falls on the seam. The ear itself will seem to be inside. 12. Continue stitching the back and side. Now it will be a little more difficult: you need to push the needle through 4 layers of felt (back side + ear folded in half).
13. Sew the side panel completely. Make a knot at the end of the seam at the bottom of the part. 14. Repeat with the other side. Start from the nose. At the marked point, insert the ear, sew it and continue sewing about another 1.5 centimeters. As in the photo. 15. Now sew the side and back together from the bottom. Leave a gap of about 4 cm between this seam and the top one. The stuffing will be pushed through here. 16. Turn the mouse inside out and stuff it tightly. Make sure that the holofiber (or other material you use) fills all the curves of the pattern. First of all - the nose, stomach and head. When you're done with the stuffing, sew the side and back together.
17. Place the felt part of the upper legs on the chest of the mouse. Do not sew or glue yet. 18. Place the tummy detail on top of the paws. Contrasting bellies look interesting. They may differ in color and texture. Examples of such mice will be at the end of this instruction. Start sewing on the belly. Start the seam from the top. When you reach your paws, bend them so that they appear to be folded over your stomach. Sew the paws in this position. The color of the threads for this seam in the example in the photo is matched to the color of the rest of the material. But you can act differently and choose contrasting threads. It looks good too. 19. Use black thread to mark the mouth and nose of the mouse. The eyes can be indicated by knots of the same threads. Or sew on small black beads - whatever you like. 20. Cut a thin, tapered strip of felt. This will be the tail of our mouse. Wrinkle and twirl this strip between your fingers to make the tail less straight and flat. 21. Sew the tail in the place where the bottom point was on the felt mouse diagram. If the mark has already worn off, no problem. Sew the tail at the very bottom of the back, where it meets the sides. 22. Final step. Sew the lower legs of the mouse with a couple of stitches. Place them on either side of the tail sewn on in the previous step.
This fairly simple pattern by needlewoman Anne Wood is popular all over the world. You yourself have probably already convinced yourself. The toys turn out to be cute and at the same time varied. You can experiment with the expression of the faces, the color of the tummies, and even the felt itself. Look what happens in the end.
“Friendly mouse”: pattern and step-by-step description
Difficulty level for beginners
Materials for work
- Felt of a basic color for the body (shades of gray, brown or cream are most often used).
- A piece of pink felt for the tail and ears.
- Light and dark threads.
- Black beads are for the eyes.
- Stuffing (wool, holofiber, cotton wool, padding polyester).
- A coin, pebble or large metal washer - to give the mouse stability.
- Pattern (picture for A4 format is located just below).
Tools
- Needle.
- Scissors.
- Pins.
- Chalk for marking.
2. When the thread reaches point “A” (this is where the mouse’s nose will be), begin sewing on the ABDOMINAL part. Align both points marked on the pattern with the letter “A” and sew one side - from “A” to “B”. Make a knot at point “B”.
3. Sew the other side of the belly. Also from "A" to "B". This time, do not make a knot at the bottom.
4. Take the BOTTOM piece. Place the wide side against the wide, still free part of the abdomen. Continue the seam that led from “A” to “B”: sew the bottom and side parts together (that is, continue the seam from point “B” to point “B”).
5. Stop at point “B”. There will be a tail here. Insert it between the bottom and side pieces and secure with 2-3 stitches.
6. Continue stitching until both sides are sewn to the bottom.
7-8. It's time to give our felt mouse volume and stability. Push the stuffing into the gap between the bottom of the belly and the front edge of the bottom. It is better to use a knitting needle or a wooden Chinese stick so that the stuffing fills all the cavities. Including where the nose is.
9. Our mouse will appear to be standing on its hind legs and we need to think about how to make its lower part heavier. The easiest way is to insert a coin or a large metal washer when the stuffing is finished. They weigh more than felt and holofiber and are flat. You can also use a pebble from a pebble beach. Then make sure that it is surrounded on all sides by padding and does not stick out from under the felt.
10. Sew the belly and bottom. Our little mouse is almost ready. If there is still enough thread on the needle, thread the needle through the stuffing, making sure the needle comes out where the ear will be.
11-12. Sew on the ear. Tack with a couple of stitches, first passing one across, to create a gather at the bottom.
13. Pass the needle through the seal again and out the other side. Sew on the second ear.
14-15. Sew on the mouse's eyes in the same way - black beads. First one (step 14), then the second (step 15).
16. Now repeat the same thing, but do not sew anything. Just make loops of thread in the area of the nose (point “A” on the pattern). These will be the mouse's whiskers. After each loop, secure the thread so that the loop does not unravel.
Finally fixing the thread, tighten the knot at the tip of the nose. Cut the thread. And cut the mustache loops to make the mustache straight.
Your felt mouse is ready. Can be used as a keychain, as an interior decoration, a pincushion or as a toy in a children's dollhouse. As a symbol of 2022 after all
Popular articles Happy Easter greetings in verse
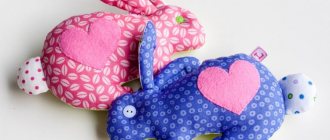
Heart mouse for a cat - master class
From any piece of fabric, leather, or suede you can make this heart-mouse for a cat. This toy can be filled with different “fillings” - you can take dry catnip, chamomile, wheatgrass, barley, oats. You cannot take plants that are poisonous to cats: datura, wormwood, hogweed, henbane, poppy. If you stuff your mouse with fresh grass, collect it away from the roads, in a clean area, and be sure to wash it in water and then dry it with a napkin.
So, we have decided on the filling, all that remains is to sew the mouse itself. You can sew several mice for your pet and fill them with different herbs - then you can determine exactly what attracts your cat more. We offer you our master class on sewing a mouse step by step.
- Fabric (small pieces).
- Grass.
- Sample.
- Needle, scissors, thread.
- A stick or pencil for stuffing the “mouse”.
- Tailor's pins.
- Rope.
- Thick needle.
We print or draw the toy pattern by hand. The dotted line indicates the line along which we will sew 2 parts. Using two points - the place that we are missing - we will turn the toy inside out through it.
Place the 2 parts of the mouse with the right sides facing inward. We pin the pattern with pins.
We cut a piece of rope equal to 16 cm. We need to insert the rope into the center of the heart so that it protrudes 1 cm.
We insert a piece of rope inside two parts of the toy.
Let's see: we will sew on the wrong side, we have already inserted the “tail” of the mouse. Don't forget to leave an unstitched section for turning the toy inside out.
We sewed 2 parts and turned them right side out. We fill the toy with chopped grass through the unstitched area; it is more convenient to do this through a funnel.
We compact the grass with a stick or pencil more firmly, let the mouse be plump.
Sew up the remaining hole. We take a thick needle and thread a rope into the eye. This will be a mouse's whisker.
We tie thick knots at both ends of the mustache. Tie more knots - it will be more interesting for the cat to untangle them.
You can sew 2 eyes from felt, but this is not necessary. Even without this, the cat will understand that it is a mouse; everything on the mouse is in place: the mustache and the tail.
How to crochet a cat, descriptions from the Internet
How to tie a cat Sweetie
In one city in the cartoon “Three Cats” there live funny kittens Caramel, Korzhik and Kompot. These are cheerful and friendly cats who have many friends. For example, Nudik, Sweetheart and Bonya. Today we are knitting Sweetheart.
- Children's new pekhorka yarn is white for the eyes, pink for the head, ears, tail, arms and legs, lilac (purple) for the eyelashes and mouth (but you can embroider the mouth in black, I saw it differently in the cartoon), black for the nose and mustache.
- Kr. 1.3 and 1.5.
- Holofiber filler (fill as you knit).
- Needle for stitching and embroidery.
- Plastic eyes 5 mm.
- Glue.
Cardboard houses are allowed, cardboard toys and threads are not.
Kittens, like children, try everything, so it makes sense to exclude small cardboard toys and various kinds of thread pompoms until they are one year old. Kittens can choke on string or small pieces of cardboard. But no cat will remain indifferent to large cardboard boxes. Especially if it is corrugated cardboard from which the house is made. They won’t chew, but they will happily hide and scratch.
The technology is the simplest - using a cutter using a thread secured in the center, we successively cut out several circles and rings. The circles are the roof, we cut the rings, and, pushing them apart (so that the overlap appears as in the photo), we assemble the hut. It is better to secure the structure with a strong thread and a thick needle; you should not use staplers.
It’s even easier to take some fabric (preferably brightly colored flannel), three slats (you can use the long handle of a broken plastic mop or something similar). Depending on the piece of fabric, cut it into triangles or sew slats into a single piece. There is no need to make a floor; just a bedding is enough, which will be easier to clean. We connect the slats in the upper part, decorating to taste, and the elegant home for the cat is ready.
Useful tips for beginners
At first glance, it may indeed seem that crocheting is incredibly difficult. You can learn anything; you just need to put in some effort to learn the basics. Knitted toys in the shape of cats evoke affection in both children and adults.
When choosing a knitting pattern, all beginners should pay attention to the complexity of the work ahead:
- Simple (consist of a body, ears and tail), knitted in one piece.
- Complex (all parts of the body are connected separately, after which they are combined into a finished product).
- For beginners, we recommend choosing toys knitted from thick yarn, such as plush. The fabric grows very quickly; you do not need to spend a lot of time knitting the toy. And the resulting product is very pleasant to knit in your hands. Missed stitches or different knitting densities are not particularly noticeable.
- The simplest products include pear-shaped and ball-shaped toys. As a filler, you can use not only the usual holofiber, padding polyester, comforter, padding polyester, but you can also take anti-stress balls.
Coming to a specialized store, many novice needlewomen are lost in the choice of threads and hooks. It is best to learn with middle number hooks (third, fourth, fifth). Hooks with very small heads are usually used for knitting lace, which will not be easy, to put it mildly, in the first stages of learning.
Meet our selection of cats and knit for fun!
Crochet cat - amigurumi toy, video tutorial part 1
The video should load here, please wait or refresh the page.
Crochet cat - amigurumi toy, video tutorial part 2
The video should load here, please wait or refresh the page.
DIY cat toys
There are many possibilities to make cat toys from available materials. You can buy a paper bag for 8 rubles in any large store (Auchan, OK) - we are sure that this will be an excellent opportunity to keep your cat busy. Various sticks, pencils, balls of any size. You can make something yourself from what you have in the house.
Candy toy
The next master class is DIY kitten toys. To make it, you need 2 parts: a paper tube from used foil or paper towels and corrugated or any rustling paper.
Cut a small piece from the paper core.
Use a thread to pull the rustling paper.
Insert it into the sleeve - that’s it, the cat toy is ready! You can start the game.
Toy made from a regular bottle
Every home has an empty plastic drink bottle. We wash it, dry it, and wipe it dry.
We cut holes in the bottle - large and small. The holes should not be sharp - otherwise the cat may injure its paw. You can burn the edges with a lighter so that they are not sharp. We put a treat for cats in the bottle. The cat’s task is to get the treat with its paw. To be convincing, you can rattle the bottle and roll it on the floor. The interactive toy is ready.
Paper applique of a cat
Applique paintings are no less beautiful - there are several options: geometric (details in the form of geometric shapes), torn (pieces of paper come off) and others.
Both beginners and advanced students can make a cat craft in the form of an applique - in fact, everything is simpler than it seems at first glance.
Let's consider the simplest option - a geometric application, for which we will need:
- Colored cardboard (background),
- Glue,
- Scissors and colored paper blanks in the form of three small circles and two triangles.
Work progress:
- Take one of the circles and cut it in half with scissors. Glue half of the circle to the cardboard with the rounded side up. We glue the second half to the side on the left, slightly above the edge - this will be the tail of our cat.
- Next we glue the circle so as to “capture” a little bit of the semicircles - this is the body of the cat. We glue the last circle, placing it on the upper edge of the cat’s body circle - this is how we made the cat’s head.
- Triangle blanks are cat ears. We glue them on both sides of the head.
- In general, the cat applique is ready. Circles and triangles can be used in different colors to create the look of a motley cat. You need to draw a muzzle on the face with a felt-tip pen or pen, although the eyes can be glued on if you have special stationery - it will look very cool!
What's the use of it
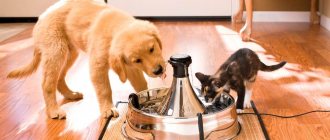
There really are a lot of advantages to such an unusual toy. We'll deal with everyone. To put it very simply, a food puzzle is a food dispenser, that’s all. But…
Your pet will eat more slowly - and this is the key to his health and the foundation of longevity. And at the same time move a lot and invent ways to obtain food “hunting”.
By the way, zoologists agree that this type of nutrition is more correct than with free access to dry food.
- If your pet has problems with excess weight, this useful device will help reduce the amount of food eaten and ensure the burning of excess weight through greater physical activity.
- May help animals prone to vomiting from haste while eating. This toy feeder encourages leisurely eating of food or treats.
- It forces you not only to exert physical effort, but also trains your cat’s intelligence. A homemade food puzzle for a cat will make it more active, dexterous, and smarter.
The principle of operation is this: the cat needs to think and act on the toy in a certain way in order to get the treasured treat. Food puzzles perfectly develop logical thinking and the “hunter” instinct.
In the wild, it is unlikely that you will come across a bowl filled with mice. And with such a toy, a whole world of adventure is open to the cat.
Physical activity increases and a new hobby appears that will protect your curtains and sofa from an overly active animal. In addition, this is a great activity for those times when our cat is left to his own devices. For example, when it’s night outside or the owners leave and leave the animal alone.
Interactive cardboard and plastic games
A four-legged child can also be interested in other educational crafts. Such structures are made of wood, cardboard or plastic. In the latter case, plumbing pipes or elbows are used.
Plastic ring
To assemble an unusual toy for a kitten, you need to get and prepare:
- plumbing plastic elbows - 4 pieces;
- flexible plastic tube (diameter - 5 mm) for edging the holes;
- drill with attachment;
- electrical tape;
- glue;
- sharp knife, file, sandpaper;
- small tennis ping pong balls and/or treats.
The step-by-step creation of an interactive design looks like this:
- A ring is assembled from plumbing blanks: they first wrap electrical tape around their edges, then smear them with glue and connect them. Wait for it to dry completely.
- In the upper part, along the entire perimeter of the product, holes are drilled of such a diameter that the ball and, naturally, the paw of a kitten and an adult creature do not fit into it too freely, since the structure is made for growth.
- Their edges are processed with a knife or file, then with sandpaper. A thin tube is cut lengthwise, then glued along the perimeter of the holes and allowed to dry. Balls are placed in the finished ring and treats are poured in.
Having made such a simple design, the owners have the right to hope that for some time the stomping of a small animal and the noise from its toys will not be heard in the apartment, because everything new and unknown is always very attractive. Especially for creatures whose curiosity can be the subject of legends.
Cardboard house
This material is very popular, if we talk about “handmade” in general. Cardboard is available, can be found in almost any household, and it is quite easy to make various useful items from it. Even a simple open cat box automatically becomes a magnet—enough reason to explore. However, such a basic cardboard option will interest the kitten only for a short time. Therefore, it is better to choose other designs.
- A labyrinth of several boxes. It is much more attractive even for adult animals. In this case, as many boxes are glued together as the room can allow. Door (window) openings are cut out between them, box lids are removed so that you can quickly get out of the maze, or they are left in place, making life difficult for the pet.
- Large shoe box. This is also a simulator that, like a plumbing plastic ring, teaches intelligence. Round holes are cut out on all surfaces of this object into which you can insert your paw and then pull it out without difficulty. The lid is attached to the box with tape, and a small mouse, balls and favorite treats are placed inside.
Another convenient product that can serve as such an interactive toy is a food container. In this case, the hunter-kitten will see his “victims,” and this contact will become an incentive to quickly solve a difficult problem.
Cardboard sleeve platform
Such material for interactive toys can be found in every home, and besides, it is easy to accumulate. In this case, the main characters will be cardboard tubes from various rolls: toilet paper, paper towels, baking parchment or foil.
They are glued horizontally and vertically to a sheet of thick cardboard. Holes are made in the lying elements, and treats are simply poured into the second, standing elements, or small toys are hidden. By creating such a playground, we can hope that the restless kitten will find something to do for a long time.
Corrugated cardboard - raw material for toys
This method of creating crafts for kittens is also quite simple. Several identical circles are cut out of cardboard, and holes are then made in the center with an awl. The blanks are strung on a cord, and its ends are tied in knots. Using this technique, you can make various figures: for example, the popular and beloved mouse by kittens.
Almost every owner who carefully studies the habits and preferences of his inquisitive pet will be able to come up with his own signature version on the theme “Homemade toys for kittens.” Knowing all the “weaknesses” of a furry pet, it is easier to make a toy that he will not abandon after a short period of time.
It is customary to share ideas with others, which many “inventors” do with pleasure. You can get to know some of the recipes closely by watching the following fascinating video:
Mini ball with protection
A simple but interesting toy for cats.
Letting your cat play with regular balls or spools can be dangerous as he may choke on the threads. Therefore, we propose to slightly modernize this option for entertaining a cat. Roll the threads into a medium-density ball, leaving one end free. Then wrap the ball in regular foil. Cats love its rustling and soft shine.
Basic requirements for toys for pets.
Regardless of whether a purchased or homemade trinket is used for the tailed amusement, it must meet the following requirements:
- Safety. The materials used for it must be environmentally friendly, with high-quality dyes, fillers, without sharp corners, protruding threads and other imperfections.
- Strength. Having sharp teeth and claws, kittens can easily tear a cheap store-bought treat, feast on its contents or parts, causing health problems.
- Focus on the development of natural instincts. The best cat toys encourage them to hunt, jump, run, lurk, attack, and more.
All this can easily be realized in simple crafts from waste materials. To choose what kind of toy you want to make for your pet, take a look at the gallery and look at examples of finished works.
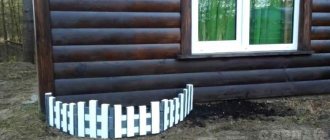
How to make a cat house quickly and inexpensively
I would like everyone’s favorite to have a house, but sometimes I don’t have enough time or money. You can make a cat's home from scrap materials without spending a lot of time. Here is one idea for such a light house.
- Cardboard or wooden box
- Old T-shirt
- Stapler
Making a house
- Prepare the box: glue the cardboard in the torn places, clean the wooden box from unnecessary parts, such as nails, staples and other objects that can harm the animal.
- The box should only be open on one side. Place a T-shirt over the box so that the neckline is in the middle of the open side of the box. This will be a kind of entrance to the house.
- Carefully fold the excess material from the hem of the T-shirt to the bottom of the box and secure everything with a stapler so that the material does not dangle. Tuck the sleeves inside.
- You can first put a soft mattress for the animal or a rug inside the box.
There you have it, an easy version of a cat house!
You can always pay attention to your beloved pet and give the cat his own house, even if you don’t have enough time. Cats love to climb into various containers and cabinets.
So why not give them their own place where they can hide and play? This will bring the animal a lot of joy and pleasure.
For needlewomen who are friends with a needle
You can sew a toy in a couple of minutes.
A person who knows how to use a needle can sew a simple toy for a cat in a couple of minutes. We recommend choosing fabrics of sufficient density, such as wool or felt.
Toy jellyfish for a cat.
Recycling corrugated cardboard
A DIY cat toy that even a child can make.
Corrugated cardboard, from which large boxes are made, is useful for creating toys for a cat. Cut a lot of circles out of it, make a small hole in the middle of each of them. Then string them onto a piece of lace, tying it into knots.