The art of sewing attracts many needlewomen. Original handmade soft toys fascinate with their beauty and uniqueness. Among the wide variety, craftswomen often give preference to the owl. This cute bird is found in the folklore of different nationalities and symbolizes wisdom, patience, mystery and knowledge. You can sew such a toy miniature, in full scale, or in the form of a keychain; naturally, you first need to model suitable templates and make the appropriate owl patterns from felt.
A felt owl is a cute toy that can be given as a gift to a loved one
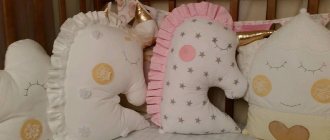
Crib pillow
In our master class, the owl has a blue shirtfront.
If you are sewing a pillow for a girl’s crib, you can make an owl in pink tones. For needlework you need:
- cotton fabric in two colors;
- pieces of felt for the eyes and beak;
- black beads or buttons for the pupils;
- ribbon for decoration;
- lace;
- filler;
- needles, pins, scissors, threads, sewing machine.
Description
Print out the pillow pattern in full size.
Cut out all the parts of the toy from the fabric.
For the bow, cut out a rectangular piece 8x16 cm and a square with a side of 45 mm.
We attach the lace and beak, making a zigzag seam along the contour. The lace should lie in the center of the body, between the wings.
Using the same seam we attach the wings and eyes. We manually sew on the pupils - beads.
We fold the two parts with the right sides inward, pin them together, and sew along the contour. At the same time, do not forget to leave an area for turning and stuffing.
We make notches on the convex areas so that the shirt front with wings does not puff up after turning it inside out.
Turn the pillow inside out and iron it. Then the main part, that is, the shirtfront, is filled with filler.
Sew up the hole using hidden stitches.
Now let's start decorating the owl. We fold the square blank for the bow into a strip (see photo) and iron it. We sew the rectangular piece with an allowance of 1 cm.
Turn the bow inside out and gather it in the center. We cover the place of gathering with a strip.
We sew the decoration onto the ear of the pillow toy.
We make a bow from a narrow ribbon and sew it on. If desired, you can also decorate the pillow with buttons.
Textile pillow toy
The pillow toy will delight not only children, but also adults. Such things fit perfectly into any interior, adding warmth and comfort to it.
Materials and pattern
What you need to prepare:
- Several fabric scraps.
- Threads of different tones.
- Sintepon.
- Needle.
- Scissors.
As with any sewn product, for further work you must first draw a pattern.
It consists of several parts:
- Body with ears - 2 pieces.
- Beak - 1 piece.
- Paws - 4 pieces.
- The inner part of the ears - 2 pieces.
- Wing - 2 pieces.
- Belly - 1 piece.
- Most of the eye - 2 pieces.
- The middle part of the eyes is 2 pieces.
- Small part of the eyes - 2 pieces.
Felt owl
It is very easy to sew such a toy. Depending on the size, the craft can be a small owl - a keychain or a comfortable sofa cushion. A bright owl made of felt with your own hands is made according to a pattern.
To work you need to prepare:
- felt of different colors;
- filler;
- fabric for finishing the belly and wings;
- needles, pins, scissors.
Description
An owl, like many felt toys, is easy to sew using a needle-forward stitch, in which the lengths of the stitches and gaps are equal.
Using pattern templates, we cut out all the elements from felt and fabric. Sew colored details onto the felt wings. We will hide the knot of thread between the felt and the fabric. For convenience, the fabric can be secured with a pin before sewing.
We design the face of a felt owl. Referring to the pattern, we place and sew on the eyelet details. Please note that from the edge of the main part to the eye, as well as between the eyes, the distance should be about 5 mm.
As an alternative, you can choose to glue the eyes.
Then we sew on the tummy, having previously secured it with a pin.
We attach the claws, beak, dark parts of the ears. We embroider the tail on the back side.
We fold the two main parts, insert the wings between them and secure with pins. We sew a seam around the circumference, leaving a small part unsewn.
We fill the owl with padding polyester or any other filler. Sew up the hole.
Homemade felt hand warmers in the shape of owls
Cold days are approaching, and you really want your loved ones to be comfortable in any weather. Sew these warmers in the shape of little owls, with them your family and children will always feel the care and warmth of your heart and hands.
You can find the original of this master class on the excellent author’s blog repeatcrafterme.com. Translated from English and published with permission of the author - Sarah
Homemade felt heating pads will help keep you warm on cold days in winter or fall. They can be given for the New Year, for the beginning of the winter holidays, or as a gift to a loved one for Valentine's Day.
Making these warmers doesn't require a lot of sewing skills, but if you have a sewing machine, it will make the job easier. Unfortunately, it is impossible to use glue to make them.
Materials:
- Felt or fleece (color of your choice). Make sure it is not a synthetic material, otherwise it may melt in the microwave.
- Yarn or floss type for sewing
- Needle
- Some rice
- Owl pattern
The process of making heating pads
In this master class, warmers are sewn in the shape of owls, but if you wish, you can choose any other creature you wish. Keep in mind that the simpler the shape, the less sewing you will have to do.
First, print out the pattern and cut out the owl parts from felt. Don't forget to prepare two identical parts for the body. Then you can start sewing: first sew the heart to the belly, then the belly to the main part of the body, then the eyes and, finally, the beak.
Use a small needle and double-strand yarn or thread (or sew all the pieces together using a sewing machine). If you wish, you can sew the pieces together using a simple overcast stitch.
When sewing, be sure to leave a small hole and fill the felt owl with rice. Then finally secure the unstitched parts with a few stitches.
Educational searching toy “Owl”
For creativity we need to prepare:
- fleece material of sand and light green color;
- brown and white felt – thickness 3 mm;
- felt, black and yellow – thickness 1 mm;
- grosgrain ribbon with bright patterns;
- film file or any thick transparent film;
- quick-drying glue;
- short chain;
- filler – rice, beads;
- small toys - scythes;
- embroidery threads;
- scissors, pencil, needles, tape.
Clouds
Sew the halves together using a buttonhole stitch, leaving a small gap at the end. We fill it tightly with the filler, straightening and distributing it evenly with your fingers, tweezers or a pencil. We complete the seam and hide the end of the thread. The cloud should be voluminous and elastic.
Asterisks
Sew the halves together using a buttonhole stitch, leaving a small gap at the end. We fill it tightly with the filler, straightening and distributing it evenly with your fingers, tweezers or a pencil. We complete the seam and hide the end of the thread. The stars should be voluminous and elastic.
Now you need to attach threads to the toys so that you can then start assembling the mobile.
It is advisable to use strong threads for attaching toys so that it is more difficult for the child to break them. If the thread is large, use a gypsy needle with a large eye. Pull the thread through the toy, make two loop stitches and tuck the end of the thread inside.
Attach threads to all the toys, and glue the moon halves to the thread above the owl.
We tie four threads opposite each other to the prepared base. You can decorate them with various beads. We tie a loop in the center. Having hung it on a bracket or any convenient hook, we adjust the tension of the threads until we get a plane parallel to the floor. Secure the threads and trim off the excess.
Cute chicks
In order to sew such wonderful chicks, you will need a pattern.
Next, we act in accordance with the instructions presented in the photo.
The chicks are ready.
Using the method shown above, you can make friends for chicks.
Here is a step-by-step photo instruction on how to create a felt owl.
Ready-made templates for work
As a ready-made template, you can use a stencil of a toy-crawler. The toy is intended for children. It promotes the development of fine motor skills through sensory sensations. The principle of operation is that the child runs his fingers through the filling and looks for surprise toys hidden in the owl’s tummy.
Developmental owl with secret elements
It is necessary to prepare the following materials:
- felt of different colors;
- transparent plastic;
- beads or small figures;
- ball filler; you can use beads, special granules and even cereals;
- buttons.
Using the template proposed above, all the details of the future owlet are cut out. Then you need to first assemble the toy. This is done in order to determine the final result before stitching. First of all, you need to assemble the eyes and sew all their parts. Then the nose is sewn on. When the muzzle is assembled, you can begin to form the body. Transparent plastic or thick polyethylene is sewn to the tummy. Having connected the front and back parts of the body, the remaining parts are sewn in parallel - paws and wings. The hole is sewn up and the owlet is ready.
The rocking toy is a new trend in creating crafts
Don't forget about the hole for filler and surprises.
Another template for creating a mobile for newborn babies is presented below. The principle of its manufacture is practically no different from other schemes for creating animals.
Carousel for a child, sewn according to the presented template
The template details are cut out in duplicate. This is necessary in order to give the figure volume. Additional accessories can make the composition complete. These can be stars, the sun, or natural materials in the form of cones. You can also play with shades of felt.
Owls made of cones and felt
The presented craft can be used with other toys, or can simply hang on the Christmas tree. The final result directly depends on what elements are added. The main thing is to prepare high-quality glue. It is most convenient to use super or thermo for this. The template can be found on the Internet, or it is better to draw it yourself. Then you will get a completely individual toy, made with your own hands.
If you use cones of different sizes and from different trees, you can create a whole family of different birds. In this matter, everything depends on the approach and imagination of the master.
