Articles
All photos from the article
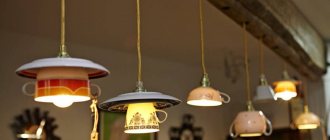
This article will be useful for creative people who want to take up making wooden products as a hobby. They come in different varieties, including wooden boxes for tea, jewelry boxes, and cases for wine and cigars. In this article we will pay more attention to the main points of creating and decorating some types of boxes and drawers.
Photo of a tea box.
Heart gift box
What do you need
- Sample;
- White paper;
- scissors;
- pencil;
- thick paper;
- glue gun.
How to do
Print the template on plain white paper. Cut and fold along the lines. On a narrow part you need to make a horizontal cut along the line indicated by the arrow.
Frame: Sarah Johnson – Pugdemonium / YouTube
Trace the templates onto construction paper and cut out. You will need two hearts and two stripes of each type. Follow the fold lines with scissors, without cutting through the paper, and fold it.
Frame: Sarah Johnson – Pugdemonium / YouTube
On all four long pieces, make many vertical cuts before the fold. Glue the wider pieces to the smaller heart so that the cuts are on the back side. Details are shown in the video.
Frame: Sarah Johnson – Pugdemonium / YouTube
To get the box lid, make the same vertical cuts on the narrow parts. Glue these parts to another heart so that the cuts are on the inside. Close the box with the resulting lid.
Frame: Sarah Johnson – Pugdemonium / YouTube
How to make a wine cabinet with your own hands
You can make a wine storage cabinet yourself at home. This will require minimal carpentry skills and a set of tools. First of all, you need to decide on the location of its installation and the dimensions of the room. The listed parameters directly affect the dimensions of the planned product. For a small room, preference should be given to small narrow pieces of furniture.
When drawing up a project, you should think in advance about what materials will be used and decide on the principle of organizing the internal space. It is worth considering the fact that diagonal shelves are the most difficult to make, and not everyone will succeed the first time. For beginners, it is better to choose simpler designs. For example, consider a master class on making a wooden cabinet.
Required tools and materials
Before starting work, it is necessary to select and prepare raw materials. Wood for making furniture must be smooth, the presence of knots and mechanical damage on the surface is unacceptable. Any deformations reduce the service life of manufactured products. Also, for carrying out events you will need the following set of tools and materials:
- pencil, tape measure, construction square, level;
- hammer, pliers;
- saw, electric drill, screwdriver;
- jigsaw, chisel, grinder;
- planed boards with a thickness of at least 20 mm;
- wooden beams 30x30;
- plywood sheets;
- corners for connecting perpendicular elements;
- clear varnish, paint;
- nails, screws.
Drawing and cutting diagram
It is impossible to do without constructing an assembly drawing, indicating in it the exact dimensions of all parts. Only on the basis of the design documentation, where the components for cutting are calculated on diagrams drawn to scale, can one calculate the amount of wood material, fasteners, functional and facial fittings required for the work.
Not many people will be able to develop a project on their own. This will require specific knowledge. But the problem can be solved. To do this, you should use ready-made sketches that are present in the literature on winemaking, or download them online. The main thing is to choose the right cabinet design, commensurate in size with the dimensions of the room.
Cabinet assembly and installation
Based on the existing drawing, it is necessary to prepare all the main parts of the cabinet. Initially, you will need to cut the beams and boards according to the dimensions indicated in the diagram, then sand them and treat them with an antiseptic compound. Next, a frame is assembled from the timber, all wooden parts are connected to each other using self-tapping screws. To ensure reliable fastening, perpendicular elements at the joints are fixed with metal corners.
The sides of the finished frame are sheathed with boards. The rear partition is cut out of a sheet of plywood and attached to the overall structure. To make shelves, you can use both wood and sheets of chipboard and fiberboard. Their width and depth must exactly match the similar internal parameters of the product
It is very important to maintain the size of the individual cells; they must match the bottle so that it is clearly fixed and cannot roll around
To build separate niches for each container, it is necessary to make small cuts at right angles in the horizontal shelves. Vertical elements are inserted into these grooves and rigidly fixed with glue and self-tapping screws. At the final stage, doors and fittings are attached. After assembling the furniture, the surfaces are varnished and installed in a pre-selected place. The base of the floor must be solid and level.
Polygonal gift box
What do you need
- Thick paper;
- compass;
- ruler;
- pencil;
- scissors;
- glue;
- bow.
How to do
Draw two circles with a diameter of 5 cm on paper. Without changing the pitch of the compass, make six marks on the circles at an equal distance from each other. Connect these marks with straight lines inside each circle.
Draw lines on the outside of each corner as shown in the video. For one figure they should be 4 cm long, and for the other - 2 cm. Connect these lines so that you get six rectangles. To the right of each of them, draw a small detail with a beveled top.
Cut out the shapes along the lines. Using scissors, draw along the sides of the polygon inside the circle and along the line of the piece with the beveled top. Bend the shapes along the marked lines and glue each of them. Place a lid on the box and decorate it with a bow.
For such a craft, you can make a voluminous lid. It looks very original. By the way, the box itself in this video is made using a different, more intricate technique:
Case stand
Here you can use your imagination to the fullest. After all, this design assumes that it will be stored on a table or, in extreme cases, on the floor. In general, everything that was described above can be applied here, only in a smaller version.
It is also necessary to mention that you can use similar wine racks for the refrigerator.
If you prefer branded products, then you can buy wine shelves. This is not difficult to do, but it costs money, especially if you want the original handmade work of a master.
But there are also inexpensive wine shelves aimed at mass production. Among them are the IKEA wine racks.
Square gift box
What do you need
- Scissors;
- thick paper;
- ruler;
- pencil;
- glue;
- bow.
How to do
Cut out a square measuring 20 × 20 cm from paper. Draw two vertical and two horizontal lines on it, stepping back 5 cm from each edge. In the middle you will get another square.
Use scissors to follow the marked lines and make grooves without cutting through the paper. Bend it along these indentations. Cut along short lines, bend the resulting parts and glue them together as shown in the video.
Cut out a square measuring 16 × 16 cm from paper. Draw two horizontal and vertical lines on it, 3 cm away from the edges. Then cut, bend and glue in exactly the same way as the previous piece. Place the lid on the box and glue a bow on top.
Instead of a regular lid, you can make two triangles that fit completely onto the box:
Garage shelves
Tools required for work: hacksaw, hammer, screwdriver, hammer drill. Materials: plywood, wooden beams.
Let's take a closer look at how to make a shelf in the garage.
We prepare the workplace. We remove the vehicle from the garage and prepare the tools.
We draw up a plan of the rack with the dimensions of the shelves.
We buy the necessary material: wood, metal, etc. The choice is made taking into account the strength of the material under load and practicality.
We put marks on the racks. We mark the vertical elements.
We drill holes. We make holes on the marks using a drill; for the welding frame, all parts of the frame are connected with seams.
We make shelves. Plywood, chipboard, and plank flooring are suitable for this. Accuracy of measurements is important here.
We assemble the frame, insert the shelves into the frame. The order of manufacture of the structure is: side posts, crossbars and amplifiers. Finally, the shelves are attached with bolts or screws.
Making it look good. Paint or cover with film.
Pyramid gift box
What do you need
- Scissors;
- thick paper;
- ruler;
- pencil;
- plate or disk;
- hole puncher;
- yarn or ribbon.
How to do
Cut out a square from paper. Using four lines, divide it into nine parts. Make a mark in the center of each side of the large square. Inside the squares adjacent to the marks, draw triangles as shown in the video.
Place a plate or disk on the sides of the triangle and trace. Cut out the shape along the marked lines. You should end up with something like a flower.
Bend the figure along all straight lines and connect the pyramid. Make holes in the tops of the triangles, thread yarn or ribbon through and tie.
Such a pyramid can also be made using the origami technique:
How to make a wine rack yourself
To store ordinary wines at home, you can make a cabinet with your own hands in several simple ways. Before starting work, you need to decide on the location of future wine storage. To do this, you need to follow simple rules:
- Determine the location for permanent installation of the cabinet.
- The ideal storage temperature for wines is 10-15 degrees. In a city apartment, it is impossible to ensure this condition without special refrigeration equipment, so the storage location should be located as far as possible from heating radiators. Installation in rooms with a “warm floor” system is also excluded, as this will have a cooling effect on the wine.
- Indoor humidity should be maintained at 60-70%.
- The storage location must be provided with a constant flow of fresh air.
- The cabinet should not be located in an area exposed to sunlight.
To set up a wine cabinet, you can use several options:
- Use an existing one, dividing it with diagonal X-shaped partitions of different sizes for each bottle separately or at the rate of storing 2-3 bottles per cell, laying them one on top of the other or dividing them into square cells of the same size for individual storage of each bottle.
- Adapt the existing niches in the apartment.
- Make an arc-shaped stand with perforations for standard 0.7 liter wine bottles, which will be stored neck down. Such a perforated arc can become a decoration for the kitchen or living room.
- For small rooms, when every square meter is valued. m, make a narrow vertical shelf from floor to ceiling with separate shelves for each bottle and perforation of one of the sides with round holes along the diameter of the bottle. This design can serve as a partition for the space of a small room.
- Set up a shelf for storing wine from cylindrical clay blocks (ideal for storing wine in a cellar) or from PVC pipes of different diameters (the design is unusual and impressive).
The best places to store wines are:
- cellar;
- kitchen;
- dining room;
- attic;
- substaircase space;
- free-standing tabletop.
Gift box clamshell
What do you need
- Pencil;
- disk;
- thick paper;
- ruler;
- scissors;
- ribbon.
How to do
Trace the disc on paper. Draw two perpendicular lines through the center of the resulting circle. Place the disk so that its edges touch the beginning of the lines at the top right and trace. Divide the new circle in the same way as the first.
In each part, trace the disc as shown in the video. Then deepen the lines.
Cut out the piece along the outer contours and bend along the deepened lines. Place the gift inside, fold the box and tie it with a ribbon.
What is a wine stand and why is it invented?
Racks for storing homemade wine in the basement of a house
The owners of a country house are absolutely lucky, who can afford to equip a real wine cellar, where they can enjoy the gifts of Dionysus all year round, sitting in front of the fireplace in the evening. But what should a person do who, being a connoisseur of the “art of wine”, is forced to live in an apartment where it is hardly possible to allocate space for specialized storage?
A wine cabinet in the kitchen allows you to preserve the quality of wine at home
The wine rack is equipment for several other purposes. Therefore, returning to the beginning of the article, it is worth fully deciding on the purpose of purchasing a rack. Would you like your wine to mature in the kitchen? Then your choice is a closet to store it. If you need a beautiful decorative element or just a shelf for storing bottles where a couple or two of semi-sweet red wines will await the next celebration - make a wine rack!
An original honeycomb shelf for wine bottles for your guests
Gift box with flip lid
What do you need
- Ruler;
- pencil;
- thick paper;
- scissors;
- glue.
How to do
Draw two lines on the two narrow sides of the sheet at a distance of 1.5–2 cm from the edge and fold the paper along these lines. Bend and straighten the sheet as shown in the video. You will get two folds in the middle.
Draw lines on the long sides of the sheet at the same distance. For clarity, draw the bends made in the middle. Make cuts down to long horizontal lines. Glue the paper together as shown in the video.
The hinged lid can be made from a separate sheet:
Features of storing wine bottles
Wine requires certain storage conditions.
All guests and friends will be glad when they come to your house to see neatly stacked bottles that are easy to get.
- Temperature 10 – 15 degrees C. This is the ideal temperature range, which makes it possible to quickly serve the drink to the table. If you keep wine at high temperatures, it begins to age: the aroma loses its former subtlety and sophistication. At low temperatures, the drink stops ripening and the oxidation process begins.
- The optimal humidity is 60%, the cork will not dry out, and the seal of the bottle will not be lost.
Making such a stand with your own hands is quite simple.
It can be used not only in the apartment, but also for the wine cellar.
Gift box-chest
What do you need
- Sample;
- thick paper;
- scissors;
- stationery knife;
- glue.
How to do
Print the template, cut along the solid lines and cut along the bottom dotted lines. Fold the shape along the remaining dotted lines. Glue it together as shown in the video. Connect the top pieces and thread them through the holes to close the chest.
You can leave the box as is or cover it in the middle with paper of a different color and decorate it with a bow.
Decoupage spice box using printout method
For this method, it is better to use plywood blanks, since during the implantation process the cardboard base may delaminate. However, if you work very carefully, you can also decorate a shoe box with decoupage and implantation of a printout.
In addition to the technique given here for implanting a printout “with its face into the varnish,” there is another method: transferring the design to the product using a hot iron.
A spice box made using the decoupage technique will fit perfectly into any kitchen interior.
This technique may seem too complicated for beginner decoupage artists, but if you follow all the steps carefully, you will be pleased with the result.
Master class for beginners on decorating a box using the technique of implanting printouts:
- Sand the box with sandpaper.
- Apply a thin layer of primer, white acrylic paint or stain to its surface and let it dry.
- On top of the primer we apply several layers of acrylic paint of the main color. Let the boxes dry thoroughly. This step does not need to be completed if you used stain to decorate the box.
- We apply several layers of acrylic varnish or special adhesive varnish to the printed motif. We cover the places where the design will be implanted with a thin layer of the same composition and until it dries, we lower the varnished image with its face into the varnish. Leave this structure in this position until completely dry.
- The next day, generously moisten the printout with water and begin to roll all the paper off the product. When you think there is no more paper on the image, dry it with a hairdryer and you will see a white coating, you need to get rid of that too.
- When only a bright image remains on the product, fill in the missing details with acrylic paint.
- Open the box with several layers of varnish and leave it until completely dry.
Despite the apparent complexity of this technique, even a beginner can handle it, the main thing is to follow the described sequence of actions exactly.
Gift box-bag
What do you need
- Thick paper;
- ruler;
- pencil;
- scissors;
- disk;
- glue;
- yarn or ribbon.
How to do
Fold the wide side of the sheet, moving 5 cm from the edge. Fold the resulting strip and cut off the remaining paper along the edge. Bend it back once.
Make one mark at the top and bottom, stepping back 5 cm from the narrow edge. Fold the edge along these marks, then fold the entire piece like an accordion.
Unfold the paper completely and make cuts along one wide edge of the sheet to a horizontal line. Cut off the narrow part, folded into an accordion, at the top and bottom. It should remain in the middle.
On the other wide side, mark the middle of the resulting squares with a pencil. Take a disk or some other round object and connect the center marked points of the squares with the corners opposite.
Fold the paper along semicircular lines. Glue the box together as shown in the video. Punch holes at the top, thread yarn or ribbon through them and tighten the bag.
DIY creative boxes for children's toys and more
In principle, you can store toys in anything, so use your imagination and go ahead!
Rare suitcase
A suitcase discovered in the depths of my grandfather's pantry is a real find! You can turn it into a magnificent element of interior decor and, at the same time, make a toy storage box out of it with your own hands. All you need to do is change its design in any convenient way. When thinking over finishing options, keep in mind that the appearance of the product should resonate with the overall interior design. This will make it easier to fit into the nursery’s decor.
Toy box from an old suitcase
Plastic containers
How to make a box for children's toys from it with your own hands? You can assemble containers into a single structure, building something like a chest of drawers. But in this case, you will have to work on creating a wooden frame, which not everyone can do.
There is an option to simply place them around the room. However, it will look a little boring, even though the elements are bright and colorful.
Rack for toys from boxes
A child’s room with chaotically stuffed toy boxes on the wall will appear from a completely different perspective. This composition will create a picturesque mess and serve as an excellent storage for children's treasures. Moreover, the child will have the opportunity to choose what and where to put it. For example, he will collect cars in a red container, and books in a green one. To prevent the baby from getting confused, each box can be labeled with corresponding pictures.
Separate boxes by color
Car tires
The idea is more suitable for a summer residence. In order to assemble such a box for children's toys with your own hands, it is enough to place two or three tires on top of each other. To make them more decorative, they can be painted in different colors or decorated in another original way.
Tire storage box
Wooden container
Seemingly unsightly designs can be turned into a real masterpiece. There are a lot of design options for wooden boxes. For example, decor with book spines looks interesting.
Another creative one is the skateboard box. The product is painted and placed on the running platform of the skateboard. Such a toy warehouse will be easy to move to any corner of the house. How else to make a toy box with your own hands, the photo will tell you.
Functional toy box
Textile storage
Instead of a box, you can make a soft structure for storing toys in the form of a bag. It will not be difficult for even the smallest child to untie the string and remove the contents. An excellent solution are transparent bags made from fabric and vinyl film. Transparent walls will allow you to quickly find the desired item, without spilling all the contents on the floor.
Transparent toy bags with drawstrings
A hammock made by yourself will be a worthy alternative to a toy box. It is often hung above the head of the bed and soft toys are stored there. This is done so that the baby can always reach his favorite bunny or dog. Sleeping in the company of fluffies is much calmer.
Hammock for soft toys
Car parking
Does the boy have a substantial collection of small cars? Invite him to park them in the beehive garage. The structure is a multi-tiered structure constructed from load-bearing bases of toilet paper rolls. How you can assemble an alternative to a toy box with your own hands, look at the photo.
Rack for machines made of bushings
In principle, the process is not labor-intensive. Cardboard reels are glued together sideways. To prevent the cars from falling out, the back wall can be covered with one common piece of cardboard.
Something similar, but in the appropriate decor (with ribbons, bows, rhinestones) can be offered to girls. After all, you don’t have to build a whole box for children’s toys with your own hands if you only plan to store some little things in it.
Organizer made of sleeves for storing small items
Fun buckets
The mission of the toy storage system can be entrusted to plastic and zinc buckets. It would be good if the containers were initially multi-colored. Otherwise, you will have to decorate them yourself. The applique will stick well to plastic, but unsightly zinc buckets will have to be painted. You can work on decorating them with decorative tape. This material will allow you to realize any fantasies. Look for ideas on how to make a box for children's toys from buckets with your own hands, in the photo.
Bright buckets for storing toys
Gift bag with bow
What do you need
- Paper;
- glue;
- ribbon.
How to do
Fold the piece of paper in half crosswise so that a mark appears in the top center for clarity. Fold both sides of the sheet to this mark, slightly overlapping one another, and glue them together.
Fold and glue the bottom of the bag as shown in the video. Fold the long sides over so that the bottom touches the seam at the bottom of the bag. Open the bag and fold it again along the side lines so that it is straighter and more beautiful.
Place the gift inside and fold the top of the package into an accordion shape. Press it in the middle and straighten the edges of the resulting bow. Tie the bag with a ribbon.
If it is more convenient for you to make boxes using ready-made templates, use the website templatemaker.nl. There are many boxes of different shapes collected there. Moreover, their parameters can be calculated automatically. Promo You will find even more interesting ideas for New Year's gifts on the marketplace of the Multibonus loyalty program for VTB Bank clients. There are more than 240 thousand products for every taste: books, gadgets, household appliances, certificates from popular stores and much more. Connect the loyalty program to your bank card in VTB Online and select the appropriate option for accumulating rewards. Now “Multibonus” is holding a holiday sale with discounts of up to 50% on products of popular brands, and for purchases from program partners in the “Accumulate” section you can get cashback of up to 30%. If there are not enough bonus rewards, just pay extra for the order in rubles. Find gifts for loved ones
Pipes
The idea may seem strange, but a wine bottle perfectly follows its cylindrical shape. So why clutter the space with a million shelves and racks when wine can be stored in space-saving tubes of the right size? For example, equip the cellar with a wall made of cylindrical building blocks. Now they can be purchased at any hardware store. A terracotta clay tube creates an ideal microclimate for storing a delicate and capricious drink.
Turn your wine rack into a real work of art! A budget alternative to brick blocks will be durable PVC pipes. Create an amazing composition from elements of different diameters, just like the Adventures in Creating designers did.
Drainage pipes are also great for storing your favorite wines. The main thing is to firmly fasten them together, then your drinks will be completely safe. Adventures of an Almost 40 Year Old Intern also suggests equipping a kind of coffee table at the top of the structure. This will create an additional surface for placing things or accessories.
If you are looking for the simplest and most economical option, then you won’t find anything better than a shelf made from cardboard mailing tubes. Agree, this project from Bob Vila looks very original and worthy of attention!
Advantages and disadvantages of wine shelves/cabinets
For short-term storage of wine, it is not at all necessary to install racks or shelves; it is enough to find a cool place and make it completely isolated from light. And if you plan to keep the drink for a long time, you will have to create optimal conditions for this. The ideal place is a wine cellar, it is dark, quiet, cool, with moderate humidity, that is, all the requirements necessary for proper maintenance and maturation are met.
Not everyone has the opportunity to make an appropriate basement, especially urban residents living in apartments in multi-storey buildings. Of course, for the sake of one or two bottles there is no point in buying an expensive cabinet or making one yourself, but to maintain a collection you cannot do without a minibar. This organization of the storage system has a number of advantages, among which are:
- Aesthetics. A beautiful shelving can become a decorative element of the interior, complementing its integrity.
- Centralized structure. The shelves allow you to collect all the bottles in one place, provide easy access and easy search for the required variety.
- Compliance with safety conditions. The rack provides the necessary lighting, horizontal position, and complete peace. Firstly, even bottles with a special coating that protects against ultraviolet rays are placed in the dark. Secondly, the wine breathes through the cork, so the liquid must come into contact with it, and this is only possible in a horizontal position. In addition, the wetted wooden material of the blockage will not dry out. Thirdly, sudden movements accelerate chemical reactions, disrupting the ripening process of alcohol.
- Demonstrative capabilities. Any owner of the collection will be able to show it to their guests.
The main disadvantage of the racks is their inability to store alcoholic beverages in compliance with all rules and regulations. Still, this is not a cellar. Other disadvantages include:
- Temperature conditions. Each variety requires a certain temperature at which the quality of the drink is preserved for as long as possible.
- Ripening. Alcohol will never ripen properly in the house; here it can only be temporarily stored.
- Humidity. Only a specialized, expensive wine cooler can maintain the required level of humidity. In other cases, this indicator will correspond to the conditions observed in the room.
- Fresh air. To prevent the wine from absorbing foreign odors, you will have to use a powerful exhaust hood and think through a ventilation system, which entails additional costs.
How to choose a ready-made wine shelf in a store
To store wine, specially organized racks are required. There are many different designs available, so there are some guidelines to keep in mind when purchasing a specific type of shelf. First you need to determine what exactly a wine rack is for. If the wine collection will mature in the kitchen, then you need to choose a full-fledged closed cabinet. An open counter is suitable as an interior decoration.
The type of design is chosen based on personal preference. The location of the bottle can be vertical, horizontal, inclined, diagonal, presentation. Based on the main types, looking at photos and videos of popular models on the Internet, you can easily make a choice in favor of a specific rack in the store.
How to make a wine rack or wine rack
If you are the happy owner of a country estate, then the issue of storing the gifts of Dionysus can be resolved in the best possible way. Just equip a real wine cellar in compliance with all rules and regulations and enjoy a noble drink all year round. For urban conditions, a hand-made rack or shelf for wine is suitable, preserving all the taste qualities.
A wine rack is a functional element of your home, which can also be decorative.
Following generally accepted storage conditions:
- the optimal temperature range is 10-15° Celsius.
- The optimal indoor humidity level is 60%. It will prevent the cork from drying out and losing its seal;
- the main storage condition is to prevent direct sunlight from falling on the bottles, the sun destroys the drink;
- The required position of the bottles is horizontal.
- static and calm. With shaking and vibration, a deterioration in the taste and quality of the wine is guaranteed.
All guests and friends will be glad when they come to your house to see neatly stacked bottles that are easy to get. We decide on the place in the apartment where we plan to place the future structure - as a rule, this is the kitchen, dining area and living room area. If you have a modest square footage, you should opt for space-saving stands and shelves that are mounted on the wall, and if you have enough space, you can, for example, make a wooden wine cabinet with your own hands.
Such designs can be varied and allow you to correctly position the bottles in a home or city apartment.