Painting from threads and nails: master class on creating a word
Using this technique you can make not only silhouettes, patterns and illustrations, but also words.
The operating procedure is as follows.
Glue several sheets of paper together and write any word, letter or sentence in block letters. Remember that the letters need to be thicker for the final picture to look nice. Cut out the word (picture 1).
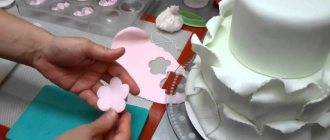
Prepare the substrate (picture 2).
Place the word on the backing (picture 3).
Drive nails along the outline of the letter. They should be located close to each other and at the same distance (picture 4).
Remove the paper letters (picture 5).
As a result, you should get something like in picture 6.
Prepare threads of such colors that the shade of one changes into another, like a rainbow (picture 7).
Start pulling the thread from the very top of the first letter (picture 8).
Then take another shade and continue working with it. So fill the letter with threads of different colors (picture 9).
Gradually fill in all the letters. Remember that you need to choose colors carefully. The selected shades should smoothly flow into one another (pictures 10 and 11).
Fill in all the letters this way. The picture made from nails and threads is ready!
Source
LiveInternetLiveInternet
Quote from what-you-want message
Read in full In your quotation book or community!
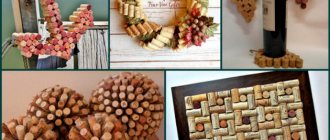
what to make from old keys, nuts, bolts
What to make from old keys, nuts, bolts
and various metal gizmos - craft ideas for men and women
And you can do, as you will see, a lot of interesting things. Something like: decorative balls, bottles, vases. And they will become unique decorations for your home and garden. One Austrian company (Moerkey) produces large-scale original crafts that decorators use in the design of modern homes.
And really, they are good! Of course, sticking keys onto the bottle, and some of them will have to be bent, is beyond the power of female hands. If only because we don’t have such devices at hand. And for men, they will definitely find them. We do it around the bottle
But there are also a lot of interesting hand-made things for us girls...
from stenciled pillows to creating artistic fabrics
shabby chic style
This is great steampunk! Do you understand how to use these things, right?
And these are new trends in steampunk: we take apart pendants and bracelets (old ones, of course, or children’s ones) and glue the parts onto keys, even rusty ones, and then use them in creativity
Well yes! I recommend watching all these metal surprises as part of some TV series. Russian TV series are in fashion these days, let’s watch them. To be honest, there are all sorts of movies there. Just in case. Historical, military, comedy. And even “Masha and the Bear,” which my nephews love very much. But personally, this Karpov has always surprised and continues to surprise me - what a mystery man: both an unpleasant and attractive personality at the same time. I think because of the look...
Just a good idea for hallway decor
Men's ideas, but very, very good. I definitely wouldn't refuse a set like this for my kitchen.
another lovely craft... I think you understand that the keys are glued to the ball, which is then removed from the craft
The example below shows how easy it is to bend and bend a key. If you have such a thing in your house, you are lucky, because you can easily make a bottle from keys and a ball. You just need to bend gently and carefully for beautiful and not strong bends.
and here they bend the keys for the hanger - a super idea for a dacha, by the way
And this young lady made her own design out of wire, “put” her keys in it and got a lampshade - not bad!
izifunny.com; mitsukai.blogg.se; Design*Sponge;yesandamenblog.blogspot.com
How do you like this for the bedroom? Part of a table lamp + keys. Only I would paint it gold for my bedroom. Well, either in silver... or decoupaged
And this is how you can stylishly hang a photo in frames
Bed Bath & Beyond
and make handles for cabinets...even kitchen ones
A lampshade for a table lamp, decorated with stencils of keys and the keys themselves - why is it a bad idea for the home?
And a pillowcase made of cotton fabric, also with a stencil
Wall decor made easy! And in the hallway there is also a stylish solution
Master class for panels of keys
What you need
Here are the basics of what you need for each pawn or piece:
- Pawn (16 pcs) = ½” hex head bolt (1 ½” high) + 1 flanged hex nut.
- Rook (4pcs) = ½” threaded rod + 1 hex flange nut + 1 (½”) locknut
- Knight (4pcs) = ½” hex bolt + 1 hex flange nut + 1 wing nut
- Bishop (4pcs) = ½" threaded rod (3" high) + 1 union nut + 1 flanged hex nut + 1 inverted (½") locknut + 1 washer
- King (2pcs) = ½" BB Bolt (3 ½" Tall) + 1 Hex Flange Nut + 1 Inner Serrated Washer + 1 1 Long Sleeve Hex Nut + 4 External Serrated Washer
- Queen (2pcs) = 1½" Threaded Rod (4" Tall) + 1 Hex Flanged Nut + 1 Washer + 1 Internal Serrated Washer + 1 Long Sleeve Hex Nut + 1 External Serrated Washer + 1 (½") Lock Nut
Now obviously this is not the way you should do it. Some of these components are quite expensive, so you may want to choose cheaper equipment or equipment you already have. How many of you have internal toothed washers? Yes... so use regular washers. The goal is to create a set that works and looks great, with the exact parts up to you. Getting creative and choosing standard parts can save money and time wasted in the store.
Source
Handicraft workshops
Good day to you, dear readers of our magazine “Masters of Handicraft”. Today our guest is a true master of his craft from Belarus, Vitebsk - Oleg Khrapovitsky. Oleg's style of needlework is very entertaining and unusual, which I was delighted with. In fact, simple bolts, nuts, nails turn into people, animals... I’ve never seen anything like this, so I asked Oleg to answer our questions, to which he kindly agreed.
Masters of Handicraft (MR) : “How long have you been doing handicraft, what kind of handicraft and how did you come to it? How it all began?"
Oleg :
“I’ve been doing handicrafts since childhood, I started with the fact that from the age of 4-5 I was sculpting motorcycles from plasticine, photographs of which were published in the 80s in the magazine “Science and Life”, then I tried to sculpt them in as much detail as possible .
Plus, an invaluable foundation was laid by my parents - from the first grade I helped my parents at their dacha with construction and housework. In the first grade, I made my first ladder, about 2.3 meters long, which my father was not even afraid to step on. At the moment, I can do everything around the house myself (I assembled the furniture in the apartment with my own hands according to my own designs).
I have been doing the handicrafts that I am doing now (sculptural miniatures from nuts, nails and all metal rubbish, if you can call them that) for about 4 years.
It all started with the fact that on some site on the Internet I saw similar products and a post (work log or master class, although without a text description) of their production, although those products were made by welding and were larger-scale, after a month again I came across the work of the same master and my hands itched.
I stocked up on the necessary minimum of tools: a soldering iron, soldering acid, wire cutters, pliers and got to work; my 9-year-old son took an active part. The first job was as a gift to relatives, whom we see every two years. My relatives were in seventh heaven and this first work of mine takes pride of place in their kitchen far away in Germany. If we compare the level of production of the first work and what I’m doing now, the difference is of course huge, but I have such reverent feelings about the first work...
From the beginning, of course, one could not do without being guided in the work by the works of other masters, and in the first works one can find a certain similarity, but probably not a single handicraft worker, artist, or inventor could do without this, you can’t reinvent the wheel a second time... but it can be modernized ! Artists, after all, also studied at art schools, and often paint with the same colors, only some in their work do not move beyond copying other people’s works, while others go forward and create something new. So in my creativity, I first looked up to those works that I liked and then, as I acquired the necessary skills, I developed.
After I had to incur certain material costs for my hobby, I thought, shouldn’t I offer my work for sale? Because A hobby is, of course, a good thing, but everything costs money - materials, and the most valuable thing - time, which is sorely lacking.
The works were gladly accepted first into one art salon, then into another.
At this time, for a new work I only need a theme, or a person’s desire to find an original souvenir, and then, in a dialogue with the customer, I try to find out the details in order to play with this theme with the available materials, of which there are not many: nuts, nails and other small scrap metal. Not all customers can formulate their desires in words, and the material I need for work has to be pulled from them as if with pincers. But what a tremendous pleasure you get when the customer, looking at the work done, is completely delighted - this is the highest rating.
Someone says that these sculptures made from nuts are primitive, but I’m not offended, I tell such people - here are 15 nuts and 4 nails - make something out of them so that another person would want to buy it (often not cheap) and at So that he would be delighted, he has not yet found a single hunter...”
MR : “Your main activity. What is handicraft to you?
Oleg:
“Programmer, system administrator.
Handicraft is an activity that allows you to detach yourself from the entire world around you, the same goes for fishermen - it doesn’t matter to them how many fish they catch, the main thing is to sit with a fishing rod and immerse yourself in your thoughts. It’s also a great pleasure when your works evoke positive emotions of their owners or just contemplators (that’s a strong word :-)), probably this is the most important thing.”
MR : “What do your family say? Do they support you and help you?
Oleg : “At first, I created inconvenience, because... worked in the kitchen and occupied the entire table (half an hour to lay out tools and materials, half an hour to assemble, 4-6 hours of work on weekends). But then I set up a workshop on the balcony and now I work there even in winter. There hasn’t been a single job that would leave my family indifferent to it, but so far I’m like a shoemaker without boots; at home, from my work there is only a small owl. My son takes an active part in the work, I have something to pass on to him, and he absorbs knowledge and skills like a sponge.”
Deer
You will need: a wooden board 20x30cm, nails, black cotton threads, black and white acrylic paints, brushes, hammer.
Master Class
- Paint the board with white acrylic paint, then wait until it dries.
- Print out the outline deer template.
- Place the template on the board, fix it so that it does not move.
- Take one nail and a hammer, then make light nail holes and remove the template.
- Drive the nails into the designated points to the same depth.
- Wrap the black thread around the outline of the deer and its antlers as shown in the image.
- Wrap the black thread around the inner outline of the deer, following clear geometric lines.
- Wrap the nose and horns with an additional layer of thread.
- Paint the nail heads with black acrylic paint using a thin, stiff brush.
The geometric panel “Deer” made of threads and nails is ready! I recommend watching this video!
Painting made from THREAD and NAILS ☆ DIY gift