How to choose material for making papier-mâché
The main “ingredient” is paper or cardboard and is used depending on the desired result:
- gray or white toilet paper and newsprint - for small crafts, since the surface is smooth;
- thick sheets, glossy magazines can be used to prepare paper dough mixed with softer types of paper;
- cardboard is indispensable for creating frame crafts such as boxes and furniture;
- packaging and trays for eggs - for forming large products or for decorative plaster, in these cases the lumpy surface will not be a hindrance.
Egg boxes and trays
Connecting components:
- PVA glue should be used in a ratio of 2:1 or 1:1 with water, depending on the thickness;
- It is better to prepare wallpaper glue according to the instructions on the package;
- starch or flour paste: take 4 parts water to 1 part flour or starch, mix until smooth, bring to a boil, stirring constantly and cook until thick.
The result in the finished product will be the same, so the choice of mixture is not important, use the option that is more convenient for you.
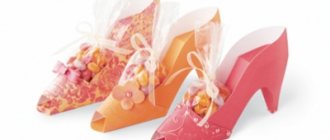
Chewed paper pointe shoes
Making amazing soft toys: 10 master classes with patterns
Soft toys are loved by all genders and ages. They return adults to a carefree childhood, and children become best friends and companions in fun games.
Therefore, we have prepared for you a selection of simple lessons from which you will learn how to sew a toy with your own hands. Homemade dogs, bunnies and bears carry a powerful charge of love and positive energy. This is also a wonderful and bright element of children’s room decor and a win-win gift option.
Basic materials and tools
1.Paper:
- newspaper
- office
- toilet
The fact is that there are two ways to obtain a paper layer on a form: a set of layers with pieces of paper and applying a homogeneous mass. Sometimes both techniques are combined in one work.
a) We tear the paper into pieces. The smaller the product, the smaller the size of the pieces. Just don’t cut it into equal squares!)
A little life hack: alternate layers of paper of different colors. This way you will know exactly what layer you are using!
Apply 2-3 layers and let dry thoroughly.
b) You can make a mass from toilet paper.
At the same time, the mass will acquire the desired color shade if the paper has been tinted.
- Pour 250 ml of PVA glue into a bowl. If it is very thick, then add water. We tear the paper along the perforations and add one leaf at a time to the glue. Knead until a homogeneous, thick, dough-like mass is obtained. You will need about half a roll, approximately 40 grams if you weigh it.
- Add to the mixture 1 tablespoon of liquid soap and 2 tablespoons of refined vegetable oil as a plasticizer. Let's knead!
- Add 50 grams to the mixture. starch and 100 gr. premium wheat flour. We lightly moisten our hands in oil and continue to knead the mass like dough, sprinkling the table with flour, until smooth. It shouldn't stick to your fingers.
- If you plan to store it for a long time, then add 1 teaspoon of lemon juice to the batch and store it in the refrigerator, wrapped in plastic.
2. We use any wallpaper glue, PVA, or flour paste.
It’s easy to make a paste yourself from flour:
- Boil 1 liter in a saucepan. water. While the water is boiling, dilute it in 0.4 liters. cold water, add flour and stir well with a spoon. You should get a saturated cloudy solution, but not very thick!
- Pour our solution into boiling water with constant stirring. Be careful not to get scalded!
- After cooling, filter the resulting jelly through a sieve. Store in the refrigerator and in a closed jar.
3. Single-color plasticine. You can buy a ready-made sculptural one, but it will be cheaper to take a colored one and mix all the colors until smooth. We will make a model from it.
4.Containers for glue and water.
5. Flat brushes made of bristles of different sizes and thin round brushes, kolinsky or synthetic, stacks.
6. Rags (rags), foam sponges.
7. Scissors, a knife with removable blades, medium and fine sandpaper (zero).
8. Plaster. The papier-mâché technique requires a base on which layers of paper will be applied. Most often, a form is used, in or onto which layers of paper coated with glue are placed. If you need a large number of identical products, then it is best to use plaster molds, as they will absorb excess moisture and the product will dry out faster!
9.Metal culinary foil, gouache or acrylic paints, tempera, decorative cords, rhinestones, sparkles, beads, silicone moldings, toothpicks.
Based on the materials, it seems that everything is ready to begin!
Master class “Desert Inhabitant - Camel”, non-traditional appliqué technique from newspaper tubes
Yulia Fedoseeva
Master class “Desert Inhabitant - Camel” non-traditional appliqué technique from newspaper tubes
Probably, many people have newspapers that have nowhere to put them.
Today I will show you what applique can be made from old newspapers , it is not much different from the traditional one, the only difference is that the material is always available. Crafting from newsprint is also interesting. This activity teaches perseverance and the ability to see things through to the end. In addition, the applique allows you to show imagination, creative imagination, trains fine motor skills and design skills. And also to develop cognitive activity, deepen and expand children’s understanding of the diversity of living creatures inhabiting our planet, introduce them to the camel, a desert inhabitant ,
Material and tools:
Newspapers , glue scissors, colored cardboard
Execution order:
camel template on colored cardboard .
Cut out the image of a camel along the contour
Cut the newspaper
Let's prepare material for our craft, namely, we'll make newspaper tubes . Newspaper is thin and curls well. the corner of the newspaper at the angle shown in the photo and begin twisting to the end. Apply a little glue to the corner of the strip and secure the tube .
The preparatory work is completed, you can create a craft, for this we take a template, apply glue to it and lay tubes .
Turn the template face down.
We begin to cut off the tubes that protrude beyond the contour.
«Desert Dweller»
ready.
Create together!
Thank you for your attention!
Technique of weaving from newspaper tubes When I first saw products made from newspapers, I was simply amazed: how it is possible to create such works of art from an ordinary newspaper.
Required materials and tools
To make a “Camel” craft, you need to stock up on paper or cardboard. You will definitely need a pencil, scissors or a stationery knife.
To begin, carefully draw on paper your favorite picture of an animal with humps. Now you need to carefully cut it out.
You can draw your animal according to your taste.
You can also supply paint of any color you like. And when the craft is ready, carefully cover it with paint.
Examples of ready-made crafts
Camel crafts are made from just about anything. They are cut out of cardboard and assembled according to the details, like a 3D constructor. Or they are folded from one sheet of paper, making folds. Even among children, there are often works that are performed like appliqués. These are quite unusual and beautiful crafts.
Cardboard craft
Paper modeling
Corrugated cardboard craft
3D puzzle
Paper model
Broken applique
The simplest origami for children 3-4 years old
Airplane
As already mentioned, for the first origami lessons it is better to choose the easiest patterns. The “airplane” scheme (Fig. 1) in 7 steps allows you to make a craft, which you can then play with, launching the resulting airplane to each other. You can make an airplane using this pattern from a regular rectangular A4 sheet.
Execution algorithm
- Fold a rectangular sheet of paper in half lengthwise. Return the sheet to its original position. Bend equal corners in the axis of the sheet of paper.
- Bend the part of the sheet with the bent corners down, move the fold line 1-2 cm below the place where the corners end.
- Bend the corners again in the axis of the sheet.
- Turn the protruding tip of the paper over the corners.
- Turn the sheet in the opposite direction along the axis.
- Bend the edges to form wings.
Dog
The next scheme, which is suitable for the first lessons with children 3-4 years old, is a “dog” (Fig. 2), obtained from a square sheet of paper in 6 steps. The finished craft according to this scheme will need to finish drawing the eyes and nose to make it complete.
Execution algorithm
- Take a square sheet of paper and fold it diagonally.
- Mark the middle on the resulting triangle.
- Bend its ends down on both sides.
- Bend the bottom corner of the triangle up.
- Draw the dog's eyes and nose.
Tulip
The following diagram is also very simple, but is assembled from two parts. “Tulip” (Fig. 3) is made in 9 steps from two identical square pieces of red and green paper. The finished two figures need to be glued together to make a beautiful flower. Before you start creating tulips, you can agree with the children that they will give the resulting flowers to their mothers or sisters.
Execution algorithm
- take a square sheet of colored paper (red, yellow, pink - your choice)
- bend the sheet diagonally.
- Bend the resulting triangle again diagonally and straighten it so that the fold line is visible. Now fold the right end of the triangle at approximately 60 degrees (2/3 of the triangle's sides)
- Bend the second end in the same way as the first.
- roll up the bottom.
- Take a square sheet of green colored paper.
- bend it diagonally and bend it back so that the bend points are visible
- fold both sides of the sheet triangles so that the fold lines are located between the free edge and the diagonal.
- fold the shape in half diagonally
- Bend the bottom as shown in the picture.
- connect both parts of the flower
Cat
By analogy with the dog, you can make a craft according to the “cat” pattern (Fig. 4) in 6 steps. For this craft, you need to use a square sheet of paper, and at the end, add eyes, nose, mouth and whiskers to the resulting cat.
Execution algorithm
- Take a square sheet of paper and fold it in half diagonally
- Fold the resulting triangle in half to mark the axis and return it to its original position.
- Mark the middle of the sides and bend the ends as shown in the picture.
- Bend the upper end and tuck it behind the “ears”.
- Flip origami
- Draw the eyes, nose and whiskers of the cat.
Ship
One of the simplest schemes is the “ship” (Fig. 5), which is done in just 4 steps.
Execution algorithm
- Take a square sheet of paper. Fold it in half diagonally
- Fold the resulting triangle again as shown in the figure.
- First one side is bent, then the other in the opposite direction.
- Mentally draw an inclined line and bend the sides along it
- Our sailboat is ready.
Preparing material for work
For machining and modeling techniques, it is enough to tear the paper into strips or scraps, but for modeling you will need special paper dough. Let's take a step-by-step look at one of the options, suitable for large crafts:
- Tear 10-12 egg boxes or trays and 2 glossy magazines into small pieces.
- Place the paper pulp in a bucket or basin, add water and leave to dissolve for a day.
- Mix the soaked mass with a household or construction mixer until it becomes a homogeneous puree.
- Strain out excess liquid through a cloth, but make sure that the mixture does not dry out.
Ready! Keep in mind that you can prepare a lot of this mass at once, and soak it with water before use.
Important! The prepared paper dough must be mixed with PVA glue immediately before modeling. Wallpaper glue can be added immediately after draining the water, but this mass must be stored in the refrigerator
Paper dough
Here is an option for making paper dough for small and thin elements:
Crafted camel from plasticine. Step-by-step master class.
In order to develop fine motor skills of children’s fingers, spatial imagination and simply give them pleasant emotions, you should definitely practice modeling. Bright, pliable plasticine is suitable for such lessons. The younger the child, the softer the material should be. Buying any product today is not a problem. Plasticine of any quality is available to all parents; you also need to take into account that it can be used many times, creating all kinds of crafts with your own hands.
Invite your child to make a camel. He will enjoy sculpting small parts and modeling the Bactrian animal. Be sure to communicate with your child while working, discuss your every action, and praise for success. All this will contribute to the development of speech.
Carnival mask
We make a preliminary accurate sketch on a scale of 1:1 on thick paper. We cut it along the contour and get a template. Using it, we mark the contours of the mask with a pencil on a plywood tablet; To save plasticine, we place wooden or foam blocks in the center of the future model. They should not protrude beyond the model; We begin to gain volume to the desired size. Based on the sketch, we sculpt all the details; Important point! All parts of the model must work for the exit, that is, have no depressions or locks that will interfere with the removal of the product! When leveling the surface, you can use a piece of hacksaw blade, and for perfect smoothing, use Vaseline. After the model is ready, we proceed to the main part: collecting the paper layer. Now you need to choose which technique to use: sticker in pieces or in bulk? The fact is that when you type in pieces, the surface of the product turns out to be uneven. If it works for the image of the mask and enhances it, then good. But if a smooth surface is required, then after drying you will need sanding, and this is a very labor-intensive process. In this case, the mass that we kneaded will help us out. It will ultimately give a smooth and even surface! Coat the model with Vaseline
Spread the paper dough evenly. Important point! After drying the layer, we make slits for the eyes and holes for fastening until it dries completely! After the polymer dries, this will be much more difficult to do! Modeling using this technique makes it possible to immediately work out all the small details! After complete drying, carefully remove the mask from the model. If you can’t separate them in any way, then it’s better to sacrifice the plasticine base and remove it from the mask piece by piece; We clean the edges with sandpaper, removing all burrs. We paint with gouache with PVA or acrylic in the desired color
We add decorative and theatrical elements necessary to create a certain image, ribbons or elastic for fastening.
You can go to a masquerade ball!
⇡#Nanoorigami: DNA instead of paper
Not so long ago, in the spring of 2006, American biologist Paul Rothemund from the California Institute of Technology announced an amazing discovery, which the young scientist called DNA origami.
Paul Rothemund
The biologist touched upon the holy of holies of genetics—molecular programming. Paul figured out how to shape the deoxyribonucleic acid molecule into a specific shape. To do this, he used complementarity (the property of nitrogenous bases to form pairs of certain types using hydrogen bonds during the interaction of nucleic acid chains). In his experiment, Rothemund used so-called “paper clips” - short synthetic DNA strands. The scientist calculated these auxiliary “clips” on a computer and then ordered their synthesis in the laboratory. During the experiment, synthetic DNA strands were attached in strictly programmed places, pulling the main DNA into the desired shape.
To effectively demonstrate his discovery to others, Rothemund began to “fold” DNA strands, obtaining completely recognizable forms - letters, signs, figures. And based on the ring-shaped thread, he even made many smiling emoticons.
What is this fun with building DNA figures for? When Paul Rothemund began to study origami at the nanoscale, he did not particularly think about this question. The scientist even laughed it off in an interview, claiming that he was very lucky in life and was simply fooling around, and also getting paid for it. However, this hobby of his opened up new prospects for creating nanodevices for humanity.
Rothemund's colleagues from the same California Institute of Technology made a functioning switch (transistor) using the DNA origami technique. This switch is ten times smaller than similar elements in a modern PC. It is clear that in order to make an entire DNA computer, billions of times more such switches will be needed, but a start has been made. In addition, the process of creating the intended DNA forms is extremely simple: assembly occurs almost automatically, following the basic principles of double helix formation. Strands of DNA are placed in a solution that is brought to a boiling point, after which it is slowly cooled to form the desired shapes.
A few years later, scientists improved the DNA origami method and began to create three-dimensional objects - a box, gears and other interesting things. For example, they managed to make the smallest jug in the world, the volume of which could fit 800 thousand water molecules.
Through the use of this technology, it has become possible to transport medications to the desired part of the organ with perfect accuracy. In the future, this will undoubtedly increase the effectiveness of drugs and reduce the number of side effects.
Camel on the coat of arms
So camels are not lazy creatures, but quite the opposite – incredibly hardworking creatures. People appreciated this quality by placing the image of a camel on the coats of arms of countries and cities. It is even in Russian symbols. This animal, for example, adorns the coat of arms of Chelyabinsk. Why camel? After all, they don’t live there at all.
It's simple. In the old days, Chelyabinsk was a center of trade with Asian countries. It was there that numerous caravans came. Thanks to this, the city actively developed. And the townspeople decided to place a camel on the coat of arms as a sign of respect for this hardy and hardworking helper of man. That is why the coat of arms of Chelyabinsk depicts a camel. When the city became the center of the entire region, it was time to come up with the coat of arms of the Chelyabinsk region. “Why can’t a camel be depicted here too?” – the residents thought and kept their favorite animal on this symbol too.
Wonderful camel
How to survive in the desert? Temperature fluctuations are extreme: winters are not only very cold, but with extreme winds, and summers are exceptionally hot. Grass and large shrubs cannot grow on soil exposed to the destructive effects of winds, so the desert consists of bare rocks and stones. No one has adapted to life in the desert better than the camel. “Endurable, noble, wise, patient and the most beautiful in the world!”
There are two types of camels. Dromedaries (dromedary camels) are widespread in Western Asia and Africa. In Central and East Asia: in Mongolia, Northern China, Kazakhstan, and the Caucasus, Bactrians (Bactrian camels) predominate. Camels belong to the callosed order (like alpacas and vicunas).
The camel has long thick eyelashes in two rows, hard fleshy forked lips, one or two humps with fat on the back (up to 150 kg!), and on the back of the head there are glands that secrete a black viscous and odorous secretion. In case of danger, the camel spits out the foul contents of its stomach, and does it quite accurately, aiming at the enemy’s eye. Therefore, it is worth noting another feature of the camel - its “special smell”.
The name "dromedary" comes from the Greek word δρομάς, which means "running".
The word “Bactrian” is Latin (lat. bactrianus), literally meaning “Bactrian”, after the name of the historical region of Bactria, located in the middle reaches of the Amu Darya (in ancient times - a Persian province).
Camel red blood cells are oval and are able to accumulate moisture, increasing in size by 2.5 times. We wish we had those!
Camel hair is taken from the Bactrian - a two-humped camel, its wool is thicker, less often from the dromedary. Bactrians have protective outer hair that reaches a length of 40 cm.
Camel hair is cut and combed, but most often collected during shedding. Then the fibers are sorted - the fluff is separated from coarse hair. The resulting fine undercoat, 4–13 mm long, has a tiny diameter of 5–40 microns and is golden or reddish brown in color. Each camel can produce about 2.25 kg of wool per year.
Should I knit from camel wool?
Camel wool fiber is thin, covered with scales and hollow along its entire length, so it is very light.
Camel wool has unique properties - excellent hygroscopicity, high heat-saving qualities, fluffiness and volume with low weight.
Camel wool has no analogues in its overall health-improving effect on the body. It relieves rheumatic pain, treats sprains and bruises, radiculitis, strengthens muscles and joints, and stimulates blood circulation.
A camel blanket maintains optimal conditions for a person, allows the body to breathe, absorbs moisture and retains heat.
Women of Ancient Egypt used camel down corsets to correct firoure, because camel hair quickly absorbs moisture and evaporates it just as quickly.
Camel wool is 2 times lighter than sheep's wool, so the largest camel blanket remains light.
Source
How to make papier-mâché at home
You need to start working with papier-mâché with objects that are simpler in shape. A vase or saucer would be perfect. If you manage to recreate a saucer or vase from paper, then you should take on more elaborate figures: a dinosaur, a human head, a Christmas tree toy, etc.
From toilet paper and glue
We discussed earlier how to prepare a papier-mâché mixture from toilet paper and glue. The main secret is to squeeze the paper well before adding glue to the composition. Next, we take the vase, wrap it in cling film and begin to apply the composition. You need to completely cover the vase and make sure it is even. Now you need to leave it until it dries completely. Sometimes this takes several days. We take the dried workpiece and cut it into two halves with a stationery knife. We try not to damage the template vase. Both halves at the ends of the cut are coated with glue, and strips of napkins or other thin paper greased with glue are additionally applied on top to cover the places where the papier-mâché layer separates. The seam should also be allowed to dry before you begin painting the vase.
From the newspaper
Let's take a plate as a base. You need to apply a layer of Vaseline or cling film on it. Newspaper, torn into pieces, is dipped into prepared paste or PVA glue. The pieces soaked in glue are placed on the plate from the bottom, if you need to get a slightly larger craft, or from the inside, if the product is needed a little smaller than the template. A second layer is applied to the first layer of paper, after which the work is dried. Then you need to apply two more layers of newspapers, etc.
To make a papier-mâché object durable, you will need 10–12 layers, or even more. This depends on the original thickness of the newspaper sheet. Crafts made from thicker paper take longer to dry, so it takes more time to fuss with them. But thin material will require more layers to achieve suitable strength.
From paper clay
Working with paper clay is done in almost the same way as with papier-mâché from napkins. Only the stage of preparing the mass is simply omitted. Since paper glue is sold ready-made, you need to study the instructions for working with it on the packaging. In particular, if a template or frame is needed, how the mass will interact with it will become clear from the instructions.
If a figure is molded from paper clay, like from plasticine, that is, without cavities, then you need to pay special attention to the proper drying of papier-mâché. After all, moisture will evaporate from the depths of the product for a very long time
You may have to create the figure in stages, as if in layers. First, sculpt a certain frame, dry it, and then cover it with a new layer, giving it the necessary shapes and bends. Dry again, then apply the finishing layer with all the subtleties of the relief.
Volumetric hippo
Are the shelves in the nursery already full of soft toys? Are there hippos among them? If not, you need to urgently correct the mistake. A cheerful and friendly hippopotamus really wants to visit you. Thanks to the step-by-step handicraft lesson, even a novice handicraft enthusiast can make it.
To work you will need:
Print or redraw the toy pattern. By printing it on A4 format, you will receive a pet measuring 22*15cm. The details are drawn without seam allowances.
Cut out the resulting patterns and cut out the parts of the future toy from the fabric. It is better to take a material for the body that is dense and elastic, so the toy will look more neat.
The belly and back of the hippopotamus can be cut from the same fabric or made in different colors. If you settled on a monochromatic option, cut out a solid piece. To do this, connect the two parts of the pattern in the muzzle area.
First of all, sew the ears and paws, connecting the parts with the right side inward. Sew the foot circles to the bottom of the paws.
Turn the pieces inside out and stuff the paws, leaving free space at the top for sewing.
If you took a fabric that is not very dense, glue a piece of non-woven fabric on the back side where the eyes should be.
If using two parts for the body, sew them along the muzzle.
Where the muzzle bends, the fabric needs to be gathered a little. It is better to secure it with a pin and then stitch it.
The result should be a piece with one unsewn seam at the back (where the butt is).
Machine or hand sew all seams except the opening at the bottom of the back. Turn the toy inside out.
On the muzzle, make cuts in place of the eyes and secure them. You can make do with beads or glue half beads.
Fill the toy with padding polyester.
Sew up the hole left earlier. Sew a loop of braid in place of the tail and a button on it.
Don't forget about the button nostrils. As you can see, making this cutie is not at all difficult.
An unusual handmade pet is ready to live in your home. It will also be an excellent gift for loved ones. They will definitely appreciate your efforts and care.
Waste material or wire base
When making a bird or animal figure, you can use several bases as a frame, connected together with tape or masking tape. For example, a vase can be made from a balloon and a paper cup attached to its top.
They use cardboard tubes from toilet paper or kitchen napkins, parts cut from corrugated packaging cardboard or wire frame structures. To make them voluminous, several turns of fabric, bandage or masking tape are wound on top of the wire and wrapped with cling film.
Then the entire surface of the frame is covered with pieces of paper or paper clay, layer by layer. When the figurine has the desired shape, its outer shell is rubbed down, leveled using the methods described above and prepared for painting.
How to make a camel from paper and cardboard
Camel crafts made from cardboard are gaining momentum in popularity every time. Even ardent connoisseurs of paper and cardboard animals will like them.
Step-by-step assembly of a three-dimensional craft
Making a camel out of cardboard is quite easy and simple. To begin, remove the figures from the base. We lay out the resulting parts in front of us - it’s easier and faster to see them in this state.
Origami of a simple camel with diagram
This paper craft will definitely not go unnoticed. And a child who is at least a little interested in the origami technique will undoubtedly want to repeat it.
Camels are proud and leisurely animals. They are often called "ships of the desert." Their step is firm and confident, but not hasty. They seem to know where they are going.
Also, camels are the hardiest animals. Even wandering in the desert for several weeks, they can easily survive without food and water. They are the indispensable helpers for a person when it comes to carrying weight.
Your child will really like this craft. He will definitely want to play with her. Such a camel will perfectly decorate any nursery interior and fit into any color scheme (if it was originally made of paper in a neutral shade).
- First you need to take a piece of paper in the shape of a square. Connect opposite corners one by one. (Picture 1).
- Now, having folded the square in half, with opposite hands facing each other, you need to connect the remaining opposite corners to each other. (Figure 2)
- Now, holding a sheet of paper as shown in the figure, you need to take one corner of it and fold it along the side lines. (Figure 3)
- Now you need to smooth out the edges of the resulting square and turn it over so that all the fold lines are at the bottom. (Figure 4)
- We do the same with the other free corner. (Figure 4-7). At the end of this stage, you should end up with a smaller square (or rhombus).
- Now, holding the resulting diamond in front of you, you need to lift the upper corner and make manipulations with it, which are shown below in the figure.
- Now place the figure in front of you. At this stage it is necessary to straighten all the fold lines.
- Raise two corners up (Figure 14). Smooth out the lines. Now we lower the right corner. These will be the hind legs of the animal (Figure 12). Now we lower the left corner.
- Now you need to slightly modify the head so that the resulting animal looks like a real camel. To do this, lower the corner of the strip of paper on the left. (Figure 13).
- Now we add more folds next to the head. (Figure 14).
- The origami Camel figure is ready. You can carefully draw on the eyes, mouth and design it your way.
If suddenly the origami didn’t work out. Or it’s quite difficult to follow the pictures, we present the video below. With it you can learn how to make an origami camel.
Applications for children
Children love these animals very much. And after training your hand a little, the Camel drawing will be easy and simple.
"Applique for children Camel."
Drawing of "Camel" using handprints.
Templates for cutting (and drawing)
To make the task easier for very young craftsmen, various templates for cutting and drawing are collected below. With their help, you can follow your own imagination and allow your child to do so.
Children will have a blast learning about animals through a variety of games. And after they get beautiful crafts, the children will be satisfied for a long time.
By following simple master classes with step-by-step descriptions, camel crafts will turn out beautiful.
They can be added to the animal collection. Or decorate the children's room by painting it in a color that will optimally fit into the interior of the child's room.
The child will be able to assemble a 3D construction set, cut out images of camels, color them, decorate them, etc.
And also have fun trying your hand at creating appliqués on a sheet of paper.
Step-by-step photo lesson:
Take a sheet of paper and fold it diagonally.
Turn it back in half.
Turn the corner inside out and fold the top side down.
How to dry the finished product
Making papier-mâché means not only sculpting a masterpiece, but also subjecting it to high-quality drying, which provides almost half the success. If ceramics need to be fired at high temperatures, then with papier-mâché everything is different. The material does not tolerate too rapid heating. It must be remembered that the base is paper, a flammable material, so the figures should be removed away from open fire. There are recommendations on how to dry papier-mâché in the oven of a gas stove, but it is better for beginners not to use this method.
The material dries well in the open air near the radiator, in the sun, next to (but not close to) an electric heater, in an extinguished but heated stove. The oven can be used if you have an electric or combination stove. You should first heat up the gas oven, turn it off, and only then place the papier-mâché product there. You should not close the door completely, because air circulation is important so that water vapor is carried away from the product.
If papier-mâché consists of many layers, then it is better to glue no more than 3-4 of them, and then leave the work for a day so that it dries completely. Only then is it possible to take on the next layers.
Doll Master class Craft product Sewing
Cotton wool Glue Tapes Threads Sequins rhinestones Soutache braid cord Fabric
I'm not an expert in creating MK, so don't judge strictly. I'll try to tell you everything in more detail. So, let's start with the pattern. I drew the pattern approximately how it should look, by eye, because I started making the camel spontaneously. Therefore, do not rely on my drawing, it is not entirely correct, the neck should be thicker, otherwise it will not be a camel, but a swan.
I sewed the parts of the camel and beat it with cotton wool. This is what happened.
View from the other side.
Bottom view, you can clearly see the bottom. For strength, you can reinforce the bottom with cardboard of a similar shape, my mistake was that I didn’t do this, but it’s not fatal, the camel turned out to be quite stable)
Here the camel has sequins at the bottom of the ribbon, pouches and a bridle.
The camel has eyes. I drew it on paper and taped it on top so that it would shine and not rub off. I glued my eyes.
I made the ears. To prevent the ears from flapping, I treated them with PVA glue. It becomes transparent when dried, but secures the fabric well.
Ears from a different angle.
I made a tail for a camel. At the tip there is still the same velvet braid.
Source
Houses
I'll start with the video of the master class - wonderful!
Now photo master class
To make a house, we need:
- Additionally, you may need foil to construct parts from it. But if the mass is elastic and is well attached to the base, then all the parts are made from it;
- instead of a balloon, use a jar for the base;
- not newspapers, but a mass of papier-mâché.
How to do it. Simple instructions:
- First, we cover the jar with “plasticine”, taking into account the doors and windows.
- Level the surface.
- We apply a pattern in the form of masonry or make convex “bricks”.
- Let's decorate.
- The author of the master class is Svetlana, she has her own shop at the crafts fair.
Do you want to make a two-story house?
After the figures are made, it is worth paying attention to alignment. To do this you need to sand the craft
Then you can start painting. Otherwise, unevenness and bumps will be noticeable due to lumps in the mass or due to layers. Such irregularities can be disguised with decor.
The magical properties of camel wool.
Dear Subscribers and Guests of my Shop! I present to you my New Products. namely what they are made of. So. a short excursion about the magical and wonderful properties of the wool of Mongolian camels.
Camel hair in the East is considered sacred and brings good luck and happiness to the home.
Camel hair is produced from the downy undercoat, which is collected from two types of camels during the spring molt. It is either combed out or cut. On the body of one animal it occupies 80-85% of the total wool volume. And 4-9 kg of wool are combed from one animal! Camel wool, with the same volume, is 2 times lighter than sheep wool.
The one that is sheared is used to make textile threads, and for yarn, they mainly take wool, which is combed out.
Camel cubs up to 1 year old are white in color and their down is most highly valued. As the animal grows, the color of its coat also changes. Camel wool is almost impossible to dye, so most often we see it in its natural color: beige-brown shades.
Only camel wool does not electrify at all and removes static electricity better than other types of yarn.
Products knitted from this yarn are able to maintain the temperature balance of the body and do not cause allergic reactions, and have healing qualities.
Everyone in Central Asia knows about the medicinal properties of camel hair. I still recommend it as part of a complex of thermal treatment procedures for the prevention and treatment of diseases of the peripheral nervous system. It also has a very good effect on the musculoskeletal, respiratory and cardiovascular systems. It even neutralizes toxins produced by the body and rejuvenates the skin, making it firmer and more elastic.
Camel wool repels dust and products made from it remain clean for a long time, sometimes just shaking is enough!
Camel wool has the ability to absorb moisture and then quickly evaporate it, leaving the body dry, which prevents the formation of extra pounds.
And all this is true. verified by me personally. Many knitters who knit by hand. can confirm that by the end of the working day. arms and joints may hurt... pull... sometimes the hands just don’t obey. and here. miracle. lightness and the desire not to stop)) since the wool of the Mongolian camel contains a large amount of natural wax-lanolin.
Well, of course, you don’t have to be “sick” to wear these things. Make yourself happy and pamper yourself. Wear with Pleasure and Health.
The collection will be presented in three natural colors. Camel (sand). Linen (light gray with a sparkle) and Brown (brown with gray).
All products are incredibly warm. and also very versatile in style!! From casual (jeans + jumper) to the classic version with heels!! Any fashionable look with these products will be Unique and Original.
Source
Peacock using papier-mâché technique - master class
We bend the frame from wire in the shape of two circles (small - head, large - body) connected by wire. We wrap it with foamed polyethylene and synthetic padding and secure it with threads. We add wire to the large circle for future paws. We wrap everything with padding polyester to obtain the desired shape.
We make a beak out of cardboard and attach it to the peacock’s head. We wrap everything with threads again, you can use paper tape. We make feathers. We cut the wire 20-25cm, wrap it with yarn of the desired color and secure it with a drop of glue. Next, select the yarn of the desired colors. We wrap each color in turn around the palm of our hand and cut it into pieces. We tie each piece on the wire with two knots, moving them tightly towards each other until we get a sufficient length.
We comb each feather, giving it the desired shape, and secure it with PVA glue (diluted with water 1:1, you can use starch). Dry and repeat the operation on the other side. After drying, use scissors to give it the desired shape.
Making a frame for the peacock's tail. This is a wire that is as long as the finished tail and has cross wires on it for attaching feathers. We wrap the wire with strips of fabric or yarn in the main color.
We fasten it with threads and glue to the frame, starting with the lowest feathers. To make the tail more fluffy and aesthetically pleasing, repeat the operation on the other side. We imitate the plumage with satin ribbons. On the head and neck we sew woven “baubles” from ribbons together and glue them. We make a hat from a scrap of fabric and embroider knots on it with yarn using the rococo technique. Glue it. We cover the rest of the carcass with triangles made of ribbons. The wings are cut out of cardboard and covered with ribbons. The paws were wrapped in yarn. We glue in the beady eyes, paint the head, checking the photo of the peacock.
We make the vase from a cardboard tube from a fireworks display; we cut out the stiffening ribs from cardboard circles of different diameters. Fill the space between the circles with crumpled paper.
Level the entire surface with papier-mâché strips. Dry it. We coat it with putty, dry it, sand it, and decorate it with stucco. We paint, add colors by rubbing in silver or bronze dust. And varnish it. Peacock using papier-mâché technique
ready. We fix the peacock on the vase and admire the work.
Peacock made using papier-mâché technique. Photo
Kondratova E.M. | Comments to the news “ Peacock on a vase using papier-mâché technique. Master class with step-by-step photos
» is already 0:
Master class Sewing Souvenir “Camel” Fabric
A camel is a voluminous souvenir. It is made from cloth of gray, white, brown, coffee color. The bottom is made of cardboard and main fabric. The mane, tail and chest are made of fur. The decoration is a twisted cord made of woolen threads of two colors in several folds. The blanket is made of any bright fabric. The camel is decorated with various beads, beads, embroidery, etc.
Here is a pattern of a dromedary camel. We need to cut out the body of a camel 2 parts Bottom of a camel 1 part Blanket – 1 part Ears – 2 parts Eyelashes – 2 parts Mane – 1 part Tail – 1 part
The same number of parts is required for a Bactrian camel.
I didn’t photograph the process of making the camel, but I think everything will be clear.
Work sequence
1. Sew 2 parts of the body together along the contour. 2. Sew a mane, breast, and fur tail to the camel’s body along the marked lines. 3. Sew eyelashes and ears along the marked lines. 4. According to the markings, glue the camel’s eyes with PVA glue under the eyelashes. 5. Stuff the camel's body very tightly with cotton wool, starting from the camel's muzzle. 6. In order for the camel to be more stable and the bottom to be more even, it is recommended to additionally insert a cardboard bottom that is smaller than the fabric bottom by 0.5 cm along the contour. 7. Connect the bottom of the camel to the body along the contour with a seam “over the edge.” 8. To decorate the camel, you can sew a blanket from bright fabric, the edges of which are decorated with twisted cord in several folds. 9. Draw the nostrils with a black pencil, draw the highlights in the eyes with putty. 10. Sew a twisted cord in several folds along the contour of the bottom of the camel. According to the markings, glue the eyes with PVA glue. 11. Make a bridle from a twisted cord and sew it to the camel. The camel can also be decorated with beads, embroidery, tassels, etc.
As a result, we get these souvenirs.
Source
Technique options
Papier-mâché is made in two ways: by gradually gluing pieces of paper in layers and by fashioning figures from wet paper dough. The art of making such figures requires care and patience, the material takes 2-3 days to dry, and finishing takes up to 2 days.
Step-by-step gluing of pieces in layers (machining)
When mashing, the prepared form is pasted over with pieces of paper.
- You need to prepare soft paper, maybe newspaper.
- Tear the paper into small pieces with your hands.
- It is not recommended to use scissors, since the thick edges of the paper do not align in the dried product.
- The first layer of paper is applied and glue is applied on top.
- About 10 layers are required.
- After applying 2 layers, let the previous ones dry.
- The edges of the pieces should overlap each other, repeat the surface, and not form unevenness.
Machining can be internal or external. For external machining, the model is pasted over from the outside; for internal machining, the model is pasted from the inside. If the mold for the cast is supposed to be left inside the finished craft, it is covered with glue; if not, then with Vaseline.
Small parts of the craft are made from a mixture of glue and paper; when dry, they shrink in size. To achieve the desired size, you need to add the required number of layers to the parts.
It is necessary to dry the figures for 2 days at an air temperature of no more than 22-25 degrees. The product will crack if it is dried near heating devices that are turned on. The last layer is made from scraps of white paper.
Video lesson
Origami camel is done like this:
Fold a short version of the basic bird shape.
1. Concave a small part of the “blind” corner. Raise the bottom corner.
2. Fold in the corners. Lower the corner.
3. Fold the side toward the middle to flatten the “pocket.” Make a cut. As you bend, lower the corner.
4. Make double zipper pleats at the bottom corners. Fold in the corner at the top. Bend the corners on the right into a mountain. Bend the tail corner.
5. Bend the corners on the hind legs, bend the corners into a mountain. Make double zipper folds on the front legs. Bend the head corner to the left.
6. Move the corner inside the head. Bend the corners on the hind legs. Opening the corner slightly, lift it up.
7. Make a camel’s muzzle: having opened the work slightly, bend the bent corner and open (flattening) the “pocket”.
8. Fold in half.
9. Make double zip pleats at the neck, pulling the neck to the side. Bend the tail corner. Design the limbs.
10. Glue the folds on the limbs to strengthen them. The origami camel is ready. Install the figurine.