Do you like to surprise your loved ones with unusual gifts? Then this master class by Anna Ivanova is for you!
I’ll tell you and show you how to make an elegant shoe for a sweet tooth with your own hands.
To create shoes from paper and candy, I need:
- "Insoles" made of thick cardboard 4 pcs. Size 39 (I took a laminate box),
- two sheets of corrugated paper (I have red and white),
- a small piece of penoplex 2 cm,
- scissors
- and glue.
For decoration I prepared:
- golden ribbon 0.6 mm,
- golden braid,
- green satin ribbon 2.5 mm,
- half beads 0.6 mm,
- decorative leaves,
- several squares of organza 8*8 cm for candy decoration,
- threads
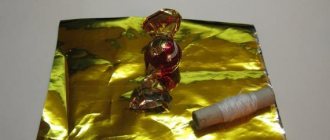
- and of course, the Alenka candies themselves in the amount of 5 pieces.
Elegant way
Materials we will need:
- paper;
- scissors;
- PVA glue or pencil or glue gun;
- decorations, sweets, decor to our taste.
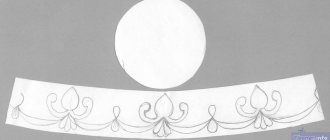
To create it, we need a template that needs to be printed on paper. The paper should be thick. Use a printer to print the template on paper. Carefully cut. The dotted line on the template shows the fold lines, and the red line is the gluing line.
You can put various souvenirs or sweets into the finished shoe, wrap it in a piece of beautiful fabric or organza, secure it with ribbons, and decorate the shoe to your liking.
Preparation process
Before you start working as a “shoemaker”, you need to prepare materials and get into a good mood. The manufacturing process will take about 4 hours, so be patient.
What you will need at work:
- colored floral paper with corrugated coating. You will need 2-3 colors;
- a piece of penoplex;
- thick and thin cardboard;
- thin wire;
- masking tape or double-sided;
- glue gun;
- decorative lace or braid;
- ribbons, beads, artificial flowers for decoration;
- candy for filling.
It is worth noting that some parts can be replaced. Floral paper can be used on a beautiful fabric, but it will be difficult to use such material for flowers. Penoplex - on foam plastic.
Interesting and tender
This is the second version of the shoe, made in the same way as the first version.
This is what the shoe template looks like:
How to make shoes out of paper using origami technique with your own hands
Print Thanks, great lesson +0
Fashion changes over the years, but high-heeled shoes always remain in trend. Of course, when creating such shoes from paper using the origami technique, you can follow this lesson, which will make your task easier.
Necessary materials:
Step-by-step photo lesson:
To create one shoe, we will prepare a one-sided sheet of square-shaped paper, but to make a pair, take two rectangular sheets. Create two diagonal folds by folding the square sheet twice.
Now we bend the lower central corner to the point of intersection of the two diagonal lines.
Open and turn the workpiece over.
Move the resulting fold to a horizontal line.
We walk along the new fold.
Turn it over.
We bend the sides under the lines of the upper central triangle.
Then once again fold the sides to the vertical fold line.
Turn it over. At the very top you can see the corner that will be the front of the shoe.
- Fold it in half and bend the front part of the shoe upward.
- We take the bottom corner with our fingers on both sides and pull the sides down, shifting the fold line.
- Bend the corner up.
Turn it over. Bend the corner up on this side.
- We unfold the bent corners on both sides and bend them inside the craft so that they are not visible.
- Let's open the bottom part.
- Bend the side parts a little.
- Fold it up.
- Bend down the upper right corner.
- Turn it over and bend the left corner down.
- Bend the right side down at an angle.
- Then bend it in the opposite direction.
Let's reveal. We get two folds.
23. Fold the heel of the shoe along the created fold lines.
24. Bend the sharp lower corner of the heel slightly inward.
25. We insert a finger or other small object into the front part of the heel and straighten all sides so that the paper craft is voluminous.
So the origami paper shoe is ready.
Video lesson
Print Thanks, great lesson +0
Source: https://papermix.ru/raznoe/odezhda/kak_sdelat_tufli_iz_bumagi_(origami)_svoimi_rukami.html
Modular origami
We make modules according to this principle:
This is the kind of shoe we will make:
To create it we will need:
- 18 sheets of yellow paper;
- 2 sheets of red paper;
- adhesive moment “Crystal”;
- scissors and a stationery knife.
To create such a shoe, you first need to make modules. We will need 279 yellow modules, 21 red modules of standard size. We will assemble the sole of the shoe separately; the heel, straps of the shoe and the flower will also be assembled separately. Then the separately assembled parts are glued together.
Assembling the sole. It is assembled from yellow modules. Red modules for collecting soles are not used. In the first row we have 7 modules. The second row is already one more module - 8 modules.
In the third row: 9 modules. Fourth row: 8 modules.
Fifth row: 8 modules. Sixth row: 8 modules.
Seventh row: 9 modules. Eighth row: 8 modules. Ninth row: 9 modules.
Tenth row: 8 modules. Eleventh row: 9 modules. Twelfth row: 8 modules.
Thirteenth row: 7 modules. Fourteenth row: 8 modules. Fifteenth: 7 modules.
The corners of the previous rows should not stick out; we hide them in the pockets of the modules of the next row.
Row 16: 6 modules. Row 17: 7 modules. Row 18: 6 modules.
Row 19: 7 modules. Row 20: 6 modules. 21 row: 5 modules.
Row 22: 6 modules. 23 row: 5 modules. 24 row: 6 modules. Row 25: 5 modules.
Due to the bends we make the sole realistic.
Let's continue to create. Row 26: 6 modules. Row 27: 5 modules. Row 28: 6 modules. Row 29: 5 modules. Row 30: 6 modules.
31 row: 5 modules. Row 32: 6 modules. Row 33: 5 modules.
Here we have the sole of our shoe.
Now we need to make the heel. In the heel we will have 15 rows of modules.
From the 1st to the 13th row, the number of modules in the rows changes: 2 and 1, and so the alternation continues
Related article: Felt flowers for decoration
From the 14th row to the 18th row, the number of modules in the rows changes. 3 and 2 modules alternate.
The fifteenth row consists of 4 modules and our heel ends with this row.
Glue the sole to the heel.
Let the glue dry and assemble the straps. But we will now use both yellow and red modules.
One strap needs to be made 2 rows longer.
Now let's glue the straps.
Let's decorate our shoe with a flower. We assemble it from red and yellow modules, as shown in the photo:
We glue the finished flower onto our shoe.
The shoe is ready!
Candy gifts
For more step-by-step tutorials on making gifts from candy, see the “Sweet Design” section.
Camera made from candy and coffee cans
Bouquet of roses made of corrugated paper with sweets
Laptop made from candy
Sweet winter house
Cake "Kinder"
Candy tank
Gun, weight and mug for men
For teachers:
Blackboard
Cool magazine
Bell for September 1st or last call
For the wedding: basket of roses “Tenderness”
and wedding gazebo
Heart for February 14 or any holiday
House
In order not to forget the address of the page and share with friends, add to your social network: Do you want to know news about competitions or master classes?
Tags: Gift wrapping
Attention! It is better to write urgent questions in the comments on the website (form at the bottom of the page) or, better yet, directly by email. There are no notifications about comments from the VKontakte form! This form is more for feedback. 
Discussion: there is 1 comment
- Ruslana:
May 11, 2022 at 11:39 pmWhat a delight, as if Cinderella dropped her shoe, and the prince, in addition to trying it on, decided to complement it with gifts)))
Answer
Ingredients
- cupcake batter:
- 145 gr. flour
- 180 gr. sugar "universal" from
- 130 ml. milk (warm)
- 80 gr. butter
- 1 egg
- 30 gr. cocoa
- 1 tsp baking powder (measured)
- cookie dough:
- 400 gr. flour
- 80 gr. butter
- 100 gr. powdered sugar
- 2 tbsp. cream (10% or milk)
- 1 egg (small)
- 1 tsp baking powder
- decor
- 200 gr. white chocolate
- 400 ml. cream (33%)
- 5 tbsp. powdered sugar
- vanillin
- "universal" sugar from
- gold decorative beads
- kandurin "silver"
- yellow food coloring or saffron
Manufacturing technology
To make a shoe with your own hands, you don’t have to attend a master class from professionals in this type of needlework in person. The work process is simple and quite understandable even for beginners. It is important to take your time; it will take at least 4 hours to create the craft.
Place the shoe insole on the cardboard and trace it with a pencil. The toe of the workpiece needs to be sharpened. Cut out 2 blanks from thick corrugated and thin cardboard. Attach a strip of double-sided tape to the corrugated cardboard insole and place a thin wire on top. It will help fix the bend of the insole at the desired angle. For reliable fastening, three rows of wire are enough.
Using a glue gun, connect the thick cardboard insoles so that the wire is inside. Cut a rectangle from decorative wrapping paper, glue it to the bottom of the cardboard blank, tuck the ends under and trim. Glue them on top so that the workpiece is completely wrapped in decorative paper. It is important that there are no sloppy folds left on it.
Wrap thin cardboard blanks in contrasting corrugated paper using the same technology. Cut a semicircle from the floral mesh. Connect blanks of thin and thick cardboard using a glue gun, securing a semicircle of mesh in the heel area. Give the resulting sole of the shoe the desired bend.
From foam plastic, cut out a platform that follows the toe of the shoe until it bends. Treat it with a fine-grained pedicure file for perfect smoothness, wrap it in corrugated paper and glue the shoes to the workpiece. Cut out a piece in the form of a drop from foil and glue it to the blank in the heel area.
Wrap a plastic blank for the heel or a blank cut from polystyrene foam in corrugated paper. Make a heel from a strip of a contrasting color by gluing it at the bottom of the heel. Attach the heel to the sole with a glue gun.
First step: making the insole
First, you will need a shoe insole for the pattern. If it is not available, you can use your own leg as a stencil by making a blank on it on packaging cardboard. You need to make two insoles. In the absence of thick packaging cardboard, you can make several identical blanks from thin material at once, so that the candy shoe ultimately has a dense sole. In addition, you will need another insole cut from thin material. You use it to level the top layer of the “shoe masterpiece” you are creating. If desired, prepare a similar part for the bottom of the shoe.
Let's get started
An ordinary shoe insole can be easily used as a pattern. If you don’t have one, outline your own foot on cardboard, make the toe sharper, slightly narrower on the sides. You need to cut two blanks from thick packaging cardboard. If you only have regular cardboard, you will have to prepare 4-5 pieces of future sole. Thin cardboard will also come in handy in the first case. One blank will help level the top layer.
We glue three strips of tape onto one of the blanks. At the top we fasten the wire along the length of the entire insole and secure it again with tape. Wire is the rigid frame of the product; it will help give the necessary bend.
Using hot glue we connect the templates. You can use Titan glue, but you will have to wait at least an hour for it to dry.
Now it’s time for corrugated paper (fabric, children’s cardboard for creativity). You will need a rectangular piece of material the size of the workpiece plus an allowance of 1.5 cm at the edges. We glue it to the sole, and bend the rest and glue the sidewall, going to the inside.
With a blank made of thin cardboard, which ensures evenness, we proceed according to the same principle. It is better to use a material of a different color.
We connect the resulting insoles. If you want to improve the composition, then you can glue the heel of the product between them (using the example of a floral mesh). A strap will do, a nice braid. But it depends on your imagination.
The workpiece takes on the appearance of a shoe. It's time to take on the platform. We trace the sock on the foam plastic, cut it out, slightly cut the edges inward and sand it. A heel file is perfect for this.
The platform is covered with the same material (corrugation) as the bottom of the sole, and glued to the nose of the future creation.
All unsightly joints must be hidden from an inquisitive gaze. Decorative braid is useful for this. Carefully apply it to the side parts of the sole, starting from the heel. For convenience, first grab the top of the shoe, then the bottom. At the same stage, you can additionally make one more decor: in place of the heel, glue a “droplet” from the material used on the sole and platform.
We make a heel from polystyrene foam. Please refer to the measurements here. Gradually sharpen so that the composition can be held evenly on the surface. We insert a skewer inside the heel for strength.
Starting from the bottom of the heel, pasted over with material of the same color as the bottom of the sole.
The finished heel is glued to the product. You can immediately dive into decorating. In the photo, the heel is wrapped in gold-plated wire.
The gilded beautiful shoe for the real Cinderella is ready. But the gift is not finished. Let's start making candy flowers. At this stage you need to be very careful and careful. Three small round candies in a wrapper will become the base of a rosebud. In order to easily remove them from the composition without damaging them, we create a small loop for each sweet.
We cut out blanks from red corrugated paper. For one flower you will need: 1 rectangle 7x5 cm, 12 rectangles 3x5 cm.
Use scissors to round the edges of a large rectangle and stretch the corrugated paper in the center. This creates the base of the bud, where we hide the candy, carefully connecting the edges with small drops of glue.
We turn the remaining blanks into petals with simple manipulations with scissors. We stretch each piece in the middle for a slight bend, and twist it at the top using a skewer or paste for the handle.
The petals are ready, all that remains is to create a rose from them. Glue the first row of 3 petals to the bud with a drop of glue. Second row – 4 pieces, third row – 5 pieces. The junction of the lower petals should be in the middle of the petal of the next row (like brickwork). You can use the training video for clarity.
The result was an excellent rose with a sweet secret inside. Using the same principle, two more flowers are made step by step.
For greater ambience, you can make a sepal from green corrugation.
We move on to the final stage: decoration. Use everything you can find: beads, bows, ribbons, artificial leaves, rhinestones. Let your imagination help you in this work!
Making a heel
It can be made from dense foam. It is difficult to give any additional advice on carrying out such work. The height, width, and length of the heel are selected according to your personal wishes. Some people like high thin heels, while others want to give their Cinderella a shoe with a comfortable small heel. The only thing that can be recommended is to first measure how harmoniously the chosen heel height will look on the shoe itself. Such “fittings” can be carried out several times, increasing or decreasing the height and thickness of the polymer heel. Having brought it to perfection, proceed to fixing it on the workpiece.
- To make the heel stable, you will need a metal skewer along its entire length. Part of it is inserted into the sole, ensuring the strength of the entire created product. We glue the bottom of the heel with a circle of corrugated paper. Then we carefully wrap the length of the entire heel with the material or cardboard used to decorate the sole of the shoe.
- Let's start decorating with beads or spectacular braid. At this stage, you can demonstrate all your creative abilities and ideas. For example, add “gold” to the heel, attach a beautiful wire to it, select and fix unusual mother-of-pearl rhinestones along the entire height. The created product acquired a shape that began to resemble a real shoe element. Now you can begin to create the main decoration of the composition being created - select bouquets of sweets.
- The color of the shoe should be in harmony with the labels of the sweets chosen for decoration. Three candies are enough, then it will be convenient to “get” them out of the shoe. How to fix sweets on a product? This issue is quite simple to solve. First, let's create several decorative loops from beautiful braid and glue them to the side of the shoe. We will put sweets into the resulting “pockets”. To make the candy bouquet look impressive, we will complement it with decorative leaves, arranging it in the form of an unusual flower arrangement. If the candies fall out of the loops, you can cut out rectangles from fabric or thin designer paper. By covering a candy with material, you can make a sweet “bud” by placing it in a shoe on glue.
- If desired, we decorate with rhinestones, beads, original buttons, emphasizing the center of the flower. The work involved in adding a variety of materials to a shoe depends on the taste preferences of the craftsman. Even with the same initial components, the final result is completely different for different needlewomen. For example, you can not just wrap candies in fabric blanks, but create buds from many pieces of plain material, and make the candy as their center.
- To do this, cut out 20-30 petals of equal length from fabric and tie them together using thread. Then we add leaves of a different color (their quantity can be chosen at your discretion). To increase the strength of the flower, carefully coat its base with glue or twist it with thin wire. Next, we attach the blank to the side of the shoe, and place the candy inside the bud on double-sided tape. You can make not three, but a much larger number of flowers, getting a real sweet bouquet. In order to achieve the desired result, you need to be patient and have free time. Beginners will need approximately 6 hours to create a gift for their Cinderella.
Master class: making a pincushion shoe
We cut out templates for the sole of our shoes from not very thick cardboard. 2 pcs. Length 14 cm.
For the heel we need a sushi stick and cut off the bottom from the egg cell.
Glue the wire to one sole with a glue gun (any glue can be used)
Glue the two soles together, the wire inside.
Using this wire we give our sole the shape of a shoe. After folding, cut off excess cardboard if it comes out at the heel.
Now we make the platform. I came up with the idea of making a platform out of cardboard when I couldn’t find polystyrene foam at home.
We outline part of our shoe (toe) on cardboard.
Made from cardboard 2 mm thick. got 12 pieces.
It is important that each subsequent part is 0.5 mm shorter than the previous one. Approximately.
Glue all 12 pieces to the sole. It’s better to do this with PVA glue. It will be very strong and reliable. The inner side seemed to be cut off a little. That's how it should be.
We glue our shoe with white paper using the same PVA glue
We cut off all the excess.
We also seal the platform.
I covered the inside with red glossy paper. If the paper is thick like mine (I took a magazine cover), then it is better to do this with a glue gun. If it’s thin, then you can use pva.
We cut off all excess. And we need to paint our blank for the heel (the bottom of the egg cell) red. I painted it because I didn’t intend to decorate it, but it didn’t turn out very well and I still did it a little differently later. You'll see everything later.
Using a glue gun, we glue our super shoe with material. I have red jersey.
Seal all joints with a suitable ribbon or rope.
For the heel, we connect our blank and a sushi stick. Pre-cut it to the desired size. We fasten with glue.
I also decorated the upper part of the heel with the same material. It looks better this way, and I also glued a mesh inside. Then I regretted it.
Next we make the pincushion itself. We take a piece of material to match and make a mark in the shape of our toe.
We tighten it a little, put the padding polyester inside and tighten it tighter. We make sure that the shape of the triangle (our toe) is not lost, at least approximately.
This is what should happen. Or so it seems.
Glue this cute little pillow to our shoe. The joints between the toe and the pad are not very neat. We will decorate them. I will have roses.
Now let's make a stand. We need alabaster.
Find a shape for the stand. I had a plate like this. We dilute the alabaster with cool water until it becomes a thin sour cream and pour it in. When the plaster hardens, take out our work of art and coat it with glue. We make a hole for the heel and also coat it with PVA glue.
Can be decorated. If your surface is smooth and beautiful, you can leave it that way. I sealed it with material and walked in a circle with the same rope.
Carefully make a hole in the fabric and coat the sole of our already finished beautiful shoe with glue. We drip glue into the hole for the heel and glue it.