The times when people were surprised at every new invention are long gone - nowadays progress is so rapid that we no longer even pay attention to innovation and new technologies. We are surrounded by a huge number of things that humanity could not even dream of. We fly to the moon, skillfully fight various diseases, and can call to the other end of the earth at any time of the day or night. Despite this, we know how to appreciate simple, but at the same time creative things: a perpetual calendar is an incredibly useful thing that will find application in every family. This is not only a way to always know the exact date, but also a great gift that will to everyone's liking.
The history of the perpetual calendar
It’s worth starting with what an endless calendar is. In essence, this is a kind of grid designed for a certain month of a certain year. Initially, calendars were created not to determine the day of the week, but in order not to miss religious holidays. There were simply a huge number of them in Rus', and they began to prepare for each one in advance.
The very first endless calendar was drawn on the wall of the Kyiv Sophia Church - this is a kind of graffiti that helps to navigate the days of the week. Later, parchment began to be used, with the invention of printing, paper, and then progress stepped far forward. Since the beginning of the 20th century, a variety of materials have been used for their production.
Perpetual calendar
The idea of creating a perpetual calendar did not leave the inventors. In the USSR, it was customary to hold agricultural fairs and boast about their achievements at them. And at one of the exhibitions in 1902, the presentation of the world's first perpetual calendar took place! This design was developed by the famous scientist Ioffe; based on his developments, all versions of endless calendars were subsequently produced. This invention created a sensation - orders were booked months in advance.
In 1946, a whole batch of pocket cardboard calendars was released, designed for 201 years. They were produced by the then-famous board game factory located on Krasnaya Presnya.
The material used was fragile, and these days only collectors and museums have such calendars
At the same time, an improved version of the pocket endless calendar for 21 years was released in Leningrad - it was made of tin, and the Peter and Paul Fortress and the Vasilyeostrovskaya Spit were depicted on it. This version was produced for three years.
Cardboard is a very fragile material, so in the 60-70s they began to produce aluminum calendars. If the cardboard version had a rectangular shape, then this time the USSR was flooded with disk-type calendars.
Perpetual calendar made of aluminum
Velcro for clothes
Instead of buttons, you can use pieces of Velcro. To do this, simply draw numbers on them and attach them to a calendar grid created from the second half of Velcro.
This option makes it possible to remake the calendar much faster and easier.
Popularity of table products
In the 70s of the 20th century, kiosks with printed materials were flooded with tabular calendars - they were simple and understandable to absolutely everyone. All versions of such calendars were calculated before the year 2000.
For the 1980 Olympics in Moscow, an incredible number of different calendars were released: 4 versions of 24 cards each, with different backgrounds. Later it turned out that their quality was very poor: the cellophane coating was instantly erased, and the calendar became unusable. They can still be found in some collections, but only as a souvenir that a world-scale event took place in the USSR that year.
Perpetual calendar 1980
Perhaps perpetual calendars would have continued to be produced, but the collapse of the USSR occurred - people began to be interested in other problems. In addition, global computerization began, and the need for such a device disappeared.
Nowadays, the popularity of perpetual calendars is gaining momentum again, because:
- great gift;
- an ideal addition to any interior;
- ability to always know the day of the week.
We can say that the perpetual calendar really turned out to be eternal - invented more than 1000 years ago, it has not lost its relevance today.
Modern perpetual calendar
Design and use of the perpetual calendar
There were three types of perpetual calendars in the Soviet Union:
- With removable belt. It made it possible to find out the days of the week for the next hundred years.
- With rotating disc. They covered short time periods - about 25 years.
- Tabular. They are designed for centuries ahead , but most of these models did not allow calculating dates later than 30 years from the beginning.
The operating principle of these time keepers is based on two types of calendars:
- Julian - a cycle of 28 years.
- Gregorian - a cycle of 400 years.
Most models had a simplified version of the Gregorian, for which it is customary to use a cycle of 28 years.
It was enough to buy an endless calendar once , and you could use it for many decades. It was a profitable investment - in most Soviet families, in addition to tear-off ones, such models could be found. Nowadays, such endless calendars gather dust on mezzanines, are in private collections and are found on some models of mechanical or quartz wrist watches.
Women's watch with calendar on a metal bracelet, SL (price on the link)
Options for tabular perpetual calendars
There are several common table calendars, but most of them are quite simple and based on the same principle. The device is very simple: all days of the week are written on special grids - it’s easy to calculate the day of the week. There are tables designed for 365 days and 366 days.
There are several common options for endless calendars:
- From January 1, 1901 to 2096. It is very simple to use: we find the number of month and year we need, add to it the date of the day of the week. We take a look at another table and get the day of the week we need.
- Since 1592. This is a very interesting and easy to use option. The upper left column contains the numbers with which a particular year begins. In the parallel line there is a column with the numbers with which the year ends. To the left and right of the table are the month rows. The point of their intersection will allow us to find out the date of interest to us.
As you can see, everything is very simple - even a child can handle this calendar.
Tabular perpetual calendar
Disc perpetual calendar
Typically, such calendars were produced on thick cardboard. They were sold everywhere, and the price was affordable for everyone. It looked very funny: a circle, inside of which there is a disk with two radii:
- The years are located on the external drive.
- Days of the week on the inside.
The instructions for use are extremely simple: turn the dial until the number of the year we need matches the month. Everything is extremely simple and clear.
Disc perpetual calendar
Most disk perpetual calendars use a 28-day system, and the chronology ranges from 23 to 28 years. However, you can find other options on sale: in this case, the numbers of the month are on the disk. In this case, we get the usual calendar, starting from Monday and ending on Sunday.
Some companies that produce such calendars take up empty disk space with a list of various holidays.
Interesting examples
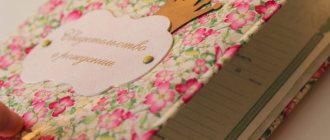
As you can see, you can use different blanks and cover our perpetual calendar with different patterns. It can not only be covered with napkins or paper. If you are good at drawing, then try to draw something on it. Perhaps you are a wood carver and can cut out a beautiful pattern or burn a picture, numbers, months. Using your imagination, you can create exactly the decor item that will fit perfectly into your interior. In the photo below you can see a selection of interesting ideas.
Read this: Papertol: a master class on techniques for creating three-dimensional drawings
Instructions
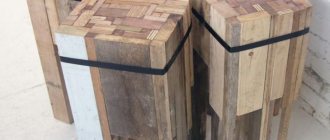
To begin, cut out 4 rectangles of different sizes from thick cardboard:
- for the back wall 16 by 14 centimeters;
- for the bottom 16 by 8 centimeters;
- for the side walls, two rectangles 8 by 7.5 centimeters.
Next, we need to cut out 2 parts from scrap paper:
- for the back wall 20 by 18 centimeters and 16 by 14;
- for the bottom 20 by 12 centimeters and 16 by 8;
- for side walls 12 by 11.5 centimeters and 8 by 7.5.
The most difficult part begins - assembling the cubes:
- Glue a 16 by 14 piece of cardboard onto a 20 by 18 rectangle. As a result of this, we will be left with two white fields, along which we will then collect cubes.
- We draw thin pencil lines along each side of the cardboard blank and cut out the resulting squares in the corners of the paper. We draw grooves along all sides of these blanks with the back of the pencil.
- We bend the edges of the scrapbooking paper and glue it to the cardboard. Carefully glue a 16 by 14 piece of paper over the margins.
- In the same way we glue all the cardboard blanks.
The cubes are almost ready, let's start assembling the stand:
- Apply glue to the edge of the back wall and place it vertically on the extreme side of the bottom.
- We glue the side posts to the back wall and bottom.
Then we need to transfer the cube development template - we make pencil marks along the cardboard lines, cut out squares and create grooves. Cut out the template and make the grooves again. After this, all that remains is to glue the ribs and assemble the cubes from this blank (with the expectation that they should fit into the rack).
Modular hedgehog
Prepare purple and yellow standard modules from 6x4 cm sheets.
Assembly diagram:
- Row 1 – 9 yellow modules (YM) with the long side up. Row 2 – 10 with the short side up, the outer corners are free. 3rd row – 9 pcs. KS.
- Add 1 purple module (FM) to the free pockets on the sides.
- Add 1 more purple to the first row and 1 to the second.
- Add 1 FM to the third row.
- Add FMs alternately on the right side until row 1 has 9 yellow and 11 purple, row 2 has 10 yellow and 9 purple, row 3 has 9 yellow and 9 purple.
- Complete the circle.
- Add 2 FM to row 3.
- Press the center of the workpiece so that it goes inward.
- 4th row – 10 yellow, 10 purple.
- 5th row – 9 ZhM, 11 FM.
- 6 rub. – 8 ZhM, 12 FM.
- 7 rub. – 7 ZhM, 13 FM.
- 8 rub. – 6 ZhM, 14 FM.
- 9 rub. – 5 FM, 15 FM.
- 10 rub. – 4 ZhM, 16 FM.
- 11 rub. – 5 FM, 15 FM.
- 12 rub. – 6 ZhM, 14 FM.
- 13 rub. – 7 ZhM, 14 FM.
- 14. R. – 6 ZhM, 14 FM.
- 15 rub. – all modules are purple.
- 16. R. - 10 purple with intervals of 2 free corners.
- Glue the face, ears, leaf. The hedgehog is ready.
Another modular model:
Decor
The most important thing remains - decoration:
- We cut out 12 squares from scrap paper and glue pre-cut numbers onto them.
- We paint the squares with any patterns or attach decorative elements (depend on your taste).
- Glue the painted parts to all sides of the cubes.
- All that remains is to make a pocket for signs with the names of the months.
- Cut out a rectangle of 14 by 17 centimeters from cardboard.
- We lay the fold lines (stepping back 1 centimeter from the edge).
- We retreat another centimeter and draw new fold lines.
- Along the fold lines, on the smaller side, we make cuts 1 centimeter long.
- Apply glue to the outer sides of the square and fold it.
- Glue to the top edge of the stand.
All that remains is to make the names of the months, just cut them out of cardboard and decorate them at your discretion. Done - you have made a perpetual calendar with your own hands.
DIY cardboard perpetual calendar
Materials
To make a calendar you will not need a lot of things. The easiest way to make it is from paper or simple cardboard, but you can use fabric, buttons, stickers and anything else that you have enough imagination for.
Scissors, a simple pencil and ruler, and glue will also come in handy.
Made of wood
It’s easy to make such a calendar – you can buy special blanks for sale. They are very inexpensive, and you can decorate them the way you like. In addition, a DIY perpetual calendar made of wood will be an excellent gift for your friends and family.
Of course, you can assemble it according to the instructions above, but in this case your costs will be very significant. You will need plywood or solid wood, paint, screws or nails , a clock mechanism, a drill and a screwdriver - such an eternal watch will cost you a lot. This blank will allow you to have a great time and create a creative gift with your own hands.
DIY perpetual calendar made of wood
Perpetual calendar in programming
Do you want to visit the past or look forward to the future? No, the time machine has not yet been invented, but it is very easy to find out what day of the week a particular date falls on. Just look at one of the special sites that host the online perpetual calendar and fill out a special form. For example: you want to know what day of the week March 21, 2076 will be. We enter the date we are interested in in a special form, click the “calculate” button - you’re done. Now we know it will be Thursday.
Perpetual calendar online
Most of these methods are based on pre-calculated tables. There are also more complex programs that perform calculations from scratch. Such endless calendars will easily show you the days of the week, starting from 1500 to 2299. Agree, it’s nice to relax sometimes and travel a little on dates. In addition, such an online calendar will be useful for historians and teachers: during lectures, you can safely tell students that the capture of Ishmael took place on Wednesday, and Galileo Galilei was born on Saturday.
Method 4. Online
You can create calendars online on the Canva website. It offers many templates for design. You will be able to upload your photos and personalize the project. The work will not take much time, thanks to ready-made design elements, a catalog of pictures, photo filters, and clipart. The service will also help with the design of invitations, cards and posters. To get started:
- you need to register on the site or log into your account;
- create a project. Choose a blank: monthly, weekly, photo calendar, diary or birthday gift;
- customize the fill of elements, font and text size, add photos from the collection or upload your own, place icons and clipart, set a new background.
You can download the image only in three formats: JPG, PNG or PDF.
The blank can be applied only to one month or to several at once
In the free version of the service, you cannot adjust the size and set the resolution. When printing on large paper, the image will have poor quality. Canva also gives you access to many elements, photos, and backgrounds only by purchasing a subscription.
Decorating a room with a perpetual calendar
A perpetual calendar is a great souvenir that your friends and family will appreciate. It will serve its owner indefinitely: it is simply impossible to break it! In addition, you will always know what day of the week it is.
This gift can be used to decorate an office or bedroom - it will fit perfectly into any interior. Engraving, scrapbooking, painting or decoupage - you can create a perpetual calendar with your own design. At a corporate event, such a calendar with the company logo or motto will be an excellent souvenir for employees.
Perpetual calendar as a room decoration
This is a great souvenir for all people, regardless of age and social status.
Basic Rule
All instructions on how to make calendars correctly recommend that you first find a ready-made calendar for the next year and create your own creation based on it. This will help avoid errors in numbers and dates.
Making a home calendar will be a fun activity for the whole family; children will especially love this idea. And the best options can be presented as unusual surprises or placed on your desktop.