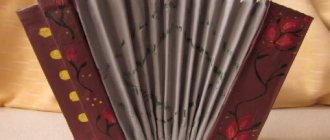
Transfer using decoupage film
Decoupage is becoming a very popular hobby, so many people know how to handle film from it. After printing the desired image on it, also prepare white acrylic paint.
It is necessary to perfectly clean the wood and also give it a smooth surface. Next, we apply pre-slightly diluted paint in two layers. Moreover, the application directions must be perpendicular to each other.
The paint must be allowed to dry. Once this has happened, the dampened decoupage paper (about 30 seconds soaking in room temperature water) is placed on the surface, removing the base and rubbing with a sponge to ensure a tight seal. After waiting for it to dry, you can treat the surface with varnish.
What needs to be done with the drawing and wood before transferring
- Transferring an image onto a wood surface, like any other, is in some cases impossible without the mirroring effect. In the case of an image, this is not so important, but it is better to initially make letters and numbers mirrored so that after transfer they take on the correct appearance;
- Any drawing is best transferred in high resolution. During the work process, blurriness may appear, and if the image resolution was initially low, this can greatly deteriorate the quality of the final result;
- The quality of the transfer directly depends on how clean and smooth the surface is. Any contamination is unacceptable, as are unevenness. In the latter case, you can use sandpaper;
- The color of the wood can also play a role in transfer. It is best to use options that are as light as possible.
Ironing paper
It is often used when it is necessary to transfer images to wood for subsequent tracing with a special soldering iron and thus creating a picture. Some people draw by hand, while others prefer this method. However, the method is also suitable for creating final products, and due to its cheapness and simplicity, it is very accessible and popular.
To transfer, you need to print the desired image on a sheet of paper. The sheet itself is laid on a perfectly cleaned and smooth wood surface. In this case, the paper is moistened with a small amount of acetone, which will make the process of transferring pigment from it to wood when heated better.
Important! When working with acetone, all precautions should be taken. Remember that the material has a strong odor and evaporates rapidly. It is best to work in a ventilated area, and you should protect your respiratory system with a respirator or at least a mask. It is also important to have a fire extinguisher on hand to prevent static electricity.
Having stretched the paper soaked in acetone to the desired size, we begin to iron it with a hot iron, and after a while the image will be transferred.
Examples of decals
You can find ready-made transfers on sale. They are also called applications, thermal transfers or thermal stickers. This is a color image glued face down to paper. The reverse side is impregnated with adhesive.
Transferring a design from a template to fabric is very simple. You need to attach the picture face down (paper side up) to the fabric and run a hot iron on top. It is advisable to set the temperature to maximum.
Advantages and disadvantages
the result is a colorful picture; You can use the applique as a patch.
synthetic thin materials may not withstand high temperatures; After washing, the picture may come off.
The transfer of drawing to matter is carried out in different ways. The easiest way is to transfer the outline of the image. To do this you will need a regular pencil and carbon paper. A drawing in color can also be depicted on matter. However, in this case you will need special paper (freezer or thermal paper).
Powdering
You can transfer the design onto the material in an original way, using tooth powder, crushed chalk or activated carbon, and also blue. First they make a matrix. It can be used several times. This is a blank in which the design along the contour is pierced with a sharp object (a needle). There are many holes on the surface of the matrix. The more there are, the higher the image accuracy. All holes are sprinkled with powder. The matrix is first attached to the material. For white surfaces, choose a dark powder; for black surfaces, on the contrary, light powder.
Advantages and disadvantages
minimal costs; clear contours.
a pattern is obtained on the fabric in one color; labor intensity of the process.
Final touches
At this stage you can show your creativity. Since we were going for a vintage look, we gave it one coat of wood paint. Be careful not to let the work become too dark or take on an undesirable color. After application, you can soak the surface with a rag to remove excess.
We then lightly sanded the edges to remove any excess gel and smooth out the wood surface. We also used a product called Pigment and sponged it onto the edges to create a vignetting-like effect.
At the final stage, coat the painting with soft paraffin to make it smooth and even. After the first layer has dried, the procedure can be repeated.
Benefits of homemade stickers
Self-made stickers are in many ways superior to their printed counterparts:
- Versatility of use for different types of surfaces: wood, plastic, and cardboard.
- The image does not get wet. It can last a long time, is resistant to mechanical stress and sunlight.
- The cost of a homemade sticker is low compared to printing house products. It can be made from scrap materials.
- You choose the design and image yourself.
- Printing companies do not take on small orders. You can make even one sticker yourself.
View this post on Instagram
A post shared by BEGINNING ARTIST ???✨ (@edinorog_hudozhnic) on Mar 25, 2022 at 5:43am PDT
Laser printer
A laser printer and paper for freezing food products (freezer paper) will help to transfer the image to matter. It is better to print the design on thin white cotton or linen fabric. The freezing paper with the smooth shiny side must be glued to the material using an iron. For printing, cut out an A4 size rectangle.
You can print a picture on textiles in any color complexity. To do this, the glued blank (from freezer and fabric) is placed in the printer. First you need to make sure that the design will be printed on fabric and not on paper. Sometimes a printer not designed for printing on fabric may fail. In this case, the attempt must be repeated until the printing device accepts the workpiece.
Advantages and disadvantages
the ability to receive a copy in color; perfect picture.
labor-intensive process; a printer not designed for printing on fabric may not accept the workpiece; The pattern obtained on the fabric is erased during frequent washing.
How to transfer a drawing to plywood?
During school years, during labor lessons, girls and boys often worked together, for example, in artistic sawing. Some patterns were cut out on the plywood with a jigsaw, but before that the design itself was transferred onto it using carbon paper. The labor teacher always brought old carbon paper to class; the new one gets very dirty and leaves bold lines. The copy sheet was placed face down on the plywood, the drawing was placed on top of it so that the sheet with the drawing did not move - everything was secured with buttons. We traced the pattern with a sharpened hard pencil; if it had many straight lines, we drew them using a ruler. Instead of a pencil, you can use a ballpoint pen with a refill without paste.
You can draw a pattern or ornament yourself directly on the plywood, but this method is for those who draw beautifully.
Currently, you can buy self-adhesive paper with a ready-made design. The sheet is glued to the plywood, then the ornament is cut out with a jigsaw; when finished, the paper remaining on the plywood is easily removed.
Transferring a design onto a sheet of plywood is a very simple matter, and those who work with plywood know how this process is done. There are several transfer methods:
The first is to place a sheet of carbon paper on a sheet of plywood (carbon paper to the plywood) on the carbon copy drawing, smooth out all the sheets and attach the corners with buttons so that the sheets do not suddenly shift during translation.
The second method: if the drawings are large, then they should be transferred through tracing paper simply by firmly and carefully pressing the tracing paper onto the plywood along the lines of the drawing.
Why do we need stickers, what types are they?
Stickers can be useful for children's games and studies. They can be used in household chores, interior decoration, and gadget design.
Pictures with a sticky base come in different types:
- Small ones. Used to decorate small items such as phones or tablets.
- Decorative. They are used for decorating premises - residential, work, public.
- Advertising. They depict brand logos and brand names.
- Labels. They are glued to food packaging, medical products, equipment, and household chemicals. The labels indicate information about the composition, shelf life, and methods of use.
- Directions and warning signs. Needed for retail and catering establishments, medical institutions and so on. This could be the organization’s work schedule, directional arrows, prohibition signs, and the like.
- Stencil. They are used when they want to create an unusual pattern on a surface.
- Reminders. Used for making notes with a pen or pencil. Mounted in a visible place, usually at eye level, for example, on a refrigerator. Allows you not to forget about important matters.
- Glowing in the dark. Used as interior decoration.