A paper accordion is one of the simplest elements. Anyone can create it, after which a huge number of spectacular decorative things can be made from it: for example, various snowflakes and little books. Accordions can be simple or more complex, small or huge, for interiors and postcards.
How to make an accordion out of paper?
Remember how, as children, we folded a piece of paper into an accordion shape and entertained our classmates? If your love for paper crafts has not passed, and the origami technique has gradually grown into a hobby, you can remember those very days and make an origami accordion out of paper. Moreover, simply folding the edge of a sheet of paper is not enough; here we will use something like a real technique of folding paper along the lines. True, in its simplest and most understandable version. What if such a hand-made paper accordion actually produces a couple of notes? There are even entire communities where craftsmen post complete tutorials on gluing such models and provide complete diagrams for cutting out parts.
How to make an accordion out of paper - a simplified version
The easiest way to make a paper accordion is to simply cut out its two bases in detail and fold its bellows using the simplest method. Here is the actual method:
- So, before making an accordion out of paper, we print its details on a printer. The blank has several empty windows where you can place a calendar for any year.
- The essence of the work is that we need to fold the base of the accordion along the dotted lines and glue it together. And then assemble the structure from individual parts.
This is such a wonderful paper accordion, glued together with your own hands, that you can make.
Origami paper accordion
If you already have some experience working with paper, you can complicate the process. This time the accordion bellows will be made much more difficult. Let's look at how to make an accordion out of paper, which will also produce a couple of notes:
First of all, print out the base. On it you will find fold lines indicated by dotted and dotted lines. We bend everything that is indicated by the dotted line upward. We bend all the lines marked with dots downwards. The gray areas on the parts are for applying glue. So, we begin to gradually bend step by step. Next, glue the workpiece into a tube. We begin to gradually bend the accordion fur lines. Along the edges the lines are drawn in a different way
We will also bend them using the reverse method: the dotted line down and the dotted line up. Next, we begin to assemble the details of the side parts of the accordion. Fold the parts according to the fold lines, apply glue to the gray area. Next, we place everything in the casing and fix it in place with glue. It is important that all parts are located exactly in their places. When closing the box and gluing it together, the edges will be completely covered by the sides. This is the very hole that will be the source of sound. Well, now we insert our blank and the paper accordion is ready.
womanadvice.ru
"And I play…"
The correct name of the musical instrument played by the crocodile Gena from the popular Soviet cartoon is a chromatic hand harmonica or accordion. It was invented in 1829 by the Viennese master Cyril Demyan and his sons. The first instruments of this type were made in Saxony, and Russia became acquainted with them at the end of the 19th century. The accordion, like the button accordion, also borrowed from German masters and often called a harmonica, began to be produced in Moscow, and then in Tula. He became an integral part of folk musical culture, fitting into it extremely harmoniously. Only a few know that the purely Russian “accordion” has German roots.
When making a paper model of a tool using the origami technique, it is best to use a ready-made template from the Internet. Specialized websites provide separate patterns for bellows - accordion bellows and side half-bodies.
Step-by-step instruction:
- Having printed the template, we begin to create folds. Fold lines are drawn either with dotted lines or dots. In the first case, you need to fold the figure “valley”, forming a depression, and in the second case, “mountain”, making a bulge. First we “go through” all the folds of the bellows. If the paper is thick, they need to be slightly pressed with a stationery knife or the edge of scissors (without pressing). This will allow you to make clear bends without deviations.
- Coat the area marked in gray with glue.
- We connect it to the opposite edge, getting a cylinder - the same bellows.
- Apply folds.
- We start not from the edge of the cylinder, but by skipping one row (see figure)
- For each parallelogram along the perimeter we make four folds as a “mountain” and one as a “valley”, diagonally. We also leave the last row at the other end untouched.
- Now we add up the previously missed sections. Only the folds “mountain” and “valley” are swapped.
- Let's start making half-shells. Their design allows the harmonica to produce sounds. Of course, they are far from real music, but still they make an impression, especially on children.
- First we make a conical hole for blowing air.
- We attach a horizontal bar to the gray area marked on the pattern.
- We glue the finished part with a hole on the inside of the half-body next to the slot indicated by the arrow.
- We fix the other end and the horizontal bar together with the sides of the workpiece. At which points is shown by an arrow.
- We glue the box of the half-body.
- We do the same with the second part. But we make sure that the horizontal part is located closer to the slot.
- Glue the half-shells to the bellows. First we put them in place and check if there is sound. If it is missing, you need to better align the purge hole with the opposite end of the groove.
- We glue the half-body on one side.
- With another.
- Glue the handles.
Now you can “play” and sing Gena the crocodile’s wonderful birthday song.
A fun activity
Children love figurines of animals and beasts. Therefore, folding paper into an accordion craft will become a favorite pastime for them.
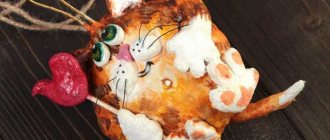
If the child does not go to school yet, then on weekends he can be carried away by working on the hedgehog. This is the favorite cartoon character for all children.
By making a fan out of brown paper, gluing a pre-prepared and painted hedgehog's face into the middle of the fan, we get a funny toy.
You can make a bunny in the same way.
If you glue eyes and a mouth to the narrow side of the fan, and a small fan-tail to the wide, corrugated part, you will get funny fish.
You can create entire collections of similar works.
Simple manufacturing method
Take a rectangle of the desired size, the length of which is several times greater than the width. To get a long accordion when there is no paper of a similar size, glue several sheets together and do not bend them until they are completely dry. The glue line should be as wide as the planned fold, so it won’t be noticeable.
If you doubt your eye, mark the workpiece with vertical lines, placing them at equal distances. Do not press too hard on the pencil when marking so that snowflakes or other products look beautiful. Mark the places where you need to make an internal fold with solid lines, and for external folds - with barely visible dots.
Once you have marked the rectangle, you can bend it, carefully smoothing each fold with your hands. It's your cardboard blank, you'll have to put in more effort to make it look neat.
We recommend: Beautiful DIY Valentine card with a spread
Paper accordion: examples, diagrams and description for beginners
Origami is one of the most beautiful forms of art. Origami masters make uniquely beautiful and very amazing things. There is a huge variety of paper crafts. They all differ in complexity, beauty, size and materials used for them. It is worth mentioning that origami has a very positive effect on the state of the human nervous system. Origami helps you calm down, learn to concentrate and focus on your goal. It also trains perseverance and perseverance very well, since many actions in origami have to be started all over again. This effect on the human condition has been scientifically proven! In this article we will tell you how to make a simple, but very beautiful and entertaining paper craft. Today our heroine is a paper accordion.
This accordion is quite easy to make for a beginner. It will not cause much difficulty during its manufacturing process. And also, you will not need to search for any special materials. Just a sheet of A4 paper and a sheet of colored paper will be enough. Crafts made using the origami technique are very beautiful.
Automation for gates
Although folding gates are easy to use, you still need to take care of their operation. Automation can handle this function best. The system can be operated using top or bottom drive. The top drive mechanism is in great demand on the market, since it does not require creating special conditions - laying a foundation. However, it has limitations in use; the maximum door height should not exceed 5 meters. Otherwise, the top drive system will not be able to control the structure.
If an automatic system is used, the following elements are installed:
- Remote control panel. It can be built-in or portable.
- Electric drive that regulates the movement of the sash.
- Signal light indicating readiness for operation.
- An electrical cable that supplies power to the system.
- Photocells that stop movement if a foreign object appears in the way.
Prices for automation for overhead gates vary, but the system itself equally guarantees the safety of using the entrance structure.
Many garage owners equip their sliding doors with a manual drive. Such structures are simple and affordable, as they do not require power. The drive for the gate is selected separately, since it is necessary to take into account the weight of the panels, the traction force of the mechanism and the intensity of its use. Therefore, before buying this or that device, it is recommended to seek advice from specialists.
Installing accordion-style entrance doors is the best solution for decorating the opening of a living room, because this type of design is practical and compact. And the purchase of automation allows you to open the gate by simply pressing a small button.
A complicated way to fold an accordion
This was a simple way to create an accordion. Once you have mastered it, you can move on to a more complex option of creating an almost real accordion or even a paper button accordion with your own hands. A square sheet of paper will be useful for this. Bend it horizontally almost in half, moving the fold line just a little beyond the center of the workpiece. This is necessary so that the edge slightly opens the bottom. A narrow strip will be visible from under it - bend it upward, covering the edge of the half of the sheet that is on top. Then the operation needs to be repeated: bend the future accordion along the same line as before, and bend the narrow part of the paper that is on top upward. The result should be a narrow paper rectangle. Bend it in half horizontally and then unfold it.
Bend the resulting folds so that there is a seam on top. In the center of the resulting element after all the manipulations you will see narrow stripes. Once this has happened, bend the workpiece exactly in half: the fold line should be under the narrow strip. And now with the resulting rectangle you need to do the same procedure that you already knew when creating a simple accordion - that is, alternate folds inward and outward. Leave a place on both edges where there will be no folds - these will be the accordion handles. Carefully smooth out the lines to roll the workpiece into a rectangle. You should end up with something that looks like a box with fold lines. By holding the handles, you can fold and spread the accordion, just like a real musical instrument does. All that remains is to make the keys on the handles.
We recommend: Box with a surprise
Now you know how to make an accordion with your own hands from any material and for any purpose, be it elegant snowflakes, bright books or stylized musical instruments. Don’t stop at the ideas we’ve proposed: you can always come up with your own version of the creative use of an accordion in decoration or the educational process. For example, you can make voluminous applications from accordions, folding them into umbrellas, hedgehogs, suns, flowers, trees, Christmas trees and many other elements. And appliqués don’t have to be only on postcards – they will look great on the walls when decorating a room for the holiday.
How to make an accordion out of paper step by step
Let's look at the sequence of making a paper musical instrument from an album sheet. The scheme of work is as follows:
- Place the sheet horizontally in front of you.
- Measure a strip of approximately 1 cm along the long edge. This will be the seam (gluing area).
- Fold the sheet in half along the long side. Perform gluing.
- Fold the resulting rectangle in half.
- Stepping back about 5 cm from the left edge, begin making accordion folds. Do them until there is also 5 cm left to the right edge.
- Carefully open the structure from one edge and blow inward. Straighten the resulting workpiece exactly so as not to damage the folds.
- Fold the side elements and draw keys on them.
So, you have learned how to make a paper accordion with your own hands. In addition to the usual white sheet, you can take colored paper with embossing, and stick the keys from another.
Of course, the instructions given do not show the implementation in the most complicated way, but the accordion will look quite realistic. And the child will quickly master the technology. It turns out to be a good option for children's creativity.
Origami album
This origami book is a six-page book folded from typical origami paper (15cm x 15cm).
The size of each page will be 2.5 cm x 5 cm. This means that if you want to place two 10 x 12 photographs on each page, then the paper size must be at least 75 x 75 cm. Making an origami album starts with horizontal and vertical Z-folds.
Photo source: www.origami-make.org/origami-album.php
Antistress
The “accordion” is also used as a popular anti-stress toy today. By stretching and squeezing the folds of the “craft”, a person enters a trance-like state and relaxes. This is the principle of operation of all toys aimed at relieving stress. Most of them were invented in Japan: a collapsible handle that can be twirled in your hands and bent without fear of breaking, pillows that emit a slight wheeze when pressed, like a sleeping person, and, finally, the famous “squishies.”
“Accordion” has a calming effect not only in its finished form, but also at the assembly stage. Rhythmic weaving of strips and complete immersion in work will allow you to escape from accumulated problems, free your mind, and therefore find the right solution that relieves constant anxiety. The color scheme of the product also has a positive effect on the psyche - it is recommended to choose shades of the rainbow for it, alternating them in a natural order.
Crafts for children
Children quickly get bored with toys, even those that they themselves begged from their parents. They want novelty and impressions. That's why schoolchildren make paper airplanes and boats, girls make fans and butterflies. And kids love crafts made from accordion-folded paper.
Caterpillars made of thin accordion paper with a mischievous little face glued to one end can keep a child occupied for hours.
If you also imagine that they snuck into the garden, where they were going to damage the apple trees, then the children will be happy to join in this game of “garden detective”.
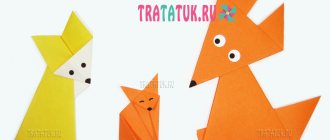
Foxes, wolves, dogs are beautifully and easily made from accordion paper.
Benefits of working on crafts
It is impossible to overestimate the importance of the work of both children and adults on accordion paper crafts. This unites the family into one close-knit creative team.
Children have great confidence in their parents who spend their leisure time with them.
The motor skills of children's hands improve; they have to make many different movements while making crafts.
Thinking and imagination develops.
Introducing children to creative processes, involving them directly in the process of creation itself, is worth a lot. The child develops artistic taste, he learns the correct combination of colors and painstaking work. He develops perseverance, which will be necessary in the school learning process.
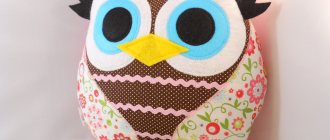
Ruffled parrot
Japan has its favorites among tropical exotic birds. And although the climate of the land of the rising sun can be very harsh, birds accustomed to the southern sun and warmth have learned to survive here in the wild. These are necklaces or Indian ringed parrots, massively imported by the Japanese in the 1960s, in the wake of the pet boom. Just a few years later, the first flocks of wild tropical birds appeared in the major cities of Tokyo, Kyoto and Osaka. The necklace parrots turned out to be too noisy and fussy for the Japanese, who were accustomed to the silence and contemplation of their compact home.
As a result, the freedom-loving pets began to fly away from their owners, and they were not too eager to look for them. According to ornithologist Takashi Fujii from the Japanese Society for the Conservation of Birds, some even deliberately released “inconvenient” exotics, caring little about their continued existence. But the parrots survived and by the 1980s had increased the population in each city to colony size. It’s not surprising when you consider that in their homeland, South Asia, they also live in the Himalayas at an altitude of 2000 m above sea level.
Necklace parrots are distinguished by their grace and beauty. Their grassy-green plumage contrasts effectively with the bright red beak, which in males is also complemented by a ring around the neck (hence the name of the species).
The assembly diagram for an origami necklace parrot is laconic in Japanese. You will need a square of green paper measuring 15x15 cm and a red marker to draw the beak.
Step-by-step instruction:
- Fold the square in half vertically. Let's reveal.
- We bend the upper corners towards the center.
- We fold the right and left edges towards the vertical axis.
- We bend the product into a mountain.
- We turn the bottom part, focusing on the near corner of the triangle.
- Open the fold.
- Repeat step 5 in the opposite direction.
- Bend the left square flap diagonally, as shown in the diagram.
- Open the last fold of the previous step.
- Using a reverse fold, we bring the left flap inward, forming a tail.
- We tilt the upper corner slightly to the left to create a beak.
- Unfold the fold from step 11.
- And just like the tail, bring it inside the figure.
- We turn the bird 45° counterclockwise to give it a sitting posture.
All that remains is to come up with an interesting design for the necklace parrot in the Japanese spirit:
Accordion book: we make it together with children
All children love to create something with their own hands: glue, fold, cut, draw, sculpt... Very often in the children's room there is not enough space for all kinds of crafts. Well, an accordion book won’t take up much space, but it’s very interesting to make and you can come up with something new every time.
A few ideas on how to make an accordion book with your own hands with children:
- Create and illustrate your own fairy tale. If the child already knows how to write, let him sign the pictures himself, and if this is still difficult for him, you can ask an adult.
- Fill each page with a multi-colored pattern: circles, squares, spirals, etc., etc.
- Draw all family members, including uncles, aunts, cousins, brothers and all other relatives known to the baby.
- Glue dried leaves collected during a walk into a booklet and sign the name of each one.
- Trace a hand on each page and color them all differently.
- Paste photos of your pet and come up with a short story about it.
- Draw what the child ate for dinner or lunch
And on the last page or on the back it would be great to sign the year when this book was made, or the age at which the child made it. Then, many years later, when reviewing a child’s creation, it will be interesting to remember how it was created.
By making such an unusual book, you can learn how to carefully hatch, make straight and wavy lines, and also try out new felt-tip pens or pencils.
What is a flip book
The folding book itself is a book that contains three-dimensional pictures. Books of this format can be on any topic. These could be educational materials or children's fairy tales.
The simplest option is a do-it-yourself folding book that folds like an accordion.
The voluminous figures that the child finds among the pages attract attention. Reading becomes more exciting and interesting.
How to make an accordion out of paper
Not only expensive things, but also simple paper toys can bring joy to a child. In order to make them beautiful, you don’t have to master the art of origami, it’s enough to be able to cut and glue according to the pattern. With a little imagination you can turn a simple toy into a unique thing. Knowing how to make an accordion out of paper, you can decorate it with buttons or make a fur calendar.
What types of accordions are there?
This toy is not as simple as it seems at first glance. There are various options for its execution:
- Accordion folded sheet. This is how children usually fold it.
- Glued in the form of a parallelepiped with two handles.
- Assembled according to an origami pattern.
- An exact copy of a real button accordion or accordion.
Masterfully crafted models can produce notes. And you can decorate them as your imagination and imagination allows. Such a toy, made by the hands of parents, will be very dear to the child.
How to make an accordion out of paper
First of all, you should decide on the model of the product and prepare everything you need for work. In the simplest case, it will be paper and glue. In more complex options, additional materials may be needed:
- Product diagram.
- Rhinestones or beads in black and white.
- Black tape 5-7 mm wide.
- Glitter.
- Foil or acrylic outline to imitate metal.
- Double-sided tape for attaching the tape.
You can use a standard diagram, but if you want to make a copy of the tool, you should find photographs of it and crop them so that the individual elements overlap the diagram, and perform this operation in Excel. Next you need to print and cut out the diagram. Another nuance on how to make a paper accordion more realistic: use photo paper and color printing, then the toy will look like an exact copy of the real instrument. You can even save the name of the manufacturer's brand on it.
Work process
When the diagram and necessary materials have been prepared, you should staple the straps to the tool. Only after this can it be glued. The straps are attached like on a real button accordion.
Let's look at how to make a paper accordion step by step:
- Furs should be drawn on the sheet. They consist of three stripes: two wide and one slightly narrower (for the top). Their total width and height should be slightly less than the height and depth of the instrument. After cutting out the strips, you need to stick pieces of tape on them. They are attached to pencil strips one at a time. After the tape is fixed, you can glue the furs.
- First, the side parts are connected to each other, after which the top is glued. After fixing it, it must be straightened. The lower part of the bellows can be fastened with a stapler or another accordion can be made.
- The accordion is glued into the button accordion.
Instrument design
Design is of great importance, since you need to make an accordion out of paper with your own hands so beautifully that its appearance compensates for the lack of sound. Buttons for button accordions are made of beads or rhinestones. Since they differ in size on opposite sides of the instrument, the decorative elements on one side should be larger than on the other. The white paper corners of the furs should be covered with a silver acrylic outline. In the place where the decoration is intended, you need to drop a little glue and sprinkle with glitter. The excess can be blown off after drying. If the diagram was not printed in color, it is advisable to paint the toy yourself and then varnish it.
There are many ways to make a paper accordion beautiful and look like a real instrument. The time and effort spent will be rewarded by the excitement of the creative process and the joy of the child who received a beautiful toy that the parent made.
www.syl.ru
Master class on making an information folding bed
Svetlana Golikova
Master class on making an information folding bed
And today I would like to bring to your attention a master class on making an information folding bed . I have a huge variety of them, covering almost all thematic periods. Making them is very simple , you will need:
- cardboard packaging from colored paper and colored cardboard
- sheets of cardboard (uncommon colors)
- strips of colored paper
First, we select covers from colored cardboard or paper, in this case I needed three pieces, I select them by size.
I glue them together so that it looks like an accordion.
If necessary, I level the top and bottom of the folding bed , draw an even line with a pencil, cut off all excess
I’m trying to install it, you can already see how smooth and beautiful everything is
Now it is necessary to strengthen the sheets so that they become denser, otherwise they will bend with the propeller during use. For this I used sheets of black and brown cardboard. I paste a piece of cardboard onto each page.
This is what happened
At this stage, I fold the cot and put something heavy on top of it and leave it for a couple of hours.
Next is the decorative finishing. To prevent the dark color of the base of the pages from showing through, I glue them with album sheets. I cut the white sheets to the required size.
This is what my clamshell looks like at this stage
I glue strips of colored paper along the edges of the pages for beauty.
This is what happened. I think it's very cute!
And here is the finished information folding bed in its place .
I will be glad if my idea is useful to someone!
Master class on making flowers. A path runs through the meadow, dives to the left, to the right. Everywhere you look, there are flowers all around, and knee-deep grass. Green meadow, like a wonderful garden, fragrant and... Master class on making postcards First, you need to prepare all the necessary elements for the application. We trace children's palms on colored paper with a simple pencil. Master class on making plasticine roses We usually think about gifts on the eve of the holidays. Currently, stores offer a rich assortment and selection of different ones. Master class on making “Chamomile” I bring to your attention a master class on making chamomile. March 24 is World Tuberculosis Day. Since 1912, chamomile has been around. Master class on making screens There was a need to acquire screens in the group to divide the space. All options offered on the Internet, as a rule. Master class on making an owl Master class on making an owl from cardboard and autumn leaves. + Photo report. Autumn gives us a lot of surprises. The weather is changing. Master class on making Topiary Topiary is a fairy-tale tree, a decorative original work, the crown of which can take on a wide variety of shapes and be made. Master class on making decoration DECORATION FOR A HALL OR GROUP “FLOWER”. This is what a lush flower can be made from scrap material. To make it you will need:.
Source
"Accordion" decor
It is not at all necessary to resort to ready-made templates to make an origami accordion, but this time it is not a model of the instrument, but a decorative element. The task is not easy, requiring accuracy, attention and precision. But the result will be worth all the effort:
For the model you will need:
- 2 sheets of thick paper, the size of which is calculated individually;
- paper creasing stick (applies grooves to make clear fold lines);
- ruler, pencil;
- cutting board or self-healing mat;
- glue.
Step-by-step instruction:
- It is necessary to decide on the initial parameters of the workpiece. To do this, multiply the length of the product that you want to get in the end by 4.2, and the width by 1.5. For example, if we are making a decorative flower pot measuring 9x7 cm, the original rectangle should be 13.5x29.4 cm. To play it safe, it’s better to add another 1 cm on both sides. In our case it will be 14x30 cm.
- Place the rectangle with the long side facing you. Fold in half from left to right. We open and bend the short sides towards the center, as in the basic “Door” shape.
- Next, fold each half of the figure in half again. We open all the folds.
- Using the division method we get 8 equal parts. To divide them in half, you need to fold the workpiece to the penultimate division on the right and left sides, then to the second from the end, and so on until we reach the desired amount. It is better to immediately mark the first 8 divisions with a felt-tip pen, otherwise there is a risk of getting confused.
- Turn the workpiece over to the back side. Apply a diagonal mesh. We draw the first line from the upper left corner to the fourth fold. It’s better to mark it with a felt-tip pen too.
- We place the future “accordion” on a cutting board, or even better, on a breadboard (self-healing) mat and draw all the fold lines with creasing. If you don’t have one, you can use a utility knife, pressing the lines very lightly, or a non-writing ballpoint pen.
- Let's start making folds.
Butterfly pleated
As soon as they don’t fold banknotes using the origami technique. There is a way to make butterflies with accordion wings, which are very elegant despite their simplicity. Dollars are ideal for pleated manigami, as they are durable and can quickly regain their shape. For each butterfly you will need 2 bills.
Place the banknote with the green side up. Let's start the assembly with it.
Fold the short sides along the white lines. Fold it in half lengthwise. We open and bend all the corners towards the outlined central axis.
Now we bend the long sides along the white border. And then we continue pleating the same size.
We collect the second bill along the long side.
You get two parts of the butterfly - upper and lower.
We connect them with bead wire.
You can additionally decorate with beads.
Insects
To make a ladybug:
- Draw a large circle and cut it out. Fold in half and cut.
- Gather narrow folds, starting from the straight side.
- Fold in half.
- Glue the edges of the inner sides and straighten the part.
- Cut out a triangle and glue eyes on it from white circles with black dots.
- Three long black strips are glued to the bottom side. The ends are bent.
- Small black circles are glued onto the back of the insect.
The bee is made by assembling a durable accordion.
- Two strips of the same width are glued together at right angles.
- Fold starting from the corner. Alternate bends. The last fold is glued.
- A round head with pasted eyes and a smile is connected to an accordion.
- Two oval wings are attached to the first fold from the head.
How to make an accordion out of paper with your own hands?
Want to learn how to make an accordion out of paper? Read how. Even a child can handle the simplest method, but even an adult can make complex versions using the origami technique only using a template. As for the size and appearance of the product, the accordion can be either a very small decorative, souvenir, or a life-size model. In a word, here you will find information both about options for children’s creative activities or hobbies for adults, and the possibility of creating attributes for a holiday at school or preschool.
Materials and tools
If you decide to learn how to make an accordion out of paper, then most likely you already have the items necessary for the work. Depending on the complexity of the manufacturing method, different requirements may be required. A sample list is:
- paper (A4 sheet, roll, printed template) or cardboard;
- glue;
- pencil;
- ruler;
- paints, felt-tip pens for coloring the product or other decor.
The most important tool here is skillful hands and fingers.
Necessary materials
The quality of the product directly depends on the availability of the tools and materials necessary for the work. To make an accordion out of paper you need to prepare:
- colored cardboard and paper;
- office glue;
- a simple pencil;
- a knitting needle or a straight piece of wire;
- scissors (stationery knife);
- metal ruler.
Additionally, it is worth taking a piece of plywood as a backing, on which you can bend and cut out small parts.
Ready-made templates
To create a carved accordion, you will need several templates, which are used to form the framed part of the product.
Sketch of the inside of the product (fur):
The second sketch is a sketch for the side parts:
If you print the templates, then the only snag in the work will be assembling, cutting and gluing the necessary elements together.
Possible template options
Even a child can cope with the formation of a paper assembly. If you use a ready-made template. You can draw the sheet yourself or print a sketch. The principle of assembly and the appearance of the finished base will depend on the specified diagram. An example of the simplest accordion assembly diagram:
Using this assembly scheme you can get a very original shape. If you use a more complex principle of forming bends, then the appearance of the assembly will look quite complicated. To do this, use the following template:
The simplest and most commonly used template (especially in children's crafts) for making an accordion is the following diagram:
Depending on the complexity of the craft itself and the design, you can choose any of the scheme options presented below. Additionally, ready-made templates can be used to make the side bodies of a “musical instrument.” When using such templates, it is enough to cut out the parts, assemble the structure correctly and glue the formed workpiece.
Step-by-step instruction
To make a beautiful “musical instrument” it is not enough to prepare the necessary templates and devices. You need to know the assembly sequence and manufacturing stages. To do this, you should use a detailed master class:
1. Cut out the blanks for the side parts of the product. In the case presented, the sketch is represented by a painted base. All small internal patterns can be cut out using a stationery knife.
2. Next, you need to make bends on the workpiece, which will subsequently form the bellows. On the template, all the lines are drawn differently, indicating the direction and type of bend.
3. When all the bends are formed, you can assemble the bellows. The procedure is carried out by properly gluing the parts.
4. Next, the side parts are partially assembled.
5. The side parts are glued to the furs.
If thick cardboard is used as a base, then instead of glue it is better to use double-sided tape.
The result will be an original accordion.
How to make an accordion out of paper?
Remember how, as children, we folded a piece of paper into an accordion shape and entertained our classmates? If your love for paper crafts has not passed, and the origami technique has gradually grown into a hobby, you can remember those very days and make an origami accordion out of paper. Moreover, simply folding the edge of a sheet of paper is not enough; here we will use something like a real technique of folding paper along the lines. True, in its simplest and most understandable version. What if such a hand-made paper accordion actually produces a couple of notes? There are even entire communities where craftsmen post complete tutorials on gluing such models and provide complete diagrams for cutting out parts.
How to make an accordion out of paper - a simplified version
The easiest way to make a paper accordion is to simply cut out its two bases in detail and fold its bellows using the simplest method. Here is the actual method:
- So, before making an accordion out of paper, we print its details on a printer. The blank has several empty windows where you can place a calendar for any year.
- The essence of the work is that we need to fold the base of the accordion along the dotted lines and glue it together. And then assemble the structure from individual parts.
This is such a wonderful paper accordion, glued together with your own hands, that you can make.
Origami paper accordion
If you already have some experience working with paper, you can complicate the process. This time the accordion bellows will be made much more difficult. Let's look at how to make an accordion out of paper, which will also produce a couple of notes:
Description of the production process
- First you need to cut out the size of the page from cardboard. This is already arbitrary, it is desirable that all pages are the same.
- We will need strips of fabric that are about 4 centimeters wide and their length is equal to the length of the page.
- You need to connect all the resulting pages by gluing them onto these pieces of fabric, and then bend the workpiece like an accordion.
- Now you should carefully place the book on its edge and make sure that it opens and closes well.
- After which it needs to be folded and pressed down with something heavy so that when it dries, it remains flat.
- Pages can be decorated with beautiful frames made of colored paper or with fabric strips.
Done, now you have a frame for a children's book. The decorating process can take a long time. It is important to be creative and original while creating. If you don’t have any ideas, then involve the rest of the family in the process or create a book together with your child! This will leave warm memories in his memory.
Making a large accordion
What you will need to complete:
- paper, wallpaper and cardboard;
- tape, PVA glue and “Moment”;
- colored pencils, ruler, clips and decor.
To begin, cut out 4 rectangles from the wallpaper, from which you will make furs. Their size depends on what you want the result to be. Apply masking tape to the wrong side. Draw lines at equal distances from each other and make folds. Make notches on the inner folds so that they do not tear further, stick with tape. For vertical parts, make bends. Cut rectangles of cardboard to the size of your musical instrument. The quantity will correspond to the folds on the blanks.
Apply glue to the cardboard and place the first accordion fold into it. Use a clamp to secure the gluing areas. Apply the same steps for the remaining rectangles. You will get the upper part of the furs, and for the lower part, repeat the process. Let the product dry.
For the side parts, take 2 cardboard boxes. On any of them, place an element where the keys will be. Cut them out of cardboard and round the edges. You can also use a hole punch.
How to make an accordion out of paper, for example, a long one? The diagram will not change, but you will need a larger sheet. If you don’t have this at your disposal, then glue several sheets of paper yourself. To do this, take tape and connect two sheets of paper. Using gentle movements, combine the two parts into one using a thin piece of tape along the entire length. If your child comes to you with a question about how to make an accordion or a Christmas tree out of paper, you should show him a simple version of the craft.
If you are into origami yourself, then try more complex patterns.
Some of them look real. All that remains is to be patient and imaginative.
Side parts
The sides of the accordion are made in the form of 2 cardboard boxes of appropriate sizes. You can also make an applique in the form of buttons and keys - this decor will give the paper accordion more credibility.
Conclusion:
Making an accordion out of paper is not a difficult but interesting process. Even a child can master it. There are many options for creating such a craft. The level of difficulty must be correlated with your capabilities.
How to make an accordion out of paper Do-it-yourself accordion out of paper Making an accordion out of paper
Here are some interesting accordion paper crafts with links to a detailed master class and photos. Of course, the list of works using this technique is not final; more and more new, interesting crafts from a simple accordion and a slightly complex version of it will appear.
How it all started
The idea of making an accordion with my own hands had been in my mind for quite some time, but it didn’t linger in my head for long, since this work seemed incredibly difficult, given the lack of a full-fledged workshop and the presence of only fragmentary knowledge about the process itself.
But the pile of pieces of planks that had accumulated thanks to kind people pushed us to get down to business. And my hands were already unbearably itching to try.
Books are useful not only to read, but also to do
If a child is not inclined to active games and prefers quiet fiddling with toys, then the opportunity to do something interesting together with adults will be good entertainment for him. Such tasks are good for developing not obvious, but important qualities in children:
Volume book with fairy tales
fine motor skills and manual dexterity; rapid formation of the speech apparatus - in the brain, the centers of motor skills and speech are located nearby and stimulate each other; acquisition of communication and collaboration skills; the ability to focus one's attention on an interesting task.
Fun folding book
Paper accordion using origami technique, craft diagrams, photo and video master classes
During the New Year holidays, you want to amuse the children and do something with your own hands. But I want the children to take part in the process of exciting joint creativity, to do something interesting, and at the end to be able to admire the creation of their own hands. I had to tinker, look for something to make, until I found an accordion made of paper, which can be made using the origami method or simply constructed and glued together.
The making itself seemed simple, but it took a lot of work before the accordion acquired its characteristic appearance. The production required a minimum of ingredients and a maximum of patience and diligence. So, if you want, you can try making a paper accordion; this will keep the children busy and will also provide them with another toy.
Let's make a book together
The simplest option is a do-it-yourself folding book that folds like an accordion. It consists of pages sequentially fastened with flexible corner joints. To make a folding book you will need:
Think about the contents of the book. It can consist of color pictures, small and simple text that convey the content of your favorite fairy tale. Images should be bright, large and understandable to a child. Type the text on the computer in large letters. Make it with one and a half line spacing and a font size of at least 14. At 4 years old, study