Autumn is the golden time! Nature's gifts rain down on us from all sides. Just have time to collect! And now, when the cellar is bursting with supplies, and we have eaten our fill of puddings, salads and stews... The time for creativity comes. And autumn crafts from vegetables and fruits are perfect. We urgently go to the garden, forest, park to collect material! Choose the most beautiful and interesting. In our case, anything will do: sticks, cones, acorns, seeds.
Auxiliary materials will also be useful. For example: wire, wooden skewers, beads, glue, matches and a base for work. You are ready?
And I have prepared some cool material for you! I used the entire Internet! She herself was very surprised by what she saw. And I set my mind on making an autumn topiary. If the idea works out, I’ll definitely tell you. Well, let's go ahead?
DIY airplane
For an airplane you will need two medium sized zucchini. The first one will serve as the base, so there is no need to cut it. It would be good if it had a thin tip curved upward. The second must be divided into three parts. The middle one can be immediately put aside - it will not be needed. In the remaining two, deep oval cuts need to be made in the center so that in the future they will fit tightly around the main part of the craft.
To prevent the wings from falling, you can prop them up with skewers or toothpicks. The screw can be made from zucchini peels and carrots.
Zucchini helicopter
If you plan to make a helicopter, you can try to find a plant that is shaped like this type of transport (as shown in the photo). Then all that remains is to attach bright carrot details to it and take the autumn craft to an exhibition at school or kindergarten.
If all the zucchini that you have at home is round in shape, you shouldn’t upset it - you can also make funny helicopters out of them.
Fun DIY helicopter
You need to lay the plant on its side, cut off the peel from the front to make it look like glass in the cabin. Make cuts on the sides in the form of windows. Attach the blades to the top.
cartoon helicopter
Instead of the chassis, put small potatoes. If you decorate the helicopter with eyes and a nose made from other vegetables, it will immediately come to life.
Engine
Among the various types of transport that can be made from zucchini, there is also a steam locomotive. It is as easy to do as other crafts. The following components will be required:
- three zucchini;
- carrot;
- skewers;
- knife.
The zucchini should be approximately the same size. Attach two zucchini with skewers. Cut the third zucchini in half crosswise. Place half on the main carriage, securing with skewers.
Cut the other half into circles to make 12 wheels. Fasten the parts with skewers. Make a pipe, a window, and connections between wheels from carrots.
DIY vegetable flowers
If you decide to make flowers from vegetables, you will need:
- one onion;
- one beet;
- knife with thin blade
- cucumber.
This selection depends on what specific vegetables you are going to cut from. It could be a carrot, a tomato, or any other object. Today we will show you how to make a rose from a beet and a chrysanthemum from a bulb. You will see that it is not that difficult.
First we'll make a rose. Using a knife, cut a long piece from the beets in a circle. This is what happens when you peel potatoes in one piece.
Cut it as long as possible. Then we roll it up into a spiral.
From the remaining segment we cut off relatively small and low pieces - these are the petals.
We slip them one by one under the first piece. Now the rose is ready.
You can also cut leaves from the cucumber to go with it.
For chrysanthemums, take a medium bulb.
The larger the bulb, the larger and more magnificent the flower will be. When peeling, do not cut off the root, but only lightly peel until clean. If you cut it, the outer layers will fall off.
Take a knife and cut the top layer into thin strips, sharpening the edges. We do this around the entire perimeter and disconnect the cut parts.
We repeat this step with the next layer and further, until the very end. The thinner the petals are, the more magnificent and delicate the flower will be.
The finished flower can be sprinkled with lemon juice so that it does not cause watery eyes.
Vegetable bouquet
- Tomatoes, apples, turnips and other round vegetables can easily be made into flower-shaped decorations. To do this, use a small sharp knife to make zigzag cuts around the circumference and divide the fruit into two halves.
- Cut the peeled tomato (it is better to choose a not very ripe vegetable; the tomato should not be soft) in half. Cut each half into thin slices, not cutting all the way through. After this, move the slices apart and you will get a lush “flower”.
- Try making a “rose” from a tomato. For this decoration you need to take a tomato with dense pulp. Using a sharp knife, very carefully cut off the skin of the tomato along with the pulp in one strip. Start cutting from the stem.
The strip of skin with pulp should be very thin so that it can be easily rolled up. Roll the strip with the flesh inward, starting from the part that corresponds to the stalk. Fold back the last turn of the strip to simulate an open rose petal. Connect all layers using a toothpick. Place the rosette on a leaf of lettuce or place a few sprigs of parsley underneath it.
Onion flowers.
- "Daffodils" can be cut from small white bulbs with a stem. To strengthen the stem, place a thin skewer inside the feathers. Make deep zigzag cuts on the bulbs, right down to the center. Using the point of a knife, separate the two halves of the onion and place them in very cold water. After some time, the “narcissists” will open up.
- Squeeze a few drops of mayonnaise onto a feather of green onion - you will get a “lily of the valley”.
- Flatten the green onion. Cut it on one side like a herringbone, and then cut it lengthwise and unfold it - the feather will turn into a “palm branch”.
Cheerful radish-rose.
Try cutting flowers out of radishes. To do this, cut one radish into thin circles. And cut the other one twice with a cross. Insert the circles into the slits. Isn't it beautiful?!
Multi-colored peppercorns.
- Yellow bell pepper easily turns into a real “sunflower”. Using the sharp tip of a knife, carefully cut the pepper almost to the base into long, narrow “petals.” Cut the skin of each “petal”.
- Place the pepper in very cold water for half an hour to an hour until the “petals” open. Cut off the thick “butt” of the eggplant and cut the skin lengthwise and crosswise several times. Pull apart slightly to get the middle of the sunflower. Insert the cut eggplant into the middle of the flower. Place the sunflower on a lettuce leaf.
- The red and green fruits of bell peppers with shiny and dense skin are ideal for making “exotic flowers.” Divide each pod into four parts. Do not complete the cut. Use scissors to cut thinner “petals.”
- Trim the ends of the “petals” if the pods are too long. Place the prepared “flowers” in ice water for a while.
Cucumber bells.
You can cut “bells” from a strong cucumber, carrot or beetroot.
To do this, you need to carefully cut off the top layer from the end of the fruit to form a cone and roll the bell. Place carrot, tomato, and red pepper slices in the middle of the flower
Beautiful crafts made from vegetables and fruits turned out and were very tasty! Of course, it’s not easy to immediately become an artist of vegetable crafts, and pumpkin baskets, so beloved by decorators, are of no use in everyday life. But try, learn - and everything will work out!
Useful tips for using vegetables in creating animals
Vegetables can come in many different forms. We can easily adapt round or oval fruits to construct a body or head. Pointed vegetables are ideal for the face of a mouse or puppy. Even cauliflower and broccoli are used to create interesting crafts. The poodle and sheep made from these vegetables are proof of this.
The color of the fruit plays a big role in creating compositions. For example, the dark purple, almost black, color of an eggplant provides an excellent opportunity for constructing crafts of black and white inhabitants of the earth. A whale can come from a whole fetus. Since the eggplant is white under the skin, it will be easy to make a zebra. To do this, use a knife to cut strips on her body and face. The penguin and koala are also made; it is enough to cut off the skin on the abdomen to get a white apron.
Making crafts from vegetables is not only a fun activity, but also a responsible one. It is necessary to take into account all the features of working with such material. It is necessary not only to make a craft, but also to preserve it so that it pleases with its beauty for as long as possible.
squash ship
To make a ship, you can take both large and small zucchini, wash it and dry it. Then, without first removing the peel, cut off the upper part longitudinally. The remaining workpiece should be approximately 2/3 of the original volume.
Then you need to carefully remove all the pulp and grains. To make a flag and anchor, it is advisable to use some bright vegetables, for example, carrots, tomatoes, red peppers. You should also try to make the helm and porthole catchy.
Beautiful ship
You can build something like a ladder from the cut part of the zucchini. All additional parts are well fixed with toothpicks. For decoration, you can use grass, flowers - it all depends on the child’s preferences.
A ship with scarlet sails made of cardboard
The most beautiful flag is made from white cabbage leaves. They can be pre-painted with gouache. If you don’t have cabbage at home, you can use a bright cloth attached to a wooden branch.
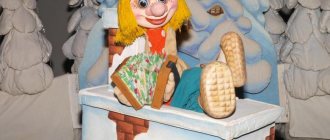
Crafts from zucchini Young lady
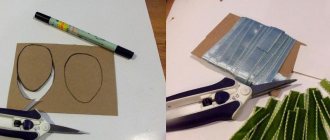
We suggest making a young lady out of vegetables, leaves and berries. Such a beauty deserves to take first place in a children's competition at school or kindergarten. The work uses:
- zucchini,
- felt-tip pen,
- carrot tops,
- Sweet pepper,
- grape leaves,
- tree branches,
- black and red currant berries,
- thread with needle.
First, let's work on creating jewelry for the young lady. We string berries on a thread, piercing them with a needle. This will be an ornament for a hat or amber beads. If you make the punctures carefully, will the juice of the berries not flow? and the appearance of the beads will not deteriorate.
We tie the ends of the thread into a knot and cut off the excess length. The decoration is ready.
We will design the young lady’s head on the narrow part, that is, from the side of the tail. Using a black felt-tip pen, draw the main parts of the face: eyes, eyebrows, nose and mouth. The doll smiles.
Let's make curly hair using fresh carrot tops. To get a fashionable haircut, cut the greens and carefully tie them with a thread to the tail of the zucchini.
To hide the ugly top of the head, we will put a hat on our head. Pre-prepared sweet peppers will be useful for this. We cut off the tail, clean out the seeds and try on the headdress on the young lady. First, we put a berry decoration on our hair and a hat on top.
We demonstrate the result.
We will make a ball gown from grape leaves. Apply the green frills to the body and tie them with white ribbon.
Now we cut out holes for the arms in the zucchini. The pliable pulp of the vegetable is easily affected by any sharp objects. Carving a zucchini doesn't require much effort. By the way, a good ornamental property of this vegetable is its ability to retain color in the cut areas. Unlike potatoes, zucchini does not darken or lose its shape. It is thanks to this feature that children often use not only the whole vegetable, but also its parts (pieces or rings) when creating.
Let's return to our doll. All that remains is to insert branches 5-6 cm long into the resulting holes. Your hands are ready.
We take the final photo of the craft. We admire the resulting young lady.
Knowing that schools regularly hold competitions and events on the topic in the fall, we will be ready to take a prize by performing with a doll in the “Miss Zucchini” category.
We wish the young masters creative success!
More interesting:
Book of Good Deeds! We do it ourselves!
Good afternoon friends! Today Elena Kushnereva reminds us that December 19 is International Day for...
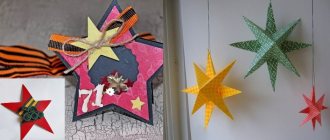
New Year's craft - star
Another New Year's craft in the shape of a star from Lina. Craft “Star from skewers” Simple and straightforward…
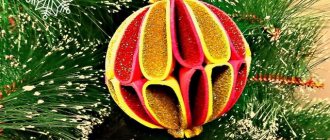
Christmas tree toys made from scrap materials
Christmas tree decorations from scrap materials Lyudmila Pugacheva sent new photos of how easy it was to make...
Buildings made of snow MBDOU No. 267 (continued...)
New photographs of snow sculptures, as well as slides and sports facilities made of snow, were sent to us by Ol...
Hedgehog
One of the simplest zucchini crafts for kindergarten on the theme “Autumn” is making a hedgehog. Needles can be made from toothpicks, and if you are worried that the child will get hurt, replace them with matches. Materials:
- small zucchini;
- large carrots;
- fruits, berries and mushrooms for decoration;
- foliage;
- toothpicks or matches;
- board or tray.
For a hedgehog, a zucchini that is narrowed at the base is best suited. The narrow side will be the muzzle. The nose and eyes can be made from berries. Then take toothpicks or matches and insert them in the form of needles along the entire top of the zucchini, except for the muzzle area.
Paws can be made from carrot halves. Place the resulting hedgehog on a board or tray covered with leaves. Needles can be decorated with fruits, berries or mushrooms.
Crafts from zucchini and other vegetables
Here's a zucchini penguin bird - with a sweet red pepper bow and orange eyes. It’s very easy and accessible to make with your own hands, even for children.
And here is another bird with a tomato head and a green crest and green pepper wings. The belly is a white zucchini.
You can make human or animal heads from squash crops.
If the fruit has a pointed shape, then you can play it like the face of a puppy or mouse.
You can also make a sculptural dragon craft from zucchini halves. But this is a real challenge to our creativity. The most important thing here is the head - if you have the muzzle, then you can continue and make the body.
Using the same principle, you can create similar composite sculptures from oranges.
Fruit fantasy.
But the watermelon also became famous for becoming a canvas for artists. There is even such a concept - carving. This is artistic cutting of fruits and vegetables.
WATERMELON SHADES
WATERMELON TEA PARTY
SERIOUS WATERMELON
WOW!
FAVORITE WATERMELON
CHARMING BASKET
Other fruits are not far behind and also participate in the exhibition of Nature's Gifts.
FRIENDLY DOLPHINS
FUNNY DAX
HEDGEHOG DESSERT
GOLD FISH
SWEET DESSERT
How to make cartoon characters and animals from zucchini
Zucchini is not only a valuable, but also a healthy vegetable. Various delicious dishes are prepared from it. It can be found in the refrigerator of almost every housewife.
Various figures are made from zucchini: cars, trains, men, boats, animals. You can use it to create different cartoon characters that your child will definitely like.
This craft is taken to kindergarten for a fair or matinee.
To make a big pig from zucchini and pumpkin, you must follow the following step-by-step technology:
- You need to choose a zucchini of suitable shape and size.
- Next, take a carrot, from which a snout and ears are cut out. The finished parts are attached to the zucchini. Small holes are first cut in these places. Small triangles are needed for the ears, and the snout should be round.
- The parts are secured with toothpicks.
- For the eyes, take two large black peppercorns and glue them into the eye holes.
- You also need to cut a spiral strip from the carrot and attach it to the other end of the zucchini. This is a pig's tail.
- A headdress and jewelry are made as additional decoration. For a pig girl, eyelashes that are cut out of thin black paper are suitable. You can glue on red lips and paint your cheeks with blush.
Note! You can make an unusual house for a pig from cabbage and squash.
When creating crafts of animals or cartoon characters with your own hands, you don’t need to limit your imagination. While working with your child, you can make original figures from a round zucchini.
People who resemble cartoon characters are also made from this vegetable:
- It is necessary to prepare a longitudinal squash, carrots, flowers or straw, pieces of pumpkin, black peppercorns, and other gifts of autumn for decoration.
- Holes are made on the zucchini for the eyes, nose and mouth. A small triangle for the nose is cut out of the carrot and attached to the vegetable with a toothpick.
- The mouth or smile is made from pumpkin, carrots or cardboard paper. Glue two black peppercorns into the eye holes.
- If a child and his parents create a female figurine, then with the help of a beet they paint a blush on the cheeks. And for boys they make a hat from the tail of a bell pepper or straw.
Materials and tools
A craft made from apples (a caterpillar made by a child with his own hands can be a gift to one of the parents or grandparents for a family holiday) requires certain materials and tools to create.
This:
- apples of medium or large size (only fruits with a perfectly smooth surface without visible damage and uniform color are suitable for crafts);
- plasticine (with the help of which the child will have to detail the appearance of the main object, for example, sculpt eyes, hair, mouth or nose, if it is a person, or horns, fur, fangs, if it is an animal);
- a special knife or scissors for dividing plasticine into pieces of the required size (these office supplies usually have blunt ends, thus minimizing the risk of injury to the child during the creative process);
- additional consumables (depending on the type of craft, these could be branches, threads, pieces of fabric, and so on);
- a backing for the table (in order not to distract the child from maintaining cleanliness and order during the creative process, parents are recommended to place a special backing on the baby’s desktop that prevents damage to the surface of the furniture);
- templates (with their help, the child will be able to cut out, for example, an even geometric figure, and achieving small goals helps strengthen the child’s desire to engage in creativity).
Crafts from vegetables for Cipollino kindergarten by car
In this master class we will turn a zucchini into a car, and Cipollino made from cucumber and onion will drive it. This craft can be done by both elementary school students and children from older kindergarten groups, if you cut out the base for the machine.
Necessary materials:
- zucchini – 2 pcs.
- carrots – 1 pc.
- cucumber – 1 pc.
- small onion – 1 pc.
- several toothpicks
On a note! Let's prepare all the vegetables we need to make the craft.
The zucchini will be the body of a convertible, so when choosing it, pay attention to the curve of the vegetable. With a curved zucchini our car will look more interesting
Also, choose vegetables that are proportional in size, so that it doesn’t look like a huge body rides on small wheels.
Potato crafts
Even ordinary potatoes can become an interesting tool for children's creativity. These minions can be made from potatoes - they can be dressed in overalls made from black eggplants. The minions themselves can be painted with yellow gouache paint. Glasses can be cut from round carrots (cut the carrot into a circle and cut a round hole in the circle).
The very shape of the potato can give you an idea for a craft - in the photo above we see that the potato in the shape of panties suggested the idea of creating a girl in shorts. You can also look for interesting shapes in a bag of potatoes - for example, in the form of Peppa Pig's head, you very often come across them.
Beautiful and quick DIY crafts made from fruits
Fruits are most often small in size, with the exception of melon and watermelon. This is where we will start our delicious selection.
Minions are very easy to make, so they are sculpted from different types of vegetables and even watermelon.
The melon bunny is also very cute.
Sweet boat.
A lot of interesting ideas can be found from apples. It is dense and holds its shape well. But its flesh quickly darkens. To prevent this from happening, the craft can be lowered into a solution of citric acid.
The family of caterpillars looks very decent.
Funny little frog. What if we made a whole pond with them.
More ladybug ideas.
Funny elephant made from an apple.
From half an apple and a banana, craftsmen came up with such a phone.
Seasonal apples united into a wise caterpillar.
Apple peel snake idea.
Yes, another cute caterpillar with carrot legs.
What can be made from a banana? I liked the idea with dolphins.
Or another handsome guy like this.
Original lop-eared dachshund puppy. Maybe he will inspire someone to repeat this idea.
Make funny parrots out of pears.
Or hedgehogs.
Here is a detailed master class on how to create them. You will need the pear itself, toothpicks, grapes of any color and clove inflorescences.
You can make a panel from pumpkin and sunflower seeds. Why not an autumn craft?
The lemon fish turned out very bright.
Well, the kiwi koala just captivated me. Kiwi needs to be firm and sour. Otherwise, all the pulp will leak out.
My dears, but that’s not all. Indeed, one can simply envy the parents’ fantasies.
Original hedgehog
The photos will help you make step-by-step crafts from vegetables and fruits with your own hands. The original hedgehog is a great option for an exhibition
Such a composition will not go unnoticed; both adults and children will pay attention to it.
It won’t be difficult to complete the work; even kids can make a craft. First you need to prepare all the necessary tools, and you can get to work.
Execution sequence:
- The tray will act as a clearing. Therefore, it needs to be decorated. To do this, place leaves and spruce branches on a tray.
- We install the pumpkin - this will be the body of the hedgehog.
- Cut the potatoes in half and make paws. We attach them to the body with toothpicks.
- We form a muzzle from carrots. The chestnut will act as the nose, the caps of the acorns can be used for the eyes.
- We stick toothpicks into the pumpkin over the entire surface.
- We attach mushrooms, apples, berries, and acorns to the top.
- In autumn there is an abundance of vegetables and fruits. Just at this time, parents need to prepare original crafts for school and kindergarten. The ideas are quite varied and interesting.
Thanks to imagination, you can create real masterpieces and take prizes at exhibitions. This is a great reward for the work done.
Carving
This option is more suitable for adults and schoolchildren, i.e. for those who can handle a sharp knife well. Squash fruits seem to be ideally suited for carving, because these vegetables are quite elastic and soft, and they are quite easy to cut. Well, the patterns turn out to be unusually attractive due to the contrast between the light flesh of the zucchini and their dark green skin. Of course, to become a real master, you will have to spend a lot of effort and time, but if the next fruit was spoiled due to your slightly unsuccessful actions, then you can always prepare and please the whole family with a delicious dish, which is also quite easy to prepare .
As for the options for crafts, there are countless of them - a variety of vases, figurines, a tea set and even a pair of stylish shoes. We suggest you make small openwork candlesticks. Cut off the bottom of the fruit for stability, determine exactly what height the future candlestick will have, select the core with the seeds with a spoon and cut out beautiful patterns on the walls. Well, now all you have to do is put a round tablet candle inside and light the wick. Using the same principle, you can make lanterns that can create a romantic atmosphere in your home.
You can also use beautiful carved vegetable products to decorate your holiday table. To do this, purchase vegetable cutters at a hardware store that will allow you to cut strips of different thicknesses. Ready-made zucchini strips can be rolled into the shape of various flowers, tinted with food coloring - this is how you get roses, peonies, and daffodils. Ship
To make such a beautiful “handicraft” you should take a large squash fruit (do not peel it, as you usually do when cooking) and cut it so that the cut part is a third, and the remaining part, respectively, is two thirds.
To work, take a large part and leave about a third of the raised deck from one end, make a depression in the remaining part - select the pulp with a spoon or cut it out with a knife.
Peel the carrots and cut them into layers; use them to make an anchor and a couple of flags. Chop another carrot, also peeled, into slices; they will later be useful for making portholes and a steering wheel.
From the remaining third of the vegetable, or rather, using its skin, make a pair of stairs, their length should be equal to the height between decks. Make a steering wheel - stick several broken toothpicks into a large carrot circle. Use the same toothpicks to secure the portholes along the boats and to secure the anchor. If you want to further decorate your boat, you can stick broken matches with sulfur heads along the top side.
Cut a few large whole cabbage leaves to size - secure these sails using long bamboo skewers. Decorate the top of the mast with carrot flags. If you don’t have cabbage leaves, then don’t be upset, because regular colored paper is also suitable for sails. Make a through hole on the bow of the boat and place a whole thin peeled carrot there. You turned out so wonderful!
Zucchini penguin for school
When making a penguin, you will have to work a little more with a sharp knife, so a small child will not be able to make such a craft without the help of adults. To make it easier, it is advisable to take a plant whose walls have become a little soft due to the fact that it was cut a few days ago.
On the sides of the zucchini you need to make cuts towards the “tail” and bend the resulting ovals to the sides. They will act as wings. You can cut out a small tummy in the center. Then the little penguin will be very cute.
The eyes of a seabird can be made of plasticine or small buttons, the beak - from pieces of a plastic bottle, carrot or beetroot - whoever happens to have it at home. There is no ideal manufacturing scheme here. For a craft to be unique, you must bring something of your own to it, so feel free to experiment.
Penguin family
Corncob horse
It's not difficult to make. Of course, a small child is unlikely to cope with the task on his own, but with the help of adults it is necessary. This sweet miracle is done like this. First, let's prepare:
- flat plywood, cardboard or fiberboard sheet. This is a stand for a horse;
- glue;
- four sticks. These are horse legs;
- four acorn caps. These will be the hooves;
- two ears of corn - one large, the other slightly smaller. The large cob is the horse’s body, and the smaller one is its neck and head;
- We will make the tail and mane of the horse from plant fibers, which, as you know, wrap a corncob.
The process of making a “corn” horse is as follows.
- We connect both cobs using wire. Now the horse has a body, neck and muzzle.
- Using a knife, we sharpen the sticks - each at one end - and stick them into a large ear of corn - two sticks in front and behind. This results in a torso and four legs.
- At the other end we glue acorn caps to the horse’s legs – one for each leg. Now the horse has hooves.
- We attach part of the plant fibers to the back - this will be the tail. We place the other part of the fibers on top of a small cob (neck) - this will be the mane.
- Glue beads (eyes) and ears onto one edge of a small cob. By the way, they are easy to cut from corn husks, which envelop the cob along with the fibers.
- We glue the entire product to plywood or cardboard so that the horse can stand.
Look how amazing the horse turned out!
Caterpillar
Even children can easily make a funny caterpillar. Ideal for creating original crafts. Such work will not get lost at the exhibition and will delight visitors to the event. Making the product is not difficult.
In addition, the work will require a little time and a small list of tools.
Materials for work:
- apples;
- toothpicks;
- carrot;
- rowan berries;
- grape;
- decorations.
Cut the carrots into thin rings. Their thickness should not exceed 5 mm.
- Using a toothpick, we prick the apple at the place of the tail, thread the carrot ring, and connect it with another apple.
- We repeat the same thing until we get the insect body of the desired size.
- We attach the whole apple vertically, this will be the head.
- We use the remaining carrot rings to create legs. To do this, we attach them to the sides.
Decorations will help complement the composition. A dried flower will turn a caterpillar into a yoke, and a top hat will help create an elegant gentleman.
Master class on lemon mice for kindergarten
For small children it is difficult to come up with compositions with a lot of decorations and details. I would like to invite you to make a little yellow mouse out of a lemon with your baby.
Only mom works with sharp objects. And even a three-year-old child can insert parts into the slots.
We will need:
- lemon,
- 2 clove inflorescences,
- wire or thick thread.
First, cut a quarter of the lemon lengthwise. This is how we made the base so that the mouse’s body would not fall. We cut off the zest from a small part so that we have enough for small ears and a tail.
From one edge of the lemon, where we have a sharp tip, we stick a clove. She acts as our eyes.
We make a slit in the peel and insert the ears. Attach the tail to the body with a toothpick.
The antennae can be made with wire by simply piercing the muzzle right through. Or you can make them from thread by stitching the fruit with a needle.
That's the whole craft. Fast and interesting.
Shark
Similar to the whale described above, you can make a shark. To do this, you will need the ability to carefully handle a knife, since the main parts need to be cut out. You will need:
- zucchini;
- peppercorns;
- knife.
The shark's tail should point downwards. Starting from the thick side of the squash, cut out the mouth with teeth, eye holes and gills. To narrow the body, cut off a little at the tail. Use these scraps to make the top and side fins.
Step-by-step instructions for making zucchini crafts for an exhibition
A small car with a sailboat can be made from a yellow zucchini.
To make such a craft for the exhibition, you need to collect the following natural materials and prepare tools:
- Medium sized zucchini.
- Grape berries.
- You can take wheels and additional parts from an old car.
- Figures made of plastic or plasticine.
Step-by-step instructions for creating a zucchini machine with your own hands:
- The zucchini needs to be washed and dried well. The vegetable should not be too soft.
- It needs to be laid horizontally and the top cut off. The core is cut out.
- Wheels from an old car are attached to the sides. If you don't have them, you can take strong cardboard, cut out 4 circles and attach them to the zucchini.
- The wheels are attached in the middle and secured with toothpicks. You can also make a mesh out of them and add grapes.
- Various figures of people and animals made of plastic or plasticine are planted inside the zucchini.
Also, the vegetable is often used to make an original ship with sails, which will attract attention due to its originality. To make a craft, you need to prepare the following materials:
To make a craft, you need to prepare the following materials:
- Large zucchini (wall thickness should be the same).
- Toothpicks.
- Colored thick paper.
- Scissors, plasticine, knife, tape.
How to make a boat from zucchini:
- It is necessary to cut off an even part of the vegetable on one side.
- The inner pulp is thoroughly cleaned.
- Square windows are made on the side of the zucchini using a knife and scissors.
- A sailboat is built from toothpicks and thick multi-colored paper. It is fixed and secured with tape.
- A steering wheel is made from vegetables and toothpicks.
- As a ship captain, you can use a ready-made plastic toy or make one from carrots or plasticine.
- To quickly make holes in the zucchini, you need to use a sharp thin knife, scissors and a vegetable peeler.
Important! It is better to create crafts of animals or figures together with a child who will be interested in building unusual things with his own hands.
Typewriter
Another craft option that boys will especially like is a zucchini car. The base is a whole zucchini with wheels made from circles of another zucchini. For this craft you need:
- two zucchini;
- toothpicks;
- knife.
From the first zucchini we make the base of the machine. To do this, you need to carefully cut out the cabin with a knife. The easiest way to make a convertible is from a straight zucchini. If the zucchini is pot-bellied, then you can try cutting out a cabin with a roof. We cut the second zucchini into circles and attach them with toothpicks in the form of wheels.
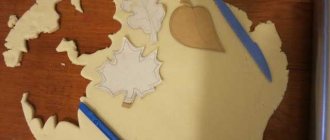
Simple autumn crafts for kindergarten
Autumn is the best time to create bright crafts in the form of animals or figurines with your own hands. Nature provides a wide and varied selection of materials for creativity. You can take twigs of unusual shape, leaves, cones, acorns, chestnuts.
There are several original and unusual crafts. They are often made for schools where they hold fairs on the theme: “Golden Autumn”.
| Craft | Detailed description |
| Doll made of autumn leaves | In the park you need to collect yellow leaves and connect their edges in the shape of a cone. You can secure it with glue or a paper clip. The stem is decorated with bright beads. The head of the doll is made from a small leaf, which is attached to the stem. You can draw a mouth on it, glue on eyes and come up with a headdress. |
| Autumn wreath | To make a craft with your own hands, you need to build a circle from a vine and securely fix the branches. Yellow, green and red leaves are glued to their surface. As an additional decoration, you can use chestnuts, rose hips, rowan and other gifts of nature. |
| Light leaf plate | To make such a simple craft, you need to inflate a balloon. It is necessary to stick the leaves on its semicircle in a thick layer and let them dry well. Each leaf requires careful work, and more glue must be applied to the surface, which will ensure the hardness of the finished product. When the structure is dry, you need to carefully disconnect it from the ball and put candies, chestnuts, and rowan sprigs into the prepared plate. Using this principle, you can make a vase with flowers for an autumn ball |