What is papier-mâché
Crafts using the papier-mâché technique are the formation of three-dimensional figures by pasting the base or frame with paper.
Depending on the technique used, the following materials can be used for pasting:
- Ordinary newsprint.
- Cardboard soaked in paste.
- Cardboard egg molds, mixed into a homogeneous mass using a blender.
- Paper napkins of varying degrees of density.
The paste, if used separately from the paper base, can be applied to the mold with a brush or the paper parts can be dipped directly into the adhesive solution.
Rules for papier-mâché technique
DIY papier-mâché crafts are a fairly easy task, but they also obey a number of rules:
It is better to use forms for pasting without an abundance of small protruding parts. After drying, the workpieces must be cut to remove the frame, and small parts will make work difficult.
Before applying the paste, the molds must be greased with vegetable oil or wrapped in cling film. With proper care, a frame (vase, plate, toy) can still serve its life.
If you use cardboard mass in your work, you should stir it thoroughly. In this case, the mixture will be easy to apply, and the craft will acquire smooth, beautiful walls.
Thorough drying of the finished product. Paint, varnish, and decorative elements should only be applied to a well-dried product. Drying of the workpieces is carried out in the open air at a comfortable temperature for 3-4 days.
Also, when working, you should use individual gloves to avoid the development of contact dermatitis.
Boy with bagels
The sequence of actions for creating cotton figures is simple:
- Select a picture.
- Make a wire frame around it and add volume to it using paper in the appropriate places.
- Treat the base with glue and dry thoroughly.
- Wrap the template in foil.
- Take cotton wool and wrap the workpiece in it, giving it volume.
- Impregnate the product with starch solution.
- After drying, paint the figure and cover it with acrylic varnish.
The bagels are made separately. They require flour and a bandage. The algorithm is as follows:
- Roll a piece of cotton wool into a rope and wrap it with a bandage;
- Fold the resulting sausage into a ring and stitch;
- Dip the workpiece into the pre-prepared dough;
- Bake for 10 minutes (a nice crust should form);
- String the finished bagels on a thread and hand them to the boy you made earlier.
A similar craft made from cotton wool with your own hands is easy to repeat even for a beginner.
Crafts making techniques
Today, there are two main methods for step-by-step production of three-dimensional crafts in the art of papier-mâché:
Pasting the prepared frame-mold with pieces of paper cloth moistened with a paste solution. The selected paper is first divided into small pieces.
Each part is dipped into the adhesive solution and applied to the surface of the base. The parts are applied in such a way that the edges of adjacent workpieces are on top of each other. To create a durable figure, it is necessary to apply several layers of paper.
Forming crafts from cardboard mass. To create a wet base, cardboard is crushed and mixed with a paste solution. Next, the working base is thoroughly stirred, achieving maximum homogeneity.
The prepared mass can be applied to the frame, and integral crafts can be formed from it. The choice depends on the practical skills of the master.
In addition to the presented types of papier-mâché, techniques are divided according to a number of additional criteria. For example, they highlight the internal and external pasting of the mold for creating crafts.
Features of preparatory work
Cotton wool toys are made on your own from available raw materials and do not require serious financial costs. In the old days, not every family could afford purchased jewelry - everything was created with their own hands using materials available on the farm.
Today, before you start creating crafts from cotton wool, you need to take into account the likely need:
- In newspaper sheets;
- In the wire;
- In glue;
- In film, foil paper;
- In acrylic paints;
- In sparkles, rhinestones, sequins, beads;
- In nail polish;
- In satin ribbons.
If you plan to create a toy with a face, then you should prepare flour, salt, water, and beige paint.
How to color cotton wool for crafts? You will need aniline fabric dye. The required colors are selected based on your own preferences. Instructions for making colored cotton wool:
- Dilute the dye in a steel container.
- Boil the contents.
- Place the cotton wool in the dye solution for 2 – 3 minutes.
- Gently squeeze and lay out to dry.
Master classes on making crafts
Before starting master classes on papier-mâché crafts, you should prepare a workplace and a set of materials:
- Newspapers, napkins, cardboard to choose from.
- Brushes, paste.
- Watercolors or gouache, transparent acrylic varnish.
- Decor elements.
- Cling film to protect the mold from the paste solution.
- Thin rubber gloves.
Auxiliary materials are a blender, containers for mixing adhesive solution and paper, frame forms for pasting.
Beginning craftsmen should also familiarize themselves with the recipe for making paste:
- Two tablespoons of starch and flour are mixed with 1 glass of water.
- Bring water to a boil, pour in the prepared mixture.
- During the cooking process, the solution is constantly stirred to reduce the number of lumps.
The paste can be used immediately after cooling.
Applications
Cotton wool is also suitable for creating applications. Moreover, they can be performed in several variations:
- On a cardboard base and paste a template cut out of colored paper. He can depict an animal, a plant, a man. Twist small balls, coat them with adhesive and press onto the workpiece. Additionally, decorate the craft with details made from colored paper.
- Take cardboard. Draw the outline of the animal. Fill the inner area with glue and lay out small balls rolled from cotton wool. Complete the work with elements cut from colored paper.
There are a lot of master classes on crafts made from cotton wool. This article lists just a few of them. You can use ready-made ideas or come up with something of your own together with your child.
The main thing is to remember that there is nothing complicated or difficult in such creativity. You just need to be careful and patient.
Painted paper plates
To work, you will need a plate of any shape and size, paste, paper or newspapers. Instructions for creating papier-mâché crafts for beginners:
- Grease the plate with vegetable oil.
- Wear rubber gloves.
- Tear newspaper or paper into small pieces. Dip each piece into the adhesive solution and apply to the surface of the plate.
- According to the proposed scheme, apply 4-5 layers of paper.
- Leave the figure to dry.
- After the mass has hardened and completely shrinked, cut the workpiece along one line with a sharp knife.
- Carefully remove the two halves of the future decorative plate from the mold.
- Glue the two halves along the seam with strong glue.
- If the surface has a lot of unevenness, it is worth using a water-based primer, which will eliminate visible defects.
The next stage is decorative painting. It is better for beginning craftsmen to use a template or photo of a beautiful artistic painting.
Christmas tree toy
- To make a toy, we will take as a basis a plastic ball of the required size;
- We carry out the set using the method of gluing in layers, described in detail above, option A. The number of layers is 5-6;
- On the dried product, mark the cut line around the circumference with a pencil. Carefully cut the ball into two halves and remove from the base;
- Now the halves need to be connected. Before gluing, we insert a decorative cord in the form of a loop between them. A button or several matches are tied to the end of the loop, which will keep the cord from being pulled out;
- We put a couple of layers of paper along the seam and again paste it with paper of the desired color. Let it dry.
- If we paint with gouache with PVA or acrylic, we decide whether it will be narrative or ornamental. We decorate with ready-made elements in the form of beads or rhinestones either freely or with clear lines and in an orderly manner, in the form of an ornament. But even if you just wrap the ball in foil, it will turn out quite impressive!
New Year's toys, masks and angels, created with your own hands, carry the warmth and creative energy of the author, which is now so lacking in modern products from the store.
Handicraft, antique effect, “vintage” help to recreate the atmosphere of a real holiday from our childhood!
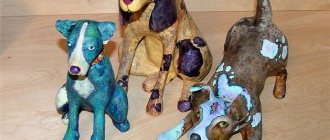
Fruit composition
Another option for an original decoration of a kitchen or dining room interior is a papier-mâché fruit composition. The set of materials is similar to the previous master class, but as a basis you can take several balloons of various sizes.
Instructions on how to make a papier-mâché craft:
- There is no need to lubricate the ball with vegetable oil while working, but it is worth protecting the master’s hands.
- Carefully, trying not to damage it ahead of time, apply pieces of paper napkins or pieces of newspaper moistened with an adhesive solution to the ball.
- Apply 4-5 layers of paper according to the scheme.
- Allow the product to dry.
- The ball is pierced with a thin needle and removed through the previously left hole.
Fruits can be painted, giving them a realistic look: for oranges - this is colored semolina (surface grain), for an apple - green gouache and the gloss of acrylic varnish, for a pear - a small spotted scattering on the side roundness.
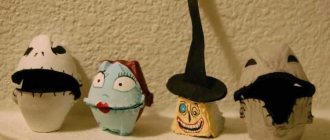
Head of Santa Claus
We take plasticine and roll it into a ball in our hands. Next, we sculpt a face on one side: nose, lips, eyes and cheeks, and simply flatten the other side so that our head of Santa Claus lies calmly on the table and does not roll around.
If there is no plasticine, then you can use an egg tray as a face shape and then sculpt the nose and cheeks from paper.
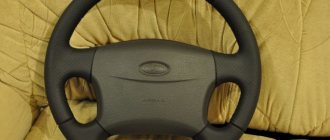
Cardboard frame
For the next master class you will need to prepare a cardboard mass according to the existing scheme.
Mix the mixture thoroughly so that there are no large lumps left and begin to create an original frame for family photos:
- An ordinary cutting board is wrapped in cling film.
- A cardboard mass is placed on the film.
- Using a rolling pin, roll out the mass into a thin layer of 2-3 cm.
- Using a sharp knife, cut out the inside of the frame, focusing on the standard size of the photograph.
Next, you need to let the frame harden and dry. The finished product can be decorated with original painting, a scattering of rhinestones, miniature butterflies and bows (the decor depends on the purpose and future owner of the frame).
Adding color to the toy
We take our dried figure and begin to decorate it. Let's start with the face, paint the whole face with beige paint and let it dry. If you don’t have paints of that color, you can mix white paint with orange.
What types of arcade games are there?About educational toys for babies
- T-shirts with Native American prints
Then we draw the eyes and lips with a pencil or pen. We make the cheeks and nose reddish with diluted red paint. And wait until everything dries so as not to smudge.
In order for our Santa Claus to become completely New Year's, his fur coat, hat and mittens need to be decorated with gouache. Choose the color of the suit yourself: blue or red, but we’ll paint the fur white. For beauty, you can even sprinkle glitter on your fur coat and hat.
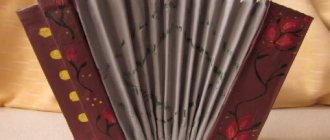
Papier-mâché fruit bowl
A fruit vase (plastic or paper) can be made in any of the presented variations. If you have the proper experience and certain skills, you can make a vase according to an individual project from cardboard mass.
In another case, the master can use a rigid base frame. They carry out the craft according to the available step-by-step instructions and decorate it with original painting.
Interesting papier-mâché ideas
The papier-mâché technique is a whole storehouse of various ideas for the master. Photos of finished products, instructions and educational video lessons help you master a new technique in a few steps.
Interesting craft options for beginners:
- Set of Christmas tree decorations.
- Souvenir figurines on a shelf.
- Christmas wreath on the door facade.
A number of garden figurines will be a pleasant find, but you will have to use additional treatment with a primer and a moisture-resistant solution for strength.