It is easier and more interesting for children to learn about the world around them with the help of crafts. The first step to studying space and celestial bodies can be an application, a structured piece of work on the theme of the starry sky, made with your own hands. As you work, you can tell your child about how space was explored and teach him to recognize constellations and planets.
Sky map
You will need: cardboard base for the layout, acrylic paints in black, purple, blue and silver, brushes, sheets of A4 paper, corrugated paper in yellow and orange, scissors, glue, gouache, water, liquid soap, cocktail tube, white egg shell , rope for hanging.
Master Class
- Paint the cardboard base of the mockup with black acrylic paint.
- Spray blue, purple and silver acrylic paint.
- Draw the orbits of the planets with silver paint.
- Make the sun disk by "cutting" - cut the corrugated paper into small pieces, then glue them tightly together so that they are raised up.
- Paint sheets of paper with gouache to match the colors of the planets.
- To make craters and mottled surfaces for some planets, pour gouache, water and liquid soap into a plate. Take a cocktail tube, blow bubbles and transfer them to paper.
- Wait for the paper to dry, then cut out the planets.
- Glue the shells as ice floes onto Pluto.
- Glue the planets in order to the layout.
- Attach rope for further hanging.
The sky map is ready! I recommend watching this video!
Model of the solar system Planetarium. Solar system planetarium model.
Space applique
Even small children can make this application. After all, the manufacturing technique is as simple as possible.
Paper rocket
A very beautiful applique can be made for children for Cosmonautics Day. Despite the simplicity of the image, these crafts look great:
- First we select the background, it is blue, dark blue, black.
- We will lay out the pre-prepared parts of the craft on colored paper or cardboard. Children from 3-4 years old can cope with this work.
- Details - the main part of the rocket, a round window, triangular wings. We glue everything one by one.
- Paste it carefully. We decorate the sky with golden stars.
- Children of older groups will perform a more complex applique. They themselves draw the parts according to the template and cut them out. Details are placed on the background.
A rocket made of silver paper on a black outer space background, impressive:
- cut out the nose and wings from blue paper;
- round windows - portholes, made of red, on which we apply smaller white circles;
- highlight the back compartment with a blue stripe, put a cut-out fire from red paper, put a yellow cut-out on it, it is smaller in size.
It remains to depict 2-3 planets and stars. The beauty of the craft is obvious.
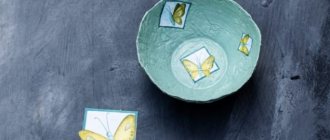
Volume applique
The same craft made from corrugated cardboard looks great. The paper parts are glued to the background, and the same cardboard parts are glued to them with double tape. The result is a three-dimensional application.
From beads and beads
On drawings depicting constellations, draw stars using a stencil:
- Select small beads and seed beads in yellow, red, and blue colors.
- Apply glue to the outline, lay out the ornamental material along the outline, then small beads and beads, distribute evenly with a stick over the entire star. It turns out beautifully.
- So we fill all the constellations with decor.
Choose the background at your discretion.
Using the same technique, you can make other objects: the moon, a comet, a satellite, to the main decoration, it doesn’t hurt to add elements of voluminous decorative stickers and distribute them along the contour.
Cardboard postcard
On the outer part of the postcard, depict a rocket with a cut-out porthole; the astronaut, depicted on the inside and glued to a paper spring, should look out of this window:
- We must try to ensure that the image of the face in the helmet falls exactly into the lens of the window.
- The color of the postcard is blue, with a brilliant image of the object.
- We draw one or more astronauts according to the template, color them, and cut them out.
- We make a spring from a small strip of paper folded into an accordion. Glue one end to the card, the other to the person.
- We unfold the postcard and see the starry sky, an astronaut who has “walked” into outer space.
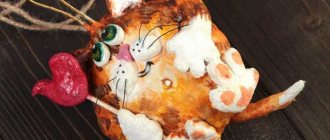
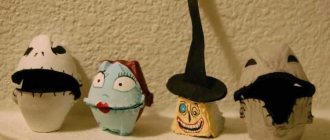
Salt dough rocket
Children are given a rolling pin to roll out a piece of dough, cut out the body according to the template, the windows can be removed, holes can be left in this place, or an overhead window can be made:
- Add a triangle-shaped bow and compartments to the main craft, and add fire too.
- Cut out using a star shape. We pierce all the products, leaving holes for making a pendant. If desired, the product can be used this way.
- Place the product in the oven to dry.
- Color with colors at the child's discretion.
- Now our rocket can fly to distant stars. On a purple or blue background, spray white paint - small stars. Glue the craft.
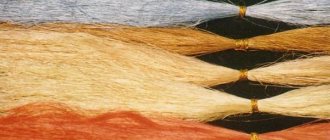
Solar system made of yarn
You will need: whatman paper, blue, black and white paints, yarn (thick threads) of different colors, balloons, water, pva glue, scissors.
Master Class
- Paint whatman paper with blue paint, wait until it dries, then apply a black layer.
- Spray some white paint.
- Mix glue with water in a 1:1 ratio.
- Place the yarn in the glue solution and leave for 30 minutes for good saturation.
- Inflate the balloons.
- Wrap yarn around the balls in a random direction. A detailed master class on how to make a ball of thread is described here.
- Hang the balls and leave them for several hours to dry completely.
- Pop the balls, then take them out.
- Glue the balls of thread to whatman paper.
The yarn solar system is ready!
Drawing
Of all kinds of artistic creativity, the theme of astronautics is best expressed in a drawing.
You can depict a rocket, as well as spaceships, lunar rovers, satellites. Kids are just starting to use paints, but older children can do more serious work.
Preschoolers should be asked to draw a drawing of an astronaut in a helmet, a rocket, and the earth:
- We divide the sheet into three parts and roughly outline where the figures will be.
- On the right side we draw a large round head, a rectangular body, arms and legs in voluminous clothes.
- Inside the circle we draw a square - a spacesuit. Let's draw the person's face.
- On the left we draw a round earth. You can draw a circle according to the template to depict the continents.
- At the top of the picture is a spaceship, we draw it small, it is in the background, the child will do it himself: a triangle, a circle.
- A cord stretches from the ship to the astronaut’s spacesuit, draw a line. Our hero in outer space!
- You can decorate with colored pencils, crayons: Blue earth, a bright astronaut suit, everything is at the child’s discretion.
It is advisable to paint over the entire sheet of the drawing, without leaving any white spots.
With younger schoolchildren, you can depict more complex objects, use a palette, and mix paints.
Having depicted satellites, ships, planets with a simple pencil, you need to paint over them with suitable colors, in addition to this, we make the background of the picture from mixed colors, for example, blue, cyan, a little red, mix, paint over the surface, you get a mysterious space.
Or you can start the image not with objects, but with the background: paint a sheet of paper blue and purple, add blue, white, spray white, yellow paints, when dry, draw white objects on a beautiful background - an astronaut, a ship, a planet. The drawing is a miracle!
Original solar system
You will need: paper to create a ball, cardboard Whatman paper, blue, yellow and silver acrylic paints, yellow cardboard, scissors, glue gun, Christmas tree decorations, glue gun.
Master Class
- Paint whatman paper with blue paint, and when dry, cut out a circle.
- Make a ball out of papier-mâché, then paint it yellow.
- Draw the orbits of the planets.
- Cut a small circle in the center of the blue circle.
- Cut out the rays of the sun and glue them.
- Glue Christmas tree decorations as planets.
- Cut out some stars, then glue them on.
- Attach the papier-mâché ball to the center of the circle.
The original solar system is ready! The advantage of this craft is that it can be twisted like a spinning top. The idea for another great craft is shown in this video!
DIY solar system: master class
DIY felt space
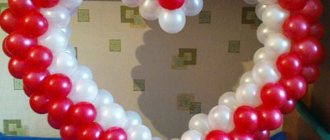
A felt panel with a month and stars will look great in the interior of a children's room. Working on it will not take much time; you will need a minimum of materials and tools:
- a piece of dark dense fabric;
- yellow felt scraps;
- filler;
- sewing supplies.
We cut out the details of the “heroes” from yellow material. There must be an even number of elements - 2 for the month, two for each star.
We sew the parts together in pairs using a hand-overlock stitch, leaving an open area for stuffing. We stuff each element with padding polyester, cotton wool or scraps of soft fabric, and sew up the hole.
The decor can be anything - embroidered or ready-made glued eyes, knitted hats and scarves. In this regard, we do not limit imagination, or even better, we involve the child in the process of decorating the panels. If he wants to add planets, we add them.
Using this principle, you can make a children's mobile on which clouds, the sun, and space objects will swing.
Planets of the solar system
You will need: 8 balloons, newspapers, cardboard, paper, water, starch, acrylic paints, brushes, primer, varnish, scissors, sponge, needle.
Master Class
- Inflate balloons on a planetary scale.
- Make a paste in this way: mix 3 tablespoons of starch with half a glass of cold water. Add 2 cups of boiling water, stir thoroughly and wait until it cools.
- Prepare strips of newspaper, then dip them in paste and cover each ball in 3 layers using the papier-mâché principle, do not forget that each layer must dry before applying the next.
- When all 3 layers of paper are dry, pierce the balls with a needle, carefully pull them out, and cover the holes with strips of paper.
- Cover the planets with primer and wait until completely dry.
- Paint the planets in several layers using a sponge and wait until completely dry.
- Cover the planets with varnish.
- Make a circle out of cardboard and glue it onto Saturn.
Planets of the solar system using papier-mâché technique are ready!
Secrets of the Universe on your desktop
The theme is fascinating and multifaceted, allowing you to use cardboard, paints, plasticine, foam plastic, small toys, and household items. The works of children, such as the space applique with the image of a rocket and stars, are no less interesting than the luxurious panels of high school students, because it is about Space! After all, people still have little information about other worlds, but the interest in them is enormous. The guys are tasked with looking into the unknown, and a huge scope for creativity opens up before them.
How are these activities useful? The child will express his cosmic fantasies, and crafts will reveal his idea of the future of humanity. He will gain the skill of working in a technology that is new to him, with different resources, and will receive accessible knowledge about the achievements of science and the structure of the Universe. Will acquire design experience that develops aesthetic perception when it comes to complex compositions on the theme of Space.
Mobile model of the solar system
You will need: foam balls with a diameter of 12.7; 10.2; 7.6; 6.4; 5.1; 3.8; 3.2 cm, (you will need 2 balls with a diameter of 3.8; 3.2 cm), a sheet of foam plastic 12.7 x 12.7 cm thick 1.3 cm (for the rings of Saturn), acrylic paints of orange, red, yellow, green, blue, light blue, turquoise, black and white, glue, 76 cm long wooden rod for attaching planets, transparent fishing line, bowl, teaspoon, scissors, stationery knife, brush, water, wooden sticks.
Master Class
- Insert a stick into each ball until it reaches the middle.
- Place the balls in this order - 12.7; 3.2; 3.8; 3.8; 3.2; 10.2; 7.6; 6.4; 5.1 cm.
- Cut out the rings of Saturn this way: take a sheet of foam and trace the bowl with a pencil, then draw the inner ring and cut them out with a craft knife.
- Smooth the edges of the rings with a teaspoon.
- Paint the wooden rod with black paint.
- Paint the planets and place them in a jar to dry completely.
- Apply glue to the edge of Saturn and put on the ring.
- Cut the threads for each planet of a different diameter and tie a knot at the end of each.
- Remove the skewers from the planets and glue the knot into the skewer hole.
- Tie the threads with the planets to the wooden base.
The moving model of the solar system is ready! I recommend viewing a photo gallery of DIY solar system ideas!
In order, all the planets can be named by any of us: One - Mercury, Two - Venus, Three - Earth, Four - Mars. Five is Jupiter, Six is Saturn, Seven is Uranus, followed by Neptune. He is the eighth in a row. And behind it, then, is the ninth planet called Pluto.
What should you pay attention to?
Avoid the pattern. From the very beginning, let children understand that what is interesting is what is unique, different, and not the same green men for everyone, exactly copying a cartoon character.
What can we all do together?
Products with interplanetary themes are very diverse; they make excellent, luxurious compositions, to which each of the participants brings something of their own. In kindergarten or elementary school, such collective work can be a large joint application of Cosmos.
In the school classroom, successful compositions are those that combine a variety of products made using different techniques, both complex and not so complex. This way you can create a whole paper Universe - a craft made from paper and other materials for the competition.
An example of a successful idea is to present in a collective work a space base with real and fantastic interplanetary ships, representatives of different civilizations against the backdrop of a starry sky with comets and satellites.
The heterogeneity of the materials used reflects the diversity of the world, in which there is much that is different and unusual.
You can organize a competition of robots and equipment for exploring unknown planets. Or arrange an exhibition of alien landscapes; their beauty and unusualness can also inspire children creating crafts on the theme of space.
Shooting
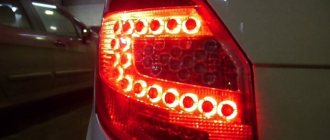
Focusing on the Moon should not be a problem. If your camera allows you to use the rear screen to take a photo (LiveView mode), this is a great way to carefully check that everything is clear. You can use the camera's autofocus system, but if you find that it doesn't work and is constantly hunting back and forth to find your subject, then it's better to opt for manual focus.
Photo: Mikhail Tikhonov
Once you're ready to take a photo, use your camera's self-timer mode. Many cameras have a mode that will wait two seconds after you press a button to take a photo, and this is very convenient. Pressing the shutter button with your finger may cause slight camera shake and blurry photos, even when the camera is on a tripod.
Take as many shots as possible while you have the opportunity. If your lens doesn't allow you to get a really close-up photo of the Moon, don't worry too much. You need an image that is approximately 1000 x 1000 pixels to look great on Instagram. Therefore, you can always crop a photo in Photoshop. The matrix resolution of modern cameras allows this.
Source
Studying the constellations....Homemade telescope and constellation cards
HELLO everyone! My daughter’s birthday is coming up, which I want to spend as a SPACE TRAVEL... on this trip we’ll pay attention to the constellations... but how to look at the constellations without a telescope, in the daytime and in the room? My husband and I found a way out, made this funny one telescope and cards for it with the necessary constellations... I want to tell you how we did it all... We did everything in secret from the children at night, so that it would be unexpected and interesting... For cards with constellations: - I printed out the necessary constellations from here https://www.clipartpal.com/clipart_pd/space/constellations1.html, - prepared: foil, tape, cardboard, scissors, an awl and a push pin...
For cards with constellations: - I printed out the necessary constellations from here https://www.clipartpal.com/clipart_pd/space/constellations1.html, - prepared: foil, tape, cardboard, scissors, an awl and a pushpin...
and for the “telescope” we used empty tin cans of corn and beans, my husband cut out the bottoms, inserted one can into the other... then we wrapped it with tape, the joints, then we wrapped everything with foil, and on top with tape...
I cut the cardboard, wrapped it in foil, wrapped it with tape for strength, and glued the names of the constellations in the corner...
... I attached a printed picture (attached it so that it wouldn’t “travel” with tape) and pierced the large stars with an awl, and the small ones with a button...
but my husband is checking how our “telescope” works...
and our “telescope” works SUPERBLY!!!!!!here we are looking at the constellation Ursa Minor….
...and here is the constellation Taurus...if you move the “telescope” a little, the “stars” seem to twinkle!!! I urge you to make such a device and study the constellations with your children!!!! (and for the “telescope” itself it is not necessary to use tin cans, you can use paper towel rolls, any cardboard tubes (with foil, cling film, etc.
d.) Thank you for your attention!
Juravliki.ru
The moon is a feminine symbol and universally represents the rhythm of time. The phases of the moon symbolize immortality, eternity and enlightenment. This page presents a very beautiful and high-quality origami moon model.
| 1. Make folds along the diagonals of the sheet, then fold the sides to the center line as shown | 2. Fold the sides at the bottom in the same way |
| 3. Fold all four sides at the same time | 4. You should get a figure like this, fold its left side back |
| 5. Fold the corner down along the indicated line | 6. Shaping the nose |
| 7. Make a fold, thereby forming the nostrils | 8. Make a fold, turn the model over |
| 9. Bend the corner down | 10. Fold the corner up along the indicated line |
| 11. Make the fold indicated. | 12. Fold the triangle along the indicated line |
| 13. Fold the corners | 14. Fold the outer sides inward, thereby dividing each part in half. |
| 15. | 16. |
| 17. Open this area to narrow your lips. | 18. Fold the top down |
| 19. Fold up using the given link | 20. Raise the indicated area |
| 21. Open the dampers to the position of step 18. | 22. Place the indicated areas inside |
| 23. Pull the paper out of the pocket. Repeat the same at the back. | 24. Pull the edge of the paper on the right and fold it to the side to form an eye. Repeat this at the back. |
| 25. Form a semi-circular shape by making the folds indicated. | 26. Shape the back of the moon to make it an even shape, folding in the excess. |
| Congratulations! Origami moon is ready! |
Plan your shoot
I'll start with the bad news: accidentally seeing a beautiful moon and capturing it on your smartphone is extremely unlikely. In fact, you'll probably end up with something like this that sucks.
This is because a smartphone, even the coolest one - at least on its own - is not designed for taking this kind of shot. The lens is too wide, the sensor generates too much digital noise, and the lens often gets dirty in your pocket. And what comes out is ugly.
So it’s worth visualizing the shot you need, and then determining the equipment and technique that is best to use for this.
By the way. Sites like In-the-sky.org are a good reference for planning lunar events or simply tracking lunar activity. And the shooting time can be determined with their help.
How to learn to draw the Earth's satellite (Moon) with a simple pencil
The mysterious night luminary is the Moon; it has attracted glances at all times. It attracted attention and gave rise to a lot of reasoning and superstitions. We see it either as a crescent, waning or waxing, or as a full moon. The color is mostly gray-silver, with darker crater areas. Therefore, today we will draw the night luminary, the Moon, step by step with a simple pencil.
So, how can a child draw the Moon with a simple pencil?
To work, we will need a landscape sheet, a simple pencil with a softness of 4 B, a kneading pen or an eraser, ready-made shading, or you can use a piece of napkin.
1. First, draw an even circle on a sheet of paper; you can use a compass.
2. Next we apply shading. We shade thickly, first apply one layer of pencil, then slightly changing the angle of the hatching, apply a second layer. Then you need to even out the tone by shading.
3. The next step is to sketch the craters. We draw the lines of the craters uneven, and we also draw the craters themselves in different sizes.
4. Then we begin to additionally shade the areas with craters. We make the boundaries of the crankcases darker, from their main area. We go through them with shading, shade the borders a little so that they are not too clear.
5. The final step is to highlight some areas of the satellite outside the crater so that they are lighter compared to the rest of the bright areas of the Moon. We will also highlight small areas in the area of the craters using a knob or an eraser. And also with a knob or an eraser (thinly cut) we will draw thin stripes, like rays, which will help show the pattern on the Moon and give it the shape of a ball. And now the drawing of the Moon with a simple pencil is completed.
Coloring pages
You can offer the little ones coloring pages with the moon, and while they are drawing, tell them about the satellite planet. Most parents prefer ready-made books bought in a store, but psychologists say that children are much more interested in drawing on coloring books that mom or dad made with their own hands in front of their eyes. Working together brings people together and helps both adults and children relax.
If parents do not have a talent for drawing, you can use ready-made templates.
The choice of what the child will use to draw the moon according to the proposed template depends on the quality of the paper. If it is thin, then it is better to use pencils or felt-tip pens, and if it is thick, then you can use watercolors or gouache. Ask your child what he would like to work with, and only then choose a basis for coloring.
What kind of brothers are you?
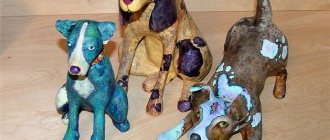
Alien children's crafts can be incredibly funny and surprise with the inventive use of the most unexpected materials. The images of whimsical “monsters” successfully combine Lego bricks with pencils of different lengths. Spools of thread with springs and cardboard cylinders, parts from broken plastic toys with balls of yarn - all this should be glued and connected using plasticine inserts. Expressive eyes and the resemblance of limbs will give the appearance of a living, even intelligent creature to any creation of a cheerful children's fantasy.
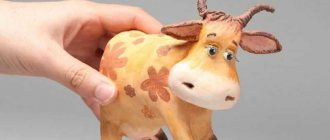
The alien, of course, can be made using traditional techniques - from plasticine or dough. The aliens, molded from the recently appeared “air plasticine”, will gradually harden in the air and turn into homemade space toys - a gift for their younger brother.
Products made from dough are simplified in shape compared to plasticine, their advantage is hand-coloring, you can see how hard the kid tried to create his craft for Cosmonautics Day. The dough is kneaded from the following components:
- a glass of flour;
- a glass of salt (extra);
- water, about half a glass.
The mass should be elastic, but pliable. The finished product is dried in the oven in 2-3 steps for 2 hours at a temperature of about 70 degrees; in a more severe mode there is a risk that the dough will crack. Drying outdoors is safer, but lasts 2 - 3 days. It is advisable to cover the dried and painted figurine with two layers of varnish.
Step-by-step instruction
First, draw a month on cardboard and cut it out. Since we will be making a volumetric month, we will make two such parts. We also cut out strips for the side parts of the Moon. We assemble the structure using tape.
Now we cut the paper into strips. We cut each strip across, getting “shaggy” parts. We make a large number of such strips and glue them from bottom to top for a month, each next one overlapping the previous one. The more such stripes there are, and the stripes have cuts, the more fluffy and beautiful the month will turn out to be.