Battery
This gadget uses a new 18650 lithium-ion battery from PKCELL with a capacity of 2200 mAh and an output voltage of 3.7 V for autonomous power supply.
You can also use batteries from old laptops in a portable speaker, but the battery life will be reduced.
The numbers 18650 in the name of the battery indicate its dimensions: diameter - 18 mm and length - 65 mm.
TOP 5 best models of portable speaker systems
The list below includes speakers that are in high demand and receive more positive reviews. The rating is based on sales data in large retail chains (Eldorado, M.Video, DNS) and online stores (Citrus, Ozon, Citilink and others).
Best budget model
Ginzzu GM-986B. This is a standalone speaker with a passive subwoofer. The total power of the speakers is 10 W. The weight of the model is less than 1 kg, the length is only 25 cm. The battery capacity is enough for 5 hours of operation when charged in 4 hours. This speaker with a flash drive and radio is also equipped with connectors for microSD and mini-jack. There is Bluetooth support. Playback frequencies - from 100 Hz to 20 kHz, signal-to-noise indicator - from 72 dB.
| Advantages | Flaws | Starting price, rub. |
| Loud, compact, easy-to-use acoustics with a good battery, advanced functionality, decent sound quality and several connection options. | Shallow bass. | 1060 |
Best wireless model
JBL Flip 4. This is a stereo speaker with a microphone and two 8 W speakers. Degree of water protection - IPX7, power supply - from a battery (up to 12 hours when charging in 3.5 hours). The upper frequency value is the same as the previous model, the lower one is 70 Hz. Signal/noise - 80 dB. In addition to Bluetooth connection, this model can be connected via a 3.5 mm jack. Its length is 17.5 cm, weight - 510 g. The acoustics are available in several color options: black, gray, white, blue, red, light blue.
| Advantages | Flaws | Starting price, rub. |
| High-quality assembly and sound, small size and weight, moisture protection, large battery capacity with fast charging. | Not detected. | 4280 |
Best multifunctional model
SVEN PS-460. The power of each of the two passive speakers of this model is 9 W, the frequency range is 100Hz-20kHz. The acoustics are equipped with a comfortable plastic handle and an LCD display on the front panel. It connects via Bluetooth and line-in. Additional functions: reading flash and microSD cards, speakerphone, FM radio.
| Advantages | Flaws | Starting price, rub. |
| Wide functionality, ease of use, high-quality sound. | Dimensions (39 cm in length and weight 1.75 kg). | 2230 |
The most powerful model
Sony GTK-XB7. This is a networked speaker system with a power of 470 W. It is characterized by separate emitters for high/medium and low frequencies, and colored backlighting. The model supports Bluetooth, NFC, and reading flash drives. There is a line input and a remote control. The speaker can be placed horizontally or vertically, and you can also combine several similar audio systems for more powerful and spacious sound.
| Advantages | Flaws | Starting price, rub. |
| Loud, bright sound, high-quality assembly, fast connection. | Insufficiently strong bass, large dimensions (65 by 32.6 cm with a depth of 34 cm), powered only from the network, high cost. | 14580 |
The best combination of price and quality
Xiaomi Mi Bluetooth Speaker. This is a stereo system with a microphone that can be used as a headset. The total power of the speakers is 6 W. The battery provides up to 8 hours of operation. The model in an aluminum case is available in four colors: gold, pink, red and blue. The lower limit of reproduced frequencies is 85 Hz. The speaker is slightly larger in size than a smartphone - 16.8 x 5.8 x 2.5 cm and weighs 270 g. The speaker connects via Bluetooth or mini-jack and is equipped with a microUSB connector.
| Advantages | Flaws | Starting price, rub. |
| Loud sound, stylish design, compactness, long battery life. | Instructions and voice comments in Chinese, weak bass. | 1900 |
So, among the many options for portable speaker systems presented on the domestic market, there is sure to be a model to suit individual requirements and for any budget. The main thing when choosing is to focus on your own needs and delve into the technical characteristics.
Battery pack assembly
The battery is assembled as follows:
- Both poles of the battery are bad.
- On two wires of different colors at the ends, the insulation is removed on one side by 7-10 mm, on the other by 20-25 mm and also tinned.
Long tinned ends are soldered to the batteries folded together:
- black wire - to the battery negative;
- red wire - to positive.
Finding the radiator size
Two amplifier channels are connected to the heatsink:
The chip must be attached to a heatsink, otherwise it will quickly overheat and be damaged. The size of the heatsink will depend on the maximum power dissipation and thermal resistances along the heat flow path from the TDA2050 chip.
Maximum power dissipation
Maximum power dissipation (P dmax) is the amount of power that the TDA2050 will dissipate as heat at its operating limit. P dmax depends on the maximum supply voltage from the transformer and the speaker resistance:
For the amplifier we are making here, the maximum supply voltage from the transformer is ± 24.7 V, and 6 Ohm speakers are used, so P dmax:
P dmax 20.6 W is below the TDA2050's absolute maximum of 25 W, so it's fine.
Heat sink thermal resistance
Now we can determine the maximum thermal resistance (in °C/W) of the heatsink required to dissipate all the power generated by the TDA2050. But first you need to find out the values of three thermal resistances along the path of heat flow from the microcircuit:
- 0 jc: Thermal resistance from the chip junction to the outside of the plastic case.
- 0 cs : thermal resistance from case to heatsink.
- 0 sa: thermal resistance from the heatsink to the surrounding air.
Heat dissipation will be more efficient when any of them becomes smaller. There is nothing we can do to get a lower 0 jc value because it depends on the chip design. 0 cs can be reduced by using thermal paste between the chip and the heatsink. Thermal paste's thermal resistance is typically around 0.2°C/W.
The greatest reduction in thermal resistance will occur when choosing a radiator (0 sa). The thermal resistance of a heatsink is usually listed in a table as °C/W. Heatsinks with lower thermal resistance will dissipate more heat, meaning they are better.
Use this formula to calculate the maximum heat sink thermal resistance required to dissipate P dmax TDA2050:
- 0 cs TDA2050 is 3°C/W.
- T jmax is the maximum junction temperature, or the temperature at which the thermal protection circuit is turned on. T jmax for TDA2050 is 150 °C.
- T amb is the ambient temperature during operation of the amplifier. Typical value is room temperature (25°C).
The maximum thermal resistance of the heatsink for this amplifier with P dmax 20.6 W is:
Therefore, you will need a heatsink with a value of no more than 2.9 ° C / W to ensure that all the power produced by the amplifier is dissipated.
Switch and power connector
To replenish the battery capacity after the portable speaker is assembled, you can use any charger that comes with a smartphone or other device with a constant output voltage of 3.7-5 V.
You must first connect the adapter with a USB Type-A/Micro USB cable to the micro-USB port located on the controller board, and then insert the plug into a 220 V AC power supply.
To prevent the batteries from being discharged idle and the speaker to be turned on and off, the battery is disconnected from the amplifier using a rocker microswitch.
Features of portable speakers
The main distinguishing feature of portable audio equipment is its ability to be transported. Manufacturers remove unnecessary wires and protruding controls, reduce the size of the emitters and place them more compactly than in conventional speakers. All components of the audio system are placed under one housing, which often contains convenient handles or mounts . Rotary controls are replaced with buttons, and in some models all control is carried out from the sound source - player, PC, smartphone or tablet. Some equipment is equipped with a display that displays data about the track and the state of the acoustics.
Another important task of the manufacturer is to make the speaker autonomous, so that the lack of an outlet does not become an obstacle to listening to audio tracks. Although some models are powered by replaceable batteries, most of the acoustics are powered by a built-in battery, which lasts from 2-3 to 12 hours, and for some samples - up to a day. There are options with combined power supply: when the battery is discharged, the speaker is connected to the network. Some devices charge from a wall outlet, others support USB charging.
You can connect equipment to playback devices in different ways: using wired and wireless standards. Among the former, the most common connectors are USB and mini-jack (3.5 mm), while the latter include Bluetooth and Wi-Fi. Many models offer both options. Some speakers support NFC and AirPlay standards. Legacy RCA plugs (also called "tulips") are rarely used.
Varieties
All speakers are divided into two main types: passive - without a sound amplifier, and active - with a built-in amplifier. Portable systems belong to the second type, since one of the requirements for them is autonomy. But models are produced in which both types of speakers are located under one housing, for example, two active ones for mid and high frequencies and one passive one for low frequencies.
Based on the number of channels, mobile speakers are divided into:
- mono devices, with one channel for outputting all frequencies;
- stereo acoustics, with two channels for surround sound.
Important!
Stereo systems come without a channel for low-frequency sounds or with a separate driver for bass. In the first case, the designation “2.0” is used, in the second - “2.1”. Dimensions vary from several to tens of centimeters: the smallest models fit freely in the palm of your hand, and the largest are comparable in size to conventional speakers.
Advantages and disadvantages
The advantages of portable audio systems are obvious:
- mobility;
- autonomy;
- ease of connection to various types of equipment;
- ease of setup;
- loud sound with small size;
- resistance to external influences (for models protected from water and dust);
- attractive design.
The disadvantages of mini-speakers are associated with the limitations that their design features impose on them - short battery life (especially for inexpensive models) and poor sound quality compared to stationary speakers . How long the device can function without recharging depends on the battery capacity, volume level, and the presence of a subwoofer (this element has high power consumption).
On a note! Playing loud music will drain your battery faster. For some models, when the charge level is low, the sound is muffled, even if the settings are set to maximum.
The sound quality and volume of portable equipment is lower due to the reduction in the size and number of emitters to make the case lighter - the channels have to be combined (one emitter is used for high and medium sounds), and the frequencies have to be cut.
Installation of main modules
To install the modules, unscrew the back panel on the speaker body. The amplifier and controller boards must be secured in its upper part with self-tapping screws and hot glue.
Since there will be no mechanical impact on the amplifier, its micro-USB port is glued to the inside of the rear panel of the speaker, and then screwed to it with a self-tapping screw through a hole on the board. Before mounting the DW-CT14+, a hole is drilled on the panel opposite the LED.
The micro-USB port of the controller is also glued to the inside of the rear panel so that when installing the plate into the body of a portable speaker, the input of the micro-USB port is adjacent to the top edge of the speaker.
At this point, a rectangular opening is cut out in it to connect an external charger to the USB connector. Before gluing the charging module, a common hole is drilled in the plate opposite the LEDs.
Since the controller board will constantly be subject to mechanical stress when connecting the plug, it is additionally screwed to the back plate with self-tapping screws through the unused contact holes “IN-” and “IN+”.
For a miniature rocker switch with a diameter of 20 mm, you can bore the hole left on the back plate from the outgoing wires with a file, or drill a new one with a core drill.
It is better to secure the battery at the bottom of the rear panel of the speaker using double-sided tape.
What you will need
To install a homemade speaker on 2 mid-frequency dynamic radiators, you will need a number of consumables and tools.
Accessories:
- Speakers. Selected according to the required parameters: extractable frequency range, output power.
- Decorative grilles for emitters. You can purchase them or make them yourself.
- Amplifier. Recommended class D with output power for 2 channels up to 50 W.
- Digital or LED voltmeter. It allows you to control the battery charge level during autonomous operation of the device.
- Volume control. Any standard one for devices of this type will do.
- You can supplement the design with an additional audio input.
- Socket and charging module. It is recommended to use 14 V.
- Switch and power connector. Any standard ones for devices of this type will do.
- Rechargeable batteries - 3 pcs. x 1.5 V. It is necessary to install samples of a proven brand with the same charge level.
- Bluetooth device. It is recommended to use wireless. If it is wired, then it also needs a power board.
Materials:
- Chipboard. The workpiece area is taken with a margin of 10% of the calculated one.
- Furniture self-tapping ties. The quantity is taken at the rate of 2-3 pcs. on one side. For a rectangular case you will need a maximum of 24 pcs.
- Screws or fastenings for the back panel, if it is removable. Quantity based on 2-3 pcs. to the brink.
- PVA glue. It is used to lubricate bonded surfaces.
Tools:
- wood hacksaw;
- drill with attachments and drills;
- jigsaw for wood;
- bench knife;
- screwdriver or screwdriver;
- glue brush;
- sandpaper;
- soldering iron
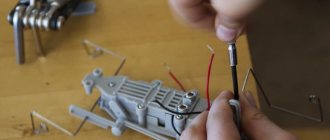
Soldering modules
The wiring and connection of circuit components is carried out in the following order:
1. Solder wires from two small chips that come with the amplifier to each speaker, strictly observing the polarity. The yellow wire is soldered to the positive of the emitter, and the blue wire to the negative.
2. The red wire coming from the battery is connected to the “B+” contact on the controller board, the black wire to “B-”.
3. A large chip is inserted into the red “BAT” connector on the amplifier block, and the wires coming from it are soldered in the following order:
- black - to one of the rocker microswitch terminals;
- red - to the “OUT+” contact.
4. It remains to cut another black wire of the required length, strip it and tin it on both sides and solder it to the second terminal of the switch and to the “OUT-” contact.
5. The panel with the speakers, which has become a façade, is attached to the body of the portable speaker with self-tapping screws or hot-melt adhesive, after which 2 chips coming from the dynamic emitters are inserted into the corresponding “Lout” and “Rout” sockets on the board of the DW-CT14+ electronic unit.
The manufacturer of the portable speaker himself determines which of the speakers, when the Bluetooth speaker is placed horizontally, will be left and right.
Selection of materials for manufacturing
This factor directly affects the quality of the emitted sound. The selected material must meet a number of requirements and have specific properties.
The main ones:
- Low sound absorption. Materials with a “loose” surface (fibreboard, soft wood, etc.) will actively absorb high frequencies, which will lead to dullness of sound.
- Moderate hardness. At full volume, the device should not be subject to deformation. Soft plastics, thin plywood, etc. are excluded.
- Ease. For a portable Bluetooth speaker, this is an important factor.
- Easy to process. For those who decide to make a speaker with their own hands at home, this factor must be taken into account when selecting a tool.
- Affordable price. For example, the use of ebony provides high-quality sound, but it is expensive. If a beginner begins to master the radio business from scratch, then it is advisable for him to look for budget materials.
Practicing acousticians recommend choosing:
- on chipboard (medium density chipboard);
- on MDF (fine fraction of medium density).
The simplest sound amplifier
Nowadays, bipolar transistors are becoming a thing of the past, and now, in order to assemble any simple amplifier, you no longer need to struggle with calculations and rivet a large printed circuit board.
TDA chips
Now almost all cheap amplification equipment is made on microcircuits. The most widespread are TDA chips for amplifying audio signals. Currently used in car radios, powered subwoofers, home speakers and many other audio amplifiers, they look something like this:
Single-channel amplifier on TDA7396
Here is the pinout of the microcircuit:
We will assemble our amplifier according to a typical diagram, which was attached in the datasheet itself:
We apply +Vs to leg 8, and nothing to leg 4. Therefore, the diagram will look like this:
+Vs is the supply voltage. It can be from 8 to 18 Volts. “IN+” and “IN-” – we send a weak sound signal here. We attach a speaker to the 5th and 7th legs. We set the sixth leg to minus.
Here is my wall mounted assembly
I did not use capacitors at the power input of 100nF and 1000uF, since I already have pure voltage coming from the power supply.
I rocked the speaker with the following parameters:
As you can see, the coil resistance is 4 ohms. The frequency band indicates that it is a subwoofer type.
And this is what my sub in a self-made housing looks like:
I tried to take a video, but the sound on the video is very poor. But I can still say that the phone at medium power was already hammering so hard that my ears were turning, although the consumption of the entire circuit in working form was only about 10 watts (multiply 14.3 by 0.73). In this example, I took the voltage as in a car, that is, 14.4 Volts, which is well within our operating range from 8 to 18 Volts.
If you do not have a powerful power source, then you can assemble it according to this diagram.
Don't get hung up on this particular chip. These TDA chips, as I already said, there are many types. Some of them amplify the stereo signal and can output sound to 4 speakers at once, as is done in car radios. So don’t be lazy to scour the Internet and find a suitable TDA. After completing the assembly, let your neighbors check out your amplifier by turning the volume knob all the way to the balalaika and leaning the powerful speaker against the wall).
But in this article I assembled an amplifier using the TDA2030A chip
It turned out very well, since the TDA2030A has better characteristics than the TDA7396
For variety, I’ll also attach another diagram from a subscriber whose TDA 1557Q amplifier has been working properly for more than 10 years in a row:
Amplifiers on Aliexpress
And here it is already ready right away
And in general, there are a lot of these amplifier modules on Aliexpress. Click on this link and choose any amplifier you like.
Making a modern music device out of an old music center
Car acoustics. How to make it?
We take out the old stereo system from the storage room and take the speakers from it. We find an amplifier in the car (if it is missing, turn off the rear speakers), thoroughly strip the wires on the old speakers, it is important not to confuse the polarities, and connect. The sound from the old speakers from the center is much louder and better quality than ordinary car mugs, some of them will replace the subwoofer, the main thing is not to burn it or turn the music volume up to maximum. You'll have to find the best option for setting the volume so that it doesn't gurgle.. Universal Bluetooth speaker system
How to collect it?
Universal Bluetooth speaker system. How to collect it?
To make it, we take an old stereo system and buy a Bluetooth adapter with an aux or a standard 3.5 mm jack. It all depends on the inputs on your speaker system
The price of adapters varies between two hundred and five hundred rubles. It is important to choose the right adapters so that you do not have to solder them in the future. We connect Bluetooth to our music center, set up a computer, laptop, smartphone... This assembly is perfect for an apartment
You can take the device with you to your country house by connecting your smartphone. In your car, you can connect a Bluetooth adapter to the radio and listen to music directly from the Internet via a smartphone (mobile phone)
This assembly is perfect for an apartment. You can take the device with you to your country house by connecting your smartphone. In the car, you can connect a Bluetooth adapter to the radio and listen to music directly from the Internet via a smartphone (mobile phone).
We assemble the simplest circuit using one transistor
Next, consider the simplest ULF design, consisting of a single semiconductor
Please note that this circuit is a single-channel amplifier. Here is a schematic diagram of such an amplifier
As an example, let's assemble a simple sound device using a single transistor.
First, you should prepare the necessary components and equipment. For assembly you will need:
- · Silicon NPN transistor, for example, KT805, or its equivalent.
- · An electrolytic capacitor with a capacity of 100 uF; its voltage should be 16 volts or more.
- · Variable resistor, with a resistance of approximately 5 kOhm.
- · Circuit board, if available. If not, you can assemble the device by hanging it.
- · A radiator is a must, without it the transistor will quickly overheat and fail.
- · Wires for connecting components.
- · Mini jack connector for connecting a sound source. This could be a computer or other device with an audio output, for example, you can use a smartphone.
- · DC power source 5-12 volts, this can be a power supply or a crown battery.
- · Soldering iron for soldering elements, as well as solder and rosin or any other flux.
We will assemble our amplifier from components that have already seen life.
So, when all the components are selected, we begin the assembly. First, we place the components on the circuit board.
Next, you need to solder the negative terminal of the capacitor and the central contact of the variable resistor to the base of the transistor.
According to the diagram, we connect the power plus and the speaker plus to the second contact of the variable resistor. To do this, we connect the contact using a wire to the circuit board. The central contact of the transistor (collector) is the negative terminal of the speaker; we will also connect it to the board.
Then the remaining contact of the transistor (emitter) must be connected to the negative power supply, as well as the contact for the negative input signal. The positive terminal of the input signal is the positive leg of the capacitor.
The assembly is almost ready; to start testing, all that remains is to solder three pairs of wires. From left to right in the photo: entrance, exit, food. And also be sure to install a radiator on the transistor.
Then we proceed to setting up our amplifier. To do this, we connect all components, be sure to strictly observe polarity. Also, before connecting, you need to make sure that there is no short circuit, especially when mounted.
The setting is made by adjusting the variable resistor, thus matching the resistance of the speaker and the transistor.
That's all, the assembly and configuration of a simple low-frequency amplifier is complete. Accordingly, such a ULF is a mono amplifier, i.e. single-channel. To achieve stereo sound, you need to assemble two similar devices
It should be noted that such devices, assembled according to the simplest scheme, are not used anywhere due to their inexpediency. More complex devices are needed for domestic needs