If the master’s tools are in order, then the work moves quickly and easily. No need to look for where the bolts, pliers or hammer are, everything is at hand. Factory-made organizers offer ready-made storage solutions, but they are not always convenient, and the cost of high-quality models is not the cheapest. If you have the desire and leftover materials after repairs, making a tool box with your own hands will not be difficult, and it will cost much less than the factory equivalent.
Varieties and materials
There are many types of organizers:
- The simplest designs where all the tools and small accessories available in the house are stored. If the work is performed periodically, this is a completely convenient option.
- For storing a certain tool, for example, an angle grinder or a drill, especially if the device is not included in the factory configuration.
- Spacious and versatile, with numerous compartments and even wheels for easy movement.
- With advanced features, including workplace organization. For example, the structure unfolds and transforms into a small table with equipment attached to its surface.
Each craftsman can make a tool box “for himself”. If you don’t have to do repairs too often, then limit yourself to a simple drawer with a handle. It is advisable to provide several compartments or external “pockets” in which all the necessary items would be placed.
When there is a lot of equipment and you have to use it regularly, you will need a professional organizer. The location of compartments, cells or containers in this case must be carefully thought out in order to quickly find what you need.
When making a tool box organizer, the following are used:
- Metal - sheet aluminum, stainless steel, galvanized steel. Structures made from them are resistant to mechanical stress and corrosion, reliable, and durable.
- Wood - plywood, chipboard, fiberboard, MDF, bars, boards. The material is easy to process; you can use any scraps remaining from the repair.
- Plastic - for storing and carrying heavy tools, it is better to use impact-resistant polypropylene. It is not as fragile as other types of polymers, can withstand fairly high loads and is not afraid of frost. To keep small items of light weight in order, you can use any sheet of plastic.
Devices are often made in combination - a body made of durable metal or plywood, plastic filling, fiberboard. Small containers, containers, and cuttings of polymer pipes are suitable for small items.
To make materials last longer, you need to use protective equipment. Wooden parts are painted or impregnated with linseed oil. Aluminum, stainless steel, galvanized steel or plastic are themselves resistant to moisture and corrosion, so they do not require additional processing.
Let's sum it up
As you can see, there are many different plywood box designs available. Not all of them are presented in this material, however, you can find the drawing you need or get an idea on the Internet. However, many of you are able to make a drawing yourself, simply using the materials presented in the article you are reading now as a guide, while determining your own dimensions for the products.
The box can be assembled without drawings, by eye, however, such aerobatics is a sign of the highest skill in the field of furniture assembly. If you can do it, then go for it, and everything will definitely turn out the way it was intended.
Design
For manual production, you can limit yourself to a simple design or “swing” at a more complex option. This will depend on the functions assigned to the organizer, as well as on the type of stored devices and materials:
- A simple box with a handle is often used for carpentry, construction or painting tools. It is easy to make, quite versatile and easy to carry.
- Case - a suitcase-type design, closed with a lid with a lock. In such an organizer you can keep small tools, fragile devices, and consumables.
- A container with a lid is a very popular option. The internal space is organized according to the needs of the user. Large tools are placed on the bottom, and containers for storing “small things” are installed on top. They can be either fixed or removable.
- Folding accordions. When folded they are very compact, and when unfolded they provide a complete overview of everything that is inside.
- With retractable compartments - they are a cabinet-type structure. Each compartment is separate, all items are neatly folded and do not come into contact with each other.
- On wheels - a convenient modification of any heavy organizer. The problem of carrying it over long distances disappears by itself. For professional craftsmen or teams performing a wide range of work, this is a significant help.
- A box stool is a functional option that can be used as a seating area or a small work surface.
Master's advice
If the thickness of the plywood differs from the standard one. Have you ever cut plywood pieces to specific dimensions and then discovered they couldn't be assembled correctly? The reason for this is that the actual thickness of the plywood does not correspond to the standard, which usually indicates the nominal thickness, so it is necessary to change the dimensions of some parts so that problems do not arise during assembly. Follow these tips to help you identify significant details and determine their exact dimensions ■ Never cut all the plywood parts of a project in advance, as some dimensions may need to be altered. ■ Carefully review all illustrations, diagrams, and drawings to identify parts that may require dimensional adjustments. First of all, pay attention to parts that are installed between other parts, such as shelves, partitions and drawers, as well as those whose length or width depend on the dimensions of previously assembled parts of the project. Circle, underline, or highlight any dimensions that need clarification, as we did in the pictures and Materials List, to serve as a reminder before assembly. ■ Only cut parts that have the exact length and width specified. After assembling them, check the dependent dimensions of the remaining parts (it is better to first carry out a test assembly without glue).
4. To determine the width of large partitions D, measure the distance from the front of the A-pillar A to the rebate of the rear pillar. Cut the partitions to this width and saw them to a length of 572 mm. Then cut out shelf E of the same width and length 864 mm. (Before doing this, measure the distance between the sides to determine the length of the shelf.) Now install the shelf (photo B).
Using the large partitions D as spacers to install shelf E, drive screws through the side panels B into the ends of the shelf.
Using spacers, align the large partitions D in the cabinet and secure with screws, screwing them through the bottom C and shelf E.
5. Cut out four spacers measuring 51x305 mm from plywood scraps to accommodate large partitions D in the body (Fig. 1). Secure the partition with screws (photo C). Then, also using spacers, install the second partition.
Quick tip! Be sure to use spacers - they will ensure that the partitions are placed neatly, and the drawers will slide out easily without getting stuck.
Measure the distance from the top of panel B to shelf E to find out the exact width of the small partition F.
6. Determine the length of the small partition F (photo D ). width should be the same as for large partitions D. Place the partition in the middle of shelf E and secure it with screws from below.
7. Place the bottom cover C on the body and align it. the middle of the edges of the side panels A/B and the small partition F. Screw in the screws. Then line up the second cover C and screw it to the bottom one. (Drill screw holes along the front and back edges of the cover at a slight angle.)
Quick tip! Do not glue the top cover to the bottom cover so that it can be easily replaced if damaged. And if you screw in the screws from below, then on top there will be a smooth working surface without traces of fasteners.
G from 6 mm birch plywood , adjusting its dimensions to the distance between the folds of the sidewalls. Although the dimensions should be as specified, make sure using a tape measure. Once you have cut out the back wall, set it aside.
Operating principles and manufacturing requirements
Craftsmen quite often encounter the breakdown of a purchased organizer. Flimsy structures cannot withstand loads, accidental impacts, crack and become unusable.
The weak point of factory boxes is the handles and locks. As a rule, in inexpensive models they are made of plastic or very thin metal, which quickly fail under heavy operating conditions.
All these nuances can be provided for in a DIY toolbox. Durable material, reliable fastenings, and high-quality fittings will ensure not only comfortable use, but also an unlimited service life.
The organizer manufacturing process includes:
- development of a design drawing;
- preparation of materials;
- cutting parts to size;
- assembly;
- installation of accessories;
- protective and decorative treatment.
When preparing the drawing, the type of storage, the dimensions of the tool, the number of compartments, the method of opening and carrying are taken into account.
Working drawing with dimensions
Metal tool box
The metal is highly durable and durable, but working with it requires skill, as well as special processing tools.
Required:
- sheet of galvanized sheet or aluminum;
- metal scissors;
- riveter;
- handles, locks, hinges.
Most often, case structures or folding “accordions” are made from metal, where the ribs form a rigid frame. In this case, a sufficiently thin sheet does not deform under load.
Step-by-step production of a metal tool box:
- On the sheet mark the main elements of the organizer - side parts, bottom, lid, taking into account an allowance of 1-1.5 cm for connection.
- Cut out the elements using metal scissors.
- Fold in the seam allowances along the edges.
- Rivet the joints with a riveter.
- Connect the compartments together using strips or special springs.
- Install locks and handle.
If there is no riveter, you can connect the parts with bolts, nuts and washers. This is a more labor-intensive job, but is also used on thin-sheet structures. The fasteners are chosen to be stainless or galvanized so that when paired with the metal of the organizer, it does not quickly begin to corrode.
Plastic tool box
A modern plastic L-boxx can be made from foamed PVC or any other polymer sheet material with sufficient mechanical strength. You will need glue for the plastic and transparent plastic for the lid.
Making a plastic tool box is easy. The parts are cut out with a regular knife, the joints are glued, and cured until they gain strength.
The top of the device is closed with a transparent lid, through which all the contents are visible. Drills, screws, nuts, soldering supplies - everything will be in separate compartments in plain sight.
The procedure for making a plastic box:
- Mark the contours of the bottom, walls and partitions on the sheet.
- Cut out the elements with a knife.
- Carefully glue the parts together.
- Make a lid.
- Clean the edges with fine sandpaper.
Such a box is not intended for storing heavy equipment, but it is quite useful for organizing all the “little things” necessary for work.
Wooden tool box
The simplest and most affordable option is to make a tool box from plywood or thin planed boards. Surely there are scraps of suitable sizes in the house. Cutting and drilling wood materials is not difficult, so even a beginner can handle the job. You will need a jigsaw or hacksaw, a screwdriver, and wood fasteners.
Part connections can be made in various ways:
- half a tree;
- dovetail;
- with dowels;
- with tongues and grooves;
- on self-tapping screws.
To neatly connect the boards into half a tree, select half the thickness of the element on each of them. The parts are glued together at the sampling site. If you choose the dovetail method, you need to file a trapezoidal cutout at one end, and a protrusion of a similar shape at the other.
To connect dowels, blind holes are drilled in two adjacent structures, glue is applied around them, then dowels - pieces of wooden rod - are inserted. When tightly joined, the structures are held together. The joint with tongues and grooves is labor-intensive and requires precise cutting of parts in the form of a toothed comb at the joint.
Joints between wooden structures are strengthened by gluing. To perform this operation correctly, you need:
- Carefully sand the joint area.
- Remove dust and degrease.
- Apply glue to both surfaces.
- Let the composition stand for some time (the duration is indicated in the instructions).
- Press the elements together and secure with a clamp.
- Remove excess glue and leave until the composition is completely polymerized for about a day.
It is recommended to load the adhesive joint no earlier than after 24 hours. The junction is neat and invisible. If the toolbox does not have any decorative requirements, it is easier and faster to fasten the elements with ordinary self-tapping screws. Pre-drilling of holes is not required.
Simple model
The option in the shape of a rectangle or square is suitable for storing any items (clothes, dishes) and documents. Several open boxes can be combined into a shelving unit. If the container needs to be carried, then handles are needed. Holes for fingers or furniture fittings located on the reverse side can be used as holders.
Source jofo.me
I draw a drawing of the future box with dimensions on paper. I transfer the schematic image with a pencil onto a sheet of plywood. The square model consists of 4 identical walls and a bottom. The rectangular design has:
- 2 long sides;
- 2 short parts;
- base.
Using a hacksaw or jigsaw, I carefully cut out the elements along the contour, holding the blade securely with my hand. Unprocessed blanks look untidy and do not fit well along the lines. Using sandpaper I clean the edges from any rough edges.
I assemble the side parts into a single structure. For beginners, I advise you to nail the walls with small nails or self-tapping screws. To prevent the frame from wobbling, I use metal corners as additional fasteners. I fix the bottom last.
For a box, a groove connection is stronger. The grooves and adhesive give the box maximum durability. At the end of the process, I attach the bottom and screw it to the frame with self-tapping screws. The screws should not be longer than the height of the structure, otherwise the plywood will burst.
Internal partitions will allow you to turn an ordinary box into an organizer. I fasten the walls using metal corners. If the box needs to be moved around the room, then it is better to install the structure on furniture wheels.
To keep the model closed, you can fix the hinged lid on piano hinges. The retractable canvas is smaller in size than the frame. The part moves in special grooves, which I drill from the inside in the sides. It is more convenient to make lines using a cutter.
Source artists-lab.ru
How to make an open box: step-by-step instructions with drawings, dimensions and photos
The simplest tool organizer is a box-shaped design with a handle. You can arrange several compartments inside, and attach “pockets” of various capacities to the outside.
For a medium sized box you will need:
- plywood, board, MDF or other wood sheet material that can be easily fastened with self-tapping screws;
- fasteners;
- electric jigsaw;
- screwdriver;
- pencil, ruler;
- linseed oil for wood processing.
Mark the details:
- A - bottom of the box 35x20 cm;
- B - 2 side parts 22x22 cm;
- C - 2 long side elements 35x10 cm.
A handle 35 cm long is prepared from the block with a small margin. Then you can adjust the dimensions accordingly. You can use steel or aluminum tubes, scraps of smooth fittings.
Cut out the marked parts with a jigsaw. The bottom and sides are alternately connected using self-tapping screws, which are screwed through the part into the end of the other element. The approximate step for installing hardware is 7-10 cm. You can additionally glue all joints with wood glue.
To avoid misalignment during fastening or hardware breakage, self-tapping screws must be installed correctly:
- do not screw into places with knots and other wood defects;
- install fasteners perpendicular to the surface;
- the axes of the screwdriver and the self-tapping screw must strictly coincide;
- increase the twisting speed smoothly, without jerking.
Some craftsmen recommend pre-rubbing the screws with soap. After this they enter the wood very easily.
The handle block is sanded until smooth. When attaching it to the sidewalls, you first need to drill a hole through the part, and then screw in the self-tapping screw.
The handle can be made folding - cut holes in the sides, thread a strong cord and tie a block to it. The box is carried in the usual way, then the handle is placed to the side. In this form, it does not interfere with access to tools.
For small parts, side pockets are made of plywood or fiberboard. The plates are cut out to appropriate sizes and screwed to the sidewalls through narrow linings.
Partitions are cut out for internal compartments. They are secured using overlays or inserted into pre-cut grooves.
Under the containers to be removed, stops made of bars or scraps of plywood are installed inside the box. You can make removable containers yourself from sheet plastic, tin, wood, or take ready-made ones of a suitable size.
After assembly, the organizer is coated with linseed oil. You can paint the wood with acrylic varnish for external work or treat it with stain or antiseptic impregnation.
How to create a beautiful box?
There are many options for boxes, each person tries to create the design they need. But the decorative item is unique and is used in many ways. The main thing is that the process does not require additional knowledge or extensive construction experience. The box is spacious and can be used for different needs.
It is better to decide on the dimensions before starting work and draw up a rough diagram of the future structure. The outer walls are cut out with a jigsaw. In order not to make mistakes with the size and not spoil the material, it is better to make blanks from thick cardboard. After this, transfer them to plywood and cut them out. It's also easy to make interesting lines, giving the drawer special patterns.
To prevent unpleasant odors from accumulating in the box, it is worth making ventilation holes in the bottom. They are also cut out neatly (can be symmetrical or chaotic). Now, when creating pens, everyone will be able to realize their fantasies, especially if they have all the necessary tools, this will not be difficult.
Stool box: drawings and description
This is a carpentry product of a more complex level of manufacture than a simple box. For a stool on which you can sit or stand, a durable frame is built from a bar. The interior space is used to store tools.
You will need:
- board 20 mm thick;
- block 50x50;
- plywood 8-10 mm;
- wood glue;
- cutting tool;
- screwdriver or drill;
- block, fine sandpaper or sander;
- hinges, handles, lock.
First prepare a drawing with dimensions
Now you need to assemble the stool:
- Trim the blanks to size.
- Connect the bars with tongue-and-groove fastenings and dowels.
- Cut out the bottom and sides from plywood.
- Sand all the details.
- Lubricate the contacting surfaces with glue.
- Insert dowels and connect the elements, remove excess lei
- Tighten with clamps for 24 hours.
Aging in clamps
While the glue is setting, a seat is made from the board. The parts are polished and the edges are rounded. Glued to the frame and connected with an “oblique” screw.
The sides and bottom are fixed to the stool. The opening part is secured with overhead hinges. To prevent the lid from opening spontaneously, install a latch. The functional box-stool is ready.
Determining the dimensions of the box
Before you start designing the box, you can draw up a sketch and/or decide on the dimensions of the walls and bottom of the future storage product
It is important to consider the linear dimensions of the plywood that you can purchase. There are two types of sheets on sale:
square, for example, 1.5 by 1.5 meters or 1.2 by 1.2 m;
rectangular 1.5 by 1.2, 3 by 1.5 or 2.4 by 1.2 meters.
By thinking in advance about the overall dimensions of the future box, you can minimize material consumption. The best option is if at least one of the parts of the box - the bottom or a pair of walls - is equal in size to a plywood sheet. But given the standard sizes, you will have to make a fairly large box.
As practice shows, in most cases it is impossible to do without cutting sheets. But in general, to make a sufficiently spacious and practical container, it is enough to purchase two sheets of plywood. So, one of them is cut out for the back and front walls, and the second - for the bottom, end parts and lid (if one is planned at all).
Plywood tool storage box with lid
The lid design is very practical. Tools become less dirty and are not subject to accidental exposure to snow or rain outdoors.
The lid can be hinged or removable. If the handle is attached directly to it, the hinge and lock mechanisms must be as reliable as possible. The entire load will be taken by these parts; how long the organizer will last depends on their quality.
Before starting work, you need to prepare a drawing of a tool box, where you indicate the dimensions and numbering of parts. Such a simple operation will help during assembly, you will quickly find them and dock them correctly.
For an organizer with a lid you will need:
- plywood 12-18 mm thick for the frame, 6-10 for non-load-bearing parts;
- self-tapping screws;
- wood glue;
- overhead hinges (mortise, hinged or other type as desired);
- a pen (buy ready-made in a store or take from an old suitcase);
- ruler, pencil;
- hacksaw or jigsaw;
- screwdriver;
- clamps;
- a block for sanding edges.
Step by step execution:
- Transfer the markings from the drawing to the plywood and number them.
- Use a jigsaw or hacksaw to prepare the parts.
- Using glue and self-tapping screws, assemble the body. Tighten the structure with clamps until it dries completely.
- In a similar way, make internal removable trays.
- Secure the bars for stops parallel to each other in the box.
- Assemble the cover and secure it to the body with hinges.
- Install locks.
- Attach the handle to the lid.
- Sand and treat with a protective and decorative agent.
After installing the removable containers, the organizer is ready for use. This box is not only durable and convenient, but also looks quite solid.
Ready-made models of tool boxes on wheels
A multi-section tool box or cabinet on wheels can be purchased ready-made in a store or made independently. The dimensions and configuration of this mobile device may vary, so the consumer is given the opportunity to choose the appropriate model that is most convenient for use in the existing conditions.
To begin with, it makes sense to consider the boxes offered in specialized stores or departments. Perhaps someone will immediately settle on one of the ready-made options, especially since manufacturers, as a rule, carefully consider the convenient location in their models of everything necessary to perform basic construction or repair tasks.
How to choose a tool box on wheels
This section of the publication will present a small selection of mobile tool boxes made by different manufacturers and available for purchase. For each model, the main parameters that characterize it in general terms will be given.
Portable box with drawer
This is almost a mini-version of a workshop. The top panel can be used to work with various equipment; inside is an excellent place to store tools, accessories and consumables. If you put the organizer on wheels, you get a mobile Toolbox.
The interior of the box has a compartment for large tools and pull-out compartments for small items. Additionally, you can install a panel for rulers, screwdrivers, knives, etc.
The structure is made of plywood, connecting the parts with glue and self-tapping screws. For strength, you can fasten the organizer with stiffening ribs from a 50x50 mm bar.
There is nothing complicated about assembling the box itself. The drawer design requires the most attention. It is expected to be loaded, so if it is not positioned correctly it can bind when moving and slip out of its mounts.
To install a retractable compartment, you will need guides, which can be roller or ball. The sliding of the runner occurs due to the torsion of the rollers in the grooves or the movement of the guide parts themselves relative to each other in special tracks.
Roller mechanisms are inexpensive, but less reliable. Ball ones are stronger and more durable, they move silently and allow you to open the drawer all the way. You can use reinforced versions of products that can withstand heavy loads.
To install a drawer, mark the fastening line of the guide on the wall, and the mating part on the side element of the compartment. Here it is important not to make a mistake and to connect the structures correctly in height so that the box fits tightly, but there is a small gap left for free movement. Even the slightest misalignment between parallel sides should not be allowed.
Assembly sequence:
- Cut out parts from plywood and sand.
- Assemble the frame and box using self-tapping screws and glue.
- Let it stand until it gains strength.
- Mark the guide lines on the internal side posts and sides of the drawer.
- Secure the runners with self-tapping screws.
- Insert the compartment until it clicks, slightly lifting the edge. After this, the box should move freely along the guides.
- Arrange the organizer space as you wish.
- Attach carrying handles.
- Carry out final protective and decorative treatment.
If desired, you can make several drawers of the same or different sizes. This will allow you to make maximum use of the organizer’s space.
Option with shoulder strap
First the body is made
1. From 19 mm plywood, cut out pillars A and panels B of the sidewalls according to the dimensions specified in the “List of Materials”. To enhance the appearance of the entire project, we used premium grade plywood that has no defects on the edges.
cutter with a bearing into the router collet, select 10x6 mm rebates along the rear edges of the posts A on the inside for inserting the plywood wall G. Glue the racks to panels B , placing the folds as shown in Fig. 1.
Glue the sides A/B to the bottom C, secure with clamps and screw in the screws. The mounting square will help avoid distortions.
3. Read the “Expert Tip” below. Then determine the width of the two lids and bottom C by measuring the width of the assembled sides A/B . Saw the lids and bottom to the required width and saw to a length of 1016 mm. Attach the sides to the bottom (Photo A, Fig. 1).
Quick tip! To ensure that the plywood around the screw heads does not split and the surfaces are smooth, the mounting and guide holes for the screws must be countersinked.
Tool Chest Ideas
In the hands of a true craftsman, any thing that has outlived its useful life can become a useful and functional device. Various ideas that are implemented from improvised means arouse interest and become an impetus for one’s own creativity:
- A tool box made from cable ducts and sofa springs is an economical lightweight device for storing small accessories.
- Plastic canisters are record holders for generating various ideas. If you cut out a window in the upper part, such a container can be used to store screws, nails, drills and anything else that may be useful in your work.
- A shopping cart, if obtained legally, can be transformed into a convenient Tool-box through some transformations. It is enough to arrange compartments or shelves, and the handle and wheels are already there.
- Old "diplomacy" bags are strong and durable, and reliable locks have worked properly for more than 20 years. Inside the case you can arrange small pockets for storing small items, and the suitcase itself can easily withstand the weight of a drill or screwdriver.
Tips for making a plywood box
The thickness of plywood may vary. When making a plywood box where toys, clothes, and food will be stored, plywood with a thickness of 0.5 cm is suitable. And, if the box is to be stored outdoors, then the thickness of the plywood should be more than one centimeter.
- Before you start work, you need to understand whether the drawing is made correctly.
- You need to buy or rent the necessary tools to make the box.
- When purchasing plywood, you need to carefully examine the appearance of the material. There should be no chipped pieces or other defects on it.
- To ensure that the place where the plywood is cut is clear. You need to use tape to glue the place where the plywood will be cut.
- It is necessary to apply varnish to the plywood box. It gives not only a beautiful appearance, but also protects from various external influences.
- It is better to choose fine sandpaper for sanding a plywood box.
- If you need to make several identical boxes, you can make a template for the side walls.
- It is better to paint boxes in neutral colors.
- If the boxes will be located outdoors, it is prohibited to paint them with bright colors. After all, in the sun the color of the box will quickly fade.
- It is better to remove excess glue with a wet cloth.
Device
The box consists of a bottom, walls, 2 sides and a device for a handle. These parts are used to assemble a structure in the form of a box that does not close at the top, with a small tray for small components.
Before starting work, you need to prepare drawings of a box for plumbing tools of the chosen design, which you will have to make yourself at home.
The material for the manufacture of walls, internal partitions and tray is a plywood sheet with a thickness of 0.6 to 0.8 cm.
Another sheet, 1.2 to 1.5 cm thick, is used for the bottom and carrying structure. The handle is made of a steel rod Ø 1.2 - Ø 1.5 cm or a wooden block Ø 2.0 - Ø 2.5 cm.
DIY tool case () DVDRip
If you are a real man, then due to the duty of this great title you often have to do small things. and not very minor, home repairs. Well, as you know, for a working tool you need to have an equipped place to store it. We offer you one of the options for equipping a tool case.
Total duration:
00:05:40
How to grind valves with your own hands without tools
DIY compressor () DVDRip mpg 203.58Mb
DIY bedroom chandelier () DVDRip
DIY potato digger () DVDRip mkv 654MB
The author of this short educational video will be happy to share with you some simple tricks on how to make an excellent potato digger yourself from an ordinary walk-behind tractor.
Do-it-yourself color music () DVDRip mp4 574MB
Manufacturing of necessary parts
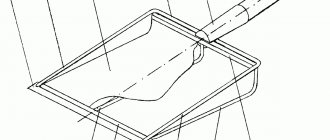
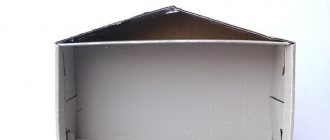
For an accurate and easy process of bending parts, we use a roller cutter in a certain way:
- Place the cardboard on a wooden surface
- Let's draw a path on the cardboard.
- Let's move the bending roller along the length of the track with proper pressure in order to reduce the thickness of the cardboard at the junction.
- Now let's bend the component along the length of the compressed distance.
All this can be done easier and faster with the help of a tool called a rule. We connect the sides and base of the box, insert a strip of cardboard into specially designated holes and get a finished tool box.
Tool organizers
There are 3 ways to store tools:
Special holders on the wall, bedside table and other places. This option is suitable for those who have their own workshop and spend a lot of time there.
A fabric organizer or backpack will satisfy those who have few and small tools. Its disadvantage is its short service life and insufficient capacity.
Tool organizer in the form of a box with removable or fixed compartments. This option is suitable for mobile craftsmen moving to work with different customers.