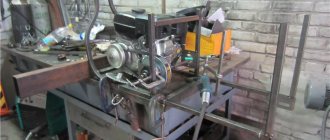
Waste oil from engines and other devices is a very popular fuel for heating garages and even homes. Putting recycled materials to good use is always a pleasure. And in the case when this issue concerns energy resources for heating, this is also beneficial. The role of the “first violin” in this situation is played by the furnace during testing with your own hands. Other names for this device are heat gun, heat generator and heater.
Any flammable oil can be used as fuel. Diesel, machine, transmission, vegetable, confectionery. Absolutely anything. A waste oil furnace with a water circuit is also made from recycled materials: pieces of metal, an old oxygen or gas cylinder, or pipe scraps of different diameters. The purpose of this article is to talk about how such furnaces are designed and how to make such a unit yourself.
Advantages of waste oil furnaces
Do-it-yourself used oil stoves are quite popular among motorists. It heats small rooms well with few requirements for aesthetics and cleanliness. This unit is perfect for a garage, workshop, small country house and other similar buildings.
Homemade furnaces for mining have the following positive aspects:
- low cost and simplicity of design;
- low requirements for the quality of combustible materials;
- good heat transfer performance;
- periodic kindling in winter does not in any way affect the unit itself;
- compactness and mobility;
- no need for complicated installation.
For reliable and uninterrupted operation of such a garage stove, you only need a good chimney.
The disadvantages of this device include low efficiency and the unpleasant odor of oil vapors that occurs during certain operating modes. It is also worth mentioning the appearance of stains on the floor or clothing that appear during direct contact with the waste. However, making a supercharged furnace more efficient is within the capabilities of any self-taught craftsman; we will tell you how to do this below.
The standard design of the stove is made in such a way as to heat the air. In order to provide heat to a home, a stove in this design is rarely used: oxygen is burned from the hot metal walls, and the air is dried. But for heating technical or industrial premises, this design is ideal because of its ability to quickly raise the temperature in the room. Such stoves can often be found in garages, car washes, greenhouses, warehouses and other industrial and technical premises.
What is required for production
Diagram of a Babington burner. (Click to enlarge) Assembling the burner is not at all difficult, but there are certain components that must all function correctly in order to ensure trouble-free operation.
The burner consists of the following parts:
- Babington nozzles, which can be used as a door handle. Usually located in the burner.
- A 20 lb (9 liter) propane tank that will act as a source of compressed air.
- The liquid fuel pump is usually a gear oil pump. Connects via copper pipe.
- A cut-off 100 lb (45.36 liter) propane tank can be used as a burner guide. Mounted at the required height. You can also get by with a blowtorch.
- A settling tank to collect impurities that have not been burned. A cut off unnecessary cylinder will do.
- A splash catcher, because without it there will be splashes everywhere. A piece of beam is used for this.
Design and principle of operation of an oil furnace
The design looks like two tanks, upper and lower, connected by a perforated pipe. They are offset relative to each other's transverse axis. Many people believe that tanks should ideally be cylindrical in shape, but in practice it turns out that rectangular ones are absolutely not inferior to them. In order for the structure to be installed on the floor, its structure is provided with legs. The furnace structure is shown in the diagram below:
The operating principle of the device is pyrolysis combustion of heavy fuel. Many people know that engine oil ignites at fairly high temperatures, and to burn it at home you will need to turn it into vapor. To create this effect, you will need to fill the bottom tank with waste through the hole about halfway, and then ignite it. But for this you will need a light fuel such as solvent or gasoline.
As gasoline burns, the waste heats up and begins to evaporate, as a result of which the vapors ignite and the furnace begins to “work.” The lower tank is the primary combustion chamber, where the fuel is partially burned due to the supply of air through the hole. To regulate the intensity of the process, a special damper is used, with the help of which the air flow is partially blocked. Maximum fuel consumption is 2 l/h, in temperature support mode – 0.5 l/h.
A do-it-yourself stove is equipped with a vertical gas duct, which has a large number of holes for the passage of secondary air. The combustion products that enter the perforated pipe mixed with waste vapors are burned well in it and inside the upper tank. After this, the flue gases exit the stove through the chimney pipe, going around the partition. Their temperature is quite high, and in order to save most of the heat along with the gases, it is recommended to carry out the following actions:
- lay the chimney along the wall through the entire room, making a slope towards the stove, this is a proven method, the walls of the pipeline have good heat transfer;
- mount a water circuit, an economizer, immediately behind the pipe, connecting to it a small tank, a battery, and a couple of heating radiators.
With a water circuit, an oil furnace can only operate in constant mode. If you intend to use it only periodically, then it is recommended to use antifreeze as a coolant. Thus, you can increase the efficiency from 40%, like a stove, to quite serious 50-55%.
What materials and tools are needed?
Any craftsman with the skills to work with a welding machine can easily and quickly make a stove with his own hands. First you need to prepare materials by checking the drawings of the waste oil furnace.
Following such detailed instructions on how to make a stove, all that remains is to assemble the prepared parts. To perform the work you will need a standard set of tools and accessories:
- welding machine;
- Bulgarian;
- drill with a set of drills;
- a set of metalwork tools;
- measuring devices.
After the assembly is completed, it is imperative to check the tightness of both containers and the quality of the welding seams, since over time the waste can seep through the smallest pores and defects. It is quite easy to perform this operation yourself; there are many methods. You can soap the joints and apply compressed air inside the tanks, or coat the seams with kerosene and visually identify defects.
To heat a medium-sized room, the power of an oil furnace needs to be increased; the design described above will not be enough. Using a similar method, power cannot be increased indefinitely, but options still exist. For example, a furnace equipped with two afterburning chambers, a retractable firebox and a separate fuel tank, as shown below:
Briefly about the main thing
An electric probe, a heated drain plug, a heating element and a heating plate - with these simple means you can safely heat the oil inside the engine in winter before starting. In fact, you don’t need to invent anything - each of the four options is available for purchase on many trading platforms.
In terms of power supply, there are no difficulties: a wire and a plug or a simple electrical circuit based on a relay and a toggle switch. Another question is whether it is necessary. The answer is short and advisory in nature: it is necessary, especially in cold weather worse than -10°C.
Many motorists are forced to think about how to heat the engine sump with their own hands due to the weather conditions in winter, which affect the normal starting of the engine. Some drivers mistakenly believe that in winter it is difficult to start the power unit due to weak battery power. In fact, the problem is caused by a change in the lubricant, which becomes very viscous, making it difficult to start the engine and the functionality of the crankshaft.
Ineffective lubrication in the initial minutes of engine start leads to excessive wear of the piston unit. These troubles can be avoided by heating the crankcase and eliminating excessive oil viscosity.
How to make a furnace for burning waste from a pipe?
If the body is already ready, the manufacture of the furnace is simplified. The operating principle of this device is based on evaporation in a plasma bowl. It is capable of delivering up to 15 kW of heat (it heats an area of about 150 m2). It is impossible to increase heat transfer by making any design changes (increasing the air supply or oven volume); you can disrupt the thermal regime by receiving more fumes in return for more heat, and this is unsafe.
If you have welding skills, you can independently make a furnace out of a pipe that runs on waste oil. Instructions on how to make a stove using waste oil:
- You will need a thick-walled pipe with a diameter of 210 mm, a wall thickness of 10 mm and a height of 780 mm.
- A bottom with a diameter of 219 mm is cut out of 5 mm sheet steel and welded on one side.
- The legs are welded to the bottom (bolts may be suitable for their manufacture).
- A viewing window is made from the bottom at a distance of about 70 mm. It will serve to track combustion and warm up the bowl at the “start”. Sizes are made based on personal preference for comfort. The door is made from a cut piece of pipe, first welding a thin collar. It must still close hermetically; for this, an asbestos cord is laid around the perimeter of the door. You can also use furnace casting, in this case the dimensions of the window must be cut to fit it, it will be bolted directly to the body, the presence of an asbestos cord is also required in this case.
- The smoke exhaust pipe is welded on the opposite side, 7-10 cm away from the top. It is made from pipes with a diameter of 108 mm and a wall thickness of 4 mm.
- A circle 228 mm in diameter is cut out of a 5 mm sheet of metal.
- A side is welded from a strip 40 mm wide and 3 mm thick along the edge.
- A hole with a diameter of 89 mm is made in the center of the lid, another hole with a diameter of 18 mm is made on the side, it will serve as another viewing window. A lid is made for it, which will also serve as a safety valve.
- A pipe is made to supply fuel and air.
- To do this, you will need a pipe with a diameter of 89 mm, a wall thickness of 3 mm and a height of 760 mm.
- 9 holes with a diameter of 5 mm are drilled around the circumference, at a distance of 50 mm from the edge.
- Two more rows of holes with a diameter of 4.2 mm are made 50 mm above these holes, 8 holes in a row.
- Having retreated another 50 mm, 4 rows of holes are made, 3 mm in diameter, numbering 9 pieces.
- Using a grinder, slots are cut 1.6 mm thick and 30 mm high; they should be located on the same side. There should be 9 of them around the circumference.
- A hole with a diameter of 10 mm is cut from the other end of the pipe, at a distance of 5-7 mm from the edge.
- A fuel supply pipe with a diameter of 10 mm and a wall thickness of 1 mm is inserted into the resulting hole. It should end flush with the air supply pipe. The length and bending angle depend on the location of the fuel container.
- The finished air and fuel supply pipe is welded to the cover. It is set in such a way that it does not reach the bottom of the case 120 mm.
Making a drip heater
Most often, craftsmen use old oxygen and propane cylinders with a diameter of 220 and 300 mm, respectively, to assemble droppers. The former are preferable because of their powerful thick walls that can last a long time and not burn out. A pipe made of low-carbon steel (St 3-10) with a wall thickness of 5 mm or more is also suitable.
Select rolled metal for other parts according to the drawing of the furnace with top feed of waste into the combustion zone. The blower fan is a “snail” from a VAZ 2108 cabin heater or its Chinese equivalent, the fuel line is a stainless tube with a diameter of 8-10 mm.
The manufacturing technology is as follows:
- Make a fire bowl from a piece of pipe or take a ready-made steel container. It must be removed through the inspection hatch, so do not make the tray too large.
- Cut openings in the body for the chimney pipe and cleanout hatch. In the latter, make a frame and install the door (possibly bolted).
- Make an afterburner. Take your time to drill all the holes indicated on the drawing; do the bottom 2 rows first. You will complete the rest while setting up the oven.
- Weld a cover and an air duct with a flange for mounting the fan to the afterburner. Attach the fuel supply device as shown in the photo.
- Assemble the heating unit and connect it to the chimney.
The afterburner in the photo is close-up - side and end views
To regulate the heating power, it is necessary to provide control of the fan speed and a device for dosing the fuel supply (as a rule, an automatic drinker with a jet break is used). According to reviews from craftsmen on a popular forum where heat extraction issues are discussed, fuel consumption in the furnace can be monitored visually. The trend is this: if the oil flows in drops at the break in the stream, then less than 1 liter per hour burns, and when a thin stream flows, more than 1 liter per hour.
Different designs of dropper bowls
After ignition and warming up of the heater, it is necessary to set the optimal operating mode. The procedure is carried out according to the same scheme as with the miracle stove: you need to achieve the most transparent smoke from the chimney by drilling additional holes in the afterburner. The ideal flame color is blue, normal is yellow, and reddish is unsatisfactory. In the latter case, low heat transfer, high consumption and soot formation are observed. For details about the design and assembly of the furnace, see the video:
Features of supercharged oil furnace
An exhaust furnace, the design of which has a built-in forced air injection into the combustion zone, will help to heat a private house with an area of 100 m2. These advantages are obvious:
- increased power;
- high fuel combustion efficiency;
- You can increase the efficiency of heat use by automating the device;
- efficiency.
It is somewhat more difficult to make such a stove during testing; in addition, this design directly depends on the stability of the power supply. In areas where power outages are common, special measures will be needed to ensure uninterrupted power supply using generators.
A home-made supercharged furnace operating in mining is a closed cylindrical vessel, inside of which there is a familiar afterburning chamber, which looks like a pipe with holes. At the bottom of the structure there is a door that provides access to the firebox and ignition. A chimney pipe is welded to the top of the cylinder, and using a conventional cut-in through the side wall or top cover, a forced air supply is provided in the form of a pipe with holes.
At the bottom of the vessel there is fuel (exhaust), which is supplied automatically as it is consumed. Feeding methods can be very varied: using a float mechanism or from a container using a submersible mechanism, it all depends on personal preference. The figure shows a diagram of a furnace with air injection, a water jacket and fuel supply using a float valve.
Using a small amount of solvent or gasoline, the waste is ignited at the bottom of the container, and then the blower fan is turned on. As soon as the fuel warms up, it begins to release vapors that are burned with excess oxygen. As a result, a powerful flame is formed, which spreads in all directions as seen in the photograph.
Advice. This design is distinguished by one feature: due to the strong flame, the bottom of the vessel becomes very hot. If it is necessary to heat one room, a blowing fan is installed outside opposite this zone. In cases where it is necessary to heat an entire house, the stove is equipped with a water jacket.
Combustion products leaving the furnace container can reach a fairly high temperature, about 400 0C. As in the previous design, in order to reduce heat loss, the chimney must be equipped with a heat exchanger connected to the heating system through a storage tank. This will help increase the efficiency of the furnace to 80 - 85%.
Factory options
Furnaces operating on waste oil are not only made by handicraft methods, they are also produced by industry. Moreover, there are both imported and Russian. But their type of construction is different.
European or American waste boilers belong to the category of liquid fuel furnaces. They use the supercharging principle: oil is sprayed into small droplets and connected to the air flow. And the fuel-air mixture is ignited. Imported factory stoves use the same principle, only a special burner is installed in which the fuel is heated before spraying.
To appreciate the difference in technology and structure, watch the following video. The device is completely different.
Most Russian-made furnaces use the first principle - there is a hot (plasma) bowl in which liquid fuel turns into gaseous fuel, mixes with air and is burned. The following units are built according to this principle:
- Gecko. Produced in Vladivostok. They make units with a capacity of 15, 30, 50 and 100 kW/hour. These are hot water boilers that are built into a water heating system. Prices from 70,000 rubles for a 15 kW boiler.
Russian-made Gekkon boilers undergoing testing - Typhoon. Produces them. These are heat generators: they heat the air. There are two options - Typhoon TM 15 and TGM 300, they produce 20-30 kW/hour (price: 45,000 rubles and 65,000 rubles, respectively).
- Herringbone-Turbo, available at 15 kW, available at 30 kW. These installations heat the air, but it is possible to make a water jacket.
- Teplamos furnaces with power from 5 kW/hour to 50 kW/hour. They belong to the category of heat guns (they heat the air). They begin work by electrically heating the plasma bowl; upon reaching the desired temperature, the fuel supply begins and the forced air supply to the combustion zone is turned on. The price of these installations is from 30,000 rubles for a unit with a capacity of 5-15 kW.
How to make a simple supercharged stove?
In order to make a supercharged exhaust furnace, you will need an old propane tank. Holes for the chimney and door are cut out in it, and you will also need to cut in a pipe for air supply; its diameter does not play a big role, but for us 50 mm would be ideal.
The holes in the pipe are made with a diameter of 9 mm according to the same principle as in a conventional stove. You will also need to make a lid with a seal from asbestos cord. To do this, you will need to cut off the top of the cylinder; for convenience, handles can be welded to the lid.
In order for a homemade furnace operating in mining to function in different modes and be adjustable, it is equipped with the necessary automation. To do this, you will need to purchase a controller with temperature sensors, which is connected according to a circuit with the fan. In this case, it becomes possible to control the heating temperature by reducing or increasing the performance of the supercharger.
Quite often, such a design is made without forced air supply. All work directly depends on the draft in the chimney, and regulation is carried out manually using a damper. Now you know how to make a working furnace with your own hands, having the drawings. And how it works in real conditions can be seen in the video:
Any material that for an ordinary person is just garbage that needs to be disposed of, in the hands of a master can bring tangible material benefits.
For example, scraps of pipes of different sizes, an old gas cylinder and other metal waste will be turned into a furnace, and used oil will be turned into fuel. Organizing heating using waste oil with your own hands is not so difficult.
We will tell you about the main options for installing heating systems using waste fuel. The article we have proposed describes in detail how to manufacture home-made devices that have been tested in practice. Taking into account our recommendations, you can achieve optimal results.
How to build your own apparatus based on the Babington burner principle: drawings
The principle of operation of a homemade burner, made based on the idea of Robert Babington, is clear from the drawings, where the components of the unit are visible:
Drawing of a waste oil burner according to Babington.
- waste oil tank;
- waste tray;
- fuel supply pipe;
- a small fuel pump for supplying portions of oil;
- hemisphere for spraying with a small hole;
- heating chamber with heating element (may be missing).
On a note! The testing nozzle is not a mandatory element for organizing the smooth combustion process. It can be successfully replaced by a nozzle - a small hole for supplying an air stream and fuel. To ensure that it does not become clogged, its serviceability must be monitored.
The used oil evaporates and flows down the hemisphere. These oily vapors are mixed with the air mass, resulting in a fuel mixture. The remaining oil that has not had time to be utilized flows into the pan, and from there through the tube back into the fuel tank.
This unit, based on Babington's patent, designed to burn liquid fuel, is quite simple. Therefore, it can be reproduced from scrap parts in a home workshop. Success depends on the exact compliance of the parts with their intended purpose and on the coordinated operation of all components. Therefore, before making a burner with your own hands, you should carefully calculate all the parameters.
The design of the burner is quite simple, so it can be made from available materials. Note! If you take one option as a basis, for example, the Gnome burner, using ready-made drawings and recommendations from craftsmen, it is difficult to make a mistake in the size and functionality of the parts.
General operating principle
If we want to get high-quality heating based on waste, we cannot simply take the oil and set it on fire, as it will smoke and stink. To avoid these unpleasant and hazardous side effects, you need to heat the fuel so that it begins to evaporate.
Volatile substances obtained as a result of heating will burn. This is the basic principle of operation of the heating unit during testing.
Application of perforated tube
To implement this principle, the design of the stove includes two chambers, which are connected to each other by a pipe with holes. Fuel enters the lower chamber through the filler hole, which is heated here. The resulting volatile substances rise up the pipe, becoming saturated with air oxygen through the perforation.
The resulting combustible mixture ignites in the chimney, and its complete combustion occurs in the upper afterburning chamber, separated from the chimney by a special partition. If the process technology is properly followed, virtually no soot or smoke is generated during combustion. But the heat will be enough to warm the room.
Using the plasma bowl
In order to achieve maximum efficiency of the process, you can go a more complicated route. Let us recall that our goal is to separate volatile components from the fuel by heating it. To do this, a metal bowl should be placed in the only chamber of the unit, which must not only be heated, but heated.
Types of homemade models
You can independently make from metal only different types of potbelly stoves, which differ in efficiency, but work on the same principle - while the fuel burns, the device releases thermal energy.
Therefore, the differences concern only:
- method of fuel combustion (burner);
- the material from which the heating device is made;
- a method of transferring heat from a flame to the air in a room.
The choice of burner is determined by the availability of materials and your skills, so evaporators are better suited for primitive potbelly stoves.
After all, their production does not require serious effort, but for air heaters, various nozzle options are better suited.
The heater is much more difficult to manufacture, but its efficiency is 1.5–2 times higher due to more intense air movement through special channels. Therefore, further we will talk about various options for manufacturing such furnaces using different types of burners and heat exchanger designs.
Balance of advantages and disadvantages
It would seem that the idea is practically devoid of shortcomings, but this is not so. To make an informed decision about using such heating in your home, you need to see not only the advantages of its use, but also the disadvantages.
Let's start with the advantages of the method. So, if you have regular access to waste fuel, which essentially is waste fuel, then you can effectively use and at the same time dispose of this material. Proper use of technology allows you to obtain heat with complete combustion of the material without releasing harmful substances into the atmosphere.
Other advantages include:
- simple design of the heating unit;
- low costs for fuel and equipment;
- the possibility of using any oil that is available on the farm: vegetable, organic, synthetic;
- flammable material can be used even if contaminants make up a tenth of its volume;
- high efficiency.
The disadvantages of the method should be taken seriously. If the process technology is not followed, incomplete combustion of the fuel may occur. Its fumes are dangerous to others.
It is not for nothing that the main requirement when arranging heating during testing is the presence of ventilation in the room where the boiler will be operated.
We list other disadvantages:
- since good draft requires a high-quality chimney, it must be straight and its length must be at least five meters;
- the chimney and plasma bowl must be cleaned regularly and thoroughly;
- the difficulty of drip technology lies in the problematic ignition: at the time of fuel supply, the bowl should already be red-hot;
- operation of the boiler causes air drying and oxygen burnout;
- independent creation and use of hot water structures can help lower the temperature in the combustion zone, which jeopardizes the efficiency of the process as a whole.
To solve the last of the above problems, you can install a water jacket where it cannot affect the quality of combustion - on the chimney. The listed shortcomings have led to the fact that the product, without significant modifications, is practically not used for heating residential premises.
Where to apply and how to modify?
Due to a significant list of disadvantages, waste oil heaters are rarely used in housing. Their use is possible only in utility rooms and in the case of trouble-free supply and exhaust ventilation. But they are widely used for heating technical and production areas.
Motorists use them as heaters for garages, and only if they have a good exhaust hood. Gardeners install them in greenhouses, livestock farmers install them in outbuildings. There is always a place for them at car washes, service stations, and warehouses where there are no flammable materials.
Often basic designs are subject to various kinds of modifications. For example, a water jacket or water heating coils are used for these purposes. Such equipment is included in water heating. Furnaces of this type must operate using automation, otherwise their functioning will have to be closely monitored.
Several successful homemade products
Using the basic design principle, you can always come up with a product that will best suit your own needs. We will try to offer you some options that are worthy not only of attention, but also of implementation.
Option #1 – with a finished body
This design may appeal to the home craftsman who has already mastered welding skills. Its essence lies in the use of a finished base as the body of the product - an oxygen or gas cylinder, pipe or barrel with thick walls.
To visualize the process of turning billets into a mining furnace, carefully consider the diagram below.
The product uses a plasma bowl and, therefore, drip feed technology. It is capable of producing approximately 15 kW of heat, which will heat up to 150 m2 of area.
You should not try to modernize this model with the goal of increasing its performance by increasing the air flow or changing the size of the combustion chamber. This can lead to an increase in the volume of soot and smoke, which is unsafe.
First, we need to build the base of the model - its body. To do this, we need a pipe with a height of 780 mm, a diameter of 210 mm and with thick walls (at least 10 mm). We cut out the bottom of the case from a steel sheet (at least 5 mm). The diameter of the bottom circle is 219 mm. All that remains is to weld the bottom to one side of the body.
The legs that you have to weld to the bottom can be made from strong bolts. To monitor the combustion process inside the pipe and be able to start heating the bowl, you need to make an inspection window in the housing 70 mm from the bottom level. To do this, a hole should be cut in the housing of such a size that it is functional - convenient for the user.
The cut out part of the pipe will be used to make the opening door. You just need to weld a neat collar to it and lay an asbestos cord around its perimeter so that the door hermetically closes the hole. We secure the door to the body using bolts.
For the chimney you will need a pipe with a diameter of 108 mm with thick walls (4 mm). It should be welded to the body on the side opposite to the one where the inspection window is cut. Step back 7-10 cm from the top.
To make the lid, a round blank with a diameter of 228 mm is cut out of sheet metal (5 mm thick). A bead should be welded along the edge of the workpiece. To do this, you need a metal strip 3 mm thick and 40 mm wide. In the resulting lid we make another inspection hole on the side with a diameter of 18 mm. Its door will act as a safety valve.
In the center of the lid we cut out another hole with a diameter of 89 mm. An air supply pipe will be inserted into it, which is made from a piece 76 cm long, 89 mm in diameter, and 3 mm in wall thickness.
We perforate the workpiece. To do this, we retreat 5 cm from the edge and drill 9 holes with a diameter of 5 mm in a circle. After 5 cm, you need to make two more rows of holes - 8 in a row, diameter 4.2 mm. After another 5 cm we make a fourth row of holes - 9 pieces, diameter 3 mm.
To complete the next job we will need a grinder. Along the edge of the pipe, from which we retreated 5 cm, we cut slots 3 cm high and 1.6 mm thick. There should be 9 such slots around the circumference.
From the opposite end of the pipe, 5-7 mm from the edge, cut a hole 10 mm in diameter. A fuel supply pipe with a diameter of 10 mm and walls 1 mm thick will be inserted into it. As can be seen from the diagram, it enters the air pipe and ends at the same time as it. The length of this fuel line and its bend angle depend on the location of the oil tank.
The fuel and air supply pipe assembly is welded to the cover. When installed in the body of the product, it should not rest against the bottom, but not reach 12 cm to it.
Let's start making the plasma bowl. To do this, you will need a thick-walled pipe (4 mm thick) with a diameter of 133 mm. We cut off a 3 cm piece from it. From a steel sheet 2 mm thick, we cut out a round blank with a diameter of 219 mm. We weld the workpiece to the segment and get a bowl.
Actually, the stove is almost ready. All that remains is to collect it. To do this, place a bowl inside the body 7 cm from the bottom. It should now be clearly visible from the viewing window located below. From the window the bowl is set on fire. We place the cover with devices for supplying air and oil in the place provided for it.
The chimney, which will be connected to the corresponding pipe, is made from a pipe 4 mm thick and 114 mm in diameter. The length of the chimney must be at least 4 meters. Its unique feature can be considered its exclusively vertical location. There should be no inclined areas! The outer part of the chimney should be insulated.
Operating principle of the device
Household fan heaters are compact devices that can easily be installed in almost any suitable place. To operate the device, you need electricity: both for the fan and for the heating element.
Such devices are often used in apartments, garages, and even for heating workshops, greenhouses and other premises. It all depends on the power of the device.
Any fan heater model has three components:
- fan;
- a heating element;
- frame.
The fan drives a stream of air through the body, the spiral heats this air, and the warm air flows throughout the room.
If you add automatic control elements to the device, you can set an acceptable air temperature. The device will turn on and off without human intervention, which will save energy.
To make a homemade fan heater, a regular household fan, the dimensions of which correspond to the body of the device, is suitable. Sometimes the housing is made based on the size of the fan
When operating the fan heater, you must adhere to safety rules. Do not place any objects or materials directly on the fan heater body or too close to the protective grille.
If the device is equipped with an overheat protection system, it will simply turn off. But if this module was not installed during assembly, the device may overheat, break down, or even catch fire.
A self-made fan heater can be of almost any suitable size and power. As a housing, you can use a piece of asbestos-cement pipe, a metal pipe, a rolled sheet of metal, or even a housing from an old system unit.
Usually, a fan is first selected and a heating coil is made, and then the type of device housing is determined depending on its filling.
The most important point when creating this heating device is safety: fire and electrical.
The heating coil in homemade devices is most often of the open type; it is simply twisted from suitable wire. Direct contact with a heated coil can lead to fires, burns, etc.
To make a fan heater with your own hands, you will need the most common tools, as well as basic knowledge of installing household electrical equipment
Therefore, the spiral must be properly secured inside the case, and the outside of the device must be covered with a reliable grille. The installation of the device's power supply also requires attention.
All contacts must be insulated; the base below is usually made of materials that do not conduct current: rubber, plywood, etc.
Compliance with safety regulations
For safe operation of homemade heating during testing, it is necessary to pay special attention to the quality of the oil. It should not contain substances that are easily flammable - gasoline, acetone and others.
The quality of automobile waste, as a rule, leaves much to be desired. When using them, carbon deposits may form, which will have to be cleaned off from time to time.
In addition, the following safety precautions should be observed.
- The diameter of the chimney should not be less than 10 cm. A sandwich chimney is preferable: less soot is deposited on its surface.
- There cannot be any flammable substances near the boiler, including the fuel tank. Only at a safe distance.
- Avoid getting water or other liquid into the chamber with hot oil. The consequences of such a leak are presented in the video in the final part of this article.
- During the operation of a boiler using waste oil, heating temperatures significantly exceed those achieved during the combustion of solid fuel. Therefore, thick-walled materials are chosen for this design.
- It is advisable to equip the boiler room with a forced air circulation system.
Do not leave the unit running unattended. This is an effective, but quite dangerous thing.
Conclusions and useful video on the topic
Master craftsmen make no secrets of their own achievements and are always ready to share their achievements and show homemade products at work. Pay attention to the video, which shows the same oven as in option #2, but with some modifications.
See how it works, what is the result of its use in external frost conditions to heat a fairly spacious garage space.
Once again, we draw your attention to the safety precautions that should be observed when using homemade stoves during testing.
Waste fuel, which you can get, if not completely for nothing, then for mere pennies, always attracts the attention of handy owners of garage workshops, greenhouses or other non-residential premises that require heating.
Yes, talented people can literally make a household item out of waste. But skill does not come from the outside: it is developed. Perhaps our information will help not only those who already know how, but also those who want to learn how to do everything with their own hands.
Would you like to share your own experience in constructing a heating device for testing? Do you have information that will be useful to site visitors who want to make a garage stove with their own hands? Please write comments in the block below, post photos on the topic, and ask questions.
This heater can heat rooms up to 400 cubic meters with good insulation, or up to 200 cubic meters. with poor insulation. The consumption of used oil will be from 300 ml per hour.
We equipped this heater with automatic equipment with two temperature sensors (flame presence sensor and room air temperature sensor), an oil pump, a heat exchanger blower fan and a boost fan.
The fan for blowing the heat exchanger heat exchanger also has a small automation in the form of a thermostat, which turns it on when the heater jacket heats up and turns it off when the air inside the heater cools down.
The oil pump supplies the waste dropwise into the perolysis bowl in a dosed manner and is controlled automatically. Depending on the operating modes, oil is supplied faster and slower.
Watch everything in the video, and if you have any questions, ask.
Second video about lighter fluid
Basic principles for designing a heat gun
To construct a heat gun yourself, you need to find a large-diameter pipe. Then make two holes slightly at the two ends on opposite sides: one of large caliber, the other of small caliber. The final products of combustion will come out through the large one, and fuel will flow through the small one. Then it is necessary to install a combustion chamber with an automatic catalyst, which will bring the gas mixture into a burning state
It is very important to maintain a high degree of tightness throughout the entire structure to avoid leakage. Then you need to attach a fan to the end of the pipe, where the small-caliber hole is located, and the structure is ready
How to make an electric heat gun - this question is not difficult, the main thing is to properly follow the safety rules when using it
This position is especially important for a tank with a gas mixture; it must be at least a meter away from other objects in the room. If possible, it is advisable to temporarily remove highly flammable materials while using a homemade heating device
Because warm air can catalyze many chemical reactions.
An electric heat gun made with your own hands does not require specialized skills or professional knowledge, and what is especially important is that there are practically no material costs for construction. However, during construction it is very important to comply with the points indicated in the drawing
(See also: Do-it-yourself greenhouse heating)
A homemade electric heat gun allows you to provide adequate heat to large areas. Since from a practical point of view, double heating occurs. The first source of heat is simple warm air, the second source is a gas mixture, after combustion of which a fairly significant amount of heat is released.
This design is mainly used for heating rooms in which, due to circumstances, it is impossible to ensure proper tightness, for example, repairs in the winter. An electric-gas gun is mainly used for heating large premises or for quickly heating small living spaces.
To make a diesel heat gun you will need a number of components, namely:
- the combustion chamber;
- diesel fuel tank;
- large-caliber metal pipe;
- catalyst;
- fan.
First you need to make a hole at both ends of the metal pipe: one large and one small. Then it will be necessary to install the catalyst into the combustion chamber in the metal pipe itself. In no case should you begin construction without having a plan for the future design, since in this case either it will not be possible to assemble the unit, or its final operation will simply be energy inefficient. (See also: Do-it-yourself gas generator stove)
The smallest diesel heat gun is used mainly for heating a small room and its main advantage is efficiency. The main feature of its design is the use of a small metal pipe and the absence of a fuel tank. That is, such a unit functions solely by converting cold air into warm air. The main thing to remember is that the fan must always have a separate power source in order to avoid a short circuit in the electrical network.
To build a diesel heat gun, it is necessary to determine the footage of the future room, and also take into account the degree of air insulation of the room where the future heating unit is planned to be used. From a practical point of view, the degree of air insulation can be determined by only one parameter: air ventilation is noticeable or not. Depending on this, you need to plan the future design. If the room is sufficiently insulated, then the gas mixture can be dispensed with and, therefore, energy costs will be significantly lower.
Many people often ask the question, how to make a diesel heat gun yourself? The answer is very simple, the first thing you need to do is make your own plan, and then carefully implement it point by point. The most common practical mistake many people make is precisely failure to comply with all points of the plan or lack of due attention.
