A winch is a lifting mechanism that is actively used to move heavy objects in warehouses, construction sites, and to tow cars. The winch is such an ancient invention that no one can say exactly when it appeared, but it is known that the construction of the countries of the ancient world was carried out with its help.
Today, the winch has been transformed, acquired an electric motor and a hydraulic drive system. Car enthusiasts and summer residents remain faithful to the traditional modification of the lifting device. You can make the simplest lifting mechanism with your own hands; it will be reliable and in no way inferior to factory models.
Purpose of the device
When driving off-road, a driver may encounter an insurmountable obstacle. Then the car will have to be pulled out of the mud or sand with something. A winch is the ideal tool for this. Some vehicles have the device installed on the front bumper from the factory. Purchasing a ready-made winch can cost a lot of money, so it makes sense to make it yourself using improvised materials.
A factory or homemade winch with a manual drive (or with an electric drive from a starter) allows you to pull out a car without a tow. Experienced car enthusiasts prefer home-made devices that fully meet their needs. Factory winches often fail or cost a lot of money.
There are different types of structures. It is impossible to say unequivocally which one is better. Different types are used for different situations and purposes.
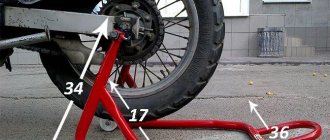
UAZ 3962 My model is on the list › Logbook › Wheeled “winch” aka “self-puller”
When I bought the jack, it turned out that it would not be possible to use it on a loaf, and then the idea came to me to make such a gadget that would allow me to jack the wheels.
Thought and done! It took two old brake drums and ten homemade stud nuts from 45X. Here is the result: But in the end it turned out that the idea of guano would not work in real conditions anyway. And it turned out that it all really works, like a self-puller... The first pancake was lumpy - there was no anchor (it’s done now)
the second application and subsequent ones are successful
With a free differential only on both bast shoes and a block is required
Well, a little video from before the anchor era:
I unsuccessfully tore the turf there and sat down on level ground, almost on the bridges
Or you can use it as a stationary swan or a second pair of wheels:
Impressions of the device: advantages 1. cheap 2. compact 3. really works, but I don’t recommend installing it on the front axle. disadvantages: 1. takes a long time to bring into working position 2. to pull forward, modification of the front bumper is necessary. 3. in a hard rut you can hang on them Summary: The device is useful and is permanently registered in the car. Here's how I broke this device (the bugs have now been fixed) And this version No. 2, by the way, is also not successful...
Device types
Classification is the first thing you need to know about the traction device. They are divided depending on the type of design, drive and technical features. Some types of winches are easy to make yourself - this is the simplest mechanism with a manual drive . And complex structures will work reliably only if they are manufactured in a factory.
This specificity must be taken into account when choosing a type for self-production. There are removable and stationary winches. The first option can be removed from the car, carried out maintenance or used for other economic purposes.
Classification depending on the type of drive:
- Manual. Its advantages are its small size and relatively light weight. The work is carried out according to the drum principle. The cable is pulled onto a separate reel, and it is rotated by hand. The disadvantage lies in the limitation of the mass with which work can be done - no more than 1 ton.
- Mechanical. The drum with the cable is rotated by the machine's engine. The design is heavy, so car enthusiasts rarely use it.
- Electric. The best option is for the drum to be driven by an electric motor. The latter is powered by a battery or the vehicle's electrical system. The load capacity in this version is 4 tons.
- Hydraulic. The design is complex, but it works silently and with great traction force. But such systems are unreliable and expensive. Another drawback is that it is impossible to make a hydraulic drive system yourself.
The manual winch is ideal for DIY. The system has a simple design that can be easily made from available materials. There are no complicated moving parts. You just need to decide on the parameters. If desired, you can install an electric motor on such a device, which will eliminate physical labor.
Purpose of the winch
The winch is designed to move stationary loads. The traction force is carried out using a flexible element (cable, rope) from the drive drum.
Small in size, this lifting device is used:
- on construction sites;
- in warehouses;
- on water bodies in a set of anchor and mooring systems;
- for towing cars;
- as a component of complex lifting mechanisms.
The simplest models of winches are loved by summer residents. With their help, you can move bulky objects with little effort.
A simple option made from scrap materials
Some motorists often drive into a field or forest, which may result in problems negotiating difficult areas - mud and sand. The car gets stuck, and you have to puzzle over how to get it out. The simplest hand-made homemade winch can be made in the field.
Materials:
- Scrap and pipe cuttings.
- Cable.
- A piece of pipe for a lever.
It is unlikely that you will have the materials with you on the road. But everything you need can be found in the nearest village. Instead of a cable, a strong rope will do.
Manufacturing procedure:
- Drive a crowbar or a small diameter tube into the ground to create an axle.
- A larger diameter tube is placed on the axle, to which a cable is attached.
- A lever is slipped under the lower turn of the cable. This could be another tube, a shovel handle, or a pole. The main thing is that the material is durable.
With such a device, which can be assembled in ten minutes, you can move any heavy object, not just a car. The lever is rotated so that the cable is wound around the pipe. Such a manual winch will help to quickly solve the problems of moving heavy loads. This is not a full-fledged device, but it will get the job done.
Pros and cons of the device
As often happens, car enthusiasts have ambivalent attitudes towards homemade pullers. Some consider them an excellent replacement for a winch, while others are exactly the opposite - categorically against their use.
The advantages of the self-extractor include:
- low cost of construction;
- the ability to do it yourself;
- ease of use and reliability;
- small dimensions;
- does not require special fastening;
- ease of installation (you can do without a professional);
- If used correctly, the traction force will be limited only by the engine power.
If used incorrectly, the self-extractor can cause quite serious troubles. There have been cases when a stake driven weakly into the ground could not withstand the load and broke the windshield.
There are other disadvantages:
- there is a risk of damage to the steering rods;
- the cable is wound unevenly around the disc;
- inconvenience of using the device.
If we compare a self-puller with a winch, then in terms of functionality and ease of use, the winch wins many times over. In cases where the driver goes fishing or relaxes in nature several times a year, a self-puller is an ideal option. If the car constantly drives off-road, you should think about purchasing a winch.
Manufacturing a system with a universal drive
The manual system is easy to manufacture. Of the special skills the master is required to do, only own a welding machine. Any metal will do the job. The appearance of the device is not so important, the main thing is performance and resistance to heavy loads. The frame should not be deformed.
Materials and tools:
- Rectangular tube for frame.
- Shaft for the drum, you can use a round tube.
- A sheet of metal with a thickness of at least 3 mm for the manufacture of drum disks.
- Threaded rods M10-M12, 24 cm long – 6 pieces, nuts.
- Tube diameter 14 mm - 6 identical pieces of 20 cm.
- Asterisks - large and small. Chain.
- Hubs to secure the drum to the shaft and secure the shaft to the frame.
- Drive lever.
- Cable with carabiner.
- Welding and electrodes.
- Grinder and grinding disc for it.
- Paint and primer.
- Wrenches included in the set.
Some materials are better purchased - for example, tubes for the studs and shaft. The rest can be picked up from old mechanisms - cars or motorcycles. Any metal will do, even used.
Manufacturing procedure:
- They sketch out a drawing, because this will make it easier to navigate during assembly - you won’t have to stand guessing over the half-finished product and think about what to do next.
- Cut out the frame parts from a pipe with a cross-section of 2 by 2 cm. Connect the frame parts together strictly perpendicularly. The cut on the workpieces is made at an angle of 45 degrees.
- Lay the frame blanks on a flat surface. The joints are spot-tightened by welding, after which they check whether everything is installed correctly. The angles of the connections must be strictly 90 degrees. If there is a lack of accuracy, corrections are made and then the parts are welded.
- Scale is removed with a grinder and a grinding wheel. The finished frame is sanded and then coated with a primer. After the latter has dried, the metal is painted with enamel in 2 layers. You can use regular paint. The goal is to protect the metal from corrosion, since operating conditions will be difficult, with dirt and moisture.
- Creating a drum. Take a sheet of metal and cut out 2 circles, their diameter is about 30 cm. On each circle you need to make 7 holes:
- One in the center. The diameter must match the shaft size.
- 6 holes at a distance of 7 cm.
- The discs are fastened together using pins. The pin is inserted into the hole of one disk in a vertical position. Tubes with a diameter of 14 cm are put on the studs, and a second disk is installed on them. The studs must not only be secured with nuts, but also additionally reinforced with locknuts to ensure reliable connections.
- The drum is ready, now the shaft is mounted. It is made from a metal pipe, but you can take a finished product from any mechanism. The latter option is preferable: since the accuracy of the factory part is higher, vibrations of the drum will be small or absent altogether.
- A large diameter sprocket is mounted on the shaft on the outside of the drum. A sprocket from a motorcycle gearbox will do. To secure the drum to the frame, the outer sides of the shaft must have hubs.
- The drum assembly with the shaft is mounted through the hubs on the frame. The structure is secured with bolts. Before installing the drum, you should prepare a platform on the frame. A drive will be installed on it - manual or electric. When using an electric drive, a motor is placed on the platform with a small sprocket attached to its shaft.
- A universal drive is often installed: a handle is placed on the reverse side of the output shaft of the electric motor. In the absence of electricity, the winch can be turned manually.
- It is important to properly tension the chain. It should not sag, but strong tension is also unacceptable - this will cause the sprockets to wear out faster, and the chain may break. Check the chain tension by rotating the drum - the chain should not hinder its rotation when the cable is unwound.
- The end of the cable is secured to the shaft and wound around the drum. A carabiner is hung on the other, free end of the cable.
- A shank is attached to one end of the frame. With its help, the winch is secured to the car frame.
The winch is created in a day. Since it will be installed on an SUV, the operating conditions will be appropriate. To prevent dirt and sediment from getting on the drum, it is covered with a casing. This way the mechanism will last longer and the cable will not wear out.
The design is simple, reliable, and easy to make yourself . Yes, it does not have the ability to change the gear ratio, there is no reverse and other additional functions. A self-made electric winch is capable of dragging a heavy load across the terrain, be it a car or something else.
DIY worm gear
The pride of many summer residents is a homemade walk-behind tractor, assembled with their own hands from parts that have served their age. Installing an electric motor or a small gasoline motor from an old scooter or motorcycle onto a frame with wheels is not difficult even for a novice amateur mechanic. But what you have to think about is the gearbox for the walk-behind tractor.
Walk-behind tractor design
Schemes for assembling homemade walk-behind tractors are as varied as the spare parts in each owner’s garage. Dimensions are also chosen for practical reasons.
With different compositions and dimensions, there are required elements:
- The frame is a durable structure for attaching other parts.
- Wheels - from homemade metal to factory-made rubber. The position of the wheel or wheelset axle is fixed relative to the frame by iron struts with pressed-in bearings.
- Engine - power from 5 to 10 horsepower. You can even use an electric motor with a battery, but the most popular are engines from a scooter or motorcycle. This choice is good because it has a ready-made speed control and even a transmission device.
- Gearbox is a unit for transmitting rotation from the engine to the actuator, converting speed and direction.
But the first gearbox you come across may not be suitable. You need to choose the type of structure, calculate the size of each part, so that the speed and power of movement of the mounted cultivator allows you to cultivate the land in a convenient mode - neither quickly nor slowly.
Types of gear units
The transmission of rotational motion from the motor shaft to the actuator shaft can be carried out by direct connection of the axes, if the speed and power of rotation of the engine are acceptable for operation, and the axes of the drive and driven shafts coincide.
Such cases are extremely rare, and with several attachments for different purposes, direct transmission absolutely cannot be used. To match the speed and power of the drive and driven shafts, 4 types of mechanisms and their combinations are used.
Main types of gears:
- belt;
- chain;
- gear;
- worm
The worm gear is structurally limited by the speed-reducing function; the rest can be used in both downshifts and overdrives. In addition, such a gearbox always has a driven axis perpendicular to the drive shaft.
This scheme is called an angular gearbox. In addition to the worm gear, you can change the direction of the axis using a spatial planetary mechanism. Belt and chain drives keep the driven axis parallel to the engine axis.
In simple devices, reverse is possible only when the rotation of the engine changes.
Motoblocks use engines with a high number of revolutions per minute, which can be verified in the product data sheet. This means that you need to make a gearbox with your own hands to reduce the speed, and it is better to choose what type of homemade gearbox for a walk-behind tractor, knowing the characteristics of each type.
Belting
The pulley or belt that transmits rotation from shaft to shaft is familiar to every motorist who has looked under the hood of the engine compartment. The rotation speed reduction coefficient is determined by dividing the radius of the small driven wheel by the radius of the large driving wheel.
The advantages of belt gearboxes are their ease of manufacture and repair, and a wide variety of parts. And the disadvantages of the belt:
- belt stretching, decreased adhesion to the pulley due to temperature and wear;
- slippage during sudden increases in torque;
- short service life.
The shortcomings are compensated by using a spring-loaded roller that presses on the surface of the belt between the wheels, and by using a toothed belt on pulleys with transverse chamfers. Belt gearboxes require the drive and driven pulleys to be in the same plane; bending or twisting the belt will quickly lead to it breaking.
Chain type
The operating principle of a chain drive is similar to a belt drive, but sprockets are installed instead of pulleys, and the belt is replaced by a chain. Such a homemade gearbox will not allow slipping, and under similar conditions it will work much longer.
Just like a belt gearbox, a chain gearbox must have drive and driven sprockets in the same plane, and its gear ratio is calculated by the ratio of their teeth. The weight of this design is greater than that of a belt design, but it is safer to install it on powerful walk-behind tractors.
Unlike a belt drive, a chain drive requires caution or additional protective measures.
If a rotating implement collides with a thick root in the soil, its drag force will be transferred to the motor, possibly damaging it.
Until the engine fails or switches off, it will try to rotate with maximum power along with the frame around the driven axis of the gearbox. The greater the engine power, the stronger the tipping torque will be.
Assembly Tips
Design development is carried out carefully, as well as assembly. The task is to treat each operation as responsibly as possible. The goal is to complete the assembly with high quality. This will avoid troubles when operating in extreme conditions. Therefore, there is no need to force the work, even if it is really necessary.
Steps to achieve high build quality:
- The work is done slowly and thoughtfully. A raw, unfinished unit cannot be used.
- Follow the drawing.
- Weld seams are treated with an anti-corrosion compound. Welding is done in carbon dioxide to obtain a high-quality seam.
- The electric drive control panel is placed as far away from rotating parts as possible.
- Electrical wiring is carefully insulated. The contacts are protected by additional insulation from moisture and dirt.
Negative results often arise due to hasty actions. The issue of moving cargo in a horizontal plane with its own device will be successfully resolved. To lift loads above the ground, the cable must be pulled over a strong support.
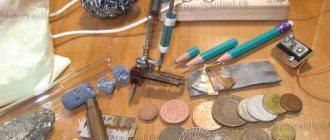
Disassembling the Chinese ratchet
To begin with, the cheapest ratchet for a Chinese truck was ordered. After receiving and inspecting this spare part, I began to think about further actions.
First, I cut off the rivets and removed the covers. I also unscrewed the plug and pulled out a spring and a ball - this was a worm stopper, it will no longer be needed.
conclusions
It is believed that homemade winches are less safe than their factory counterparts. In addition, they are in no way suitable for lifting loads. This is due to the fact that such devices do not have a stopper. But one of the main advantages of homemade winches is the fact that if assembled correctly, they can last even longer than factory-assembled winches.
Homemade winches made from starters are more compact, so when choosing an option before assembly, it is better to opt for these devices. The advantages of such winches will be noticed by the user immediately upon use.
Homemade winch for farming
All kinds of winches are an indispensable thing for motorists. But a homemade winch for the farm can also be successfully used.
Here, such devices are most often used to move loads along a horizontal surface, for example, heavy logs.
Farmers often use winches by installing them above the attic opening, thus moving loads between different parts of the room.
And some manage to use a homemade winch to plow the land.
To do this, just secure it to the edge of the site, hook the plow to the end of the cable and turn on the winch.
The mechanism pulls the plow, and the person can only give it direction. Using a winch, you can not only plow the ground, but also carry out all cycles of tillage.
We offer a winch for home work, or more precisely for hilling potatoes based on an angle grinder. Almost nothing is needed to make it. We present it as a modification of our winch with an electric motor.
When the engine turned out to be low-power, and I still had a new one, the idea arose to remake the drive. We decided to use an angle grinder. What came out of this is up to you to judge. We will tell you how the modification took place.
Let's start with altering the frame; the engine platform must be adapted to the angle grinder. The canopies and the original appearance of the site remain unchanged. The only thing you need to do is raise it on the frame with the corners to give tension to the belt.
The grinder has threaded holes for attaching handles. It is in them that we insert the bolts to secure the angle grinder to the platform, additionally weld the corner to the platform, as shown in the photo, and secure the electric drive with another bolt.
Then we weld the corners to the frame and raise the platform. We put a pulley on the grinder, put on a belt and carry out a dry test. Next, we carry out full testing on a potato field.
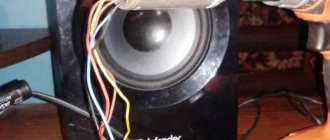
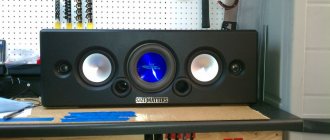
Winch
Winch
it is driven using a 2.2 kV grinder. Before that, there was a 1.5 kV three-thousander engine that could not be pulled.
The side walls are made of sheet iron 3-5 mm. Thinner sheets may become deformed when the cable is pulled under load.
The most important part is attaching the drum axis. For this, powerful bearings with podiums from some mechanism from the times of the USSR were used. You can find such spare parts at scrap metal collection points or in the workshops of abandoned factories.
The podiums are welded to the side walls. If you managed to find only bearings, weld the outer race. Nothing will happen to the rolling mechanism; the bearings simply cannot be replaced.
READ Converting Interskol Screwdriver to Lithium Batteries
We attach the gearbox to the frame so that its gear meshes with the power gear on the drum shaft. We remind you that initially we had a set of a shaft and a set of gears. We install an eyelet between the walls - a leash for the cable.
We connect the gearbox with the electric motor from the starter, put the winch in good shape: we clean the welds with a grinder, remove rust, and cover the tool with paint.
The design has been tested to lift weights up to 200 kg. In this version, two gearboxes are used - from an electric drill and a homemade one from a gas electric valve. It feels like there will be enough traction for another 100-150kg.
If you install a starter with its own planetary gearbox, the gear ratio of which will be added to the two existing ones, the capabilities of the device will double.
The video shows an example of a winch using a starter.
How to use the device?
Be sure to provide for the possibility of reversing the power supply to the winch. Reverse is necessary in such devices. Since this is a regular car electric motor, changing “” to “-” will change the direction of shaft rotation.
Let the power starter be old, from the solenoid relay
. And the start buttons come from ancient electromechanical devices. The button block can provide for polarity reversal.
If the winch is used in a car, do not connect it to the standard battery with the engine turned off. With a good load, you will drain the battery in 10-15 minutes.
The dimensions allow the winch to be placed on the bumper of an SUV prepared for off-road use.
And also interesting: Is it possible to install a kenguryatnik on Niva and other cars?
Pros and cons of self-pullers
The attitude of SUV owners towards self-extractors is ambiguous. Some consider them to be a completely worthy replacement for a winch, while others, on the contrary, speak extremely negatively about these devices. Let's try to highlight the main pros and cons that a self-extractor for a UAZ or other SUV has.
- simplicity and reliability of design;
- low cost or ease of self-production;
- takes up little space in the trunk;
- does not require special fastening or professional installation;
- When used correctly, the traction force is limited only by the engine power.
Perhaps the device has other advantages. Now let’s list the obvious disadvantages of self-pullers:
- risk of damage to the vehicle (especially steering rods);
- limited functionality (the winch can be used for many other tasks besides pulling out a car);
- uneven winding of the cable;
- inconvenient to use (it’s easier to pull the car out with a winch).
The list may also not be complete; perhaps self-pullers have other disadvantages.
Complex block system how to calculate power gain
If the system is designed in such a way that one simple pulley pulls another simple pulley, then this is already a complex system of blocks. To theoretically calculate the gain in strength, it is necessary to conditionally divide a complex chain hoist into simple ones and multiply the values of the gain from simple chain hoists.
For example, if the system consists of 4 blocks, and the first conditional simple pulley has a gain of 3. It pulls the second simple two-block pulley, also with a gain of 3. The total force that will need to be applied will be 9 times less. It is the 4-block complex chain hoist that is most often used by rescuers.
terms of Use
To operate lifting mechanisms safely, certain rules must be followed.
Homemade Pioneer crane
These rules apply to any lifting device:
- The load capacity must not be exceeded. A load that is too heavy may damage the device.
- The base must be stable. Homemade lifting devices should be located on a previously prepared hard horizontal surface.
- In bad weather conditions, you should also refrain from working with the crane. Strong winds will throw the crane off balance, and poor visibility may make it difficult to see people under the boom.
- Before operating a crane or lifting device, it is necessary to conduct an external inspection to identify any malfunctions. If malfunctions are detected, operation of the crane is prohibited.
- It should be remembered that when working with the lift, you should not make sudden movements. The load must be lifted smoothly. And most importantly, do not stand under any lifted load.
Application area
This mechanism is intended primarily for cars and drivers who spend most of their time off-road. A powerful car with a winch can overcome many more obstacles than a similar car without this device.
No matter how versatile a car is, sooner or later it will get stuck somewhere. This is where a winch comes in handy. One end of the cable is wrapped around a large rock or several trees and the car begins to be pulled out.
Factory winches, which are sold in auto stores, are quite expensive. On the other hand, the simplicity of the design of this device is quite simple, which allows you to create it at home and thus significantly increase the cross-country ability of any car.
What is a self-extractor?
A self-puller is, in fact, the simplest winch for a wheel. It is attached to the wheel hub using bolts or some other means. After this, a cable is wound around it, the other end of which is securely tied to the tree. The self-puller rotates along with the slipping wheel, wraps the cable around itself and thus pulls the car out of the mud.
Self-extractor for UAZ
Typically, the self-extractor is attached not to one wheel, but to two on the same axle. One end of the cable is attached to one wheel, the other to the other. The middle is passed through a block, which is attached to a tree or other reliable object. This ensures uniform winding of the cable and smooth movement. In addition, on conventional axles with an unlocked differential, installing a self-puller on one wheel is useless, because the device will simply block it, and the opposite wheel will slip in place.
You can also run the cable not directly, but through a system of blocks on the bumper so that the cable comes out from the center of the bumper, although this solution has dubious advantages. If possible, such a simple homemade winch should be installed on the wheels of the rear axle, because When installed on the front axle there is a risk of bending the steering rods.
Where to buy a self-extractor?
You can usually purchase this simple device by looking at ads on the Internet. Most of them are homemade and cost less than 1000 or even 500 rubles. In addition, you can make a self-puller with your own hands or order it from a local craftsman. This does not require any specific skills or tools. Drawings can be found on the Internet, or you can do without them altogether, because... The self-extractor device is incredibly simple.
The design of the self-extractor is very simple