Ceramic tableware is the most ancient piece of furniture, but despite this, ceramics do not lose their popularity these days. Pots, vases, teapots and cups, various plates - you can create all this yourself and put the warmth of your hands into the product. Such creativity is considered a refined work, so you need to approach it with special inspiration. One of the benefits of working with clay is that an item that doesn't turn out well can be fixed or remade. Clay easily forgives mistakes.
Clay dishes.
Features and benefits of earthenware
When using earthenware, you must follow some rules, then the ceramics will last a long time and will not lose its appearance. Before use, new utensils are soaked in water for 10-15 minutes. Typically, such dishes are used in the oven, and they are placed in a cold oven, then it will heat up evenly, and the food will be cooked well.
Ceramic kitchen utensils are more demanding in terms of care: washing should be done in hot water with the addition of soda or detergent with plenty of rinsing. If the dishes are not covered with glaze, they must be thoroughly dried. Storage takes place open, without lids and in a ventilated place, otherwise an unpleasant odor cannot be avoided.
It is important to pay attention to these features so that the dishes last for a long time.
There are many advantages of using:
- environmental friendliness of the manufacturing material;
- durability of use;
- easily tolerates both high and low temperatures: can be used in ovens, microwaves, and freezers;
- food does not burn to the bottom;
- scale does not form on the surface;
- does not emit odor or impurities;
- the ability to preserve the maximum useful elements of prepared products;
- can be used as a thermos;
- When food is stored for a long time, mold does not appear on it.
Seal
In this case, only one color of paint is used, so this method of decoration is best combined with additional coloring. Divided into two types:
Direct printing
It is used on surfaces without complex bends using a stencil. The foil template is attached to the product, and the paint is applied by hand or sprayed. You can use several stencils in succession. The finished product has clearly defined edges and there are no small details in the design.
Indirect or transfer printing
It is done a little differently: first, the drawing is created on paper, then transferred to the finished product. This is usually due to the complex surface of the source material. Also divided into types:
- Pad printing—the image is on a silicone cliche, which easily transfers paint to the ceramic upon contact. Due to its elasticity, the tampon transfers colorful patterns to complex (curved) and hard-to-reach areas
- Decalcomania, the image is transmitted according to the principle of decals. A picture is drawn with special paints, varnished on top and immersed in water. The varnish comes off the paper, this stain is carefully placed on the ceramic and sent to the kiln. The paint is baked on the surface, the varnish background fades. The process of transferring a design is only possible manually, this affects the cost of the product, resulting in labor-intensive and expensive work. But you can decorate dishes with the most complex shapes; the images come out reliable, with bright and rich colors
- Sublimation, the material is covered with a polymer film on top, to which a picture made with sublimation ink is tightly pressed. When heated, they penetrate the surface, firmly attaching themselves to it. The drawing is reliably protected from any mechanical impact
What is ceramics made from and where to get materials for work
Ceramics is fired clay from which the ceramist makes dishes and other products. Natural clay differs from polymer clay in its origin. It is extracted from the depths of the earth and is not subjected to chemical treatment.
To make ceramics, only fatty clay is used without any admixture of stones and other particles, otherwise the finished item may crack during baking. The modeling mass must be stored in special conditions and at a certain humidity. Natural breed comes in white, red, porcelain, blue and black (dark brown).
The most common is white clay, which after firing gives the product a nice ivory shade.
Red clay gives the red color to the crafted item. The raw material has a greenish tint due to the iron oxide contained in it. This clay mixture is pliable and does not crumble into crumbs, so it is used for sculptures and large objects. Porcelain clay allows you to make elegant, white crafts after firing.
Blue clay is used mainly for cosmetic and medicinal purposes.
Black or dark brown ceramic mass is the hardest raw material of all listed. After being in a hot oven, objects become an exquisite ivory shade.
Clay is also divided according to processing temperature:
- fusible;
- medium melting;
- refractory.
For a beginner in pottery, it is best to purchase ready-to-use ceramic mass: it is equipped with additional additives (molding, pottery wheel) that make it easier to prepare for creativity. When choosing a material, they are guided by the size of the fraction, the desired color after heat treatment and cost. The price largely depends on the manufacturer, but also on packaging and texture.
This is what clay for making dishes looks like.
In addition to clay, you need to purchase glaze and enamel to coat the finished product, as well as colored pigment for decoration. You can improve the properties of raw materials and give them texture using various additives. To glue the parts together, a slip mass is used. This is a special glue for clay. You can simply connect clay parts, but there is a possibility of the product splitting during firing. All necessary tools, additives and materials can be purchased at craft stores.
For serious work with clay, you will need more expensive equipment - a potter's wheel and a kiln. Such equipment is not cheap, but it is professional, and the products produced with it will become even more beautiful and high-quality.
Silkscreen printing
Silk fabric meshes serve as stencils. The paint is pressed through the mesh with a roller. The thickness of the paint layer depends on the thickness of the thread. The images appear in relief. To obtain a multi-color design, you also need several stencils; each layer must be dried or thermoplastic paints must be used to speed up the drying process. The colors harden almost immediately upon contact with the cool ceramics.
Unusual textures have been created to decorate ceramics:
- Variegation—the use of contrasting colors in different combinations
- Creating the texture of marble, wood for ceramics: if you use a rolling pin made of dense beech, then all the small lines are clearly imprinted on the raw product, and another unusual pattern will appear
- Gilding—liquid gold painting
- Arabesque—repetition of the same pattern several times
To decorate tableware and other ceramics, different methods are often combined to complement each other, increasing the strength and brightness of the designs, allowing for the creation of unique and repeatable creations. And if you want to try more ways of decorating and sculpting, we suggest visiting the Kolokol pottery school.
Techniques for working with clay by hand
Transforming a clay mass into an exquisite creation is a real art. There are several ways to make pottery:
- Modeling. This is perhaps the most accessible homemade clay art. The product is molded from a clay mass like plasticine, using stacks or improvised devices.
- Pottery. A more serious activity that requires special equipment, for example, a pottery wheel. You can use it to create a vase or kitchen utensil.
- Cool down. This method involves laying out a clay mass in a plaster mold. After hardening, the product is removed and fired. Great for the beginner ceramist creating tiles.
- Casting. The method is similar to the previous one, the only difference is in the forms. The resulting blanks are dried in molds and painted after removal.
No matter how the creation was made, the final stage is always firing. It is made in a pottery kiln at a temperature of more than 1000 degrees. Then you can cover the object with acrylic paint or a special glaze for ceramics. If the product has been treated with glaze, the firing is repeated.
If the product is planned to be made in a natural color, then milking is used. This technique involves covering the unpainted baked work with milk in several layers, and then baking again at a lower temperature.
Only by mastering the technique can you achieve truly worthy results. A beginner should not immediately sit down at a pottery wheel. Experienced masters strongly advise starting the practice with something simpler, for example, modeling.
Modeling
Modeling has been known since ancient times, but masters are constantly modernizing existing techniques and introducing something new. So, modeling happens:
- handmade from a single piece of clay;
- tape-harness technology;
- plastic (textile technology);
- kneading into the finished form;
- casting in plaster mold;
- drawing an object on a potter's wheel.
Hand modeling does not exclude stretching on a potter's wheel. Many craftsmen produce their products only by hand modeling. To understand the meaning and principle of operation, you can try tinkering with plasticine.
Modeling dishes from clay.
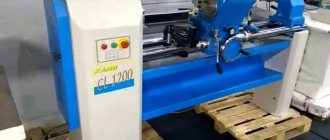
Potter's wheel
A potter's wheel is used to sculpt a round object. For a beginner, it is not necessary to purchase such equipment.
The circle comes with manual, foot and electric control.
Electric ones are considered the most convenient and practical. These are what ceramists usually buy. Interesting fact: working on an electric circle can be mastered in a few hours. A hand-operated tool can only be mastered by a master after months of training.
The potter's wheel differs by motor type:
- Collector - the simplest and most popular in compact models. It switches rotation speed smoothly and works quietly.
- Asynchronous - rotates in both directions, less noise. Such a device requires a certain skill to adjust the speed.
- The brushless DC motor is designed for professional use. It is reliable and produces a quiet sound during operation.
Making dishes using a pottery wheel.
A good initial experience can be obtained using a children's model of a circle. When starting work, the main thing is to understand how to position your hands correctly and feel confident, to work out the main technical points.
Cooldown
Kneading is popular among beginners. The technique is easy to understand and is illustrated in detail in the tutorials. The plaster mold for the warm-up was not chosen by chance. Gypsum is able to absorb excess moisture, and the product hardens well.
The process of kneading clay.
Casting
Casting differs from kneading in the forms used. In this case, the product is made with a thin, elegant wall. The strength of the craft increases only after firing.
Casting pottery.
Pour the solution into the mold
Attention!
Problem! Air bubbles in the clay solution affect the strength of the product. You need to pour the slip along the wall of the mold, like beer. Now we wait. You will see how the walls of the future mug appear along the contour of the plaster mold. The optimal wall thickness is 5-6 mm. If you see that the slip has become less, add more. When the walls have the required thickness, you need to drain the remaining solution.
How to do it right?
Carefully pour the remaining slip out of the mold. Use a knife to cut the sides of the mug flush with the mold. You can’t just turn the mold over and put it upside down: a droplet will form at the bottom. You need to leave the mug at an angle.
When the clay has set and become hard, remove the product from the mold. The fact that the mug is ready is indicated by the fact that it has begun to peel off from the plaster mold. If it is a collapsible form, then remove the bottom and separate the parts of the form.
Not only mugs and cups are made using the shlinker casting method, but also souvenirs and gift ceramics.
You can buy ready-made forms for pouring in hardware stores or online.
Materials and tools
Special stores for craftsmen offer a range of materials and tools for working with clay. It is better for a novice master to take a closer look at simpler and inexpensive ones, and while practicing, update his equipment in accordance with new requirements.
Tools
The main tool of a ceramist is his hands. However, you can’t do without special items:
- pottery wheel - the main equipment for making round products and dishes;
- string - necessary for cutting the finished work from the potter's wheel;
- tournette – a rotating metal stand necessary for cleaning, leveling the shape and painting the finished work;
- needles or awls, rolling pins, pottery combs and stacks are tools for modeling and adding texture to an object.
Set of pottery tools.
Where and what kind of clay to get
Most often, material for work is purchased in a specialized store. Of course, you can extract raw materials yourself in a ravine or quarry, but not everyone can do this, and the clay may not be suitable for modeling. It must be plastic, free from impurities, ready to be worked by hand or on a potter's wheel. As mentioned above, any extra inclusions in the material can ruin the entire work: the product will either crack in the oven or become an unexpected shade.
How to prepare for work
To prepare the clay for work, you should dissolve it in a large amount of water. It is more convenient to do this in an enamel basin. The solution is left to infuse for a while, then mixed and the kneading process begins. Foreign bodies, as well as voids that appear, can be removed from the material by denting. The working clay dough should be elastic and homogeneous.
Why plaster molds?
Plaster absorbs moisture, it will draw excess moisture from the clay slurry. It’s easy to work with plaster; you can make a homemade mold, giving it the required pattern and size.
Solid or collapsible forms?
The configuration and type of mold does not affect the quality of the ceramics, only the simplicity and convenience of removing the product from the mold. It is easier to remove the finished product from a collapsible mold.
Requirements for clay slip:
- A liquid solution without impurities, large particles and debris is used. Before cooking, sift the dry clay, remove debris, etc.
- Strain the finished slip through an old nylon stocking.
- The thicker the solution, the thicker the walls of the mug will be.
Technology of working with clay manually
Before you start working with clay, knead it by pressing on the piece with your fingers. Learning how to pinch off correctly is simple: you need to pinch a small piece, then tear it off. You can achieve a flat element by flattening the piece with your fingers or pressing it against the table with your palm.
There are also techniques necessary for sculpting:
- rolling – formation of spherical blanks;
- rolling - creating strands;
- cutting - dividing a piece into a stack;
- sharpening - pulling a piece with your finger to give it sharpness.
During the work process, the creation is regularly inspected and corrected in terms of proportionality and symmetry.
Reason 1: uniqueness
Obviously, you can make a 100% unique set or tea pair for your kitchen either to order or with your own hands. Doing it yourself will be much cheaper. You have the opportunity to bring to life the most daring ideas and make exactly what will fit perfectly into your interior or will be suitable as a gift for a loved one. And not only the design you need, but also the size you like. So it’s up to you to decide whether you’ll drink tea at home from huge cups and saucers, like in Tim Burton’s Alice in Wonderland, or from delicate tiny ones, like Kirsten Dunst’s heroine in the movie Marie Antoinette. By the way, making dishes for the home with your own hands is also convenient because, by creating, say, a service in the same style, you won’t have to overpay for soup or dessert plates that you don’t need, and then think about where to store them in your small kitchen. You will make for yourself only those plates, bowls, cups and mugs that you need and will use.
How to make a clay plate with your own hands
To make pottery with your own hands, you will need the following tools and materials:
- kneaded, prepared clay;
- rolling pin;
- container with water;
- wooden spatula;
- paper;
- Smooth surface.
Before starting work, you need to knead the clay so that it becomes elastic and non-sticky. When the material has become pliable, you can begin to create. The first step is to form a ball with a diameter of about 10 centimeters. A depression is made in the center. Gently pressing on the indentation, turn the ball clockwise, thereby stretching and enlarging the product.
Beautiful clay plates.
To make it more convenient to make rotational movements, the workpiece can be placed on a sheet of paper. The product already resembles a bowl. Using a wooden spatula or wet fingers, smooth, regular edges are formed. To complete the described step, you need to hold the future plate and instrument correctly. Rotate the sheet in a circle, and a spatula or fingers applied perpendicularly work to level it.
Next, wet your hands generously with water and smooth the inside of the product. Work is done. It may not be entirely ideal and may have an error in symmetry, but it is made independently, it contains the warmth and energy of the master’s hands.
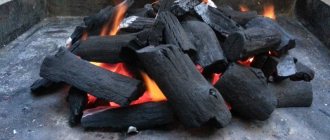
Burning
In order for clay crafts to be durable, they must be fired. A clay craft will become ceramic at a temperature of nine hundred degrees. Such heat can only be achieved in special ovens.
- Products made from baked clay attract with their primitiveness and original appearance. But not all craftsmen have the opportunity to burn clay efficiently. This is not a reason to abandon this type of creativity. Polymer clay will come to the rescue.
- It is easier to make products from polymer, self-hardening clay, since it does not require firing. This material is perfect for creating jewelry, dolls, souvenirs and flower arrangements.
How to make a clay mug with your own hands step by step
To sculpt a mug with your own hands, you will need the following tools and materials:
- clay ready for modeling;
- brush;
- container with water;
- putty knife.
The first step to making a ceramic mug is to form a ball 15-20 centimeters in diameter. Similar to working with a plate, a depression is made in the ball, and the workpiece rotates around the finger of the other hand. Next, you should start fashioning the cup from the bottom up.
To level the edges and the inside of the creation, you need to use a spatula. To make the bottom smooth and even, the cup is rotated and the material is smoothed with wet hands. Perhaps a flat, hard stand will be useful for ease of work.
How to master pottery at home
When thinking about making ceramics, it's likely that you may not have the time or resources to get started in a professional studio. If you're someone who spends a lot of time at home, looking after kids or the like, then oftentimes home is really the best and only option. If so, you should consider making pottery at home, and this article will show you how to figure it out, as well as tips and tricks to get you ready quickly and efficiently.
Decoration
Decorating is the creative part of pottery making. There are many decoration methods:
- relief;
- painting;
- glazing;
- inlay;
- embossing;
- seal;
- reservation;
- openwork;
- silkscreen printing.
Clay plate with painting.
Any chosen option will turn the product into an unusual, unique work of art.
Reason 2: environmental friendliness
Did you know that some factories still use hazardous materials, including lead and cadmium, when making tableware? Lead glazes are very beautiful; the content of this metal gives the product a special shine. The amount of lead, of course, is small, but using this glaze is strictly prohibited. It is not recommended to even store dry food in such containers, let alone pour hot soup into a bowl of lead. In some countries there is a law that prohibits the use of lead in foodware in any quantity. However, in Russia, China, Africa, and the countries of the Southeast region, there is often no strict control over manufacturers who neglect the issue of ethics and consumer health, since purchasing bright, glossy, lead-free glazes is much more expensive in large-scale production. So think ten times before you buy a cheap, bright cup or bowl. Why do you need dishes that poison you with harmful substances? By creating your own pottery, you can control which materials and glazes you use to create your plates and cups. By the way, ceramics can be bright and without colored glazes at all. There are natural colored clays: blue, green, black, and even ordinary light types have a beautiful natural color. In order for the products to be functional and not allow water to pass through, they must be covered with colorless or white glaze, but you can completely refuse colored glaze or choose safe, proven options.
How to use pottery correctly
By following the following rules and tips, you can preserve ceramic dishes for a long time:
- avoid sudden changes in temperature. Do not place the dish in a hot oven. You should put it in a cold place and then turn it on. Thus, the heating will be uniform and will not harm the dishes;
- contact with open flame is prohibited. Kitchen utensils will crack from sudden heat;
- to brew tea or herbal drink, pour boiling water over ceramic dishes;
- differentiation of kitchen utensils. Porous clay absorbs odors well, so you should not serve meat and sweet dishes in the same bowl;
- Do not use aggressive detergents. You can wash ceramics in warm water with the addition of soda or soap. Clay can absorb harmful chemicals;
- Thorough drying of products without a lid after washing.
Water is not allowed
When you have made the product, you need to dry it thoroughly and before firing, make sure that no water gets on it.
But you may ask, what happens if water gets in?
In an undried product, water is retained inside, and pressure is created from heating. Then an “explosion” occurs and a crack or chip appears on the product. This is not what we were going for, unless of course you were specifically trying to make beautiful artistic cracks.
Therefore, make sure that your product is completely dry before firing.
Reason 4: quality
A fairly common story: you bought beautiful dishes from an online store, but they turned out to be of poor quality. The bright pattern on the mug began to peel off after washing, and knife marks appeared on the plates. When producing your own dishes, especially in a ceramic workshop under the supervision of a master, such excesses are excluded. First of all, you will be taught how to handle clay correctly and will be explained the sequence of the technological process that will make your dishes high-quality and practical. So you can put it in the microwave and wash it in the dishwasher without any problems. There is no risk of cracks or peeling paint.
Reason 7: additional income
After you learn how to make dishes with your own hands, make all the necessary plates for your own home, and give gifts to your friends and colleagues, it is quite possible to monetize your favorite hobby. Create, say, an online store on Instagram and produce unique dishes in your own style to order. By the way, the most popular are craftswomen with a fairly narrow specialization, who make, for example, beautiful openwork cake stands, unusually shaped mugs, or fruit dishes with unique designs. Who knows, maybe one day you will make plates not only for your beloved man or relatives as a gift, but also for an entire restaurant.
Reason 3: replenishment
If suddenly careless guests or you yourself dropped your favorite mug and broke it, it’s okay. Your service will not suffer from this, because you can always make a couple more plates or cups. The same is true in the case of a new addition to your family - the birth of a baby or the marriage of a beloved brother. You can always make the missing set of dishes in a couple of hours. If you went on a trip, you probably noticed very interesting interior items - large vases, picture frames, candlesticks. Sometimes things are so beautiful, you just fall in love with them, but taking them with you from a trip is difficult and too troublesome. And why? It’s enough to take a couple of photos on your smartphone and, when you return from vacation, make copies of your favorite interior items or dishes, but in your own style and to suit your tastes and needs.
Reason 5: saving the family budget
If you haven’t decided to produce a whole set, but just for fun, you’ve attended an introductory course on ceramics and made a couple of mugs, then even this knowledge will be enough for you to begin to understand tableware, types of clay and glazes, and the artist’s skill. If suddenly in a store a saleswoman begins to assure you that a pair of coffee costs 20,000 rubles because it is rare blue clay, then you can safely clarify whether it is natural or just an artificial color (a pigment mixed into ordinary white clay)? Dyed clay carries no value and you are paying solely for the brand. Expensive ceramics stores also like to use stamping. This means that the shape of the products is not unique: the patterns that are applied to them can simply be printed, and not drawn by the master. It’s another matter if you see on a market somewhere in the mountains of Andalusia a designer jug made of expensive materials, unique in shape and painted. You will immediately understand how much work the master has put into it and why it costs a decent amount. By the way, if the author of this work of art is suddenly exhibited in some gallery or museum of modern art, then the purchased jug can also be sold at a profit to collectors.