Ceramic tableware is the most ancient piece of furniture, but despite this, ceramics do not lose their popularity these days. Pots, vases, teapots and cups, various plates - you can create all this yourself and put the warmth of your hands into the product. Such creativity is considered a refined work, so you need to approach it with special inspiration. One of the benefits of working with clay is that an item that doesn't turn out well can be fixed or remade. Clay easily forgives mistakes.
Clay dishes.
Features and benefits of earthenware
When using earthenware, you must follow some rules, then the ceramics will last a long time and will not lose its appearance. Before use, new utensils are soaked in water for 10-15 minutes. Typically, such dishes are used in the oven, and they are placed in a cold oven, then it will heat up evenly, and the food will be cooked well.
Ceramic kitchen utensils are more demanding in terms of care: washing should be done in hot water with the addition of soda or detergent with plenty of rinsing. If the dishes are not covered with glaze, they must be thoroughly dried. Storage takes place open, without lids and in a ventilated place, otherwise an unpleasant odor cannot be avoided.
It is important to pay attention to these features so that the dishes last for a long time.
There are many advantages of using:
- environmental friendliness of the manufacturing material;
- durability of use;
- easily tolerates both high and low temperatures: can be used in ovens, microwaves, and freezers;
- food does not burn to the bottom;
- scale does not form on the surface;
- does not emit odor or impurities;
- the ability to preserve the maximum useful elements of prepared products;
- can be used as a thermos;
- When food is stored for a long time, mold does not appear on it.
Photo of New Year's decoupage
Sources
- https://megamaster.info/kak-sdelat-dekupazh-butylok-svoimi-rukami/
- https://podelochkin.ru/novogodnij-dekupazh
- https://dnevnikmastera.ru/novogodniy-dekupazh
- https://gidrukodeliya.ru/novogodniy-dekupazh
- https://stranamasterov.ru/node/284436
- https://www.passionforum.ru/posts/84558-novogodnie-svechi-dekupazh-tarelki.html
- https://happymodern.ru/dekupazh-tarelok-svoimi-rukami/
- https://www.maam.ru/detskijsad/master-klas-novogodnii-dekupazh-bumazhnoi-tarelochki.html
- https://sdelala-sama.ru/dekupaj/4311-dekupazh-elochnyh-igrushek.html
- https://vplate.ru/dekupazh/butylok-novogodnyi/
- https://tytmaster.ru/novogodnij-dekupazh/
What is ceramics made from and where to get materials for work
Ceramics is fired clay from which the ceramist makes dishes and other products. Natural clay differs from polymer clay in its origin. It is extracted from the depths of the earth and is not subjected to chemical treatment.
To make ceramics, only fatty clay is used without any admixture of stones and other particles, otherwise the finished item may crack during baking. The modeling mass must be stored in special conditions and at a certain humidity. Natural breed comes in white, red, porcelain, blue and black (dark brown).
The most common is white clay, which after firing gives the product a nice ivory shade.
Red clay gives the red color to the crafted item. The raw material has a greenish tint due to the iron oxide contained in it. This clay mixture is pliable and does not crumble into crumbs, so it is used for sculptures and large objects. Porcelain clay allows you to make elegant, white crafts after firing.
Blue clay is used mainly for cosmetic and medicinal purposes.
Black or dark brown ceramic mass is the hardest raw material of all listed. After being in a hot oven, objects become an exquisite ivory shade.
Clay is also divided according to processing temperature:
- fusible;
- medium melting;
- refractory.
For a beginner in pottery, it is best to purchase ready-to-use ceramic mass: it is equipped with additional additives (molding, pottery wheel) that make it easier to prepare for creativity. When choosing a material, they are guided by the size of the fraction, the desired color after heat treatment and cost. The price largely depends on the manufacturer, but also on packaging and texture.
This is what clay for making dishes looks like.
In addition to clay, you need to purchase glaze and enamel to coat the finished product, as well as colored pigment for decoration. You can improve the properties of raw materials and give them texture using various additives. To glue the parts together, a slip mass is used. This is a special glue for clay. You can simply connect clay parts, but there is a possibility of the product splitting during firing. All necessary tools, additives and materials can be purchased at craft stores.
For serious work with clay, you will need more expensive equipment - a potter's wheel and a kiln. Such equipment is not cheap, but it is professional, and the products produced with it will become even more beautiful and high-quality.
Craft Decoupage Christmas plate
The red plate turned out like this! It doesn't replicate blue plates exactly, but the principle is the same. Go…
We need: 1. Plate 2. Napkin with a motif 3. Napkin without a motif (take one layer from a colored napkin) 4. Acrylic paints 5. Brushes 6. Outlines and glitters 7. Paste for creating snow 8. Palette knife (plastic or metal spatula for working with paste) 9. Glue for decoupage or PVA diluted with water (I have the latter) 10. A sheet of white A4 paper (landscape) 11. Pencil 12. Scissors 13. Double-sided or regular tape (not pictured) 14. Finishing varnish (preferably aerosol)
Take a plate of a suitable diameter (such as to indicate the thickness of the edges). Trace it. Cutting out a circle
We glue double-sided tape to the middle. Glue it to the plate. It can be on the face, or it can be on the back side. Tear the white part of the napkin into small pieces. You should not tear it very finely, as we will form folds, and it is inconvenient to do this from small pieces. We begin gluing the napkins along the contour, from the front side of the plate.
While the napkin is wet, form folds with your finger or brush. We create the relief.
It should look like in the photo. Continue gluing pieces to form a circle. Then, dip the brush in glue and coat the entire circle again. Leave to dry. Separate 2 extra layers from the patterned napkin. We cut out or tear out the motif to the desired size. For this design it is better to tear off. To make the motif bright and the edges snow-covered, paint the plate white. It is better to paint with a sponge, using point movements.
It should look like this. Be very careful when painting the relief! If you take a lot of paint, it will be a blot. Therefore, having collected paint on a sponge, “poke” it a little on the palette, and then apply it to the plate. It should look like in the photo - “frosty pattern.” When the plate is dry, glue on the motif. The most important thing is to take your time! Let's take a sample of a napkin, paint, brush and complete the plot in the right places. If you find it difficult to select a color, it is better to try not on a plate, but on a sample. Let's dry it. Let's go over the relief with gold paint and a brush with bristles. The brush should be almost dry so as not to create blots and smudges.
This is the effect you should get. Apply “snow” paste along the contour of the motif. (For blue plates, I spread the paste around the edge of the plate)
In daylight. A bit boring? No problem! Add red paint along the outline of the plate. And now the most favorite thing - glitters and contours. As your imagination tells you.
I really enjoyed working with these sparkles.
Beauty!
Let's admire it! Apply the finishing varnish and you're done!
Thank you all for watching my master class! There is nothing new in it! The techniques are well-known and not complicated. But if you have any questions, feel free to write and I will answer! And please exhibit your work, I wonder how it turned out for you! Good luck to everyone and create for the joy of those around you!
Techniques for working with clay by hand
Transforming a clay mass into an exquisite creation is a real art. There are several ways to make pottery:
- Modeling. This is perhaps the most accessible homemade clay art. The product is molded from a clay mass like plasticine, using stacks or improvised devices.
- Pottery. A more serious activity that requires special equipment, for example, a pottery wheel. You can use it to create a vase or kitchen utensil.
- Cool down. This method involves laying out a clay mass in a plaster mold. After hardening, the product is removed and fired. Great for the beginner ceramist creating tiles.
- Casting. The method is similar to the previous one, the only difference is in the forms. The resulting blanks are dried in molds and painted after removal.
No matter how the creation was made, the final stage is always firing. It is made in a pottery kiln at a temperature of more than 1000 degrees. Then you can cover the object with acrylic paint or a special glaze for ceramics. If the product has been treated with glaze, the firing is repeated.
If the product is planned to be made in a natural color, then milking is used. This technique involves covering the unpainted baked work with milk in several layers, and then baking again at a lower temperature.
Only by mastering the technique can you achieve truly worthy results. A beginner should not immediately sit down at a pottery wheel. Experienced masters strongly advise starting the practice with something simpler, for example, modeling.
Modeling
Modeling has been known since ancient times, but masters are constantly modernizing existing techniques and introducing something new. So, modeling happens:
- handmade from a single piece of clay;
- tape-harness technology;
- plastic (textile technology);
- kneading into the finished form;
- casting in plaster mold;
- drawing an object on a potter's wheel.
Hand modeling does not exclude stretching on a potter's wheel. Many craftsmen produce their products only by hand modeling. To understand the meaning and principle of operation, you can try tinkering with plasticine.
Modeling dishes from clay.
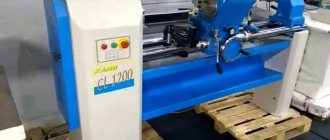
Potter's wheel
A potter's wheel is used to sculpt a round object. For a beginner, it is not necessary to purchase such equipment.
The circle comes with manual, foot and electric control.
Electric ones are considered the most convenient and practical. These are what ceramists usually buy. Interesting fact: working on an electric circle can be mastered in a few hours. A hand-operated tool can only be mastered by a master after months of training.
The potter's wheel differs by motor type:
- Collector - the simplest and most popular in compact models. It switches rotation speed smoothly and works quietly.
- Asynchronous - rotates in both directions, less noise. Such a device requires a certain skill to adjust the speed.
- The brushless DC motor is designed for professional use. It is reliable and produces a quiet sound during operation.
Making dishes using a pottery wheel.
A good initial experience can be obtained using a children's model of a circle. When starting work, the main thing is to understand how to position your hands correctly and feel confident, to work out the main technical points.
Cooldown
Kneading is popular among beginners. The technique is easy to understand and is illustrated in detail in the tutorials. The plaster mold for the warm-up was not chosen by chance. Gypsum is able to absorb excess moisture, and the product hardens well.
The process of kneading clay.
Casting
Casting differs from kneading in the forms used. In this case, the product is made with a thin, elegant wall. The strength of the craft increases only after firing.
Casting pottery.
Decoupage of Christmas tree decorations
Choose a New Year's ball with a flat surface and prepare the materials:
- sponge;
- thin brush;
- PVA;
- Images;
- white acrylic;
- scissors.
To prevent wrinkles and unevenness from forming when gluing to the base, select designs made from thin paper. Figures and patterns from New Year's napkins, magazines, catalogs, and booklets are suitable. You can print something from the Internet, even a photo, but consider the thickness of the paper.
Master class on decoupage of New Year's toys
- Preparing toys. Wipe the ball with a damp cloth to remove dust and dirt. Apply white acrylic with a sponge.
- Preparing images. If you are using napkins, cut out the pictures with a slight indentation from the outline. Separate the top layer of the napkin from the bottom, since we only need the first one. If the image is printed, then cut strictly along the contour.
- Gluing pictures onto the ball. Apply the cut-out section of the napkin to the ball in the desired, pre-thought-out place. Moving from the center to the edges, carefully coat the picture with glue. Blot excess glue with a soft cloth.
If you are decorating with a print, try it on first. Attach it to the toy, cut off all excess. Make cuts along the edges in places where the design will not be damaged. This is necessary because the paper is not as thin as a napkin, which means that folds may form when glued to a round base. After fitting, we make marks on the ball in the place where the decor will be. Apply glue to this area, attach the picture and level it with a PVA brush. After drying, carefully paint the edges with paint using a sponge.
On printed pictures, the ink may not be durable and may smear. To avoid this, coat the paper with water-based varnish in advance. Let it dry and only then start decorating.
Additional decor
If you feel like something is missing, decorate the toy with additional elements:
- Using a sponge and paint, apply a pattern or shape through the stencil.
- Draw original designs with shiny contour paints.
- Sprinkle the ball with glitter, having previously coated the desired areas with glue.
- Decorate with beads, beads, rhinestones or sequins using clear silicone or superglue.
- Tie ribbons and add lace or glitter paper to the base of the ball.
Your ball for decorating the Christmas tree is ready. Hang it on a decorative cord or ribbon.
Materials and tools
Special stores for craftsmen offer a range of materials and tools for working with clay. It is better for a novice master to take a closer look at simpler and inexpensive ones, and while practicing, update his equipment in accordance with new requirements.
Tools
The main tool of a ceramist is his hands. However, you can’t do without special items:
- pottery wheel - the main equipment for making round products and dishes;
- string - necessary for cutting the finished work from the potter's wheel;
- tournette – a rotating metal stand necessary for cleaning, leveling the shape and painting the finished work;
- needles or awls, rolling pins, pottery combs and stacks are tools for modeling and adding texture to an object.
Set of pottery tools.
Where and what kind of clay to get
Most often, material for work is purchased in a specialized store. Of course, you can extract raw materials yourself in a ravine or quarry, but not everyone can do this, and the clay may not be suitable for modeling. It must be plastic, free from impurities, ready to be worked by hand or on a potter's wheel. As mentioned above, any extra inclusions in the material can ruin the entire work: the product will either crack in the oven or become an unexpected shade.
How to prepare for work
To prepare the clay for work, you should dissolve it in a large amount of water. It is more convenient to do this in an enamel basin. The solution is left to infuse for a while, then mixed and the kneading process begins. Foreign bodies, as well as voids that appear, can be removed from the material by denting. The working clay dough should be elastic and homogeneous.
Technology of working with clay manually
Before you start working with clay, knead it by pressing on the piece with your fingers. Learning how to pinch off correctly is simple: you need to pinch a small piece, then tear it off. You can achieve a flat element by flattening the piece with your fingers or pressing it against the table with your palm.
There are also techniques necessary for sculpting:
- rolling – formation of spherical blanks;
- rolling - creating strands;
- cutting - dividing a piece into a stack;
- sharpening - pulling a piece with your finger to give it sharpness.
During the work process, the creation is regularly inspected and corrected in terms of proportionality and symmetry.
“New Year's candles” Decoupage plates.
Decoupage from a napkin. Acrylic paints, PVA glue.
Liquid pearl paste. I spread the paste with my finger. It turned out to create a slight roughness. The result was the effect of a thin crust of ice. I used two colors for the edging. Sparkles on spruce branches.
There is no painting, but I also decorated the candles with spruce branches cut from another napkin.
How to make a clay plate with your own hands
To make pottery with your own hands, you will need the following tools and materials:
- kneaded, prepared clay;
- rolling pin;
- container with water;
- wooden spatula;
- paper;
- Smooth surface.
Before starting work, you need to knead the clay so that it becomes elastic and non-sticky. When the material has become pliable, you can begin to create. The first step is to form a ball with a diameter of about 10 centimeters. A depression is made in the center. Gently pressing on the indentation, turn the ball clockwise, thereby stretching and enlarging the product.
Beautiful clay plates.
To make it more convenient to make rotational movements, the workpiece can be placed on a sheet of paper. The product already resembles a bowl. Using a wooden spatula or wet fingers, smooth, regular edges are formed. To complete the described step, you need to hold the future plate and instrument correctly. Rotate the sheet in a circle, and a spatula or fingers applied perpendicularly work to level it.
Next, wet your hands generously with water and smooth the inside of the product. Work is done. It may not be entirely ideal and may have an error in symmetry, but it is made independently, it contains the warmth and energy of the master’s hands.
DIY Basics
On New Year's Day it is customary to give candles, glasses, bottles of champagne, and Christmas tree balls. All of these traditional gifts can be made completely unique if you use one of the above techniques.
The only condition for selecting the original object will be the smoothness of its surface.
How to make a clay mug with your own hands step by step
To sculpt a mug with your own hands, you will need the following tools and materials:
- clay ready for modeling;
- brush;
- container with water;
- putty knife.
The first step to making a ceramic mug is to form a ball 15-20 centimeters in diameter. Similar to working with a plate, a depression is made in the ball, and the workpiece rotates around the finger of the other hand. Next, you should start fashioning the cup from the bottom up.
To level the edges and the inside of the creation, you need to use a spatula. To make the bottom smooth and even, the cup is rotated and the material is smoothed with wet hands. Perhaps a flat, hard stand will be useful for ease of work.
Decoration
Decorating is the creative part of pottery making. There are many decoration methods:
- relief;
- painting;
- glazing;
- inlay;
- embossing;
- seal;
- reservation;
- openwork;
- silkscreen printing.
Clay plate with painting.
Any chosen option will turn the product into an unusual, unique work of art.
How to use pottery correctly
By following the following rules and tips, you can preserve ceramic dishes for a long time:
- avoid sudden changes in temperature. Do not place the dish in a hot oven. You should put it in a cold place and then turn it on. Thus, the heating will be uniform and will not harm the dishes;
- contact with open flame is prohibited. Kitchen utensils will crack from sudden heat;
- to brew tea or herbal drink, pour boiling water over ceramic dishes;
- differentiation of kitchen utensils. Porous clay absorbs odors well, so you should not serve meat and sweet dishes in the same bowl;
- Do not use aggressive detergents. You can wash ceramics in warm water with the addition of soda or soap. Clay can absorb harmful chemicals;
- Thorough drying of products without a lid after washing.