This article is a continuation of our preparation for the New Year holidays. We have already talked about making small Christmas trees to decorate a table or windows, and we have also prepared stencils with the symbol of the year. Now let's talk about paper balls for the Christmas tree. If you have subscribed to a Facebook group, then it will be convenient for you to collect each of these articles in your personal piggy bank.
One of the advantages of paper toys is that you don’t have to save them, but make new crafts next year. These decorations are cheap in terms of money, but expensive, like pleasant memories of how we decorated our New Year. Decorate your home with bright New Year's toys that you can make at home from colored paper.
If spending on New Year's paraphernalia is not part of your plans, then DIY New Year's paper toys will be a way out for you. In addition, such an original gift for the Christmas tree will be remembered for a long time.
Paper balls made from small shaped pieces
To create such toys you will need:
- paper;
- scissors;
- glue;
- thread and needle.
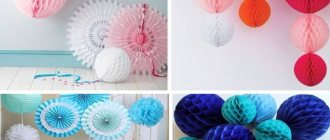
The photo below shows several variations of crafts. For example, a New Year's craft can be made from several semicircles.
No less beautiful balls are made from paper accordions.
Flowers with five petals can be excellent starting details - the ball will turn out to be more diverse in volume.
Toys made from circles folded into triangles will also look quite bright, especially if you choose paper of an unusual color for them.
New Year's toys made from rectangles glued together at the corners look very beautiful and stylish. The photographs show the oriental version, but no one bothers to use another color or theme in the same way.
Triangles in a circle, with curved sides glued together - this is a kind of classic. It’s not difficult to make such a ball, but it will delight you with its appearance no worse than factory toys.
Learning to create kusudama lotus
This model is not original, but is very popular. Therefore, to consolidate the acquired knowledge, it is suitable for children's production.
Required:
- 30 squares of paper 10/10 cm;
- Beads;
- Scissors;
- Glue.
The model can be made using the trimming technique or by inserting a bead. It is necessary to intercept the strips clearly in the center, since they tend to scatter to the sides. We use plain paper.
Manufacturing stages:
- Four sets of stripes are used to form the flower. Let's create an eight-petalled version of the lotus.
- The strip is folded in half based on the long side of our triangle. This is necessary to mark the center line.
- Next, we will focus precisely on its edge.
- The corners are bent towards the central part. It is necessary to bend all four corners.
- The sides are bent towards the marked central part.
- To create a bud, the upper corners are bent towards the center line as if in the opposite direction. The bent parts will be on the outside. All modules of the flower are added.
- The petals rise one after another in a circle. They overlap one another.
- All that remains is to decorate the product and it will be ready for use.
Now we have become acquainted with the history of kusudama and methods of simple crafts. This is enough for the initial familiarization of children.
Later in the process of increasing skill, you can consider more complex options.
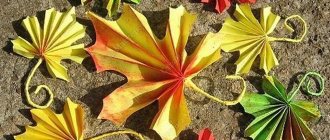
Balls made from long paper strips
Two-color balls made of stripes with a drop-shaped pattern are an excellent solution for a New Year's interior, decorated for the holiday in two colors. Small toys can be hung on the tree, and large ones on the walls, or you can arrange them without hanging them. In such a craft, the main color can be the color of the symbol of the coming year.
Balls made of stripes, patterned with circles of different sizes, look slightly twisted towards the bases and with small gaps in the body itself. Made with your own hands, they can even become a decoration for the New Year's table setting.
By increasing the distance between the circles in the strip, you can get a ball with perfect circles as a pattern. Perfectionists will be happy to see such decoration!
You can also make a handmade New Year's ball from straight, even strips of paper. In this case, you don’t even need templates - it’s easy to cut even strips yourself, and their length will determine the size of the finished product, which also depends on the creator.
Even strips can be glued together on their own; make circles out of them and glue them; secure the composition by stitching; attach bows made from the same strips on top; sew the parts together, putting a bead on top of them.
Straight stripes can be either perfectly smooth or patterned - just draw the pattern you like, enclosing it in an oval, combine several of these ovals, cut out this paper “queue”, then round it a little with a pen or pencil and fasten it to the edge and upstairs. If you use special stencils, this is one of the easiest ways to create a New Year's ball.
Fans of more “magical” figures will certainly appreciate the beauty of a ball made from paper with curved stripes. Such a ball will come out with small gaps, but to make it you will need only three wide stripes.
Templates and stencils for cutting out balloons for windows that can be printed
I won't leave you without balloons for the windows. Print it out! Cut out and decorate your windows with the paper balls from this assembly. I have found different patterns for the balls for you. To make your window look original and elegant. Some of the patterns can be decorated before sticking to the window.
Below you will see a selection of templates for cutting out Christmas balls from paper.
Paper circle balls
New Year's crafts are often very logical in their production. Also here - the ball is assembled from circles. Small rounds cut out of paper can be folded in half, cut, glued, folded, stitched, secured with or without strings. In gluing, you can combine two or three circles to give the finished product a different shape.
Let's create origami using the kusudama technique
To create a high-quality origami kusudama craft, you will need specialized paper. But for children's creativity, you can use a color analogue.
To work you will need:
- Scissors;
- PVA glue;
- Contrasting color threads;
- Several needles for fastening;
- Beads;
- Ribbons;
- Sequins;
- Buttons.
We use the classic kusudama pattern, it has been known for many years. But first, it’s worth learning the basics with its help, since even a child can do the job.
Paper honeycomb ball
Honeycomb balls will look great on your Christmas tree. The advantage of these products is that making them yourself is not at all difficult.
You will need:
- paper of two colors
- glue
- pencil
- roller
- thread with needle
- scissors
Cut ten circles with scissors, fold them in half twice and cut. Roll the resulting parts into something like a “funnel” and glue them together.
Thread the finished “funnels” together with a needle and thread to form a kind of ball. The thread must be long, because this is the basis on which the product will be held.
Decorate the resulting ball with traditional rain, glitter, or paint it with acrylic paints.
Curious legend
It turns out that the paper ball has a lot of history behind it. There are many legends in which this hand-made figure wears more than just an object for decoration. One of them says that many, many years ago, a certain master gave a rich man a large paper ball.
He found no use for it and brought it to his old mother’s house. Some time after this, the son became very ill and died. But the mother already expected this, because at the moment of her son’s death, his gift fell and shattered into small pieces.
Origami also has its own important history. Masters of this craft from ancient times bring interesting wisdom - you need to create only in a good mood, otherwise the figurine is burned.
Such things are said to be associated with a talisman; they carry the same meaning in a person’s life.
"Spiky" paper ball
This type of New Year's decoration is quite easy to make; even a child can handle it.
You will need:
- Paper
- Glue
- Scissors
- Thread and needle
- Unnecessary school eraser
Take a sheet of paper, fold the triangle from the corner so that you then get a square. Cut off the excess part. Fold the resulting triangle into another triangle 2 times.
Make cuts from each tip to the center, without cutting all the way through. Do the same with 10 circles.
By expanding the triangles, you get a square shape, with identical triangles at the ends. Roll each triangle into a “ball” and glue it with glue so that you get a sharp tip.
Take a school eraser, cut a small strip and cut it into 2 parts. Take a thread and a needle, making a large knot at the end of the thread in advance, and pass the needle through the eraser, through the middle of the resulting “needle” warp circle, on the smooth side.
Do this operation with 5 circles, attach the remaining 5 with the reverse side (smooth side up) so that the smooth side is at the top and bottom. Using two pieces of eraser, pull the thread tighter to create a circle. The ball is ready.
“Spiky” balls can decorate the Christmas tree and New Year’s interior. Feel free to decorate the spines with rain or glitter.
Add lightness and airiness
If you have an idea of airy, light, festive, then balloons made of corrugated paper are a good choice, because this is a universal material for various types of creativity. They do it differently. An option that is not difficult to implement.
We must try to evenly stack nine rectangular sheets 45 cm wide and 40 cm long on top of each other. An accordion is formed with a width of less than six centimeters. The middle of the accordion is stitched with a needle and thread. The edges curl in different directions.
The next step is to straighten the sheets and form a sphere, gluing the edges with glue. After attaching the ribbon, hang it up.
As you can already see, you can make handicrafts from a huge selection of materials. Giving tenderness is achieved through the necessary selection of the base material. A package of napkins is added to the standard set; the more, the more voluminous and airy the craft will be.
We fold a stack of 10-12 napkins, using a round stencil to draw a circle on the top. The entire stack is cut out and stapled in the middle. In the resulting figure, cuts of up to 2-3 centimeters are made along the edges. The napkins are shaggy to the sides until they acquire the required shape.
Volumetric paper ball
You will need:
- thread
- glue stick
- colored paper
- scissors
- simple pencil
- compass
Using a pencil and a compass, draw 5 circles (more if you want to make a three-dimensional ball) and cut out. You can cut out one circle and it will be your template for cutting out the rest of the circles.
Bend all the circles in half. Coat one side of the circle with glue and glue the side of the other circle there. Do this operation with all the circles. You should end up with an “accordion”.
Before gluing the first circle to the last, take a piece of thread, fold it into a loop and glue the ends of the thread to the paper. Glue the sides of the first circle to the last one. The decoration is ready!
What is papier-mâché
The papier-mâché technique is original. Not without paper, a balloon, a brush and homemade glue. The recipe is simple, prepared from one glass of wheat flour and five cold water, plus a pinch of salt to prevent mold from appearing.
The main task is to cover the inflated balloon with scraps of paper soaked in an adhesive solution in several layers.
When everything is dry, wait at least 12 hours, there will be a light, even sphere. For beauty, you can paint it with acrylic paints.
Craft New Year's ball
When imagining voluminous small balls, many people associate Christmas tree decorations. They can be either an independent Christmas tree decoration or a garland when several pieces are connected together. So, how to make a paper ball with your own hands?
For the first answer to the question of how to make a New Year's ball, you use colored paper (two to five colors), a pencil, a compass, thread, glue and scissors. 20 circles of the same diameter are cut out, approximately 7 cm.
Taking the first steps
To draw a circle, you can use a compass or any household item of the required shape and circle it. To save time, it is recommended not to draw separately, but to roll the sheet in several layers and draw one on top.
The more multiples you can fold in half, the more desired shapes will come out.
Then bend three sides to form a triangle. Repeat with each one. Alternately, in a circle, glue together any bent elements of the five. Glue the fifth to the first to create something similar to a hat.
You need two hats. The remaining 10 are glued in a straight line. Wrapping this straight line with the protruding sides facing outwards, glue the ends together. A ring has formed. By gluing the resulting parts along the curved parts of the circles together in the order cap-ring-cap, a Christmas tree ball is formed from paper.
How to hang it on a branch?
Hanging on a Christmas tree is easy. All that remains is to attach the string to the core of the hat. For a garland, the string should pass through both centers of the two hats. It is more convenient to provide for this at the final stage of gluing the three parts.
The second method of making a paper ball for a Christmas tree with your own hands is no less beautiful. You will need colored paper, a compass, a glue gun or double-sided tape, and wire.
There can be any number of colors, but even two will look harmonious and bright.
You need to cut out 16 circles of identical size, approximately 7-8 cm in diameter. Then fold it in half twice and tape each one together the second time you fold it. Glue eight of the outer circles together to form a hemisphere. Make the second half from the remaining eight.
The finished halves are connected with wire. It is advisable to take a thin one. The glued parts are strung on it. Can be glued for strength. The edges of the wire are bent on one side in the shape of a hook, for easy hanging, and on the other - with any decorative pattern, so that the toy does not fall down.
Important Tips
Various techniques and methods are considered on the topic: how to make a ball out of paper. Everyone can cope if they listen to five recommendations:
- Quality materials;
- Compliance with technology;
- Perseverance;
- Attentiveness;
- Wish.
Now this topic is gaining popularity. Applications in everyday life, at work, at holidays, at photo shoots, in schools and kindergartens. Significant advantages are: a positive effect on memory, imagination, development of fine motor skills, eye, perseverance and artistic thinking of the mind. A big plus is that handwork brings pleasure, including aesthetic pleasure.
Origami toys in the form of balls for the Christmas tree
Would you believe that from two squares 15 by 15 cm you get such an original ball? And at the same time it’s easy to do, it will take no more than 10 minutes (for beginners).
Fold the square in half diagonally. Then we fold it along the other diagonal.
We make 2 more folds: vertical and parallel.
We bend the sides of the square inward so that there is a triangle at the top and bottom.
We do the same with the second leaf.
Next, bend one part of the triangle so that this part looks up. Unbend the seam in the middle and fold the piece into a triangle.
We fold this triangle in half.
We perform all these manipulations with the remaining parts. Cut off the bottom triangles.
Take one of the eight triangles of the workpiece. And bend its edge towards the middle. And they straightened it out right away.
On all 8 petals we bend the lower part inward, along the fold lines.
We do all this with the second workpiece.
We make a hole in the top of one of the blanks and thread a loop through it.
We glue 2 blanks. We glue each curved section of the bottom to a section of the second workpiece.
creative ball
You will need: double-sided colored paper, ruler, glue, paper clips.
Master Class
- Prepare sheets of paper measuring 10x10 cm.
- Fold the square sheet diagonally.
- Fold the edges of the triangle up to form a diamond, then bend the edges as shown in the animation.
- Apply glue to the sides of the workpiece, then glue them together to form a petal.
- Make 5 petals in the same way and glue the flower.
- Make a total of 12 of these flowers.
- Start assembling the ball: take a flower, apply glue to the middle fold of any petal and glue the second flower, then secure with a paper clip.
- Apply glue to the petal of the 1st and 2nd flowers that are located next to each other, then glue the 3rd flower, forming a triangle.
- Secure the 3rd flower with two paper clips.
- Glue the 4th and 5th flowers in the same way and do not forget to secure with paper clips.
- Apply glue to the petals of 3 flowers that are located next to each other and glue the 6th flower, then secure with 3 paper clips.
- Make the other half of the 6-color ball in the same way.
- Apply glue to each petal and glue the 2 halves of the ball together, then secure with paper clips.
- Wait until dry and remove the staples.
Kusudama "Diamond"
You will need: 6 sheets of A4 double-sided colored paper, PVA glue, scissors.
Master Class
- Make squares from A4 sheets.
- Bend the squares diagonally on both sides.
- Fold each corner toward the center of the square, then straighten them out.
- Fold the sides of the squares to src=»https://sp-ao.shortpixel.ai/client/to_webp,q_glossy,ret_img,w_700,h_517/https://mypapercraft.ru/images/wp-content/uploads/2018/ 06/43-700×517.jpg" class="aligncenter" width="700″ height="517″[/img]
- Fold the top and bottom sides towards the center.
- Use your finger to reach the hidden edge of the paper on the right from the inside, holding the center of the workpiece with your palm.
- Lay out part of the workpiece as shown in the image.
- Place one finger on top in the center of the workpiece and place 2 fingers under the paper at the top and bottom.
- Remove your finger from the center, and bring the two extreme ones together and press the sides together. Do the same process on the left side.
- Pry your finger and open each corner.
- Fold the corners towards the center to form a square on top. Fold all 4 corners in this way.
- Fold the sides of each square toward the center.
- Lift and straighten each side.
- Fold the 4 overhanging corners under to create an octagon.
- Make 6 blanks this way.
- Glue the 4 side elements at the corners, then glue the bottom and lid.
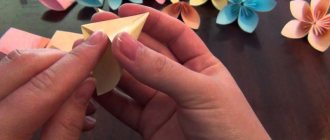
"Rose"
Kusudama, reminiscent of a pink bouquet, looks no less impressive on the New Year tree than “Venus”. Such decoration is difficult not to notice even among expensive and fashionable purchased toys. Kusudama “Rose” will also make a wonderful hand-made gift. It is not as complicated as it seems at first glance and is accessible to beginning origamists or children over 8 years old.
First, let's try to put together a simplified version. Diagram for one rose-shaped module:
Step-by-step instruction:
You will need 12 squares, 8x8 cm in size. You can use paper of several colors, but without patterns, they will interfere with the perception of the complex shape of the model.
- Fold one of the squares in half from top to bottom.
- Then from right to left. We iron the folds with a stack so that the figure does not open.
- Fold the new square, ¼ the size of the original one, diagonally, matching the upper left and lower right corners. Return the workpiece to its original position. Open the “pocket” on the left, straighten and smooth it out.
- We turn the model over.
- Repeat step 3 on the right side.
- We get the basic figure “Double Triangle”. We lower the top to the base and straighten it.
- We open the workpiece from below, flatten the central part into a square. Turn it over.
- Raise the triangle in the center vertically. Fold the upper left part along the dotted line. We do the same with the lower right quarter.
- The result is a cross-shaped figure, separated by vertical partitions.
- We take the protruding part and carefully twist it clockwise.
- Turn the workpiece over.
- We bend the protruding triangles inward.
- This is what the rose module looks like.
Assembly:
- We make 11 more identical parts, repeating steps 1 – 12.
- We take three modules of different colors. Apply glue as shown in the picture.
- Let's connect.
- In the same way we assemble three more structures. We glue them together based on the diagram.
- Christmas decorations with roses look best on classic-style Christmas trees:
Having mastered this kusudama, you can move on to a more complex ball, known as the “Curler Rose”, named after the unusual modules with curls. The author of the model was the Belgian origamist Herman van Gubergen, known for his innovative ideas and love for optical illusions. The master does not strive to blindly copy the techniques of classical Japanese paper-making; he offers his own concepts and “Rose Curler” is no exception. Those who start making it will receive double pleasure from both the learning process and the result.
The model will also require 12 squares with a side of 8 cm.
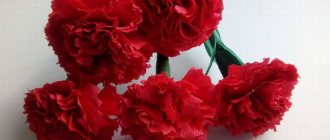
How to make pompoms from crepe paper
A real holiday would not be complete without various decorations. It is the decorated hall that creates the mood for the guests and the birthday boy. Thanks to balloons, garlands and other beautiful things, you get the feeling that a fun holiday is about to begin. All that remains is to choose the appropriate decor, or make it yourself.
Paper pompoms are very easy to make and look elegant. You can buy these pom-poms ready-made, but creating holiday decorations with your own hands is always more enjoyable. Moreover, even a child can figure out how to make pom-poms from corrugated paper.
This decoration will be appropriate for any holiday. Light, airy pom-poms can be hung from the ceiling or collected into garlands. They will decorate the photo zone and candy bar, and will successfully complement the decor of the hall or room.
If you decide to make paper pompoms with your own hands, the master class below will help you with this.
Materials
To make pompoms we will need:
- corrugated paper (we have 50 cm * 200 cm);
- scissors;
- ruler;
- thread or ribbon.
Pompoms can be made not only from corrugated paper; tissue paper will also work. Pompoms made from corrugated paper are denser and hold their shape well, while from tissue paper they are lighter and airier.
How to do
Now let’s look at the process itself, how to make paper pompoms with your own hands.
First, divide the roll of corrugated paper into two equal parts. You will get two pieces of 25 cm*200 cm. These two pieces are just enough for two pompoms.
We take one of them and divide it into 8 equal parts. At this stage you can do without a ruler, just fold it in half and cut it. We do this until we have 8 squares with a side of 25 cm.
We fold the squares in a pile and begin to form an accordion out of them - we bend the edge of the paper by about 1-1.5 cm, then turn it over and bend it again, but in the other direction. We press each fold a little and smooth it out with our fingers. This is what the accordion should look like as a result.
Next we need to find the middle of this accordion. Here you can take a ruler to accurately mark the middle. If you try to do this by eye, there is a risk that the pompom will turn out uneven. The middle found using a ruler is tightly tied with thread or thin ribbon. Leave the end of the thread long enough so that you can then hang the pompom from it.
Next we have to work with the edges of our accordion. There are two options here: you can make them sharp, or you can round them. It’s worth noting right away that this is not an easy task, because the paper accordion is quite thick. Therefore, involve the strong hands of dad in the creative process.
When you trim the edges, your pompom is essentially finished.
In order for it to have a finished look, it must be carefully straightened, but if you plan to celebrate the holiday away from home and the decor will need to be taken to a restaurant or cafe, then it is better to transport it in this folded form so as not to wrinkle it on the road.
Then on the spot you will dissolve it. If the celebration will take place at home, straighten the decorations immediately so that later, on the holiday, you do not waste your precious time on this.
How to straighten the pompom: carefully, one by one, bend each petal and open it. Do not pull too hard, because the corrugated paper will stretch and the ball will lose its appearance. This is what the ball looks like, half of which has already been flattened.
And this is what the finished product looks like.
Where to begin
To begin with, it is worth showing the kids a photo of kusudama in its various versions. This will help you realize that we are talking about a paper craft. Next, to broaden a child’s horizons, it is useful to plunge a little into history.
The word “kusudama” itself is formed by combining two others - “kusuri” means medicine and “tama” means ball. The result is a “medicine ball”. This way you can learn several Japanese symbols from this complex language.
In ancient times, there was actually a cult of paper in Japan. It was used only for the most important matters, since there was little material. It was first brought from China.
They began to create balls, diamonds, and squares from paper to decorate homes. They are believed to fill the home with positive energy and delicious smells as they were infused with camphor oil, medicinal herbs, incense and many types of dried flower petals.
The first versions were created in the form of boxes, they were sewn together with threads. Later, new models of this craft appeared. The evolution can be seen in various pictures of kusudama based on the interior of Japanese houses.
Paper ball interesting design
You need to cut out 8 circles of the same size, then fold 3 edges to form an equilateral triangle. Sew half a line on each side. Then we begin to fasten all the pieces together. At the end, glue a loop of rope. So an interesting ball is ready.
Sources
- https://new-year-party.ru/novogodnie-shary-iz-bumagi/
- https://podelochkin.ru/novogodnie-shary-iz-bumagi
- https://svoimirukami.guru/kak-sdelat-shar-iz-bumagi/
- https://daymam.ru/novogodnie-shary-iz-bumagi.html
- https://svoimirukamy.com/shary-kusudama.html
- https://all-origami.ru/novogodnie-shary-origami/
- https://art-fashn.ru/spitsy/bumazhnye-shary-svoimi-rukami-shemy-i-master-klass-iz-gofrirovannoj-bumagi.html
- https://sdelatbumagi.ru/drugie-modeli/shary-iz-bumagi-svoimi-rukami.html
[collapse]