Useful tips
To decorate a Christmas tree, home or office, it is not necessary to purchase a large number of New Year's balls.
You can make beautiful balls with your own hands at home from various materials.
Just stock up on a few simple tools to create Christmas balls, take the time to make crafts, and be patient.
All New Year's balls are made quite simply, and even children can be involved in working on them.
On our website you will also find:
- How to wrap a gift in 15 seconds using the Japanese method
- What crafts to make for the New Year: Christmas trees, snowmen, New Year's balls
- Original DIY crafts for the New Year
Volumetric balls for the New Year: a ball made of foam and fabrics
You will need:
- foam ball
- skewer
- PVA glue
- glue brush
- ribbon
- scissors
- beads.
1. Using a skewer, make a hole in the center of the foam ball.
2. Now take the ribbon and use a skewer to thread it through the hole. Pass the end of the ribbon through a small bead and tie the ribbon in a knot.
3. Pass the other end of the ribbon through another bead and also tie it in a knot. You can secure the knots with PVA glue.
4. In a bowl, dilute PVA glue and a small amount of water.
5. Cut the fabric into several pieces of different shapes and sizes.
6. Using a brush, apply glue to the ball and begin carefully gluing pieces of fabric.
*Do not apply too much glue.
Alternative
If a guy wants to impress his girlfriend, he can cut out a heart out of foam and paint it bright red. You can buy beautiful beads as a gift and attach them to your heart. Offer your heart to her as a gift and present it to her at the most romantic moment of the date. A girl should appreciate not only the gift itself, but the attention and creativity, the originality of thinking of the person giving the gift. And if the occasion is interesting: a certain number of months from the date they met, the first kiss, the first time they came to the park, you are doomed to admiration.
How to make a New Year's ball: Golden Snitch
You will need:
- thin wire
- thin paper (papyrus paper)
- PVA glue
- glitter
- scissors
- self-hardening modeling compound
- acrylic paint
- paint brush.
1. On paper, draw a pattern of wings for your Snitch. Use this pattern to model thin wire wings. Twist the ends of the wire.
2. Place a sheet of thin paper on the table and place wire wings on it.
3. Apply a little glue to the wire on several sides and carefully bend the paper.
4. Carefully trim the paper around the wire to create wings.
*You can paint the wings using acrylic paint.
*You can also apply glitter. To do this, coat the wings with PVA glue and sprinkle with glitter.
5. Glue the wings to the ball using self-curing modeling compound.
* You can also use a foam ball instead of a glass ball. In this case, the twisted ends of the wire wing are simply screwed into the ball. The foam ball will also need to be decorated with paint, for example.
Why do you need to create it yourself?
Why know how to make a ball out of polystyrene foam? After all, now in any craft store you can buy ready-made plastic balls. But there are advantages to doing them yourself:
- The cost of making a craft is reduced. You can confidently say that you will make a craft from start to finish. Styrofoam is used, which ultimately should have ended up in the trash.
Of course, there are also disadvantages:
- It takes more time to create a craft. The balls may not turn out as perfectly smooth as store-bought ones. You end up with a lot of garbage.
Christmas balls made from chewing candies for the New Year
You will need:
- foam ball
- ribbon
- pins
- hot glue
- small chewy candies or marmalade
- scissors.
1. Take a foam ball and use glue to glue a piece of ribbon to it and thread it with a pin on top so that you can later hang the ornament on the Christmas tree.
2. Start adding glue drop by drop and gluing the candies or marmalade (or pieces of marmalade) to the ball.
* Instead of sweets, you can glue almost any decorations: buttons, sequins, small tinsel, etc.
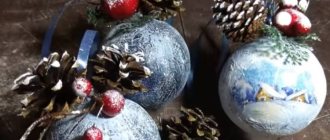
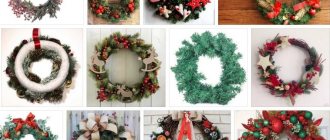
A ball of acorn caps for a Christmas tree for the New Year
You will need:
- acorn caps
- acrylic paint and brush
- foam ball
- jute rope
- thin wire (floristic, for example)
- thin tape
- glitter (optional)
- PVA glue
- hot glue.
1. To paint the foam ball, choose a color close to the color of the acorn caps. You can skip this step. It is only needed to hide the white color of the ball.
2. Start adding hot glue drop by drop and attaching the acorn caps. You can pierce the foam ball a little with these caps. Glue the hats as close to each other as possible, but don't worry too much - there will still be gaps, and that's normal.
3. Make a loop from the wire, twist the ends and screw them into the ball. Now you can cut the rope and thread it through the loop to hang it on the tree.
4. You can also make a bow out of ribbon and hot glue it to the top of the balloon.
5. You can apply PVA glue to the outer parts of the acorn caps and sprinkle glitter on the glue.
Preparation, tools and operating rules
Foam does not require much physical effort. Crafts are easy to correct - cut off excess, add missing volume. At the same time, there are certain requirements for working with this material.
The figures are made outdoors (but should not be used in sub-zero weather). The finished product is not afraid of temperature changes or moisture, but it is better to avoid prolonged exposure to direct sunlight.
Clear varnish will provide additional protection from weather conditions. Furniture varnish is most often used, but ship varnish is also used.
It is more convenient to take polyurethane foam for winter work - it holds its shape better during the manufacture of crafts, and is also more suitable for outdoor conditions.
Polyurethane foam for winter conditions will keep its shape better
The material gets dirty, so you should take care of gloves (2-3 pairs) and work clothes, as well as film or other protection for the site.
The foam is sticky, which means you need a solvent to clean your hands and surfaces.
The sealant is applied in layers, allowing each layer to dry thoroughly (at least 15 minutes). On average, complete drying time is 10–12 hours (a large figure will need up to a week). After drying, you can process the product - cut it, prime it, paint it. For “sculpting” you need a sharp knife (a stationery knife will do), and for making a frame you need wire, plastic bottles, old unnecessary dishes (pots, etc.), nails, fishing line, etc.
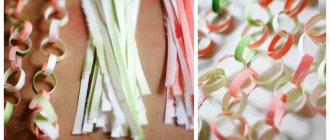
DIY New Year's crafts: balls decorated with thread
You will need:
- knitting thread (the thicker it is, the easier it will be to secure it)
- foam ball
- PVA glue
- scissors
- wire or pin.
1. Bend a piece of wire into a U shape and insert it into a foam ball. The wire will then help you hang the ball on the Christmas tree.
You can use a pin to pierce the thread and then insert it into the foam ball. In this case, you will need to leave a small tail on the thread (which you will then glue onto the ball) in order to hang the ball on the Christmas tree.
2. Cover half the ball with PVA glue and begin to carefully wind the thread around it.
3. When you have almost reached the center of the ball, turn it over, apply glue to the other half and continue wrapping the ball with thread.
Do-it-yourself volumetric balls for the New Year
You will need:
- cardboard (white or colored)
- scissors
- printer (to print the template)
- a thread
- scotch.
*You are asked to print two versions of templates for two balls of different sizes.
* Each ball is made from 12 paper pieces of the same size.
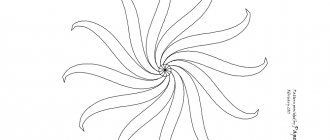
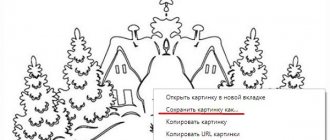
Paper ball templates for the New Year
Small
Big
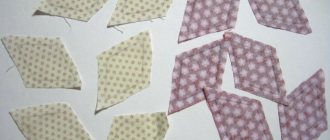
1. Print the templates and cut them out, making cuts in the indicated places.
2. Make a small hole in one cut out flower, thread a thread through it, tie its end into a knot and secure it on the back with tape.
To make it easier to assemble the ball, consider the part with the thread to be the “north pole” of the ball. Add details to it until you reach the “south pole”.
3. Use the cut lines in each cut out element and fasten all the pieces together to form a ball.
Jewelry making
Knowing how to make a ball out of foam plastic, you can make a lot of useful and original decorations for your home.
For example, create a set of exclusive New Year's toys, decorate the interior with hanging balls or decorative trees of different sizes. There are plenty of options for use and decoration. This is fertile ground for the development of creative abilities.
Balls can be decorated using quilling, kanzashi, and decoupage techniques. Buttons, sequins, beads, ribbons - everything that is stored in the needlewoman's basket can be used.
Polystyrene foam is an easy material to process, so working with it will be interesting for both children and adults. Date: 02/11/2015 Views: 634 Comments: Rating: 38 The New Year holidays are approaching, and many are already beginning to think about how to decorate the Christmas tree and what gifts to give to their loved ones. There is a large selection of gifts in stores, but handmade toys are becoming more popular. To make many of them, you may need a ball-shaped blank, which you can also make yourself from different materials. Foam balls are quite easy to work with: they can be easily cut, painted, and at the same time they are durable and resistant to any deformation.
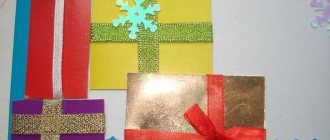
Beautiful balls made of paper strips for the New Year.
Option 1.
You will need:
- colored cardboard
- scissors
- stapler
1. Cut a sheet of colored cardboard into several identical strips.
2. Fasten all the strips with a stapler. First, cross two strips at right angles and fasten them, then add two more strips diagonally and also fasten (you can use glue).
3. Bend each strip in turn and secure the ends.
The ball can be decorated with tinsel by cutting off a small piece and gluing it.
Typical crafts made from polyurethane foam for the garden
Studying a wide range of garden objects made using polyurethane foam, we can roughly distinguish two groups of crafts. In one case, the surface of the figures is smooth, in the other it is lumpy and often imitates the skin of an animal.
Leveled areas are often additionally covered with putty. This creates a protective layer against UV rays. This technique is not used with rough garden figures.
It is unlikely that it will be possible to achieve the identity of an animal skin immediately after applying the foam; this will require additional manipulations. But the result of painstaking work is always impressive. The only exception may be the lamb, whose curls are so similar to the lumpy surface obtained from a liquid construction substance. Vivid examples of crafts made from polyurethane foam, made by hand, are shown in the photo:
Representatives of the animal world are the most popular solution when creating garden figures. Less often they create objects of inanimate origin - all kinds of flowerpots, shoes and other objects, mainly intended as decorative stands for flowers.
Christmas balls for the New Year
Option 2.
At the end of the text instructions you will find video instructions.
You will need:
- colored cardboard (multi-colored magazines)
- scissors
- ruler
- cocktail straw
- pencil
- needle and thread (or wire)
- awl or screwdriver
- beads
- various decorations (optional).
1. You need to cut out 6 strips of colored cardboard. The stripes should not be too wide.
2. Using an awl, make a hole at the end of each strip.
3. Lay out all the paper strips as shown in the image, and use an awl to make a hole in the center.
4. Prepare a thread, a needle and a bead, which will need to be attached to the bottom of the future ball.
Cut the thread to the required length so that you can hang the ball.
Pull the first bead all the way through.
Pull the needle and thread through the hole in the center of the strips, leaving a bead at the bottom.
5. Cut off approximately half of the cocktail tube (its length is 1/4 the length of the paper strip), insert it into the center of the workpiece and thread a thread and needle through it.
6. Start bending the strips at the top and pull a thread and needle through the hole at the end of each strip. It is also better to secure a bead on top.
Video instruction:
*You can use wire instead of thread.
Advantages
Why is this material so popular in crafts? The answer is simple: it is light, can be processed well with simple tools, and is easy to work with. Foam plastic is not afraid of dust and mold. In addition, there are a lot of options for decorating balloons. You can attach decoration elements with needles or glue them with different types of glue. Knowing how to make a ball out of polystyrene foam, you can prepare a lot of blanks at home from which to make various crafts. They can become an original gift for loved ones or the basis for interior decoration.