Time runs inexorably forward and now white flies are flying outside the window, slowly falling to the ground and covering everything around with a snow-white fluffy blanket. However, despite the cold, my soul is warm and joyful. And all because suddenly appearing snowflakes herald the coming of the New Year. The most important holiday of the year is already very close, which means it’s time to think about New Year’s decor, gifts and, of course, crafts.
The days are getting shorter and the evenings are getting colder and longer. What to do with yourself, and especially with your little fidgets, when it’s too dark for outdoor winter fun? Well, of course, crafts. New Year's crafts can be made from the most unexpected materials: cotton pads, pine cones, dough, pasta, cocktail tubes and much more. But there are also more traditional materials, such as paper. In this article, we have collected for you more than 60 step-by-step master classes on making paper crafts for the New Year. If you still think that only appliques can be made from paper, then drop everything and carefully look at our article! Well, for those who are looking for something unusual and know what miracles can be created from ordinary paper, we can only advise them to immediately begin the process of creating New Year's paper crafts using our patterns and templates.
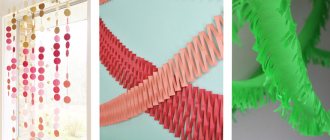
Paper garlands - making your own New Year's decor
Simple New Year's garland made of paper rings for children
One of the simplest New Year's paper crafts can rightfully be considered a garland. We all remember well from our childhood how we decorated the Christmas tree with such paper garlands not only at home, but at school or kindergarten. Making a paper garland is very simple: colored paper is cut into strips of the same width, the first strip is glued into a ring, and each subsequent one is threaded into the previous ring and also glued. This paper craft is ideal for 4-5 year olds.
DIY paper circle garland
If the task of entertaining children is not important, but you need to decorate the house, then here is another option for a paper garland. It is even easier to do than the previous one, but you will need a sewing machine. So, to create such a New Year's paper craft you will need: many circles of different diameters (the number depends on the size of the garland), a sewing machine. Sew circles through the center using a machine and hang the garland. Such a garland will “come to life” from any gust of air.
Volumetric New Year's garland DIY lanterns
So, if you have decided that the issue with garlands is closed and there is nothing more to come up with here, we hasten to upset you - this is only the very tip of the iceberg. Simple paper garlands are an activity for beginners. Professionals prefer more complex tasks, for example, voluminous paper crafts. Below is a master class on making a three-dimensional garland in the form of light bulbs.
Paper lanterns for a glowing garland + Scheme
By the way, you can decorate an ordinary LED garland with paper lanterns. This New Year's paper craft looks very cool, especially if you decorate a wall with this garland.
Interested in a garland? Then look for more ideas.
Garland of colored paper “Christmas light bulbs” + diagram
Make this cool garland using the papercraft technique. Print or redraw the template, cut out the bulbs from colored paper, glue and thread. All is ready!
Simple flat garlands
And finally, garlands for the lazy.
New Year characters
Print the templates below, cut them out and secure them to string or string.
Flashlights
This idea captivates with its simplicity and at the same time originality. If you don't have glitter paper, regular paper will do. The highlights can be completed with a white marker, paints, or completely abandoned.
Checkboxes
Flags are another simple and festive option. Choose the appropriate flag shape or combine!
Gingerbread houses
Well, how do you like this miracle? The cutest gingerbread houses will be a great addition to your New Year's decor.
Garland mesh
Another adorable idea for lazy adults or kids! I remember such beauty from kindergarten; by the way, in kindergarten we made a garland chain with the whole group. And you?
Eco garland leaves
Well, an option for lovers of eco style. Not a single tree was harmed during the making of this craft! However, in winter it is difficult to find a tree with leaves. Although …
Or the “thicker” option
By the way, you can make any shape, for example, holly. Tissue paper leaves also look really cool.
Christmas wreath made of paper - DIY paper decorations for the home
An original New Year's wreath made of colored paper - simple and quick
Since we are talking about apartment decor, it would be strange not to mention Christmas or, as they are also called, New Year’s wreaths. Anyone can make such a paper craft; in addition, a New Year's wreath made of paper is a reusable decoration that will not deteriorate or lose its appearance over time.
New Year's wreath made of paper roses - master class with photos
A very cool paper craft for the New Year - a wreath of roses. You will have to work hard to create such a craft, so if you decide to make yourself such a paper wreath for your door, be patient and in good spirits!
How to make a New Year's paper wreath for a Hawaiian party with your own hands
If you are planning a themed party for the New Year, say in a Cuban or Hawaiian style, then you will definitely need some kind of decoration to create the atmosphere. This simple but very original paper wreath will come in handy!
New Year's wreath made of paper palms - making New Year's decor with the kids
Surely your child at school or in the garden was asked to make a Christmas wreath together with his parents. Ostensibly for a competition, but the main goal of this task is to force parents to spend time with their children. But maybe you shouldn’t wait for assignments from school, but spend time with your child yourself. In addition, with such a New Year's craft you can decorate your home in a very original way, and most importantly, get a lot of positive emotions!
Need a New Year's wreath? See more ideas here.
Crafts from cucumber - master class and photo
If you decide to act out the fairy tale “The Frog Princess” with your child, then look at how to make one of the main characters in this story.
Cut a piece from the cucumber; this will be the body of the frog. Make Christmas trees from halves of cucumber slices, and make a head from the same vegetable. The eyes will be two halves of a plum. Make an arrow from a wooden skewer by gluing the tip on one side and the stop on the other side. Make a crown and decorate the place with greenery.
A fairy tale from the garden will also allow you to make magic shoes from a cucumber.
First, outline these two vegetables with the point of a knife, then remove all excess. Make bright details from radishes or leaves.
So that your child knows the fairy tale “The Golden Key,” show him how to make a turtle Tortilla. Take a head of cabbage and attach cucumber slices to it with toothpicks. You will attach the tip of the cucumber to the side of the face to make the nose of this character. Bend glasses from wire and sew a cap for this character from fabric.
You can also make a car out of a cucumber. To do this, cut a round hole and remove the pulp. Plant radishes here, which will turn into a cheerful bird. The wheels will be cucumber slices.
If a magical story requires a character like a shark, you can also create one from a cucumber. Look where you need to cut off the excess, and where to attach pieces of this vegetable in the form of fins and a tail.
This is the kind of doodle shark you will get. With its help you can recreate the famous works of Chukovsky. Here's another option that will help create this character. While walking through your garden, look for a crooked cucumber. If you want, the tail and fins will be pieces of green pepper.
If you want to read Chukovsky’s poem about Tatosha and Kakosha to your child, make these characters out of a cucumber. To do this, you need to create teeth with a small knife blade, and then attach the paws and tail. The tongue will become a piece of carrot or pepper.
DIY paper Christmas trees
Do-it-yourself voluminous Christmas tree made of paper - a simple craft for children
So, we continue to decorate the apartment. There is a garland, there is a wreath. Something is missing? Oh, of course, Christmas trees! If you prefer to display a large forest beauty for the New Year holidays, it doesn’t matter. By the way, read where to buy a live Christmas tree in Minsk. Small paper Christmas trees will be a great additional decorative element, and they can also be used as small souvenirs for guests!
Christmas tree toy “Christmas tree” - decorating the New Year tree with children
A paper Christmas tree doesn’t have to be on a table or somewhere in the house. You can make a craft out of paper, which you can then hang on the Christmas tree itself, and if there is no Christmas tree, then you can simply hang such voluminous paper Christmas trees around the house. The pattern for making a Christmas tree is quite simple, but if you don’t quite understand what the point is, or you simply don’t have time to figure it out, then you can download a ready-made template.
DIY corrugated paper Christmas tree for the New Year
A very cute Christmas tree can be made from corrugated paper. This paper craft looks very realistic, and is quick and easy to do.
Making a Japanese-style Christmas tree with your own hands
If you are still interested in a paper Christmas tree, but want to make something unusual, then take advantage of this master class.
Christmas tree garland for the ceiling - how to make it yourself
The Christmas tree does not have to stand on the floor; it can also be hung from the ceiling. An excellent Christmas tree garland can be made from plain paper.
Miniature Christmas trees made of paper for New Year's table decor
How to distinguish a New Year's table from a regular holiday one? Everything is correct! By thematic decorative elements. Find out how to make a suitable New Year's dessert here.
Making a movable Christmas tree with your own hands from paper
Do you want more master classes on making a Christmas tree out of paper? See this article.
Cabbage crafts on the theme “A fairy tale grew in a garden bed”
In the fall, many gardeners ripen this vegetable. You can always find it in grocery stores.
Well, why not a fairy tale in the garden? To make such a craft, you will need:
Remove the top leaves from the heads of cabbage. Using toothpicks or wooden skewers, connect 2 forks together. Cut the zucchini in half and use skewers to attach it to the bottom of the cabbage. These will be the hare's paws.
Cut a cucumber in half and use toothpicks to turn it into the ears of this character. A small piece of carrot will become the nose, and a piece of red pepper will become the mouth.
Place a carrot on the front of the bottom fork for the hare. Attach with skewers or toothpicks. Hide them under two cabbage leaves, which will simultaneously turn into a cloak.
Take a low cardboard box and divide it into sectors with strips of cardboard. Put moss on the bed, put a hare here. And in another bed Brussels sprouts will grow as if they were white cabbages. Place some peat moss on the bed to make it look like soil.
Design the next bed in the same way. Here you will plant carrots, which the hare loves so much. This could be a well-known garden tale, or you and your child will come up with it. Make the eyes for the hare from ovals of white cardboard, drawing blue pupils. Instead of mustaches, insert toothpicks or wooden skewers.
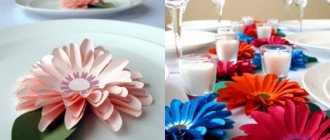
New Year's bouquets made of paper - decorating the house for the New Year with paper flowers
Simple paper flowers
In winter, wildflowers cannot be found, even in flower shops. But there’s nothing to worry about, you can make flowers out of paper with your own hands. And our step-by-step master class will help you with this.
Corrugated paper flowers
You can make a wide variety of flowers from paper, the whole secret is in cutting out the ends.
Making paper roses with your own hands
Craft paper flowers - how to make them yourself
A New Year's gift must be in beautiful packaging. In my opinion, the gift itself is not so important as the intrigue around it. After all, it is this intrigue that will remain in the memory, this pleasant expectation and unfolding of the paper. Use our DIY paper flower making pattern and decorate gifts for loved ones.
Master class “White cabbage, tasty and ripe”
Nina Tsvetkova
Master class “White cabbage, tasty and ripe”
There are many holidays in Rus'. The most joyful and generous times were in the fall, when people, having harvested their crops, made preparations for the winter. From Vozdvizhenya (September 27)
in the villages they began to chop
cabbage . Winter supplies were counted not in kilograms, but in buckets and barrels. It is difficult to make such large reserves alone, and therefore the women chopped and salted cabbage together for the entire village, moving from one house to another. On this day, housewives invited guests to “ cabbage parties .” The main treat was cabbage pie . The cabbage was salted in barrels and stored. The cabbage was a great success !
New Year's stars made of paper - step-by-step MKs
Composite volumetric star made of paper - MK + diagram
A composite paper star will be an excellent decoration for the New Year. You can download the ready-made template for gluing below.
A simple volumetric star made of paper + diagram
Nowadays, you won’t surprise anyone with ordinary paper cutouts. Volume crafts are much more delightful. This master class describes a step-by-step scheme for creating a simple three-dimensional star. You can download a ready-made template with a large, medium and small star using the link below.
DIY double-sided paper star + Scheme
It’s quite difficult to imagine New Year’s decor without all sorts of variations on the theme of stars. In this master class you will learn how to make a three-dimensional double-sided star out of paper with your own hands. You can download the finished diagram below.
DIY New Year's star using origami technique
Step-by-step diagram for creating an origami star with your own hands. You can decorate the top of the Christmas tree with such a star, you can simply create a festive atmosphere in your home, or you can combine it into one large garland.
You can make the base yourself, as in the first picture. Or you can download a ready-made pentagon blank and depending on the size of the pentagon the size of the finished star will change.
Making a big star out of paper with your own hands
If you want to make a large New Year's star to decorate a wall from paper tubes, then this master class is especially for you!
Garland chain
Make a chain of multi-colored rings, adding color to your New Year's decor.
Or dazzling white, recreating a snowy atmosphere in a warm house.
Paper cones for the Christmas tree
Do-it-yourself corrugated paper cones - step-by-step MK
A very themed New Year's craft made from crimple paper. This paper cone looks very natural and is quite difficult to distinguish, especially if it is used as decoration. With our master class you can easily cope with such a paper craft.
Cone made of colored paper
There is another technique for creating a paper cone with your own hands. This method is more labor-intensive and will take you longer. In addition, to create such a New Year's craft you will need: paper, foam blank, a lot of safety pins, ribbon and beads for decoration. However, if you have the time and desire, then pay special attention to this pattern for making a cone, especially if you want to make an impression.
New Year's craft cone made of paper circles
In continuation of New Year's paper crafts, I would like to offer you another scheme for making paper cones. In addition to paper circles, you will need an oval or round blank, glue and spruce branches for decoration.
Cone made of paper strips folded like an accordion
Fir branch with cones
For corrugated paper 5 centimeters long, green, the edge is cut by 4.5 centimeters. The resulting strips must be twisted to form fir needles.
After making all the needles, the finished workpiece needs to be wound on a wire, simulating a spruce branch. Several such blanks are made, after which they are connected to each other, forming a single thick branch.
Brown paper is cut into strips 5 centimeters wide, after which the edge is folded on one side by 1 centimeter. This curved edge needs to be twisted, retreating from the previous place of twisting one centimeter at a time, less if possible. Next, the workpiece is wound up, forming a bump. The edge of the workpiece must be tied with thread. The cone is ready.
The cone will connect with a spruce branch, forming a single New Year's composition.
Also look at paper window decoration templates for the New Year.
New Year's paper balls
Christmas ball made from strips of paper
It is customary to decorate the New Year tree with toys, but these toys do not necessarily have to be purchased. It's even better if they are made by yourself. What could be easier than making a paper Christmas tree toy? Use our step-by-step instructions and make your own Christmas ball out of paper.
Volumetric ball for the Christmas tree made of paper circles
New Year's ball using origami technique step by step
You can make very special crafts from paper using the Japanese origami technique. Our step-by-step master class will help you create a New Year's ball out of paper, which can be used to decorate both a room and a Christmas tree.
DIY prickly paper ball
DIY volumetric ball for a Christmas tree made of paper circles
Easy-to-make New Year's decorations can be made from paper. Our master class gives an example with a ball, but these can also be other shapes: hearts, stars, Christmas trees and much more. You can download ready-made templates below.
A ball of paper strips - a diagram for making a craft with a photo
Want more Christmas ball ideas? See:
Idea for a newborn photo shoot
To make a huge head of cabbage in which a small child could be placed, you need to prepare large pieces of paper - approximately 50x50 cm. For the best result, it is better to use material of 3-4 shades. Light yellow or light green is suitable for the central part, light green for the middle, and herbal for the outer leaves.
The corners of the squares are first rounded with scissors, then you need to manually stretch the paper a little at the top. The center of the head of cabbage is made not from paper, but from a soft pillow or blanket rolled into a ball. The leaves are wrapped around a soft base so that they do not touch the baby.
Source
Paper snowflakes
A simple diagram of a three-dimensional snowflake made of paper - step-by-step MK
Openwork volumetric snowflake made of paper + diagram
New Year's snowflake on a window made of colored paper
How to make a voluminous paper snowflake with your own hands - step-by-step instructions
At your service is a step-by-step diagram for making a three-dimensional paper snowflake. Follow the instructions and you will definitely get such a miracle.
Do-it-yourself large volumetric paper snowflake
Another great option for decorating an apartment with your own hands is a large voluminous snowflake on the wall. There can be not just one snowflake, but a whole ensemble. Plus, this Christmas background will make for great photos!
By the way, you can find more ideas for Snowflakes in this article.
Crafts for a fairy tale in a potato bed - step by step photos
This popular vegetable can be used to make various famous characters.
To make Cheburashka, take a few potatoes. From one side, cut a small part to indicate the hero’s tummy. Cut the second one in half. These will be Cheburashka's ears. To make its head, also cut off part of the peel containing the pulp. Attach the ears here with toothpicks. Then, using the same wooden materials, fix the head to the body. The handles will be two small potatoes, and the legs will be one, cut in half.
Attach the whites of the eyes from radishes, and make pupils from olives. The pepper will become a bright mouth.
To make a hedgehog, just stick toothpicks or matches into part of a washed potato. You can pin berries on these needles and paint eyes and mouths to create facial features.
Christmas tree decorations made of paper
DIY Christmas tree crafts - step-by-step master class + diagram
Simple Christmas tree toy DIY paper lantern
Very simple, but incredibly cute three-dimensional lanterns can be made from ordinary colored paper. Even children can handle this craft, so feel free to get to work if you have little helpers. Well, if not, then you can handle it yourself!
Christmas tree toy made of paper rings - step-by-step MK
Christmas tree toy House made of paper
New Year's Christmas tree decorations diamond crystals + diagram
Download ready-made patterns and make your own diamond crystals from paper.
New Year's deer on the Christmas tree - master class and diagram
Paper Christmas tree lanterns step by step with photos
Mini angel made of paper for a Christmas tree with your own hands
Cute DIY paper angels - MK with diagram
Do-it-yourself geometric Christmas tree decorations made of paper + diagram
A wide variety of decorative elements can be made from plain paper, just download the ready-made diagram, print it, cut it out and glue it. A wonderful New Year's paper craft is ready!
DIY New Year's lantern: decorate the New Year's tree with paper toys
You can make a simple and original Chinese lantern with your own hands using our ready-made diagram.
Miniature wreath using origami technique for a Christmas tree
Master class: do-it-yourself voluminous paper house for a Christmas tree
See even more paper Christmas tree decorations here.
Chick
To work you will need:
- Corrugated paper in several colors: yellow, white, orange, black, red, green, light blue and dark blue;
- Scissors;
- PVA glue;
- A sheet from an album (or A4);
- Ballpoint pen refill.
Process of creation:
- First, draw a chicken hatching from an egg. The chick will have a bow on its neck and a flower in its wing.
- Cut 1/1 cm squares from paper of different colors.
- Pour a little PVA into the screw cap and use a rod to twist a yellow tube and glue it to the head (starting from the top). Fill the surface of the body, head and wings.
- The bow is made blue. Flower - red and green.
- For the eyes, “twirls” of white, black and blue colors are used.
- The shell is made of white “corrugation”, and its edging is made of black.
When working, you need to try to ensure that the “twists” are smooth and beautiful, and that when gluing there are no gaps left between them.
New Year's crafts toys from paper cones: templates
Make simple paper cone toys with your kids. All you need to do is print the template and glue it together. If it is not possible to print the blank, make a toy yourself: roll a cone out of paper, after painting it.
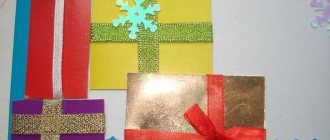
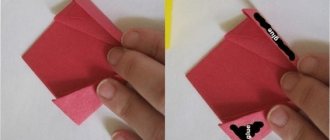
DIY Christmas packaging
Gift packaging “Big Candy”
You can make completely unexpected crafts from paper, including gift boxes. And not just boxes, but in the form of delicious sweets. For such a gift box you will need: a cardboard cylinder, colored paper, glue, scissors, satin ribbon.
Original packaging from a regular paper bag
Continuing the question of gift wrapping, we would like to offer you another budget, but very charming option. You can make such a gift elf with your own hands using our master class.
Festive packaging “Santa Hat” – step-by-step photo master class
Here is another option for original DIY New Year's gift packaging.
Need more gift wrapping ideas? See this material.
Useful tips
Flowers made from crepe have long ceased to evoke unpleasant associations; moreover, with high-quality execution, they turn into hand-made masterpieces. But this is more of a decorative accessory than an analogue of a living bouquet. And you need to “serve” it, especially on New Year’s Eve, accordingly, carefully selecting additional elements and materials, the color scheme, and most importantly, the design idea.
Basic rules for New Year's paper floristry:
- Flowers made of corrugated paper without a sweet “filling” are recommended for use in interior compositions or gift wrapping decor. Here they will look appropriate and stylish. And instead of giving a real flower bouquet, it is better to give a suite arrangement.
- The color scheme should be “winter”. Delicate spring shades or excessive summer diversity will not be able to harmoniously fit into the holiday atmosphere, causing involuntary rejection. Optimal color combinations:
- white, bright blue (or turquoise), cream, silver;
- several shades of coffee and chocolate, you can “dilute” with dark marsala;
- pink and purple tones with white and gold;
- red and green, the so-called “Scandinavian” gamma;
- powdery shades plus aged gold;
- white with green in different proportions and silver.
It is better to avoid the predominance of yellow, orange (if these are not dried orange slices), deep pink, coral and salad shades.
- Flowers for arrangements should be selected no less carefully. The best option is roses, snowdrops, anemones, poinsettias, large-headed chrysanthemums, lilies. The first three varieties are also suitable for suite design. But “purely spring” crocuses, tulips, ranunculus and peonies are best left for March 8th.
- It is not advisable to supplement corrugated paper compositions with natural plants, unless they are dried flowers. Next to natural analogues, crepe buds will definitely lose out, losing their charm.
It is also inappropriate to use living greenery, including branches of coniferous trees. Without supporting piaflora, they will quickly fade, and in combination with paper flowers they will look gloomy. Another thing is artificial spruce legs covered with decorative snow.
- To create a feeling of New Year's holidays, you can add the following to corrugated paper floral arrangements:
- Christmas tree cones with and without artificial snow or gilded;
- similarly decorated nuts;
- dried flowers, such as lotus bolls, gypsophila, cotton:
- sugar berries;
- Christmas decorations;
- shiny ribbons.
- It is also recommended to use corrugation in packaging. Other decorative paper will raise questions. Baskets, hat boxes or decorative sleighs are suitable for suite compositions.
- Only high-quality materials and decor should be used. First of all, this concerns crepe, which can vary greatly in characteristics, depending on the purpose and manufacturer.
What else can you make from paper?
Carnival masks made of paper
The list of New Year's paper crafts must include carnival masks. Well, what New Year's party can do without masks? That's right, none! In fact, there are a lot of options for making paper masks, and if you use your imagination, you can make a lot of wonderful crafts!
Sample
More ideas for New Year's masks here.
New Year templates for a photo shoot
Note! The templates are very large and of good quality, so downloading may take some time.
DIY paper vase: diagram + step-by-step master class
You can decorate your house not only with standard snowflakes or stars. You can make such a wonderful vase out of paper. Download the finished diagram and assemble the vase following the instructions in the master class.
Decorating New Year's candies: Santa Claus's reindeer
New Year's paper craft Bow - step-by-step MK with photo
Paper bow for decorating gifts - diagram
Volumetric bow using origami technique for decorating New Year's gifts
Original DIY New Year's card
You can make not only flat or three-dimensional crafts from paper, but also movable ones. With our ready-made scheme, you can make a postcard with an encrypted greeting or message. Such an unusual gift will delight not only children, but also adults! You can download the finished diagram below.
By the way, we have a cool article on How to make New Year cards with your own hands.
Volumetric paper craft Heart using origami technique
Origami snowman - step-by-step diagram with photos
There are never too many snowmen. More crafts here.
Easy paper craft for kids - Santa star
Santa Claus made of colored paper
Or this cool craft can be made from ordinary colored paper.
DIY Christmas craft paper ball “Mistletoe”
You can make this mistletoe ball out of paper with your own hands using ready-made cutting templates. Be patient and have a New Year's mood!
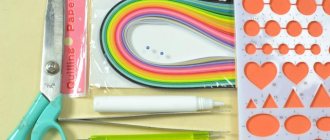
Easy lesson
The technique of trimming a flat painting begins with selecting a pattern. They draw it themselves or take it ready-made from any coloring book, after gluing it onto thick paper. We select the desired colors of paper and make blanks from them. To do this, cut the rolls of paper into strips without unrolling them, and from these strips cut them into squares with a side of about 1-2 cm.
When there are quite a lot of squares, apply PVA glue to part of the drawing, screw the squares tightly onto the end of the stick and place them on the strip greased with glue at a right angle. We take out the stick and work on the subsequent trims. Place one after the other tightly along the glue line. You can also fill in the background of the picture to create entire landscapes. Trimming a flat picture is suitable for activities with children aged 5 years and older.