Good afternoon, today I’m finally uploading a large selection of master classes on the theme of paper flowers. Here are the most interesting ways to make paper flowers. We will make a variety of flowers - flat and three-dimensional - from corrugated paper and thick colored paper. I will show each craft step by step in photographs and give the most detailed instructions for each flower made in one way or another. I will also give you stencils - templates of flower silhouettes. All the crafts I collected are laid out in order from simple to complex . First of all, we will study the MOST UNDERSTANDABLE techniques for folding paper flowers (those that are easy to understand and repeat ourselves)... and gradually move on to MORE COMPLEX and painstaking instructions (to prefabricated detailed flowers and the origami technique). I also uploaded a special article dedicated to different ways to make a paper rose - here is the link to it “PAPER ROSES (25 ways to make it yourself).”
And also, for educators (teachers and educators), I made an article with simple children's crafts WITH FLOWERS, which can be made in classes at school and kindergarten from paper and other materials:
- FLOWERS for mom (75 crafts for the garden and school).
- Craft FLOWERS (55 bouquets with your own hands).
I specifically decided to make such a large selection of paper flowers in one place - with the goal that you can immediately find a suitable scheme for assembling a flower for THAT PAPER YOU HAVE, and for the task that you want to solve using paper flowers (flower craft as a gift for mom, decorating a child’s birthday with voluminous flower arrangements, wedding decoration, decorating cards or gift bags).
The only thing I didn’t include in the body of this article was PAPER ROSES. so many ways to make a three-dimensional rose that I had to put these crafts in a separate article on the same site, it will be called “Paper roses - 20 ways to make them yourself.”
But before we start the master classes themselves, I want to make you fall in love with the very idea of paper flowers. I want even casual visitors to this web page to have their hands itch and their eyes to light up. And I want to awaken in you delight and a burning desire to make a flower with your own hands. So that this magic arises... so that your soul also spreads its petals and blooms...
Let's see what piece of life a flower you made can decorate. Here are examples of how an ordinary table setting can become very beautiful and formal with lush floral crafts.
Also, large paper flowers made of crepe or corrugated paper are used for decorative purposes to decorate a celebration - a wedding hall, a children's birthday, an incendiary party. They are mounted on the wall or on the backs of chairs, or tied to window handles.
But such large flowers can be made from A4 paper (office size) or from a roll of corrugated crepe paper.
Photographers and photo studios also use voluminous large paper flowers as exclusive props for staged photographs.
You can also make such a large paper flower simply as a gift for Mother’s Day, or for March 8th. Surely no one has ever given your mother something like this before. Will be remembered for a long time. And you can also take a picture of your mother right away with this flower - she will proudly post this photo on her social media page.
Ordinary plastic combs, rims and metal pins can also be decorated with voluminous paper flowers. This way we will get elegant decorations for hairstyles for a wedding or party.
Miniature paper flowers can decorate handmade cards and other scrapbooking crafts (like these delicate crepe paper pansies).
Also, a handmade paper flower is the best decoration for a gift box . And not costly. A lush gift ribbon costs much more than a couple of sheets of colored or white office paper - a few movements with scissors and now a paper orchid or the delicate pink color of a wild rose has bloomed on your package.
And flowers themselves can be an excellent independent gift . If you arrange your work in the form of a basket, or a decorative panel (as in the photo with poppies made of colored paper).
If you learn how to make paper flowers with your own hands, you can use this talent in many areas of life. It will be simple and easy for you to decorate a room for any holiday, decorate a family celebration at home, or beautifully decorate gifts for relatives and friends, or entertain the neighborhood kids by organizing an interesting craft with a master class.
METHOD No. 1
PAPER FLOWERS
I decided to call flowers made using this method “puff pastries” because their construction principle is the same as that of a puff pastry . Thin layers of floral silhouettes overlap each other . And each layer is given a convex volume (or faceted relief), and due to this the flower looks lush and voluminous.
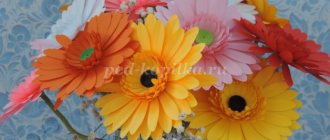
Here in the photo below we see a step-by-step master class for beginners on creating such a voluminous dahlia flower . The dahlia is not to be confused with the aster; the aster has narrower petals and each has an edge (a raised fold like on trousers).
So... let's look carefully at the photo of the flower craft below. The trick here is that the contours of the layers - each contour has six petals, and differs from its counterparts only in size. That is, the shape of the stencil is the same - only the size is different.
Before gluing, we bend each cut paper silhouette in order to give it a natural shape. We begin gluing and assembling the paper dahlia from small middle layers to larger and larger ones.
Of course, you have a QUESTION: “How to cut such uniformly sized petal circles-layers.
ANSWER: Here is the easiest and fastest way to make such a flower with your own hands as a novice craftsman. It does not require searching for a stencil template, but allows you to obtain geometrically even petal parts for a paper flower without any measuring instruments (compasses and rulers).
- We take a sheet of paper and glasses of different radii . We trace them on a sheet of paper.
- We cut out the resulting rounds, fold each round in four and in half again (as when cutting out a snowflake). And on such a round piece folded into a triangle we draw the outlines of two petals (like a heart).
- We cut this contour with scissors (see photo below) - we deepen the cutout in the middle of the heart - we unfold it and get a petal layer.
Since our circles are of different sizes, we will get petal layers of different sizes . We set the relief, put it together, add a yellow stamen-middle (stamens will be discussed below).
Such a delicate flower can be strung on a wire (to make a stem) and presented to your mother as a paper bouquet for Mother’s Day.
Next.. you still have a QUESTION: “What is the best way to give relief to the petals, to make beautiful even curves?”
ANSWER: An ordinary round stick (pencil or pen, or knitting needle) can serve as a stamp for imprinting relief on the petals. Here's how you can do it yourself, you can clearly see in the photo of a flower craft below.
The flower assembly diagram is the same as the previous one (see step-by-step photos).
Using the PAPER PAY technique you can make a variety of three-dimensional flowers (anemones, poppies, asters, dahlias, roses). The evidence is in the photo below.
You see – the same “puff” method – but the results are completely different flowers. And all due to the fact that the silhouettes of the paper petal layers are DIFFERENT IN THEIR OUTLINES .
And don’t forget that not only the contour (silhouette, shape of the petal) is important... but the RELIEF of the petals is also important. It is the correctly defined relief that turns flat outlines into living convex layers of the future flower.
For relief, we need round sticks of varying thickness (thin knitting needles, toothpicks, thick round-sided markers, felt-tip pens, spherical perfume caps, or lollipops). Any items that will help set the shape.
In order for the relief to lie neatly on thick paper , you may need to slightly moisten it before work (sprinkle it from a spray bottle or hold it on a wet towel). Try it and see how it works better - dry or wet.
And here are puff paper flower templates Flower stencils are already several sizes. You can right now put a sheet of paper on the glowing screen and trace with a pencil these silhouettes shining through from the screen onto your sheet of paper (this is my favorite way to copy a template without any printer - not every home has a printing device ).
You can also change the size of any template using your computer mouse.
Look - in the photo below I give you a template silhouette. Silhouette is only ONE size . And you want to get this silhouette in different sizes - to make a multi-layered paper flower craft.
To change the size of this silhouette, you press Ctrl button , and while holding this button down, with the other hand, roll the mouse wheel - this way and that. And from this action of yours, everything that is now drawn on your screen increases or decreases, depending on where you turn the wheel - away from you or towards you.
Try this right now - press and twist. See how the stencil design image below has changed size? In this way, you can adjust the template to any size directly on your computer screen and trace it with a pencil onto a sheet of paper placed on your monitor screen. This is the fastest way to get the outline of any flower stencil immediately in any size we need.
Here are shaped templates for future paper flowers - and you can change the size of the picture yourself. And you can design and create any paper flower with your own hands.
Let’s also take a closer look at the interesting additions to such layered colors.
How to make a stamen
in puff paper flowers.
Below is an interesting step-by-step lesson where we see how a stamen for a multi-layer paper flower is created step by step.
How to apply
large inflorescence
on one stalk.
And I would also like to show here another clever and simple technique that allows you to make a whole inflorescence of flowers on one stem . In nature, flowers are often found where many flower calyxes nest in one place and have a common central stem .
This is exactly the kind of flower craft that the step-by-step master class in the photo below will demonstrate.
- We cut out a bunch of stems with a common round base from green thick paper (or cardboard). We glue double-sided tape onto this round base.
- We twist a tube from a newspaper and wrap it in green paper. Glue the tube-stem to the round base - twisting it around the stem.
- We make flowers (from two red layers and one black stamen). We glue each flower onto its stem. We add wide leaves to the central stem-leg. It turns out to be a very beautiful stem-bouquet made of paper.
How to make a layer flower
WITH ASSYMETRICAL petals.
But in the photo below we see from what shape the layers are used to create an ORCHID paper flower with your own hands.
In a glass of water we dilute a drop of green paint - we get light green water. We wet the white parts of the orchid with this water; they become white-green (just like in nature).
Next, while the pale green petals are still wet , we apply lines of purple paint on them - on wet paper the lines themselves blur slightly - we get an uneven, blurry color (exactly like a real orchid).
the middle part of the orchid - the top layer green... and paint the very edge (right along the cut of the paper) bright purple. Thus, when we lift this top layer up, the purple edges stick out with their color upward, imitating the position and color of the furry central petals of an orchid.
Using the same principle, various asymmetrical craft flowers . Let's remember what other flowers do not have circular symmetry in their cup... that's right, these are PANSIES (photo below).
- The bottom layer is made of blue petals (2 pieces in total with the location in the upper direction).
- Then a layer of blue petals (also 2 pieces spread out to the sides).
- And the third top layer in the form of just one white petal.
- Then we smear the central part of the flower with yellow color, and draw the central lines with a pencil. We make yellow stamen balls from crumpled paper (or from plasticine).
A simple DIY craft that even a child can do. The main thing is to prepare templates in advance that the child will trace on colored paper.
Volumetric puff flower
made of THIN paper.
We do such techniques as “different layer sizes” and “work on folding the relief on paper petals” only when we use ordinary THICK COLORED PAPER
But if you are making flower crafts from CREPE, CORRUPTED CRUMPTED PAPER, then you don’t have to specify the relief there. The texture of the paper itself will allow you to make a fluffy three-dimensional flower.
Moreover, the corrugated structure of the paper allows you not to even bother with getting LAYERS OF DIFFERENT SIZES. That is, all layers of a flower can be the same in size . The master classes on paper flowers below clearly prove this.
Do you see? All layers of the flower are the same size. We pierce the middle of the layers folded in half with a hole punch (or a needle and thread, or fasten with a stapler). Unfold the flower and fluff its layers into a fluffy pompom. These are very beautiful large paper flowers.
This is perhaps the easiest and lightning fast way to make a flower with your own hands. It turns out big, lush, rich and expressive.
If we choose napkins of two colors and apply them alternating colors, we will get a play of halftones in each layer, and our flower will look like a rose.
You see, in the method below we make identical silhouettes from napkins of two colors (in shape and size like twin brothers). Under the bottom we place a piece of cardboard with two holes (like a button... however, the cardboard can be replaced with a button). And we thread threads into the holes and pierce through all the layers of the napkin. We tie a knot in the middle of the flower and fluff out all the corrugated layers of the craft with our hands.
Think for yourself how you can diversify and complement this airy napkin flower. You can also add color along the border - to do this, lightly stain the cut out napkin silhouettes along the edges with an office marker.
Turn on your imagination... and let her play around with napkins to her heart's content. There is never a shortage of tea napkins. And suddenly you will give birth to your own designer flower.
And red carnations are made using the same method. Identical round pieces with a jagged edge are also cut out of a napkin - and deep cuts are made into the petal parts. And then they simply overlap each other with a drop of glue in the center... or instead of glue in the center, we pierce them with a stick (there will be a stem on it. A beautiful DIY flower craft for dad on February 23, or on Victory Day for grandpa.
And Lingeri terry daffodils are made using exactly the same principle as carnations (in the step-by-step lesson above). This is what they are like in nature – lush and voluminous.
Spring flowers made of paper are a good gift for mom on March 8th. And now you will find out how easy it is to make them yourself.
And here's how to make them from dyed paper napkins. We place a stack of napkins on top of each other - fold them into quarters - into a triangle - cut the edges with a jagged semicircle. We paint the top napkins in a bright yellow color, and the middle layers of napkins in a light yellow color, leaving the bottom layer white.
Now about the material. Daffodils are gorgeous, you say, but where can you get these paper colors (pale yellow and bright yellow)? Here, I tell you, there are 2 ways at once - 1) dye white paper napkins 2 shades of yellow... or 2) get a pale shade of yellow from bright yellow crepe crepe paper.
INSTRUCTION No. 1. How to dye a white paper napkin.
ANSWER: We paint the napkin in a straightened form - with tinted water. Dye some water in a glass and pour it onto a straightened napkin. We wait for the napkin to dry naturally (about a day).
INSTRUCTION No. 2. How to make light yellow from bright yellow crepe paper.
ANSWER: Take yellow crepe paper - put it on a wet towel - put a dry white napkin on top. We iron it with an iron - the bright crepe paper gives up its moisture to the dry napkin, and along with the moisture it partially gives off its color. And we already get PALE YELLOW crepe paper. This way we can change the shades of crepe corrugated paper.
As you can see, everything can be solved - if you turn your head and think... and try to experiment. Knowledge often comes through experience (even if this path is wrong). One bad experience can give rise to several ideas at once. I somehow wet the crepe paper and ruined the craft, but then I saw that when it gets wet, the crepe paper loses its color. And one day I spilled water for washing brushes on a paper napkin - and it turned a delicate, even color. So out of two jambs - I got 2 experiences in changing color for delicate and thin paper textures.
…….
Well, this was all just about the FIRST METHOD of making paper flowers with your own hands. I deliberately made this first chapter of our article so extensive and detailed so that you immediately understand a simple and important truth:
Even one single design can have MULTIPLE CONTINUATIONS... numerous variations... endless designs. And you yourself can become the author - and create your own paper flower, made in the same way of “curly layers superimposed on each other .”
Now let's look at the next way to make flowers from colored paper with your own hands.
Kusudama technique for beginners: making a bell out of paper
We learn to fold unusual buds and collect them into a spherical bouquet using Japanese technology. More details >
What to give for Teacher's Day: 10 master classes + BONUS > 12 master classes on how to knit your first scarf, bactus or snood for beginners > Crochet: 12 bright master classes for your inspiration > How to sew a bag with your own hands: 15 master classes classes for every taste >
Subscribe to the Masters Fair on social networks: Yandex.Zen, Instagram, Facebook, VKontakte
TWISTED INTO A TUBE.
We have been familiar with this method of creating flowers since childhood. All of us at school or kindergarten made classic flower crafts for February 23 - red carnations from crumpled crepe paper . They twisted a strip of paper around a toothpick, wrapped a piece of green paper around the twist, and fluffed a bunch of flower panicles.
And it never occurred to us that inside this primitive method there was hidden a recipe for more than just the humble clove.
This method of “ twisting crepe paper into a roll” can give birth to completely different three-dimensional and flat flowers. It all depends on how we changed the SHAPE OF THE EDGE OF THE PAPER STRIP. Depending on its pattern, we will get paper flowers that are completely different in design.
Here's photo proof. Do you see?
Different regions produce different flowers - disheveled aster, neat chamomile, chrysanthemums. Even roses can be made in this way (but roses will be discussed in a separate article - in detail and in detail, as befits the queen of flowers).
And not only from soft corrugated (crepe) paper you can make craft flowers using this ROLL technique.
Here you go in the photo below - an example of paper flowers using the same technique of rolling a roll FROM REGULAR THICK COLORED PAPER (office double-sided colored paper).
This is a simple job and very simple instructions.
- A narrow strip of paper was wound onto a thin rod (or toothpick) (to form the center of the flower).
- And then to this rolled center they added a winding of a wider tape, already cut along the edge into petal strips.
- And the petals are folded to the side - like a spreading umbrella.
AND IF YOU ADD A THRUST FOR EXPERIMENT TO THIS SIMPLE TWISTING TECHNIQUE, YOU CAN GET NEW DESIGNS OF PAPER FLOWERS.
For example, what if... you don’t just bend these petals to the sides with a flat daisy-spread, but slightly twist the tip of each petal inward (as we do with curls in the morning) - and you’ll get a voluminous, lush ASTER.
What if... make a strip for twisting with AREAS OF DIFFERENT WIDTH. We see the result of this idea in the photo diagram below.
- A narrow strip (1 cm wide) for the middle stamen (wrap it in a tight roll on a toothpick).
- Next, we wrap a petal strip (with a fringed edge) 2 centimeters wide onto this roll.
- And then we wind a petal strip 2.5 cm wide...
- and then a petal strip 3 cm wide.
And thanks to the different widths of the stripes, we will get a roll flower in which the height of the petals increases from the center to the edges.
As you can see, you can and should do EXPERIMENTS with this simple roll technique. Let's continue to encourage our inquisitive mind and decide on another wild idea...
WHAT IF, cut the fringe not straight, but diagonally . And what if... this oblique fringe is cut not along the edge of the CUT , but along the edge of the FOLD (that is, bend the strip in half along the entire length, and cut this fold line obliquely into a fringe, and then twist it in this form.
We see the result in the photo below - an amazing aster with spirally twisting carved perforated petals. A beautiful flower craft - it looks like a difficult job, but making it with your own hands is simple and quick.
Such shaggy flowers with slanting petals can be used as a shaggy stamen for other flowers.
Like for example in this master class in the photo below. Do you see?
There, too, a bent strip is cut along the OBLIQUE FRINGE... and an orange shaggy stamen is formed - needed to decorate the center of the paper aster.
By the way, the paper aster itself from the photo below is made in a very original and simple way.
- The base of the aster is a puff (multi-rayed star with chopped rays).
- Each ray in the puff is bent with a slate ruler into a sharp arrow (like on trousers).
- The layers are superimposed on each other - we get a lush flower.
And just the stamen inside this voluminous flower is made using the OBLIQUE FRINGE technique, which we just talked about.
This roll technique can be combined with a regular petal puff (Method No. 1 from this article) .. Yes - you can - because it occurs in nature. God himself once came to this idea - and created the Marigold flowers. And we will implement this method of combining a roll and a puff on paper. (see how this is done in the infographic below).
using the roll technique . And using the “Puff ” technique, the lower petal part of the marigold flower is made of paper (templates with five-leaf silhouettes). Photo instructions for assembling the flower are below.
But here is a rosehip flower - where the stamen and the middle are also combined using the rolling twist technique and 2 petal layers. By the way, you can make them in large sheets of A4 format and stick them on the wall - and your living room will be transformed. Buy a pack of red office paper from the stationery store and play interior designer. All the neighbors will come running to gasp with delight.
But here is a flower craft where the roll technique is also used to create a fluffy panicle-stamen, and the side petals are simply glued separately to the lower layers of the fluffy panicle-stamen.
You get large sunflowers from crepe paper.
Using a similar ROLL-BUNK + INDIVIDUAL PETAS technique, you can also make a daffodil flower with your own hands.
But these flowers, EITHER LILAC OR SALVIA - with a long stem of inflorescences, are also made using the roll technique.
Yes, yes, this is also a regular roll technique, with the only difference that the strip of paper is not rolled into a tube, but is wrapped in a spiral roll around a long stick .
Here in the photo below is a master class of this lush paper flower.
- a wide strip of crepe (corrugated) paper into a long fringe.
- We wrap the fringes on a toothpick (or knitting needle) - and we get curls along one edge of the ribbon.
- We take a long wooden skewer and wrap our paper ribbon with curly fringe around it - the wrapping starts from the upper end of the wooden skewer and goes down in a spiral .
- Under the flower we make a green wrap around a skewer stem and glue wide green leaves to this stem.
Paper rose flowers
FOLDING method.
Using the roll technique, you can quickly roll up a paper rose. We will have a separate article on paper roses. But I will give two master classes right here - because they cover the roll technique of creating flowers.
Here is the first step-by-step paper rose master class . Thick paper is used here and in order for the petal parts to have the geometry of broken pink petals, this thick paper strip needs to be PUMPED AND TWISTED around itself while rolling.
And don't pay attention to these centimeters ... Just take the very essence of this instruction. Cut a strip of paper from the draft and try to twist it into a rose, simply bending the strip as God wishes - the paper itself will tell you where to bend and turn it.
You will find many other options for making a paper rose from different types of paper in the article “PAPER ROSES (25 ways to make it yourself).”
And here is another way to roll a paper roll so that it looks like a rose. For such a roll, we need a paper strip NOT IN A STRAIGHT SHAPE, but to make a strip of paper IN THE SHAPE OF A SPIRAL.
To do this, just draw a snail on a sheet of cardboard (an uneven curve, no matter what). This drawn spiral will be the template for our paper flower.
Now you need to cut out this spiral line , and then start twisting the roll NOT FROM THE MIDDLE OF THE SPIRAL... but rather FROM ITS EDGE. And a paper rose will appear in our hands by itself.
My advice is not to use polished slippery glossy paper for this rose craft - such an elastic rose will try to unfurl or the spiral circles will slip out of the flower bed. It is better to choose rough paper or not very thick cardboard - this way the rose will better hold its shape.
Peculiarities
It is important to remember that any decorations can look advantageous if they are correctly integrated into the overall style of the event. For example, in bright aggressive colors they will not look as impressive as in addition to pastel colors. These tips should be taken into account when choosing other visual components.
Plus, it is necessary to provide life-size paper flowers with suitable support: despite the fact that the material itself is quite light, they can be held unsteadily. It is better to take care of this in advance. Most often, such flowers are installed near large static elements to provide additional insurance against accidental falls.
Birthday numbers
For a children's party they come up with a variety of decorations. If you use corrugated paper, you can make a large three-dimensional figure. The child will be happy with such non-standard decor. You can arrange a photo shoot against the background of the numbers. This option is ideal for the name day of a little princess.
The basis of the design is cardboard. It is necessary to cut blanks of the required sizes from dense material and assemble the number. Pompons made independently from paper are attached to it on both sides using glue.
It is better to choose two shades that go well together. The sides of the product are carefully covered with corrugated paper to match. The number is placed in the room where the celebration will take place. Against its background you get great photos as a keepsake.
cacti
If you consider yourself a fan of minimalism and simple forms, then you will certainly be interested in these original paper cacti. They can be decorated using any patterned paper - from regular green to shiny polka dots.
To create this decor, simply cut out cacti, aloe or succulents from cardboard or very thick paper. Then decorate them with scrapbooking paper or wallpaper. Plant flowers in a pot (use pebbles, polymer clay, sand as soil), or mount them on the wall. Ready!
Photo: riotgroup.ru
Photo: proffstroygroup.ru
DIY paper bookmarks for books: 11 ideas
Materials and tools for work
Beginning craftsmen need to have a traditional craft kit on hand.
In addition to paper of various colors and shades, you will need the most basic devices, devices, stencils, as well as decorative elements.
By the way, tool kits for working with corrugated work can be found in office supply stores.
Bouquet of white flowers
A great gift for your beloved mother or grandmother are cute flowers that will never fade. Delicate decor will delight the hearts of your nearest and dearest women for a long time. It is best to place such a bouquet in a tall vase that hides the stems.
You will need:
— Several sheets of thick green and white paper; — Long skewers or thin wooden sticks; — Liquid glue; — Gold glitter or glitter glue; - Scissors; - Pencil; — A spatula or a dull butter knife.
How to do:
1. Draw a five-petal flower on paper, then cut it out and use it as a template for other flowers. 2. Draw as many colors as you want on the back of the white sheet. For our bouquet we made 9 flowers. Therefore, we drew and cut out 9 flowers for the green stem and another 18 for real flowers. 3. Now you need to make the flowers voluminous. To do this, use a spatula, butter knife or wooden stick. Draw a fold line from the center of the outer edge of the petal to the center of the flower. There should be a total of 5 folds on each flower. Fold the flowers along the fold lines. 4. Make one cut on each stalk - from the point between the petals to the center. It will be possible to fix the flower stem in it. 5. Connect the parts: squeeze a drop of glue into the center of the stalk and fix a white flower on it, and another one on it. Please note that the petals of the top flower should be located between the petals of the stalk and the other flower, respectively. 6. Also apply a drop of glue to the center of the top flower and sprinkle it with glitter (or just use glitter glue). Once the center is dry, gently shake the flower to remove any excess glitter. 7. Glue three-dimensional flowers to the tips of thin wooden sticks. Ready!
Photo: remontbp.com
Photo: yastroyu.ru
Photo: remontbp.com
Photo: remontbp.com
Photo: remontbp.com
Photo: chenyna.ru
Creating the base for the flower
The height of such crafts can reach up to 2.5 meters. Here you are limited only by your own imagination. You can combine flowers of different sizes, from 1.25 m to the very ceiling. Just keep in mind that attaching the flower itself to the holder will be a little more problematic.
In order to make the stem, you will need a material that will hold the wire securely. Craftsmen recommend using cement or plaster. One small glass will be enough to fix the base of the flower. Even one layer of thick wire may not be enough. A wire frame imitating a tree trunk is a win-win option. Then the wire needs to be wrapped in green paper. It is better to do this unevenly to create the appearance of natural thickening of the stem.
Original crafts
You can make a lot of interesting things out of paper. An excellent solution would be a green Christmas tree that will decorate the house. For work you will need the following materials:
- cardboard;
- corrugated paper;
- scissors;
- glue;
- beads, bows or other decor.
It will take a minimum of time to create a green beauty. The base of the tree will be a cone made of thick cardboard. We choose any height. The cone needs to be covered with green paper.
Afterwards, you need to cut strips 16 cm long, the width of which is 1.5 cm. Using scissors, a fringe is made on each element. The parts are neatly twisted. For a small Christmas tree 14-15 cm high you will need 130 elements. They need to be glued to the base.
All that remains is to decorate the forest beauty with beads, small bows made of thin ribbon, and gold braid. The souvenir is ready. You can put it on the table at home or in the office, hang it above the window. Adults and children will definitely like it and bring a festive mood to the house.
It’s easy to make various crafts from corrugated paper:
- picture;
- pompom garlands;
- animals.
Use your imagination and get to work.
Children will be happy to take part in creating original things to decorate the house. A simple and useful activity will help develop new skills in your baby, teach him to understand colors and types of materials. A pleasant activity will distract parents from worries, allow them to relax and have fun with their family.
Multilayer petals
Now you will learn how to make life-size flowers with your own hands using this technique. Compared to the others, they look the most artificial and cartoonish. As a decor for a children's party, it is an excellent choice, but for a wedding or corporate event, something like this already sounds dubious, only if it does not resonate with the main style. Always remember that any decoration should harmoniously complement the overall spirit of the event.
You need to prepare a template. No special drawing skills are needed here: just draw a flower with leaves expanding outward. It is better to make three or more such templates of different sizes, then the result will be more realistic. On a large sheet of corrugated paper, you need to circle and cut out these blanks, and then put them on the wire one by one.

