Every girl had her favorite toys as a child. A special place was usually given to dolls. They made houses for them, sewed various outfits, and created accessories.
Making crafts for dolls with your own hands allows you not only to save on toys, but also to develop creative thinking. To make doll furniture, clothes and accessories you will need available materials that can be found in any home and a little imagination.
What is suitable for crafts?
Depending on the desired result, there are many ways to make mini furniture and accessories. You can use a variety of available tools that everyone can find at home:
- Old CDs.
- Carton boxes.
- Foam sponges and more.
If the upcoming work requires a large number of details, it is better to create a sketch or drawing of the future work in advance.
Crafts for Barbie
The Barbie doll differs from others in that she is a very kind and sympathetic girl. She has many friends, loves the color pink, has a big house and has different talents.
First you need to decide what temperament the doll will have and what its goals in life are. She can be a ballerina, a traveler, a housewife, a doctor, and so on.
Then you need to come up with clothes, furniture and accessories suitable for this profession.
If the doll is a future traveler, then she will need an umbrella, comfortable clothes, a backpack or a suitcase. These items are easy to make yourself. You can make a suitcase out of cardboard, for clothes you need thick fabric, and for an umbrella, take the one that is sold with a cocktail.
Beads, sparkles or stickers are suitable for decoration.
Housing from a rack
Surely in every home there is a not-so-needed shelving unit with open shelves. Or you can buy a new one. In any case, we recommend that you use this type of furniture to create a complete home for your daughter’s dolls.
So the idea is very simple. Clear the bottom 3 or 4 shelves of the shelving unit. If possible, you can paint them. After all, it will be much more interesting for a child to play in the light or bright walls of the “house”. Typically, pink, blue, lilac, light green and white tones are chosen as the design for Barbie's home. Therefore, if your shelving is made of wood, then go to the store for paints.
Remove the top layer using sandpaper and apply paint. You can decorate all rooms (floors) in one color or in several. If you have artistic skills, paint flowers or cute designs on the walls. You can also paint windows on some of the walls. This will add even more naturalness to the rooms.
This way you will have a real box for Barbie's future house.
DIY clothes for Barbie
In addition to pink, Barbie loves turquoise and purple shades. To create a dress you will need knitted fabric, satin ribbon for straps, threads, beads, Velcro, a needle, a thimble, pins, old soap and a measuring tape.
- First you need to take measurements from the doll: chest and waist circumference and measure the length of the skirt.
- Make a pattern of two rectangles. One from the chest to the waist, the second from the waist to the knees.
- On the wrong side, use soap or chalk to mark the seam allowances, approximately 0.5 cm.
- Cut out rectangles.
- Place the bodice on the doll from the wrong side, mark the darts with pins and stitch.
- From the wrong side, assemble the dome of the skirt with pins.
- Sew the top and bottom together.
- Sew Velcro on the back.
- Measure the satin ribbon straps and sew them on.
You can add a satin belt to the dress or decorate it with beads.
For walks and cool weather, you can sew a jacket. To do this you will need dark knitted fabric for the jacket, pink fabric for finishing, threads, chalk or soap, and a pattern.
- The pattern can be easily found on the Internet.
- Place the fabric right side inward. It is better to place the back on the fold so as not to make unnecessary seams.
- Trace the pattern twice: once along the contour, the second time with a seam allowance of 0.5 cm.
- Cut out the sleeves, hood, back and shelves.
- Baste two shelves and the back along the shoulder seam, sew, and zigzag the edges.
- Fold the cuff in half and place it under the bottom of the sleeve with the folded edge, sweep and stitch.
- Sew off the hood and finish it with a zigzag.
- Baste the hood from the center to the edge and stitch it.
- Turn the jacket inside out and stitch the seam from the cuffs to the bottom of the front and back.
- Sew ribbons to the hood.
Below on our website https://dnevnikmastera.ru we offer you to see examples of patterns and photos of finished clothes.
Selection of materials
Before you make decorations for dolls with your own hands, you need to select all the materials correctly. The appearance of the future product will depend on their quality. When making accessories, it is recommended to use the following materials:
- textile;
- beads;
- polymer clay;
- satin ribbon;
- wool threads;
- various decorative elements.
Each of the listed materials is perfect for creating one or another craft. Having chosen them, you can safely start learning how to make accessories for dolls with your own hands.
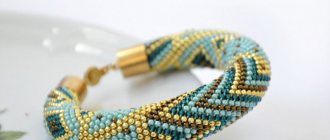
Accessories for Barbie
Decor and crafts for Barbie dolls can be made from scrap materials. For example, create a set of jewelry. It requires beads, beads, fishing line, copper wire, pins and wire cutters.
- Place three beads on the fishing line, from largest to smallest, and secure with a knot.
- Take a small cardboard circle, glue beads along the contour, and a bead in the center.
- Glue the pin. There should be a semicircle above the circle. This is the bow of the decoration, and at the bottom there is a loop for hanging.
- Connect the pendant to the circle.
- Using this principle, make a second product.
It is better to make the necklace without a clasp, because the clasps are large enough for dolls. For it you will need beads and a Hungarian elastic band. Using the same principle, you can make a bracelet. Such crafts are also suitable for Barbie double double dolls.
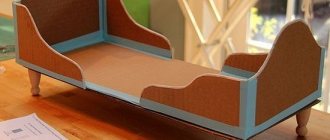
Coffee table
Dads often take part in children's creativity. Therefore, it will not be difficult to make a coffee table from plywood. It consists of three parts: a figured stand and a table top.
- According to the pattern, cut out the curly legs in the form of an arch with a groove in one of them;
- a round tabletop can be cut out with a jigsaw, or you can use an unnecessary part after working with a drill with a “crown” attachment;
- insert one stand into the groove of the other;
- glue the tabletop with Moment.
You can modernize the table using a cover made of a round mirror mounted on “liquid nails”.
Important! Carefully sand the surfaces to remove chips and nicks.
You can watch a video about crafts for dolls at the end of this article.
Paper dolls and accessories
Paper dolls can be a good component of exciting play. Here everything is limited either by your imagination, or on the Internet you can find a large number of samples of dolls of various shapes, hair and eye colors.
Clothes for paper dolls are very easy to make. A variety of ideas can be found on the Internet, magazines or books. Rectangular grips are used for fastening to clothing.
To work you need paper, scissors, glue, colored pencils, markers or pens. The paper doll needs to be placed on a sheet and traced along the outline. It is important to outline the shoulders, waist, hips, as well as those parts on which the outfit will be “put on”.
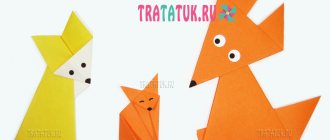
Origami dress
The dress made using the Japanese paper folding technique looks just like the real thing. Make a layout from a square sheet of any color.
See the photo for the master class.
Furniture for dolls
Matchboxes, scraps of fabric, leather, wooden and plywood blanks are suitable for furniture.
Bedroom
For a bedroom set you will need a cardboard box, foil, colored paper, glue, scissors. First, you can make a dressing table.
- You need to cut the cardboard box to the height of the table.
- Take a piece of foil equal to the width of the workpiece. This is the future mirror.
- Cut out leg space on the front. You can cover the box with self-adhesive wood-look wallpaper or paper.
- Glue the foil onto a piece of cardboard and connect the mirror and tabletop.
- Draw drawers. You can glue handles made of beads.
Dresser
For the chest of drawers you will need matchboxes, cardboard, colored napkins, and beads for pens.
- You need to connect the matchboxes so that the “boxes” move forward.
- Paste over the workpiece.
- Make a table top out of cardboard.
- Connect the parts together, glue the handles.
Sofa
For the sofa you will need wooden blocks, dense material that imitates upholstery (suede, velvet), liquid nails, and cotton wool.
- You need to cover the armrests with material and secure them with glue.
- Next, you need to put pieces of cotton wool under the seat upholstery and also cover it with material.
- Connect the seat, back and armrests.
You can sew pillows from leftover fabric and knit or crochet rugs.
How to sew a hat?
You can emphasize the doll's stylish image with the help of an accessory such as a hat. In the simplest version, it can be made from fabric, cardboard and a plastic cover. The stages of work are as follows:
- We measure the volume of the head. As a rule, for Barbie it is about 10 cm.
- We take a long strip of fabric, fold it, and sew it with a seam.
- We make a circle from a long strip, which will become the basis of the future headdress.
- To keep the Barbie hat in shape, you can put a pre-cut circle of thick paper inside the strip.
- The bottom for the headdress is made of fabric taking into account the size of the doll's head. It should fit tightly.
- After preparing the bottom, it needs to be sewn to the brim. To hide the seams, use decorative braid or some other decoration that is sewn or glued at the junction of the brim and the bottom.
That's it, the hat is ready. You can also make a handbag in the same style to make the doll’s image complete and harmonious. The easiest way to make a hat is from dense fabrics, such as felt. It is easier to use, holds its shape well and allows you to turn any design idea into reality.
Fabric doll products
For beginners, there are many different lessons and explanations, calculations, so as not to make mistakes in cutting. Otherwise, the thing may turn out to be either very large or very small.
You also need to focus on small details and decor to make the item look realistic.
Interior details
Most often, miniature crafts are made from paper, replicating our little household items. Before making paper crafts for dolls listed in this part, find old magazines and refill color printer cartridges.
Household little things mean:
- audio and video equipment;
- printed publications (magazines, newspapers, books, sketchbooks);
- cards;
- money;
- boxed food;
- passport;
- posters and paintings;
- frames with photographs.
Many prints have miniatures on the back and can be used for the covers of homemade magazines or newspapers. All you need to do is cut out the picture and glue it to the stapled sheets of paper.
The paper technique is glued together using the box principle. Before assembling, draw small details, as it will be very difficult to decorate miniature toys later. If you have a color printer at home, you can download pre-created box layouts. This way you will make the most realistic models possible.