How to avoid these inconveniences at home or at work
A modern gadget has many functions besides telephone communication. Plus a dozen more necessary digital things: graphic editing, the Internet, a notebook or pocket computer (organizer), TV and music player and more.
A lot of time is spent searching for a charger and headphones. And at least at home they should be next to the mobile phone on the same stand.
Below are clear instructions on how to make a stand with your own hands.
Use your imagination and select materials. If you don’t want to purchase neat and expensive factory-made coasters.
What material to use
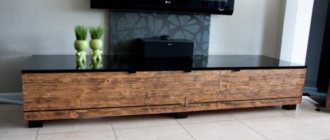
To make a shelf, craftsmen most often use laminated chipboard for a number of reasons.
Firstly, a shelf made from this material can be used immediately, while a product made from natural products will need to be varnished and dried for several hours.
Secondly, working with LSPD is very simple; additional tools for processing wood are not required.
Thirdly, looking at the photo of shelves for phones, you will notice that the color range of laminated chipboard sheets presented in construction stores is very wide, so everyone can choose a material that suits the interior.
From cardboard
Pick any strong one. Although you can also practice how to make a paper stand (there is a video). If your smartphone is 18 cm long, then draw a rectangle 75 cm long and 2 - 3 cm wide than the narrow part of the gadget.
Cut it out. Mark the fold strips with numbers: 1 - at 17 cm, 2 - at 24 cm, 3 - at 18 cm, and 4 - at 16 cm. Count the 24 cm line as the middle, and make all folds from it inward.
The largest part (No. 2) is the gadget’s bed; make a slot in it five cm from the bottom according to the thickness of the cardboard.
No. 4, cut to a depth of 6 cm, will fit into it from the inside. Place your mobile phone on this ledge. No. 1 will become the base of the stand, and No. 3 will become the vertical support.
Pros and cons of each method
Let's summarize and consider the pros and cons of each method.
| Method | Advantages | Flaws |
| Cassette case | No additional tools required - simply deploy. | Unprepossessing appearance of the plastic box. |
| CD case | Hangs on the wall, conveniently holds your phone. | Due to the number of small parts, the technology requires human accuracy. |
| Pencils and eraser | Available raw materials. | Not suitable for large models. |
| Toilet paper rolls | Ease of execution. | Only for small gadgets. |
| Lego | There are many assembly options that can be modified to suit the device. The tired support is rebuilt into a new one. | Unpresentable appearance. |
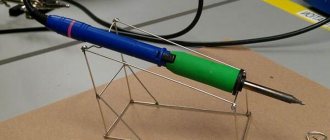
| Wire | Lightweight designs do not take up much space. | They can scratch the body and glass of the phone. |
| Paper | There are many assembly options according to the diagrams. | They require accuracy from the performer. |
| Cardboard | Easy to create, suitable for gadgets of various parameters. | You need to take only dense raw materials. |
| Plastic bottles | Available material. | After cutting, sharp edges remain. |
| Binders | Easy to assemble and disassemble. | They slide on the table. |
| Paper clips | Easy to use. | They require attentiveness from the performer. |
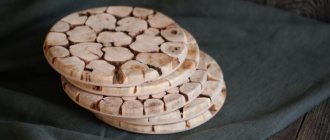
| Wine corks | Availability, many assembly options. | Wine stains are difficult to remove. |
| Tree | Looks prestigious, lots of solutions and schemes. | You need to have cutting skills and have a special tool. |
3.8/5 — (5 votes)
From fabric
The shape is a soft pillow. This business is for women. Cut a square of textile 10 cm longer than the vertical of the smartphone. Then fold the fabric in half to create a rectangle.
Sew the bottom part using a machine or by hand, carefully place the remaining padding polyester or cotton wool there, twisting them into a roll. This will be the heel on which the smartphone will rest. Next, also lay a line behind it.
From there, about four centimeters, smooth out the bottom and front side and back of your rectangle of fabric, and stitch again.
Up to this part of the pad, stitch from bottom to top at the junction of the strips, and also from above. Only the space for stuffing the top of the pad with synthetic padding will remain open. Close it with a seam too.
But unusual. You will have to trim it further so that when sewn together you get a triangle, with an acute angle downwards. This is the leg of the pad, and the smartphone rests semi-vertically on the wide part.
The stand is mostly ready. All that remains is to stitch or attach a pocket for the charger with Velcro. Now you will be surprised how you managed to make the stand yourself so quickly.
Wooden structures
It is worth considering that the stand for the tablet is made taking into account the weight of the device. Therefore, it makes sense to use harder and more durable materials for it. So, to make a structure from wood beams, you need:
- align the edges of the workpiece;
- outline the dimensions of the smartphone;
- cut along the markings with rounding and surface treatment to remove roughness;
- mark the locations for the grooves at the back;
- cut holes, clearing them of debris;
- sand the product, then treat it with stain;
- assemble elements into a single structure.
As an alternative, you can use a board in which you will have to cut a gap in the middle with a table saw.
The excess material is cut off. The groove must be made at an angle to ensure the desired tilt of the device. The hole made needs to be sanded and coated with oil.
PVC
80 percent of apartment chemicals are bottled in PVC. Find an empty and flat one, or better yet a 0.5 liter semi-oval one. Wash well. Measure 24 cm from the bottom and cut off the entire top.
Take the back part as the sole of a slipper and cut it off so that a full slipper comes out. The recess of the container will become a pocket for the gadget.
Above, “on the heel of the slipper,” cut out a window. You will insert the plug of the mobile phone charger through it. The “slipper stand” with the gadget will hang on it.
You can paint the toe of the stand with paints at your discretion or cover it with prints. Look at the picture.
Holders that attach to the wall
If you want to turn your smartphone into something like a television panel, you can use an old disc box as the base of the holder. The work is performed according to the following scheme:
- After measuring the device parameters, the case is disassembled into two parts.
- The smartphone diagram is printed on a flat plastic part. The design will require a rectangular back panel with four sides along the edges.
- The parts are cut according to the markings. To prevent the screen from scratching on sharp edges, they are dulled with sandpaper.
- Now we need to connect the structural parts with a glue gun.
- An element with openings for self-tapping screws is attached to the upper part of the holder on the wall side. The bottom edges are supplemented with corners and a soft film to prevent the device from accidentally falling.
All that remains is to screw a couple of screws into the wall and hang the finished structure on them.
A hanging holder can be easily made from a bottle. To do this, the neck and part of the front wall are cut off. All that remains is to make a hole for the hook in the upper back part. Using a similar scheme, holders are made from containers left over from shampoos or shower gels.
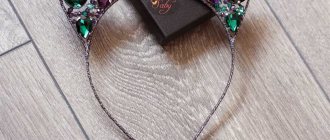
Made of wood, plywood
Unlike cardboard, which can be cut with a knife or scissors, these materials require a jigsaw. But it will turn out to be a very strong and stable stand.
Have you chosen the grumpy cat shape? Great, draw its outline as if looking at it from the front. The ears are strictly on the top of the head. Insert the lower part into the slot of the rectangle on which the cat will sit.
A little higher, glue in the paws and toes, also cut out with a jigsaw. You will place your mobile phone on your paws.
What material to use
To make a shelf, craftsmen most often use laminated chipboard for a number of reasons.
Firstly, a shelf made from this material can be used immediately, while a product made from natural products will need to be varnished and dried for several hours.
Secondly, working with LSPD is very simple; additional tools for processing wood are not required.
Thirdly, looking at the photo of shelves for phones, you will notice that the color range of laminated chipboard sheets presented in construction stores is very wide, so everyone can choose a material that suits the interior.
Arrangement in a home greenhouse
Briefly about how to make a flower stand.
First, decide where the stand will be located: on a windowsill, on the wall of a balcony, just on a tripod in the courtyard of a country house or cottage.
Then decide on the materials: metal rods - they require welding, a little simpler - a wooden frame stand mounted on some wall. Next, watch the video to see how it’s easier to do.
Functionality of wall shelves
Interior design is not an easy job, the goal of which, first of all, is the beautiful and cozy appearance of the room. Everything inside it should be in harmony with each other, not only in color, but also in style, and many, many more factors must also be taken into account. It is very important to choose the right furniture, which will not only be functional, but also suit the interior in all respects.
Wall shelves in the interior
The seemingly most banal interior items – wall shelves – deserve special attention. For an unassuming owner, they may be just ordinary storage systems for a variety of things, but in fact, shelves perform not only this function - they are quite capable of becoming decorative elements in themselves, as well as being a place where other items that decorate the room will be located. That is why it is important to choose a shelf wisely.
Original wall shelf
The functionality of the shelves is as follows:
If you wish, you can identify quite a few purposes for using shelves, but these are the main ones. Many shelves can combine several functions at once, and this will depend on the wishes of the owner, as well as on what shape and type of shelf is used.
Shoe shelf made from pallets
Important! When choosing the type of shelf, you should focus on the purpose of its use, the purpose of the room and the general style of the room. Only then will it be possible to buy or make the very product that will fit perfectly into the interior.
Photo tips on how to make a stand
https://www.youtube.com/watch?v=AL77AN5hJBg
Buy or make it yourself?
Buying ready-made shelves for walls is not a problem. Nowadays you can find all kinds of products in stores, among which you can almost always choose the one that will fit perfectly into the interior and will be in perfect harmony with the environment, but at the same time remain comfortable and functional.
Wall shelves for kitchen
But often shelves are made with your own hands. Why? It's simple. The fact is that not all cities have such a variety of furniture stores that will allow you to find exactly that dream shelf. Also, some variations of furniture products can cost incredible amounts of money, especially when it comes to designer products. In addition, making a shelf yourself is quite simple - sometimes it turns out to be even easier than finding an option that is ideal for the room. So the creation and further use of a homemade product is completely justified. Plus, it saves money. And with due desire and effort, a handmade shelf can practically become a work of art.
On a note! In some apartments, the size of the product may play a decisive role. And a homemade shelf in this case is an ideal option. It can be adjusted to the parameters that are necessary.
Corner shelf on the wall
DIY phone shelf on the wall
What could be more banal than an ordinary hanging shelf on the wall? But a good imagination and skillful hands can work wonders with such a simple object, turning it into a beautiful element of the interior design of your home.
One of the ways to decorate a room is to use shelves.
All materials have their advantages and disadvantages. The following are suitable for wall shelves.
- Wood lumber is the most common and cheapest - it is easy to saw into blanks, processed and painted.
- Metal is not always suitable, it is more difficult to process at home, shelves made of it do not fit well into the home interior, and are susceptible to corrosion.
- Glass looks great in the interior of any room, makes shelves visually lighter and airier, but due to its fragility, it requires special tools and equipment for cutting complex holes and grinding.
- Plastic is the lightest material that can replace all previous ones.
Shelves are hung on the wall, placed on the floor, some are hung from the ceiling or beams.
FOR YOUR INFORMATION! A person’s imagination in choosing material for shelves on the wall is inexhaustible - old suitcases, TV cases, water pipes and corners. Even... trouser belts can be used as fasteners.
Much more often they are functional.
What is the advantage of homemade wall shelves over purchased ones? Furniture stores offer options for all occasions - bookshelves, for dishes, for phones, for flowers. But in defense of homemade products, the following arguments can be given:
- The purchased shelf does not always correspond to your ideas of beauty - either the color is inappropriate, or the shape is awkward;
- the dimensions of the purchased product do not fit into the dimensions of your room;
- the height or width of the shelves does not correspond to the size of the things you want to place on them;
- After the repair, there were pieces of good material and fasteners left - it would be a shame to throw it away, but there was no desire or space to store it.
But the best thing is that they are easy to make yourself, with your own hands.
ON A NOTE! Making shelves on the wall with your own hands is often cheaper than purchasing them from a well-known furniture company.
They are made of wood, plywood, laminated chipboard, fiberboard, and there are glass shelves.
Before assembling the shelf, determine what type it will be. Furniture craftsmen have become adept at making wall shelves for all occasions:
- open – without side walls, front doors and back wall;
- closed - in essence, such shelves are hanging cabinets in miniature, differing from them in smaller mass, depth and height;
- corner – located at the junction of two walls, can be for both the internal and external corners;
- asymmetrical - the layout of the shelves is devoid of an axis of symmetry, provided that functionality is maintained;
- suspended - harnesses, cables, dense fabric materials, belts are used as hangers for shelves, and the ceiling is used as a support;
- decorative - designed to beautifully arrange interesting things.
The same materials are used as stands, but they are also made from metal, plastic and other absolutely incredible things - for example, pipes or bottles.
The easiest way to assemble wall shelves consists of side, top and bottom walls, fastened together with self-tapping screws or furniture fittings. Make the required number of such “modules” of different lengths and heights and fix them on the wall in the desired order. This option is well suited for making bookshelves.
In living rooms, it is not so important what material the shelf is made of. It is important that its design is in the same style as the interior.
You will need the following materials and tools:
- board 16-20 mm thick and 150-180 mm wide - it can be pine, MDF, plywood or chipboard.
- self-tapping screws;
- screwdriver;
- building level;
- furniture hacksaw for wood.
Even functionality is not always important: some play a purely decorative role. If they have anything on them, it’s only one or two items.
The height and width of the shelf are selected arbitrarily. If the ends of the upper and lower walls rest against the edges of the side walls, then, when determining their height, it is necessary to make an allowance for the double thickness of the board.
Their role is to give the interior of the home a special style and flavor.
ATTENTION! To cut the board, use a hand-held circular saw or jigsaw. Their use allows you to make the cut surface smooth.
If we talk about shelves in technical rooms - the kitchen and bathroom, in particular, then in addition to aesthetic considerations, practicality requirements are almost universally added.
When marking parts for corner wall shelves, the upper and lower walls are made of two boards with oblique ends. Their connection must fit exactly into the angle for which they are intended. The surface of the ends is lubricated with wood glue, the boards are connected and tightened with clamps until completely dry. Additionally, you can fasten the corners with self-tapping screws.
Before installation, the wooden parts of the shelves must be sanded and a protective coating applied. You can treat the wood with stain and varnish. However, such a shelf does not always fit into the overall color scheme of the interior. Then it is better to apply a primer and paint it in the desired color.
To secure the place where the self-tapping screw is screwed into the lower part of the sidewall, you need to pre-drill holes with a thin drill.
To fasten the walls with self-tapping screws, you need to mark the holes. From the end edge of the bottom wall, measure a distance equal to half the thickness of the side wall and draw a line parallel to the cut. Marks are made on it for the drill, stepping back five centimeters to the left and right. The opposite end is also marked. They make holes. Secure the side walls of the shelf with self-tapping screws. Mark and fasten the upper wall of the shelf in the same way.
To ensure that the shelf is level and subsequently does not warp, in the lower part, on the reverse side, you can fix the location of the parts with flat window corners.
ON A NOTE! Other methods can be used to fasten the walls of the shelf - wooden dowels with wood glue, special fastening fittings - tie corners, eccentric tie.
Despite the fact that electronic devices are replacing printed publications from a person’s life, many people still carefully store books and magazines dear to their hearts, the storage location of which often leaves much to be desired.
It would seem that nothing is simpler. In fact, this is a crucial stage. You don’t want all your efforts to improve your home to collapse in one moment?
The easiest way is to use a hanging corner for shelves. The upper eye is attached to the wall using a dowel, the lower one is attached to the shelf with a self-tapping screw or bolt with a nut and washer.
IMPORTANT! When the load on the shelf is from 20 to 50 kg, use brackets. Mark the holes on the wall using a building level.
Hands must be clean, because untreated wood is very easily soiled.
The dimensions of the shelf will depend on the size of the books that will be stored on it.
A shelf of an original shape requires some imagination and a little more hard work, but your efforts will more than pay off - the original product will enliven the interior appearance of the room.
- We saw the board into 15 sections 300 mm long with a cutting angle of 30°.
- We make the first “honeycomb”. To do this, we glue the hexagonal section and strengthen its corners with self-tapping screws.
- We make all other “honeycomb” shelves without one wall.
- We stack them on the floor in such a way that the missing edge is replaced by the wall of the adjacent section. We fasten them together with glue and self-tapping screws.
- If there are segments of sufficient length left, then you can make shelves inside the “honeycomb” itself.
Each part needs to be processed with a grinder, only then can it be fastened with other parts into a single structure.
IMPORTANT! To avoid the appearance of cracks and distortions when tightening screws, pre-drill holes with a diameter of 1.2 mm.
Of course, you can’t do without a tool. The minimum is a wood saw and a Phillips screwdriver.
There are strength requirements for bookshelves: they can hold significant weight.
If your taste is offended by the type of fastening hardware, then you can make a small open shelf with hidden fasteners.
The first thing you need to think about is the size of the shelf being made and decide on the place where it will be located, only then purchase boards.
It is often seen when people decorate their homes with artificial flowers, but still nothing can replace the freshness of a natural beautiful plant.
- wooden beam with a thickness of 25-30 mm with a well-polished surface;
- a board of the same thickness, made of the same material;
- dowels – cylindrical pins made of wood;
- wood glue;
- dowels and screws.
Thanks to a modern universal tool, a home craftsman can make almost any shelf, even in an apartment, not to mention working in his workshop.
Assembling such a shelf consists of the following steps.
- The timber and board are sawn into pieces of equal length.
- Using a template, matching holes are made in the side of the block and the future shelf, the diameter and total depth of which must match the length of the dowels.
- The beam is attached to the wall using dowels and self-tapping screws.
- Dowels lubricated with glue are carefully hammered into the holes of the timber.
- The surfaces of the beams and the shelves that will be connected with their help are also lubricated with glue.
- The shelf is “slipped” onto the dowels and pressed tightly. To be sure, you can gently tap along the entire length of the side of the shelf with a rubber mallet.
Of course, you immediately want to make something voluminous and beautiful, which is quite natural, but first you can try your hand at making a simple but neat shelf.
This shelf will look like a natural extension of the wall of your room. Just don't load it with too many items.
Moreover, these products may be the first self-made things. It's really simple.
You have assembled and hung the shelves on the wall. But they look unpresentable - too empty or, on the contrary, littered with books and other small items. To make wall shelves in the interior of your room look aesthetically pleasing and eye-catching, follow these simple rules.
- The law of three colors - one dominant color for the shelf and two additional ones for the items on it. It is advisable that the color of the shelf contrasts with the objects standing on it - this way they will look more expressive.
- Control chaos with triads. Arrange items with similar colors on different shelves so that they are on the tops of imaginary triangles.
- Give more air - some things, especially large ones, require more free space on the shelf.
- Small things need a favorable background. For example, a figurine standing on a shelf next to a luxurious vase must be moved away from its spectacular neighbor and placed against the background of a small watercolor painting.
- Try to place objects that are similar in size and color relative to the imaginary vertical or horizontal axes of symmetry.
- The higher the shelf, the lighter the items should be. It is advisable to place all massive objects on the lower shelves, and light ones on the upper shelves.
- Don't forget about functionality - on a shelf located at your eye level, place the things you use most often.
A simple design is good: you can make any shelves with your own hands.
Don't be afraid to experiment. A wall shelf can be made from any material, but lumber works best. For installation, use hanging corners or brackets. And don’t be lazy to beautifully arrange books and vases on them.
Structurally, most shelves consist of the actual shelves and lintels.
If you have a desire to do something, then a DIY phone shelf is the best place to start working around the house. Manufacturing does not take much time and investments are minimal, but the output will be interesting options for the interior of the entire room. You can use a regular edged board or chipboard. The first option is more beautiful, but you will have to wait and the whole process will take up to a day and a half.
Brief contents of the article:
It will require:
- Roulette
- laminated chipboard
- Screwdriver
- Jigsaw
- Pencil
- Scissors and paper
First prepare an ordinary rectangular shelf, where it is possible to attach a rack with a telephone directory and other small devices. The side shields are equipped with 2 similar stripes. The width is 25 centimeters, and the height is 30-35 centimeters. On the front side, you can round off all the sharp corners. This will protect your hands and other parts of your body from accidentally hitting a dangerous surface when you try to sharply lift the handset.
Mark on the tile in one place where you will cut, and then do a similar operation on the other side. Mark everything with a regular pencil so that everything can be easily erased later. You can cut off the excess with a simple jigsaw.
The shelf for the telephone in the hallway does not exceed 40 centimeters in width. The depth of the plates themselves does not change - 25 cm. The bottom shelf can be made so that it can accommodate a telephone directory or components for a phone - headphones and a charger. The height of the inner part can reach 11-14 cm. But there is no need to install another horizontal bar.
When assembling, measure and drill holes where the horizontal ceilings are then inserted. Only then can furniture screws be screwed in there. If this is not done, the tree will easily split and lose its pleasant appearance.
People strive to simplify their activities in any matter. Here, a lot depends on what shape you decide to choose - round or rectangular. Craftsmen can get creative by choosing completely outlandish architectural types. This shelf is inferior to the previous one in that there is no longer space for a reference book or other things. But you can very quickly connect to all electronic devices in space.
Here the instructions on how to make a shelf for a phone are quite simple. First you need to prepare three different plates. One will be 35 centimeters long, the thickness will be 2 cm, and the height will be about 10 cm. The second will be the same in thickness and height, and the length will be about 17 cm – a stiffening rib. The third is identical in thickness, 35 cm in length, 20 cm in width - the same “stand”. Putting all this together is not difficult. Insert two furniture screws into all joints.
The stiffener requires entry from the other side of the load-bearing shield, which hides all elements of the work. The upper part, when drilling in the load-bearing part, helps the rib become a support element, and when drilling completely, you need to beautifully hide the joints, which is not always possible when working for the first time.
The basic design, for all its modernity, needs decorative elements, otherwise it looks too simple and faded. Everything on the wall should look harmonious without elements that immediately catch the eye. Good photos of phone shelves clearly demonstrate to us that it is always possible to make very beautiful, reliable and original options.
You can use an element that will suit both cases above - this is an edging running along the outer edge. To attach it, you need to find some kind of heating surface, for example, an iron. Apply it with simple movements and secure the edge.
Be sure to try to hide any exposed connections. Before drilling, you need to remove a small area. Its diameter should match the diameter of the screw head. After you have drilled everything successfully, you can drip glue onto the wood, and then the cut element is pressed.
If you do all this carefully, nothing will be noticeable. You need to drill with a specialized drill, which ends in a special head that helps create a groove just the size of the head.
Usually, a wall-mounted shelf for a telephone, when made from laminated chipboard, also has a special design applied. First, they make a small hole, and then manually cut out, for example, a gnawed apple with a jigsaw. In this case, working with your own hands is justified.
When attaching to the wall, you need to screw a couple of fasteners on the back side, and for a good fit, you can take 3-4. If everything went well, then don’t rush to rejoice. The shelf must be disassembled and reassembled again, gluing all the joints with glue. Then you can safely forget about the service life of this item in the apartment. Everything will hold out calmly for 20, 30, and 50 years. The main thing is that your eye is pleased with the final finished product.
Classic version
It will require:
- Roulette
- laminated chipboard
- Screwdriver
- Jigsaw
- Pencil
- Scissors and paper
First prepare an ordinary rectangular shelf, where it is possible to attach a rack with a telephone directory and other small devices. The side shields are equipped with 2 similar stripes. The width is 25 centimeters, and the height is 30-35 centimeters. On the front side, you can round off all the sharp corners. This will protect your hands and other parts of your body from accidentally hitting a dangerous surface when you try to sharply lift the handset.
Mark on the tile in one place where you will cut, and then do a similar operation on the other side. Mark everything with a regular pencil so that everything can be easily erased later. You can cut off the excess with a simple jigsaw.
The shelf for the telephone in the hallway does not exceed 40 centimeters in width. The depth of the plates themselves does not change - 25 cm. The bottom shelf can be made so that it can accommodate a telephone directory or components for a phone - headphones and a charger. The height of the inner part can reach 11-14 cm. But there is no need to install another horizontal bar.
When assembling, measure and drill holes where the horizontal ceilings are then inserted. Only then can furniture screws be screwed in there. If this is not done, the tree will easily split and lose its pleasant appearance.