The approach of the New Year 2022 of the Blue Water Tiger makes many of us already today think about upcoming children's matinees. And it doesn’t matter whether it’s a kindergarten or an elementary school. All of us, without exception, want our children to look as bright and best as possible, regardless of their location. For this purpose, every caring mother carefully selects and thinks through a fairy-tale image for her baby. Of course, princesses are especially popular.
With the intense efforts of needlewomen, chic fluffy and airy dresses, delicate makeup, and magnificent hairstyles with shiny curls are created. Everything is so full of beauty and grace, splendor and nobility. But the most important thing that you should not forget about at the Christmas tree is the crown. It will be simply necessary for your girl. After all, as a rule, everyone’s favorite princesses cannot do a single minute without their main attribute, which, in fact, gives them important status and universal respect in a certain society. Of course, many parents run to stores in search of this decoration, and some, who have excellent handicraft skills, try to create real masterpieces of art at home, which, with their uniqueness and unsurpassed quality, can easily outshine market goods of this type.
If you have never had to make these products, then on the eve of the New Year holidays you should definitely try. After all, your little daughters really want everyone to admire and admire their beauty and perfection at this early age, and this decoration, made by you yourself for the New Year’s party, will give them self-confidence and a certain grace. If you don’t know how to make an original crown for a girl for the New Year 2022 with your own hands at home, then you should read our article, which presents to your attention 57 photos of ideas and simple master classes available for your understanding and creativity.
Ears on the headband
How to make ears with your own hands? Quite simple. Take the following materials:
- a piece of fur;
- a piece of beige or coral fabric;
- a coil of thin wire;
- threads;
- finished headband;
- filler.
Tools you will need are wire cutters and scissors. As you can see from the master class “making a headband with ears,” the procedure is as follows:
Let's make a pattern. There should be two of them - one larger, the other smaller. We transfer the pattern to the fur and carefully cut it out. We sew the resulting blanks together.
We take the wire, cut a piece of 44 cm, which we divide into two parts. Our ears will be 11 cm in height each.
We work the wire, giving it the shape of the ears. We sew the fur blank to the fabric part, stepping back from the edge by 1 cm. We insert the wire into the resulting pocket. We fill the ear with padding polyester. We bend the lower part and sew it to the rim.
This type of decoration is universal. It can be worn by both girls and boys.
Instead of fabric, you can use suede or leather. For greater rigidity, it is appropriate to use cardboard or paper inserts.
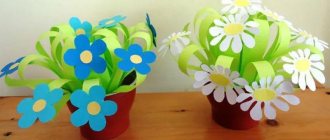
Master class “Paper flower cap”
Karimova Yulia Alexandrovna
Master class “Paper flower cap”
1) Cut out a strip of thick cardboard, 4 to 5 centimeters wide, around the circumference of the head, and secure the ends of the strip with a stapler. The result is a headband. 2) The headband must be wrapped in corrugated paper in bright colors . 3) Cut 4 more strips to fit the volume of the head and fasten them to the headband at both ends. You will get a hat . 4) Cut out circles with a diameter of 5 to 7 centimeters and give them the shape of petals. 5) We secure each petal individually with a stapler, starting from the rim, rising to the crown. The crown can be made in a different color. Decorate the hat as desired. 6) As a result, we get a beautiful flower hat.
Competition-review “Oh, what a hat!” (photo report) A funny and cheerful hat competition for children was held in our kindergarten. 22 people took part in it. We didn't even expect there to be so many.
Summary of a lesson for older preschoolers “The Magic Hat” using educational games by V. Voskobovich Objectives: • Continue to teach children to compose an object according to a diagram from parts. • Develop skills in techniques for constructing geometric shapes.
GCD notes on paper construction for “May 9” “Dove” Goal: Mastering the technique of folding a paper dove figurine using the origami technique. Develop the eye and coordination of movements. Material:.
Context of the GCD “World of Paper” Purpose. Improve knowledge about different types of paper (napkin, writing, wrapping, drawing, compare their quality characteristics.
Paper construction. Paper construction. “The origins of children’s creativity and talent are at their fingertips. From the finger, figuratively speaking, come the finest.
Designing from paper Designing is a practical activity aimed at obtaining a specific, pre-conceived product. Children's design. Master class "Cylinder Hat" Hello dear guests! The Graduation Party is approaching. I would like to invite you to see how to make a top hat for boys. Paper craft “Butterfly” Paper craft “Butterfly” Butterflies are one of the most beautiful insects, the appearance of which reminds us of spring and the long-awaited summer, and. My paper crafts Mysterious world paper transformation All the sorcerers, wizards, magicians are here. We create fairy tales with our own hands. My “paper fantasy” has begun.
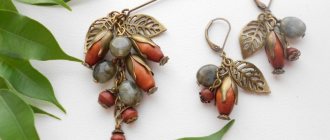
Ears made of beads
The instructions on how to make cat ears from beads are striking in their simplicity. It only takes a couple of hours to make such an accessory.
At the same time, it looks incredibly elegant and cute on the head. Prepare:
- wire dia. 2 mm;
- wire cutters;
- thin bezel;
- beads of the same size;
- decorative cord for wrapping around the headband.
Sequencing:
- Mark on the rim the points where the ears will be attached.
- Bend the wire in half and screw it to the base.
- Insert one end of the wire into the bead, and go around it with the other. Then connect the ends and twist three times.
- Repeat the manipulation until there are 9 beads on the ear.
- Screw the wire to the headband to form an ear. Do the same for the second ear.
DIY crown made from a plastic bottle
Making a crown for the New Year 2022 from a plastic bottle is a fairly cheap option among all of the above.
After all, in almost every home there is a similar auxiliary material from which you can create incredibly beautiful decorations for your little girl’s head with your own hands. For production you will need:
- two-liter plastic bottle;
- scissors;
- adhesive tape;
- Blank sheet;
- marker of any color;
- glitter glue;
- decorative elements at your discretion.
Work process:
- Using sharp scissors, carefully cut out about 1/3 of the plastic bottle to form a cylinder.
- On plain paper we draw a template for the future crown.
- Using tape, attach the resulting stencil to the inside of the plastic cylinder. We outline the drawing with a marker; there is no need to draw out the details.
- Now, using sharp scissors, cut along the contour of the design so that no traces of the marker remain on the plastic. Please note that the shape must be cut with a rim.
- We again attach the template to the workpiece and, using shiny glue, trace our resulting product along the contour and draw all the details.
- All that's left is to let the glue dry. To do this, you should remove our creation for two hours to a place that will not be accessible to your children.
That, in principle, is the whole complexity of this work. Don’t be lazy, and you will create a wonderful decoration for your girl for the New Year 2022 with your own hands in a matter of hours, for which she will certainly be grateful.
Don't forget to check out our photo ideas, which you will find useful and quite interesting.
If this option seems too primitive to you, then we recommend watching our video tutorial. Thanks to this, all the secrets of creating a New Year's crown from wire and beads will be revealed to you.
Master class on making head jewelry at home
Cardboard ears
They can be made in a couple of minutes. To make ears on your head you will need:
- cardboard;
- paints;
- scissors;
- base (rim).
Take cardboard and cut out two rhombuses from it. Fold them in half and insert a headband between them.
We cover the inside of the cardboard blanks with glue and compress them. You should end up with elegant triangular ears. Let them dry and put them on.
Royal lace crown
You are confused and can’t figure out what you can use to make a crown for a girl for the New Year 2022 with your own hands quickly and quite simply, then turn your attention to the royal lace version. It won’t be difficult for you to create such charm with your own hands at home. If you don't believe me, see for yourself.
For production you will need:
- beautiful openwork lace, 40 - 45 cm long;
- PVA glue;
- wax paper;
- spray in a can of silver, gold or some other color;
- hot glue;
- sponge to remove excess glue.
Work process:
- Spread out wax paper and place an even piece of lace on it. If the openwork is slightly wrinkled, it is advisable to iron it properly.
- Now we need PVA glue in order to thoroughly coat our braid in two or even three layers. We are waiting for our workpiece to dry completely.
- Let's start with the decorative part of the work. In this case, we will need acrylic paints or, better yet, a golden or silver spray. We process our product with it, capturing each pattern. After this, you need to give the lace time to dry.
- After the allotted hour has passed, we should connect the ends of the openwork, thereby recreating the festive crown for your girl for the New Year 2022 with our own hands.
If you are extremely careful in your creative work, you will create true perfection that will outshine everyone at your daughter’s New Year’s party. We suggest you look through our photo ideas that will provide you with new opportunities in this area.
We offer another simple option on how to make the main royal attribute for your child’s festive look. Our interesting video tutorial will provide you with step-by-step instructions for this technique.
Master class on creating a crown from cardboard, organza and glitter
Knitted ears
Prepare:
- thick yarn;
- headband;
- hook No. 4;
- needle and cardboard.
Let's look at the order of steps:
Tie 12 single crochets around the rim and knit 1 instep stitch. Make 12 more loops behind the front wall.
Unfold the canvas and repeat the previous operation. You should have an “oval” of 24 loops.
Insert the cardboard triangle and continue knitting around it. Follow the following pattern:
- 3rd row – 12 sc for both walls of the loop;
- Row 4 – alternate 2 sc together and 8 sc;
- 5th row – 2 sbn together, 7 sbn, 2 sbn together, 9 sbn;
- 6th row - 2 sc together, 6 sc, 2 sc together, 8 sc;
- Row 7 - 2 sc together, 5 sc; 2 sc together, 7 sc;
- 8th row - 2 sc together, 4 sc, 2 sc together, 6 sc;
- 9th row - 2 sc together, 3 sc, 2 sc together, 5 sc;
- Row 10 - 2 sc together around the entire perimeter of the oval.
Sew up the hole with a needle. Repeat the same steps for the second ear.
Felt headband
Felt is a material that is perfectly suited for the job. It does not wrinkle and has neat edges. You can make very beautiful flowers from felt to decorate a headband, and not just flowers.
This work uses different flowers, which can be made from felt using glue or a needle and thread. After the flowers are made, they are sewn on with a wide elastic band. You can take any sizes of flowers, from 4 to 10 cm. It all depends on the age of the girl and the purpose (holiday, photo shoot). Flower stencils are located at the end of the article.
Flowers are easy to make. You only need to print or draw a few stencils by hand. Anemones turn out delicate and beautiful, roses and hyacinths are great for decorating a DIY headband.
Rose and hyacinth. For hyacinth, cut out a strip 20 cm long, height - from 10 to 15 cm. Bend the strip in half and make cuts, not cutting 1.5 cm to the end. Roll the workpiece into a tube and secure the leg.
For anemones you will need 6 petals, cut in 2 places and a black cut fringe - the middle detail. Don't forget the leaves for the flowers. It is better to take an elastic band that matches the color of the princess’s hair.
And here are anemones with different leaves and centers. Choose which ones you like best.
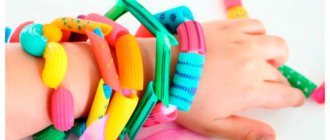
Cat ears hairstyle
This hairstyle will effectively complement any carnival look. How to make horns from hair? For this you will need hairpins - 20 pieces, no less.
Comb your hair, make a central parting. Form two symmetrical ponytails and secure them with elastic bands. To keep your hairstyle securely in place, use foam.
Take the first ponytail, twist it around the elastic and secure with bobby pins. Perform a similar operation with the second tail. As a finishing touch, spray your hair with hairspray.
In conclusion, we note that there are many answers to the question of how to make cat ears.
The choice of a specific method for making them depends on the wishes and level of skill. At the same time, it is not at all necessary to blindly copy finished works - you can come up with something of your own by involving your child in the modeling.
Crown "Snow Queen"
If your girl does not want to be a princess at the Christmas tree party for the New Year 2022, but expresses her desire to become a queen, then fulfill the child’s request and create for her a costume of a fairy-tale Snow Queen with a beautiful and majestic crown, made with your own hands. There will be no limit to amazement, you will see! A good mood and a joyful, warm smile will brighten up your child at the party. Without delay, get to work to meet the deadline.
For production you will need:
- silver snowflakes - 5 pcs.;
- wire;
- needle;
- “Travka” yarn with lurex or something like that;
- silver thread.
Work process:
- Before you start decorating the New Year 2022 crown, you should use a certain piece of wire to create a frame for the future product. Measure the volume of your girl's head and weave a kind of round mesh that will serve as a fastener for decorative New Year's elements.
- After the base of the head decoration has acquired the proper appearance, you should wrap it with Grass yarn, without missing a single component of your product.
- The final part will be the transformation of our handmade creation. For this purpose we will need silver snowflakes. We must secure them to the crown by sewing them with silver thread. If you want, you can get shimmering beads, rhinestones, sparkles and embellish your magnificent work with them. In general, the richer and more luxurious you create a children's crown, the more realistic and interesting your little one will look as a cold and proud Snow Queen at a New Year's party in kindergarten or elementary school.
We invite you to look through our photo ideas on this topic, which, in fact, will help you choose the most optimal option for independent work.
For clarity, we recommend that you watch our instructional video, thanks to which you can easily make the most beautiful decoration for your child’s head at home from available materials.
Master class on creating a New Year's crown from an old tiara, tulle and mesh with sequins
Photo of ears
Flower stencils for headbands
Using these stencils you can make all kinds of flowers for headbands made of felt, organza, lace, leather, and so on.
creative mask
You will need: cardboard, scissors, a thin rubber band or elastic thread, a stationery knife, felt-tip pens or pencils, a hole punch.
Master Class
- Fold a sheet of cardboard in half.
- Draw a mask template on the half.
- Cut out a hole for the eyes using a utility knife.
- Use a hole punch to make a hole for the elastic.
- Cut out the mask.
- Draw a face on the mask - nose, ears, mustache.
- Secure the elastic band.
Crown with a large flower
This crown is decorated with only one, but large and very expressive flower.
We make the base of the crown from green paper ribbons of the same width. We cover the child's head with them, and then form a crosshair so that the crown does not slide onto the forehead.
We cut out the flower petals, make cuts on each of them and lightly pinch them to give the petals a curved shape. Then we attach them to the base of the flower, cut from darker paper. Using a dark green pencil, add lines at the base of each petal to give them an even more natural look.
We make the core of the flower from pieces of yellow napkin rolled into lumps, and the stamens from wires with beads attached to their ends.
Option No. 2
You will need: nylon tights, scissors, thread, needle, centimeter, flower decoration elements, rhinestones, beads.
Master Class
- Take a head circumference measurement.
- Cut the base of the bandage from the nylon tights. You should cut 5-7 cm less than the head circumference, since nylon is a soft material and stretches very well.
- Sew the two ends together and sew on a nylon elastic band, creating the appearance of a bow shape, as shown in the picture.
- Decorate the flower headband with rhinestones and beads.
I recommend watching this video!
Headband from an old unwanted T-shirt / DIY Tsvoric
Option #1
You will need: the base of the headband is a ribbon or elastic band, the material for making the flower is soft fabric, felt or foamiran, a needle, threads, glue, a centimeter.
Master Class
- Take felt and cut out 4 circles for the future flower.
- Fold the first circle in half, apply glue to the center, place the second bent circle on top and apply glue to the center again. Repeat the same with the remaining circles.
- Wait for the glue to dry.
- Take a head circumference measurement.
- Cut the required length of ribbon or elastic.
- Sew the ends.
- Sew the flower onto the headband.
I recommend watching this video!
Children's headband made of foamiran / DIY TSVORIC