Photo collage on the wall from photos without frames: 17 successful ideas
The latest trend in photo collages is creating creative shapes simply from photos without frames. It's fun and can give unexpected results. For your inspiration, we have collected 17 of the best DIY examples. In most cases, photos are mounted directly on the wall, sometimes on thick paper, canvas, or hung on a wire. In any case, these are very cheap ways to create a photo collage. It just takes a little time and imagination. You can print photos of the same or different sizes. It depends on your idea.
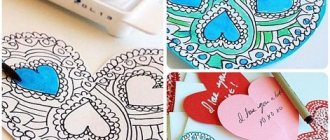
Paper hearts. Original and simple
You can not only sew a heart as a gift, but also make it out of paper. To make the gift look more thoughtful and elegant, make a heart-shaped paper craft.
Heart box
We draw the shape of a box, that is, 2 hearts, a partition between the sides and flaps for fastening. Cut out the shape and insert along the lines. Glue the desired part and let it dry. You can write a few words on the front side and put a surprise in the box.
Original modular heart as a gift
Everyone will appreciate an unusual and beautiful gift; in addition, modular origami can be used to set the table for a romantic dinner or holidays. It looks very atmospheric and creative.
The essence of this Chinese technique is to create any shape from many triangular modules. In our case it will be the heart.
Ageless b/w
A collage that can grow...
...and become a chic black and white photo wall.
They say that any photo is better in black and white.
Share with friends
- home
- Useful articles
- Photo collage on the wall from photos without frames: 17 successful ideas
By submitting any form on the site, you agree to the privacy policy of this site
Please note that this website is for informational purposes only and under no circumstances constitutes a public offer. For detailed information on the availability and cost of these goods and (or) services, please contact our managers.
Furniture factory Astron
Zarechny, Penza region, PO Box 344
Monday–Friday, 8:00 to 17:00
Applications are processed Monday to Friday from 10:00 to 18:00. Our manager will call you back at the specified phone number.
After processing the application, our manager will contact you.
How to assemble an origami module?
- To create three-dimensional triangles you need a rectangular sheet of paper. Take an A4 sheet of paper and fold it in half three times. Cut the paper along the fold lines to make 16 rectangles. It is possible to fold one sheet into four, then there will be 32 rectangles and they will be smaller.
- Fold one of the leaves in half along the wide part.
- Now fold along the short part. And straighten the paper. You should now have guidelines for further work.
- Fold the sheet of paper with the edges toward the center, as if you were making a paper airplane.
- Fold the bottom edge toward the center of the shape.
- And finally, fold the corners up and bend the resulting triangle in half.
To watch online, click on the video ⤵
DIY: COLLAGE FROM PHOTO IN THE SHAPE OF A HEART in the ROOM // ♥♥♥ Read more
How to make an Instagram heart in your photo. Instagram heart in the photo. More details
Kind Cartoon for children Chicken Como More details
How to make a “Heart” collage Read more
How to make a decorative wall heart for photos from wood Learn more
Topiary-heart. How to make an interesting gift -TOPIARY - PHOTO FRAME in the shape of a heart. More details
How to hang photos - 10 original ideas Read more
How to make a heart with your own hands 37 photo ideas in a photo album from DOMIKru.net More details
DIY HUMAN HEART WITH YOUR OWN HANDS – A GIFT FOR VALENTINE’S DAY Read more
♥DIY: How to make a three-dimensional heart ♥decor for home and photo shoots with your own hands More details
How to make a heart - creative ideas, step-by-step master classes, photo examples
How nice it is to receive gifts. Hand-made gifts are especially appreciated. We congratulate our dear people and say a lot of warm words and wishes.
But it can be difficult to talk about tender feelings. The easiest way to express your attitude is to use symbolic language. Sometimes you say words about the most important things confusingly and out of place, but a gifted heart will say everything for you.
No matter the occasion - Valentine's Day, birthday or March 8th - a gift decorated with a homemade heart will always be appropriate for a loved one.
Methodological development “Crafts from paper hearts”
Zoya Reasonable
Methodological development “Crafts from paper hearts”
Methodological development “Crafts from paper hearts”
Dear colleagues, dear friends and guests of my page, good day!
This methodological development is recommended for teachers of children's institutions, teachers of additional education in homes and creative studios, for children of senior preschool age and parents for joint creativity with children and just anyone who likes to make and create wonderful crafts with their own hands.
Crafts from hearts are not difficult and very exciting. Making crafts from hearts with your own hands is a fascinating process for children. Paper hearts make cute and fun crafts.
When making crafts from paper hearts with their own hands, children are busy with interesting activities; making crafts with their own hands contributes to the development of children's imagination, imagination and fine motor skills.
The bottom line is that this is not only a fun activity, but also a very useful one.
Goal: to develop imagination, imaginative thinking and creative abilities of children through the design of paper hearts.
Tasks:
Educational:
to form a sustainable interest in constructive activities, the desire to create, invent;
learning the ability to set a goal, plan work, select materials and tools that correspond to the plan.
to develop children's interest in using paper to make creative works.
Educational:
development of fine motor skills of the fingers when making various crafts;
expansion of vocabulary, development of attention, memory, coherent speech;
development of children's imagination and creative abilities.
Educational:
cultivate perseverance, endurance, friendly relationships, respect for one’s own and other people’s work.
cultivate love and respect for nature.
Expected result:
Know the techniques for making various crafts from paper hearts (birds, dogs, kittens, elephants, bunnies, mice, etc.)
Stages of work on making a heart-shaped photo frame
There are four stages in total. First stage
–
Preparation.
☛ Making a template.
Watch the video above.
And one more thing to pay attention to →
☛ preparing the board
Advice.
If you don’t have a carpentry machine, you can clean the surface of the board by sanding first with a coarse sanding belt and then with a fine one.
I can give an example on this matter. We once worked at a customer's dacha. The owner of the dacha was German. So, using only a grinding machine, he made such cool blanks for the bench from an ordinary unplaned timber that you would never think that they were not planed at all.
making a photo frame
Advice. Since the tree is made of strong species, it is not very easy to process compared to, say, pine. Therefore, the cutters must be very sharp and the speed of the milling cutter must be at least 5000 rpm.
Also, you cannot slow down the movement of the cutter along the plane during processing. Otherwise the wood will burn! Of course, the defect can be corrected with fine sandpaper, but this is an additional hassle.
Unfortunately, I was unable to avoid this and had to tinker a little more. Third stage
–
painting photo frame
We paint with stain varnish at least three times.
Advice. It is better to paint with an artistic brush with natural bristles.
Additional information on wood protection can be found here.
I already said that the varnish is water-based and therefore it dries quickly. So within 25 minutes you can easily finish painting. Fourth stage
–
inserting a picture or photograph into a frame
Everything is simple here. ✔ Place the finished frame on the cardboard and draw a line inside along the contour with a pencil, as shown in the video. The cardboard will serve as a seal between the frame and the photo. Instead of cardboard, you can use fiberboard. ✔ Cut out the cardboard with scissors. If it's fiberboard, then cut it out with a jigsaw.
✔ Place the cut out seal on the desired fragment of the photo, trace it and cut it out. ✔ Insert the photo and seal it with cardboard so it doesn’t fall out.
That's it, now you can give it in a solemn atmosphere accompanied by a romantic song.
Please contact us with questions via the Contact page or comments. I will be happy to answer all questions.
The publication of articles on the renovation of a small kitchen will continue in 5-7 days, so subscribe to the site’s news so as not to miss the publication of an article under the working title “Furniture in a small kitchen, what can be done.”
See you soon in new articles. Sincerely, Yuri Filippov.
Source
Frame using decoupage technique
The name of the drawing technique sounds rather pompous, but in reality it is a simple re-gluing. To make a stylish photo frame, you will need napkins with a pattern, PVA glue, a wooden or plastic base frame and varnish.
Disassemble the old frame and paint the front surface with white acrylic paint (for convenience, it is better to use a sponge), wait for it to dry. Apply a napkin, dip the brush in glue and work the canvas, smoothing out any air bubbles that may have formed.
When the product has dried thoroughly, you need to cut out the middle for the photo and glue the edges inward. Now you can assemble the photo frame and varnish it.
Photo: str-mebel.ru
Photo: kukolnik-shop.ru
Photo: elihome.ru
Photo: copytsvet.rf
Photo: mebel-miru.ru