Various substrates need to be coated with varnish materials; the layer helps create protection from water, mechanical influences and others. It is popular to apply varnish to furniture and concrete surfaces. The cost of finished products is high, for this reason there is a desire to replace these products with a homemade type. It should be noted that creating varnish from polystyrene foam with your own hands is the most popular and simplest option, but there are other recipes that allow you to obtain solutions with different properties. Details on how to make paint from polystyrene foam and varnish will be discussed below.
Samodelkino
Black varnish for cast iron stoves.
Heat 1 kg of tar almost to a boil and add 50 g of powdered iron sulfate. This varnish, while still hot, is used to cover a heated oven; It dries quickly, is quite beautiful and has no smell.
131. Water-based adhesive varnish.
1 part of wood glue or gelatin is dissolved in 22 parts of water and 28.5 parts of potassium dichromate are added before use. This mixture can serve as a primer for many leather polishes. For better preservation, add a little borax to the varnish.
132. Water-based albumin varnish.
Mix equal parts by weight of water and egg white; For storage, add a little carbolic or salicylic acid. Instead of fresh egg white, you can dissolve 28.5 parts of dry albumin in 564 parts of water. The varnish gives a good gloss when dry. When objects coated with this varnish are dried in hot air, a coating that is indelible with water is formed on them.
133. Water-based gelatin varnish.
Take 1 part of gelatin and dissolve it in 22 parts of water and add 28.5 parts of potassium dichromate before use. This mixture serves as a primer for leather varnishes. For storage, add a little borax.
134. Water-based glaze varnish.
Mix equal parts by weight of water and egg white (or albumin). To prevent albumin from decomposing, add a little formalin or salicylic acid. The varnish gives a good gloss when dry. When objects coated with this varnish are dried in hot air, a coating that is indelible with water is formed on them.
135. Water-based shellac varnish according to Kaiser.
Take 1 part borax, 3 parts crushed white shellac and 20 parts water, heat in a water bath until completely dissolved, after several hours allow to cool and filter. Adding a small amount of glycerin to the varnish makes it flexible. This varnish can be painted with any aniline dye or a mixture of several dyes.
136. Wallpaper varnish.
Dissolve 2 parts borax, 2 parts shellac, 24 parts hot water. So that you can wash the wallpaper with soap and water without damaging the design and paints, they are first coated with this varnish several times. Then, after each application and drying, rub the wallpaper with a soft brush until a shine appears on it.
137. Discoloration of shellac.
In 8000 parts of water, grind 200 parts of chlorine lime and add 1000 parts of shellac in coarse powder. After 24 hours, add a mixture of 1 part concentrated sulfuric acid in 1000 parts water and, finally, 6000 parts boiling water. The completely white shellac floating on the surface of the liquid is removed and the sticks are rolled out of it.
138. Italian varnish.
Italian varnish is known to mean a transparent oil varnish that covers the stringed instruments of Amati, Guarneri, Stradivari and other Italian masters. The recipe for this varnish was lost around 1770. Since that time, violins and all stringed instruments in general have been coated with alcohol varnishes and very rarely with dark brown oil varnishes. In view of this, we consider it useful to provide a recipe for Italian varnish created by the famous Russian violin maker A. Leman. Before making primer, you need to take care of painting the wood. Well-sanded wood is coated with an aqueous solution of brown sepia paint (a liquid extracted from cuttlefish). When the paint, applied with a very moderately wide brush, has dried, the wood is sanded with very fine flint paper and covered with a layer of colorless, quickly drying oil varnish. Then the wood is again sanded with the same fine flint paper, but this time with wood oil, after which it is wiped dry with a clean rag and coated with a colored varnish using a soft round brush, which dries very quickly, so that after a day it is already suitable for sanding with flint paper with oil or water. Colored varnish is made from colorless varnish (it is best to take amber in oil with strong drying), to which well-erased paints are mixed in tubes: brown, red and yellow. To cover a violin, 2 tablespoons of varnish are enough, and no more than 2 coffee beans of paint. The following paints can be used: Indian and Japanese yellow, Robert varnish No. 7, brown varnish, asphalt and speckled varnish. It is best to put colored varnish on a plate. First, paint is released from the tube, thoroughly rubbed with a glass pestle, varnish is added and the varnish and paint are thoroughly mixed. Then, taking a round brush, slowly apply the varnish to the wood. The varnish dries immediately, and therefore you should not brush over one place more than 2-3 times. You need to be careful when making a primer using glue and alcohol varnish, which goes too deep into the wood and greatly affects the sharpness of the sound of the instrument. Quick-drying oil varnish, on the contrary, almost does not penetrate the wood and forms a primer that does not crack or peel like alcohol varnish. After varnishing, the brushes should be immediately rinsed in kerosene and then washed with soapy water. It remains to be noted that coating a significant number of new and old stringed instruments with Italian Leman varnish gave very good results.
How to make paste: time-tested technologies
The need to make special mixtures with your own hands is explained not only by cost savings. The use of appropriate technology will allow you to personally control the composition and ensure truly high quality. This knowledge will be useful for creating reliable adhesive joints in a hurry, when there is no time to visit hardware stores. This article describes how to make a paste yourself. Here there are detailed descriptions of the relevant techniques, features of the use of ready-made products in practice.
There are no significant mistakes in this bold title. If necessary, you can create effective glue yourself in just a few minutes from inexpensive improvised components.
How to make paste for wallpapering
The title of this section specifically limits the scope of application of the composition. In fact, before starting to manufacture it, it is necessary to clarify the intended purpose. In this case, we are talking about the creation of finishing decorative coatings that will be used in residential and office premises. During operation, they should not worsen the healthy state of the atmosphere or provoke allergic reactions.
For this reason, you need to figure out how to prepare a paste from safe ingredients. It is advisable to purchase them inexpensively, since you will have to process large areas of the elements being connected. You should expect a long enough service life to avoid having to carry out repairs too often.
If you learn how to make wallpaper paste at home, you will be able to quickly eliminate such defects
Additionally, it is necessary to take into account the characteristics of the materials used. Non-woven wallpaper is characterized by good resistance to adverse external influences, but weighs relatively much. Paper-based analogues are lighter. But they deteriorate quickly in high humidity. It is necessary to clarify how to prepare a wallpaper paste that will not damage the corresponding coating. In some situations, temperature and other conditions during work operations will be of particular importance.
How to make paste from flour: time-tested technology
There are no claims regarding environmental safety for this main component. The following advantages and disadvantages of flour should also be noted:
- Attracted by the low price, availability in any grocery store. It is clear that based on such a component, even large-scale projects can be implemented without excessive financial costs.
- Flour compositions have excellent adhesion characteristics. If the technology is correctly reproduced, the finished mixture will be no worse than expensive professional analogues.
- If such a need arises, the wallpaper can be separated from the wall using simple wetting. For this procedure, it is recommended to use warm water (not boiling water) and leave it for 10-15 minutes after application.
- The absence of unpleasant spots and lumps is also an advantage. But in order to create just such a composition, you must strictly follow the rules of the corresponding recipes.
- A significant disadvantage is the low water resistance mentioned above. In rooms with high humidity, wallpaper is not firmly fixed to the surface. There may also be difficulties when gluing ceilings.
How to make wallpaper glue from flour is described in the following instructions:
For your information! When cooling, a film may form on the surface of the mixture. It needs to be removed. To separate other mechanical impurities, use the same sieve or a suitable piece of gauze. To reduce the sensitivity of the composition to high humidity, standard PVA wood glue is added to it (4-8% of the total volume).
Making a paste from starch: a recipe with inexpensive ingredients
The use of such a basic starting component allows you to create a mixture that does not leave stains on the wallpaper.
For your information! Information on how to make a paste from starch will be useful for performing various construction operations. This composition is well suited for pre-priming walls. After this treatment, the wallpaper is pasted using conventional technology. This method provides better adhesion on different surfaces.
The cooking technology differs from the previous one in the following nuances:
- For every 2 liters.
The finished composition consumes from 180 to 220 g of starch. - When adding water, it creates a consistency similar to that of medium-fat sour cream.
- The prepared adhesive solution is used immediately. Its positive characteristics deteriorate faster compared to flour-based mixtures.
- For a more delicate temperature effect, experienced specialists recommend using “water bath” technology. The container with the solution is immersed in a large pan of water, which is placed on the hob.
Method for creating high-quality papier mache paste
It is necessary to take into account the features of crafts and consumables
This information will help you figure out exactly how to prepare papier mache paste with the desired characteristics:
- To ensure a high level of safety, the same basic ingredients (flour, starch) are used. It is worth remembering that children are often involved in such creativity, so the requirements for all components of the process increase. An additional advantage is the ease of cleaning hands, tools, clothing, and the surrounding area.
- Starch-based formulations provide a less stable compound. They do not distort the color scheme and are suitable for working with thin materials.
- More durable crafts are made from flour using glue. In some cases, its white color will not work, so you will have to use the previous option.
To prepare mixtures, use the recipes discussed above. Density is adjusted taking into account the parameters of specific products. As with wallpaper, it is better to start working operations as quickly as possible. As a last resort, you can store the finished composition (40-48 hours) in the refrigerator compartment at a temperature of +4°C to +6°C.
Other adhesives
The following technologies are used to create various structures using adhesive joints. Some recipes are as effective as high-quality factory samples.
How to make PVA glue at home
Don’t think that everything you need for construction or creating homemade products can be purchased in modern stores. Sometimes a special color is needed. In other situations, increased water resistance is required. Making your own glue allows you to obtain unique characteristics.
But before studying production technologies, you should list the features of this category of products:
- Some of the ingredients are encrypted in the name. PVA is a polyvinyl acetate compound.
- It has excellent adhesive characteristics. If the manufacturing procedure is followed, the tensile strength of the adhesive joint can exceed 450 N/m.
- In a liquid state, the glue loses its beneficial properties in severe frost.
But the created connection is resistant to low temperatures. - This composition does not contain components hazardous to humans. It is still recommended to avoid contact with mucous membranes and eyes.
Washing with water will quickly remove the adhesive in situations like these.
The following PVA glue recipe will help you create a high-quality composition on your own at home:
- First you need to prepare a mixture based on finely dispersed gelatin (10 g for every 100 g of water). It is mixed and left for 24 hours in a room with a positive temperature.
- The next day, you need to take the necessary containers to heat the components using the “steam bath” technique.
- First, raise the temperature of the original mixture to a boil. Next, add flour very slowly (100-120 g for the doses given above) with stirring. This procedure will take at least 50-60 minutes without forming lumps.
- At the next stages, in the same thermal regime, alcohol (30-40 g), glycerin (10-15 g), and coloring pigments are added sequentially (use the required amount). Continue heating for 25-30 minutes, after which the mixture is cooled.
For your information! The shelf life of glue in a sealed container at temperatures above 0°C is 6-8 months or more
Mixing with dyes using a special technique will help change the aesthetic parameters of the factory adhesive composition
How to make glue from polystyrene foam and gasoline
The low cost of this composition largely explains its popularity.
The required amount of polystyrene foam is placed in a container that is resistant to the appropriate chemical compounds. It is filled with gasoline. Using mixing, a fairly homogeneous viscous mass is created. It is applied to degreased surfaces, squeezed, and left in this position until completely dry. To create the required force, use a load, a clamp, or a vice.
A similar result can be obtained using such a solvent
It is difficult to determine which glue is better, polystyrene foam in acetone or gasoline. In both cases, liquids act as solvents. After their evaporation, a sufficiently strong connecting layer is created that cannot be deformed. It is used for fastening metal, wood and other solid products. Here we can only note that acetone evaporates faster. Both compounds can cause harm to human health, so it is necessary to ventilate the room well, or transfer work operations to the open air.
About the varnish
Varnish is a cosmetic product that is applied to the nail plates of the hands and feet. In ancient times, women grew their nails long and covered them with a special mixture of herbs and oils to show that they did not do housework. Now the composition of this product includes polymers, solvents, pigments and plasticizers.
Making nail polish at home is quite difficult - to do this you need to know how to work with chemicals correctly
. However, you can prepare a natural-based varnish using henna, alkana or other dyes.
Making nail polish at home
Polystyrene foam dissolves perfectly in gasoline, turning into a homogeneous mass in the form of a childish surprise. But this is not an ordinary slurry, but a good, strong glue that dries like hard plastic or glass. Complete with fiberglass, you can easily seal seams on the roof of a house, garage, joints of drainage structures, etc. With this glue you can get rid of holes in slate without any expense or seal seams on risers.
More details about homemade foam glue in the video:
632
i-dodo.ru
Varnish based on white clay and henna
You can make natural varnish using olive oil, white clay and henna. If you apply this product several times a week, your nails will look healthy and shiny. To do this you need:
- Mix olive oil and clay in a two to one ratio;
- Add a little henna and stir until smooth;
- Apply the resulting mixture to your fingertips in a thick layer;
- Wait 10-15 minutes;
- Wipe your nails with cotton wool;
- Polish your nails with a piece of silk cloth.
Alkane and beeswax based varnish
Alkane is widely used in cosmetology for the production of creams, masks and soaps. This is a plant whose roots have a coloring and healing effect - you can also make a varnish based on it:
- You need to heat olive oil (3 tbsp) and alkana root (0.5 tbsp) in a water bath;
- Then let the resulting mixture brew for 5 minutes;
- Strain through a fine sieve;
- Place in a steam bath;
- Add beeswax (0.25 tbsp);
- Wait until the wax melts;
- Add 2 drops of vitamin E oil;
- To stir thoroughly;
- Cool the resulting mixture;
- Apply to nails with a special brush in several layers, avoiding contact with the skin of your hands.
How to paint with stain
Treating parquet with stain and varnishing
There are no difficulties in the process of painting with stain. But you should read a few rules on how to properly stain wood.
1. The stain needs to be heated a little. This will increase the degree of its penetration into the wood structure.
2. It is not recommended to dip a swab or brush into the stain too much, as this will lead to drips and uneven painting.
3. The stain must be applied behind the fibers. If there are drips on the surface, soak up the excess with a soft cloth.
4. After the first layer has completely dried, apply subsequent ones until the desired color is obtained.
5. Finally, the surface treated with stain is covered with several layers of varnish. Each layer should be sanded with fine-grained sandpaper.
Return to content
Water-based varnish with shadows
You can make your own nail polish with a unique shade using drugstore clear water-based polish and regular eye shadow. To do this you will need:
- Place a blank sheet of paper on the table;
- Choose eye shadow of the same color as the future polish;
- Scrape some shadows onto the paper;
- Crush them into powder with a spoon;
- Pour the shadows into a jar of varnish;
- Using a toothpick, stir the contents;
- Cover your nails with varnish;
- Wait 10-15 minutes.
Varnish bronzer
The secret to creating a cool and beautiful varnish is that a small metal ball (less than a centimeter) is added inside the containers, which will allow you to easily and quickly mix mikka, glitter with colorless varnish.
- Clear varnish
- Golden Mikka
- Bronze Mikka
- Yellow Mikka
- 3 varnish containers
- 3 small metal balls
Step 1
. Place 1 metal ball in the varnish container. This is the most important stage! Without these balls, the mikka will not mix and the polish will end up with lumps.
Step 2
. Now carefully pour the varnish into containers until the hangers begin. we need a place for mickey.
Step 3
. Use small spoons (less than a teaspoon) to add the mickey. 2 spoons of gold and 1 spoon of other types of flowers will be enough.
Step 4
. Now insert the varnish brush, close the varnish tightly and... shake! Until completely mixed.
Now your DIY varnish is ready! It’s very easy to make at home and you can experiment with colors and glitter.
Source
LiveInternetLiveInternet
—Applications
- Cheap flights
Favorable prices, easy search, no commission, 24 hours. Book now - pay later! - Postcards
Reborn catalog of postcards for all occasions - always no analogues at hand
^_^ Allows you to insert a panel with an arbitrary Html code into your profile. You can place banners, counters, etc. there - Online game "Empire"
Transform your small castle into a mighty fortress and become the ruler of the greatest kingdom in the game Goodgame Empire. Build your own empire, expand it and defend it from other players. B - I am a photographer
Plugin for publishing photos in the user's diary. Minimum system requirements: Internet Explorer 6, Fire Fox 1.5, Opera 9.5, Safari 3.1.1 with JavaScript enabled. Maybe it will work
—Links
—Tags
—Categories
- (1)
- LIBRARY (5053)
- AUDIOBOOKS (LISTEN ONLINE) (675)
- VIDEO. (762)
- DOCUMENTARY FILM (465)
- GAMES. (81)
- CINEMA (1190)
- MUSIC. (312)
- DO YOU WANT TO LAUGH? (604)
- PROSE (362)
- POETRY. (720)
- COSTUME JEWELRY (361)
- KNITTED COSTUME JEWELRY (98)
- BEADED COSTUME JEWELRY (159)
- VARIOUS COSTUME JEWELRY (98)
- BEADS. (255)
- BONSAI (23)
- KNITTING with beads (1)
- BEAD EMBROIDERY (50)
- WEAVING (154)
- EVERYTHING AT YOUR HANDS, (329)
- EMBROIDERY (552)
- EMBROIDERY - STAIN STITCH, CROSS, RICHELIEU. (177)
- RIBBON EMBROIDERY (44)
- 3D EMBROIDERY (186)
- EMBROIDERY ON PLASTIC BORDER (27)
- TAPESTRY. (13)
- UTILITIES (81)
- KNITTING (16906)
- Knitting by machine (72)
- CRAZY-WOOL (47)
- TUNISIAN knitting (40)
- KNITTING GENERATORS (14)
- NUKING (13)
- MITTENS. GLOVES (279)
- VIDEO LESSONS (7340)
- KNITTING ON A FORK. (65)
- KNITTING+LEATHER+FUR+FABRIC (160)
- KNITTING IDEAS. (272)
- KNITTED PODIUM. (42)
- KNITTED PATCHWORK. (63)
- JACQUARD (695)
- IRELAND, FREEFORM (1126)
- USEFUL KNITTERS (183)
- RUGS (161)
- SOCKS, STOCKINGS (726)
- REVIEWS ABOUT YARN (61)
- BLANGES (324)
- UTILITIES (2718)
- TABLECLOUTS, napkins (644)
- PATTERNS - HOOK (3500)
- PATTERNS - SPOKES (4341)
- HATS - HOOK (473)
- HATS - KNEWS (660)
- SCARFS, STOPPLATES, SHAWLS (1222)
- KNITTED AND SEWED HATS (303)
- HOUSE AND IN IT (2193)
- MUSHROOMS (48)
- HOUSEKEEPING TIPS (556)
- IDEAS (312)
- UTILITIES (328)
- DIY REPAIR (146)
- GARDEN IN THE APARTMENT (298)
- GARDEN and VEGETABLE VEGETABLE (766)
- WOMEN'S ENCYCLOPEDIA. (2170)
- ABOUT CHILDREN and FOR CHILDREN. (534)
- UTILITIES (1412)
- RULES for WOMEN (67)
- HAIRSTYLES (157)
- KNITTING MAGAZINES (2011)
- Doublet (192)
- Fashion Magazine (139)
- HEALTH (1780)
- TOYS (848)
- AMIGURUMI (143)
- KNITTED TOYS (286)
- MISCELLANEOUS TOYS (236)
- DOLLS (231)
- CULINARY RECIPES. (6678)
- Pancakes, pancakes, casseroles. (248)
- RECIPES for MULTICOOKER (92)
- VIDEO RECIPES (630)
- BAKING (2049)
- PREPARATIONS FOR WINTER (564)
- PORridge (48)
- SAUSAGE (206)
- CANDIES (265)
- CREAM for CAKE (182)
- ICE CREAM (154)
- MEAT, POULTRY, MINTING (850)
- DRINKS (312)
- VEGETABLES, MUSHROOMS and BERRIES (434)
- Dumplings (98)
- PIES, PIZZA, BUNS. (814)
- Utilities (720)
- MISCELLANEOUS (338)
- RECIPES OF LENTEN DISHES (72)
- ROLLS, CAKES, GINGERBREAKERS (240)
- FISH, SEAFOOD (360)
- SALADS (130)
- SWEETS without baking (330)
- SAUCES (102)
- SOUPS (90)
- DOUGH, BREAD, EASTERS. (405)
- CAKES, PASTRY, COOKIES. (698)
- EGGS, Cottage cheese, MILK, cheese. (427)
- JACK OF ALL TRADES. (1613)
- FELTING (52)
- DECOUPAGE (2)
- CARVING (22)
- KINUSAIGA (8)
- LACE (223)
- MOLDING (141)
- MACRAME (19)
- SOAP (28)
- PLASTIC IS IN BUSINESS. (78)
- WEAVING (125)
- PAPER CRAFTS (146)
- BUTTONS (33)
- MISCELLANEOUS (498)
- DRAWING (148)
- CANDLES (17)
- TATTING (20)
- ENCAUSTIC (1)
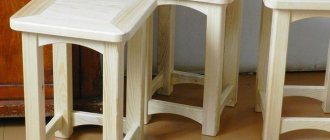
- FURNITURE (197)
- WOODEN AND CHIPBOARD FURNITURE. (57)
- CARDBOARD FURNITURE, etc. (41)
- FURNITURE IDEAS (105)
- MODELS FOR CHILDREN. (1925)
- MAGAZINES - FASHION FOR CHILDREN (126)
- IDEAS (67)
- SHOES (150)
- KNITTED CLOTHES (956)
- SEWED CLOTHES (204)
- HATS (456)
- MODELS FOR WOMEN. (9827)
- SLEEVELEVESTS, VESTS (556)
- JACKET, JACKET - HOOK (511)
- JACKETS, Sweatshirts - SPOKES (947)
- CARDIGANS (541)
- COSTUMES (209)
- UNDERWEAR, SWIMSUIT (162)
- COAT (276)
- DRESSES - HOOK (771)
- DRESSES - SPOKES (391)
- PONCHO (98)
- PULLOVER, SWEATER - HOOK (563)
- PULLOVER, SWEATER - KNEW (2834)
- THE CUMBS ARE BEAUTIFUL. (99)
- TOP, TUNIC - HOOK (1104)
- TOP, TUNIC - SPOKES (631)
- SHORTS, LEGGINGS, TROUSERS (80)
- SKIRTS (460)
- MODELS FOR MEN. (413)
- WISDOM WILL COME, LIVE! (938)
- ICONS, PRAYERS (111)
- PARABLES, STORIES, POEMS (840)
- TEMPLES (48)
- I DON'T WANT TO BE A TEAPOT. (1651)
- "EDITOR PROGRAM." (100)
- UTILITIES (1065)
- About LI.RU (255)
- PHOTOSHOP (220)
- NEWS (2310)
- CURRENT NEWS. (2294)
- FOOTWEAR (858)
- KNITTED SHOES (141)
- DIY SHOES (116)
- HOME SLIPPERS (612)
- USEFUL TIPS. (807)
- MISCELLANEOUS (400)
- BAGS (295)
- BEAUTY AND EMBODIMENT (29)
- PLASTIC, etc. (14)
- KNITTED BAGS (168)
- SEWED BAGS (86)
- FLOWERS, (390)
- KNITTED FLOWERS (251)
- FLOWERS FROM Nylon and FABRIC (131)
- WHAT IS USEFUL FOR A DIARY. (3640)
- FLASH (234)
- ANIMASHKI (161)
- GENERATORS (417)
- FOR FRAMES useful (230)
- CLIPARTS (387)
- BUTTONS - TRANSITIONS (63)
- HTML CODES (122)
- COMMENTS (51)
- CARDS, PICTURES (158)
- UTILITIES (781)
- SEPARATORS (82)
- FRAMES (673)
- FRAMES “HEALTH” (36)
- FRAMES “helpful tips” (4)
- FRAMES “RELIGION” (35)
- FRAMES without THEME (95)
- Cottage Frames (43)
- CHILDREN'S FRAMES (13)
- VIDEO FRAMES (21)
- FRAMES for POEMS (51)
- WOMEN'S FRAMES (34)
- winter frames (7)
- Witchcraft FRAMES (2)
- COMPUTER FRAMES (9)
- CULINARY FRAMES (137)
- Holiday FRAMES (18)
- HANDMADE FRAMES (35)
- FLORAL FRAMES (52)
- SCHEMES (399)
- BACKGROUND (424)
- SEWING. (2384)
- ALTERATIONS (256)
- PODIUM (56)
- UTILITIES (866)
- chenelle (5)
- WE SEW OURSELVES (1216)
- ESOTERICS. (253)
- Fortune telling and TESTS (45)
- ETIQUETTE. (53)
- THIS IS INTERESTING (4448)
- CAR (38)
- SOCIONICS (12)
- Interesting articles (9)
- ARCHITECTURE (119)
- A CENTURY LIVE - A CENTURY LEARN (156)
- Great Patriotic War (84)
- FOR INFORMATION (1600)
- ANIMALS and BIRDS (474)
- HISTORY (176)
- TRAVELERS CLUB (568)
- THE UNKNOWN (458)
- THE PLANET IS OUR HOME (304)
- Good to know (393)
- GARDENS, FLOWERS, EXOTICS (105)
- SCULPTURES, PICTURES, PHOTOS. (155)
- Yu (81)
- personal (3)
How to make your own wood varnish?
If you urgently need to coat wooden products with varnish, but you don’t have varnish on hand. You can quickly make it yourself. For this you need acetone and polystyrene foam. It is advisable to pour acetone into a transparent container and gradually add crumbled polystyrene foam into it, stirring, when the acetone thickens to the state of ordinary varnish, mix well and you can coat wooden products as with ordinary varnish. The varnish turns out to be quite durable and moisture resistant.
In addition, I can say that the varnish itself is a mixture of a special solvent with various resins. Both natural and synthetic. To independently solve this issue, acetone, as already mentioned, and solvent type 646 and the like are quite suitable. And for the mixture you can use anything that can dissolve in them. In addition to foam plastic, this can be thin cellophane, any cellulose or plexiglass. Only if the material is sufficiently thick will it have to be crushed.
Source
Luminescent clear varnish
First of all, you need a phosphor - a special pigment that accumulates and reflects light. You also need a clear varnish and a solvent for it.
Pour varnish into a glass or ceramic container. Add a phosphor. The amount of pigment will determine the brightness of the glow.
The recommended dose is 30%. For better distribution of the phosphor, add a little varnish solvent to the mixture.
Mix the mass thoroughly, bringing it to homogeneity. The resulting transparent enamel will glow beautifully in the dark.