Origami dog
The beauty of origami is that the master only needs good paper to work with. By the way, you can even use a banknote, then a small souvenir will not only please the future owner, but will also help him fulfill his dream.
How to make an origami dog:
Determine the purpose of use and storage - if the craft will be stored in a wallet, therefore, it is better to choose a “flat” design.
If the future owner will use such a dog as a figurine, you need to take care of the thickness of the paper and choose the appropriate design.
The easiest way is to make only the face using the origami technique. Stages:
- take a sheet in the shape of a square;
- folds in half;
- the folded part is folded in half again;
- the upper two triangles are pinched down - future ears;
- the lower triangle is pinched upward - the muzzle;
- The last stage is to manually draw the nose and eyes.
This simple method can be a great workout for your arms. You can even use a simple pen to highlight additional details.
The best breeds for embodiment in crafts
- Dog,
- Poodle,
- Spaniel,
- Collie,
- York,
- Boxer,
- Beagle,
- Rottweiler,
- French Bulldog,
- Newfoundland,
- Dachshund,
- Chow-chow,
- Dalmatian,
- Doberman,
- Bulldog,
- Pug,
- Bolonka,
- Italian greyhound,
- Cur.
The most suitable colors for depicting dogs in crafts are white, black, gray, brown / orange.
Paper dog
If the origami option seemed too simple, you can make a dog out of colored paper for a school competition.
How to make a dog out of paper:
- You will need: paper (you can use white), pencil, scissors, PVA glue.
- A small roll is made from a single sheet (the base must be well glued), you can use a toilet paper roll.
- The top edge is cut in the shape of an arc and the edges are connected - you can use a stapler.
- Next, the base can be covered with brown corrugated paper or fabric.
- Ears are attached - they can also be made of fabric or paper.
- The eyes are glued on and a muzzle is formed. By the way, this can be done using the 4 circles technique. 4 identical circles are cut out - 2 white and 2 brown, after which they are placed on top of each other in 2 rows.
With such a voluminous dog, you can easily win the competition. The main advantage is that you don’t need to run to the store if your parents find out about the upcoming competition late in the evening.
Complex ways for creative geniuses
- Cross-stitch. Ready-made patterns can be found in abundance on the Internet or purchased already applied to the canvas.
- Sewing. Patterns are published in magazines and on the pages of the World Wide Web. The parts can be swept by hand and filled with foam rubber or cotton wool.
- Crochet - in different sizes, from tiny Japanese amigurumi to full-fledged soft toys with multi-part assembly.
- Bead weaving - according to patterns and randomly.
- Felting wool - flat or voluminous.
- Modeling from clay / plasticine / foamiran.
- Quilling, or applique made of corrugated paper folded into curls.
Balloon dog
If the father of the family wants to surprise a child, he can easily build a dog from a long ball. By the way, this type of art is called aerodesign.
During major holidays in the center of fun, craftsmen sometimes earn a substantial amount of money from this creativity. Learning how to make such crafts is quite simple, the main thing is to stock up on balls and a good pump.
How to make a balloon dog:
- While inflating the balloon, you need to hold the tip with your hands and gradually stretch it.
- The more empty tip left, the more additional parts you can make.
- If you have no experience in such creativity, it is advisable to use a more elastic material.
- The ends of each part (bubble) are tied into a regular knot or pulled tightly.
- Modeling begins from the head, i.e. from the tail from where the balloon was inflated.
- The size is determined by squeezing the hand; the master can independently control the location of the indentation.
- The minimum rotation for fixation is 360 degrees.
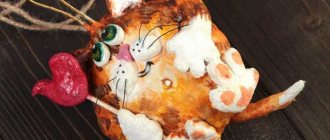
Dachshund sculpting
The dachshund figurine is formed as follows:
- We divide the plasticine into 6 parts: one large (for the body), four smaller ones (for the paws), one medium one (for the ears of the dachshund - they are long).
- We form the body from a wide and even sausage, narrowing the ends to depict a muzzle and tail.
- We form balls from four small pieces, then roll them into sausages, the ends of which are flattened (legs).
- The fifth part (ears) is a flat part in the shape of an elongated oval, which is placed on top of the intended head and pressed slightly for fastening. You can lay a thread between the ears and the body, which in the finished version will represent a leash.
- The eyes and nose are small black balls, neatly rolled with the index finger and thumb.
- To decorate a new friend, we make a blanket - a cape placed behind the ears, in the middle of the body.
INTERESTING: Fish made from salt dough
The dog turns out to be kind and sweet. Made from fondant, she is soft and cute, plump and lazy.
Before molding a dog, you always need to determine its character in advance. You might want to make a puppy or a whole “Paw Patrol”.
Adviсe
- For the dog product, it is advisable to leave 20 cm of the ball without air.
- The head from the nodule is formed at a distance of 7 cm.
- If you want to make ears, it is advisable to make two bubbles of 5 cm each, and then connect them on the head itself at 7 cm.
You can familiarize yourself with the technology separately. However, it is advisable for novice craftsmen to start with simpler twisting methods and stock up on a special pump.
Scotty is a cheerful puppy
Instructions:
- Print this page and glue it onto cardboard. Let dry.\
- Cut out two sections of Scotty's nursery, paint the back side black and punch a hole at the bottom of the white ring.
- Fold back the two sides as well as the red stripe labeled "A".
- Glue the two elements together.
- Now fold four similar tabs at the top.
- After you have made the roof, carry element No. 2. Fold down along the middle line, glue as a bottom.
- Cut out Scotty.
- Fold it with the black sides facing out and connect them (all except the ears, lower body and legs, as shown by the dotted line).
- Poke a hole - the white dot on his cute collar.
- Now bend your ears slightly downward and your legs outward.
- To make sure he doesn't escape, cut a piece of thread about 10-15 cm long and run it from the collar to the ring in the house.
- A small amount of moss, straw or leaves will make a comfortable "bed" for Scottie.
A functional product with movable elements will make a wonderful postcard and children will love it.
It seems complicated only at first glance. If you prepare all the necessary details in advance and strictly follow the step-by-step instructions in the pictures, you will succeed.
Plasticine dog
Plasticine is one of the available ways to develop hand motor skills. To distract your child from gadgets, you can devote one family evening to handicrafts.
By the way, psychologists say that doing something creative together has a positive effect on a child’s trust in an adult. Moreover, most of the tests that help determine the baby’s condition are related specifically to handicrafts.
How to make a dog from plasticine:
- You shouldn’t limit your child’s imagination, but if he doesn’t know where to start, you can show him the simplest option.
- You can take a chestnut or acorn base, cover it with brown plasticine and attach the remaining parts to it in the form of ears, paws, and tail.
You can also make a big dog face. To do this, a base is made in the form of a large pancake, after which the remaining parts are added. By the way, if a child makes dogs have big eyes with pupils, it means he is very worried and afraid.
Bookmark
The paper is suitable for making a very practical and necessary craft - a bookmark in the shape of a dog. It is better to use multi-colored sheets of paper to make the product colorful.
Everything is done simply:
- A paper sheet of suitable color is selected. You need to cut a square out of it.
- A triangle is made from a square. To do this, it should be carefully folded.
- The corner on the right rises and bends towards the top of the triangle. The corner on the left is made using the same technology. The result should be a rhombus.
- Next, the triangle opens up.
- In the central part there is a rhombus. One part of this element is bent down to form a triangle.
- The corners at the bottom are raised. It should look like a rhombus.
- The top right corner is lowered. This is done in a similar way on the left side.
- The straightened corners rise. The result is a fold. The corners are bent along it. The direction should be reverse. A pocket is created in the middle. This is where the corners should go.
- At the end, all that remains is to decorate the dog, draw its eyes, nose, and mouth.
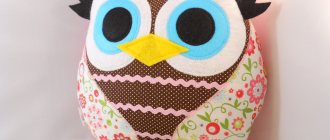
Dog pillow
Every sleepyhead knows that you can’t have too many pillows. A dog pillow is especially useful for long trips. Making a dog at home:
- You will need: tracing paper, scissors, fabric, sewing machine (you can sew the parts by hand), pins, stuffing (use an old jacket).
- You can find the pattern in the public domain - today we present improved ideas for pillows for long trips.
- It is better to use a material for the cover in a neutral shade - it is easier to wash.
- For decoration, you can attach the tail and muzzle separately.
- You should choose a hypoallergenic filler for children - no feathers. To help your child sleep peacefully, you can fill the pillow with dried herbs (lavender, mint).
This homemade pillow is an excellent alternative to expensive options. Moreover, making an eco pillow from high-quality material will cost less than purchasing the same one in a special department.
Crafts from polymer clay for beginners: step-by-step master class
First of all, it’s worth mastering master classes on making sausages from polymer clay. From such sausages you can easily create spectacular elements for toys, flowers and other products.
Master class on making strawberry sausages
This technique is accessible even to a novice polymer clay sculptor.
- You will need pink and white clay. From white material you need to make a slightly elongated triangle, and from pink material - a layer about 1 millimeter thick.
- It is also necessary to form sausages from white material. Make the same sausages from red polymer clay. After this, connect both sausages together.
- Carefully wrap the connected sausages in pink.
- The sausage, which is made from three elements, must be carefully stretched in length. Pull it out until its length is about 12 centimeters. During stretching, the sausage should not lose its original shape.
- After this, the sausage can be cut into equal pieces.
- Now you can form the strawberry. Forming a strawberry is a very simple step: wrap a white sausage in a pink layer and stick sausages made of white and red clay in a circle.
- Wrap the core again in a layer of red polymer clay.
- At this stage, the sausage is stretched to a size that will be comfortable. It is worth considering that for beads it should be short and thick, and for simple toy pieces it should be long and thin.
- At the final stage, our sausages need to be baked. They need to be baked for half an hour. After which the resulting elements are cooled and cut into strawberries.
- If all the rules of modeling have been followed, then the sausage should be easy to cut after baking. Its structure should be similar to fairly dense rubber.
Flowers made of polymer clay: master class with photos
You can make beautiful flowers for decoration from polymer clay. Let's look at a modeling master class using sakura flowers as an example:
- First of all, you should make a sausage out of clay. The color transitions should be smooth. You can use a pasta machine for this. But you will need little material, so you can get by with hand sculpting.
- When the sausage is ready, it must be cut into pieces 1.5 millimeters thick.
- Form petals from the resulting pieces. In the case of a sakura flower, they should look like a boat.
- After this, you can start sculpting the flower itself. To do this, you need to connect all the petals. A sakura flower has 7 to 11 petals. You can use a toothpick.
- Now you can start sculpting the bud, the manufacturing principle of which is the same for any flowers.
- Take a thin wire no more than 0.3 millimeters thick and about 15 centimeters long.
- Form a small loop at one end of the wire and connect it with a piece of polymer clay. From this piece you need to make a drop in advance.
- Create three more petals and stick them onto the drop.
- To add more naturalness, you can start creating sepals. In cherry blossoms, the sepal consists of five petals.
- Place the sepal on the wire and attach it to the bottom of the bud.
- Now you can lay a paper napkin on the ceramic tiles and bake!
Below you can find a video with detailed master classes on creating toys and other interesting products from polymer clay.
https://hobby-up.ru/lepka/polimernaya-glina/sobaka-iz-polimernoj-gliny.html https://stranamasterov.ru/node/386722 https://myhobby.guru/lepka/master-klassy- po-lepke-iz-polimernoj-gliny-dlya-nachinayushhih.html
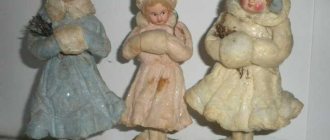
Dog antistress
Anti-stress pillows have shown positive results in everyday life. However, the options that are sold in stores today are not distinguished by their durability and creativity.
So that parents can be calm about the ecology of the product, which is especially important if the baby has allergies, it is best to make a dog with your own hands.
As a recycled material used by the Chinese for production, you can choose:
- Natural cotton.
- Linen.
The filler can also be used eco:
- Eucalyptus fiber.
- Polyester - although considered synthetic, has proven itself well.
- Buckwheat.
- Seaweed.
- Bamboo fiber.
However, the cost of such a filler can sometimes seem too high. Despite this factor, such a pillow will be a safe alternative.
Pet house
Every dog needs its own kennel. You can make a box in the shape of a pocket so that the animal can be hidden inside.
Sequencing:
- Make a small dog.
- Select a piece of cardboard the size of it and draw an outline.
- Cut along the line and glue the blank onto a thick base.
- Let's start creating a house.
- Prepare a paper square that will be larger than the pet.
- Cut a round window in it.
- Attach the roof to the cardboard base, but do not completely glue the booth itself, but only along the bottom and side contours.
- Through the upper opening, you can put the dog inside so that it looks out the window.
There is another option from which you can make a game for a child. Make several houses of different colors and the same number of doggies. Glue them scattered on a large sheet of paper and give the little one the task of drawing a leash from the animal to the kennel in its color.
An example is shown in the figure.
There are also non-functional types of crafts on this topic.
Older children will be interested in creating a three-dimensional booth. We provide a template as a tutorial. The master class has been translated and adapted for your convenience.