Bracelets made from natural materials will always be relevant. These universal accessories can add zest and complement the image of both a business person and a very extraordinary one. The leather cord bracelet has become the most popular, because the model range of this product will be limited only by your imagination. This article will talk about the origin of leather bracelets and provide 5 interesting master classes on creating original jewelry.
From the history of the accessory
According to historians, such an accessory as a bracelet has been known to mankind since the Stone Age. People didn’t just create jewelry with their own hands, they invested deep sacred meaning into it. The close connection between man and nature was reflected in the objects he created. Moving from era to era, humanity used ever new materials for its creations. The first of them were stone, wood, leather, animal fangs. To this day, these materials have not lost their attractiveness.
Initially, leather bracelets were very massive and rough. They served primitive man for protection during the hunt. It was used as a talisman that could protect the owner from illness, injury and failure in battle. Only warriors had the privilege of wearing such accessories, and the richer the decoration, the higher the status of its wearer. Nowadays, this trend is gradually fading away. If previously the brand was valued, now the originality and attractiveness of the product are more valued. Therefore, needlewomen try to make leather jewelry on their own.
Women's wardrobes were replenished with leather bracelets when the weaker sex was allowed to participate in battles. Nowadays, a bracelet has the function of decoration, which can tell a lot about the owner. By looking at a bracelet you can learn about a person’s sense of style, status, and hobbies. A leather bracelet has a number of advantages: durability, ease of execution, unisex style. This unique accessory will easily complement any look, wherever the fickle wind of fashion blows.
Related article: DIY 3D birthday cards for mom: diagrams with photos and videos
Bright colors
A leather bracelet is a place for experimentation. To create a masterpiece, all you need to do is paint the decoration. Special paints are sold that can give the product a unique look. This rather crude material sometimes resembles ancient times, in which it was widespread. Therefore, on a massive bracelet made of such material, you can draw pictures similar to rock paintings. Such decoration will attract attention and will definitely make the owner stand out from the crowd.
For macrame lovers
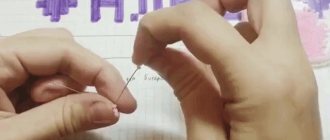
Very interesting leather bracelets can be made using weaving. Despite the simplicity of execution, this product looks very original. The difficulty level is very low, so the master class proposed below is suitable even for beginner craftswomen.
Add a few accents in the form of pendants or interesting accessories and the original decoration will delight you for a very long time.
To create such a bracelet you will need:
- leather ribbons or laces;
- scissors;
- end switches – 2 jokes;
- pliers;
- rings - 2 pieces;
- lobster clasp;
- decor as desired.
Cut the laces so long that they fit four times around your wrist.
Carefully lay out the workpieces in a straight line, insert into the end piece and crimp with pliers.
Secure the workpiece.
Braid the laces into a braid.
Do a fitting. The bracelet should go around your wrist twice. Trim off the excess, leaving 1.5-2 cm.
Strengthen the second limit switch. Attach rings to it and insert a clasp. The bracelet is ready!
Having mastered the simplest principle of creating an accessory, you can try to weave a bracelet in a different way. We offer you several popular schemes.
Handicraft master classes - “Fascination with beads”
An elegant bracelet on an adjustable chain using a natural stone connector and cord - quick and easy.
Read
2019/09/07
In this master class we will tell you how to easily and simply assemble a bracelet from wire and beads from natural stones.
Read
2019/09/03
A master class on creating asymmetrical earrings from natural beads will explain how easy it is to make earrings from beads with your own hands.
Read
2019/09/02
In this master class you will learn how to quickly and easily create bracelets from leather cords and cabochons.
Read
2018/11/27
This master class will tell you how to quickly and easily make earrings with tassels with your own hands.
Read
2018/11/14
Double bracelet made of larimar beads in a master class from Ekaterina Volgina. The decoration is easy and simple to assemble!
Read
2018/10/11
A simple master class on how to make earrings and a pendant from accessories and raw wild citrine beads.
Read
2018/09/07
How to quickly and easily assemble a set of earrings and a ring using ready-made bases for jewelry and cabochons. Step-by-step instructions with illustrations will help you understand this fascinating process.
Read
2018/09/01
- To make a bracelet we will need a ribbon, mother of pearl beads, an elastic band and a needle.
- Read
- 2012/12/07
How to make a bracelet from beads? This master class is dedicated to beginning needlewomen.
Read
2012/10/09
- We decided to make our bracelet from large beads of leopard agate tablets.
- Read
- 2012/12/16
In this master class we will show how you can weave such a Chan Lu bracelet yourself.
Read
2013/11/06
In this master class we will help you learn one of the easiest ways to assemble earrings from natural beads and carved bone beads.
Read
2014/02/06
Source: https://www.charm-beads.ru/master-class
Multi-row decoration
Creating a unique accessory with a connector is fun and simple. The connector is a small insert for jewelry.
At both ends of the part there are rings into which you can thread a cord and secure it with a simple knot.
But it also happens that the connector eye is very small. In this case, connecting rings or spring clips are used.
To create a leather bracelet with a connector you will need:
First, attach the spring clip to the connector eye.
Article on the topic: Volumetric knitting for a hat: patterns with video
Cut 20 cm of red leather cord and thread it into the connector as shown in the photo. Repeat on the other side.
Cut three gray laces twice as long as your wrist. Fasten their ends with glue and secure with a clamp.
Braid the same length as the red lace. Remove the loop from the spring and place it at the end of the weave.
Twist the ends arbitrarily and, retreating a distance equal to the width of the connector, strengthen the second spring. Continue braiding. Secure its ends with glue. Make exactly the same part.
For multi-row bracelets, wide end clamps are used; a ribbon clamp will do. Using connecting rings, install a fastener at its ends.
After careful fitting, remove excess cord tails. Coat the ends with glue and install a wide end. Make sure the laces are straight.
A magnificent decoration made of leather cords with an insert is ready!
Single puzzle
You can make both a female and a male version. In order to start weaving a bracelet with such a mysterious name, you will need strips of leather approximately 4 cm wide. Before preparing the material for processing, you need to think about the length of the bracelet and add another one and a half times the length.
As the needlework progresses, the strip will become smaller (shrink), so a little more leather won't hurt. The best length is a quarter of a meter. To trim, you need to use a sharp knife, razor or scissors.
You need to make a couple of parallel cuts along the length of the strip, however, you should not cut it all the way. You can’t touch it; there should be three centimeters from the edge to the cut. The ribbon will turn into three identical parts - laces. For further work, you should number from left to right: 1, 2, 3. You need to be sure that they end on the same line.
First of all, you should prepare your workplace . It should be perfectly smooth. As a last resort, you can put a plastic or wooden board on the table. To process leather strips, it is allowed to use a construction knife with a replaceable blade, tailor's scissors or stationery knives.
Before you start weaving, you need to secure one end of the strip. To do this, you can take a clamp, press the strip with something heavy, or even nail it with a hammer and nail. Now we can begin. It is necessary to pull the bottom of the strip in your direction, and then thread it to the bottom of the future decoration between the second and third stripes and return it to its original state.
Bracelet with decorative rings
Another master class will allow you to create an elegant bracelet with inserts of decorative rings. To create it you will need:
- leather cord – 120 cm;
- limit switches;
- three decorative rings;
- connecting rings – 2 pieces;
- clasp;
- scissors and pliers.
Divide the cord into 6 equal parts. Take the end cap and secure the laces; for greater strength, lubricate the parts with glue.
Distribute the laces in 2 pieces. Place a ring on the central pair.
Braid as shown in the photo.
Repeat weaving two more times.
After trying on, trim off any excess laces. Crimp the other end of the bracelet with the end cap and insert the clasp.
A stylish and elegant accessory is ready!
Lace lightness
If specialized sharp tools are available, an openwork bracelet is cut out. First, the drawing is drawn with a pencil and only then drawn with a knife along the graceful lines. Such work requires patience, accuracy, as well as experience, because with it comes skill.
For simpler options, there are special hole punches that leave strange patterns.
Noble turquoise
Leather products look incredibly beautiful in combination with natural stones. We suggest you make a bracelet from leather cords and beads. We will use luxurious turquoise beads.
To make a bracelet, take:
- brown leather cord - 2 pieces of 80 cm each;
- turquoise beads;
- thin thread made of leather;
- needle;
- decorative button;
- scissors;
- glue "Moment Crystal".
Related article: DIY baby album step by step with master class
The manufacturing process consists of entwining a pair of laces with leather thread. In this case, beads made of natural turquoise are inserted one by one.
Having reached the desired length of the product, lubricate the back of the laces with glue. This will help prevent the thread from moving when worn.
Form a loop on one side and sew a button to the lace on the other.
The decoration is ready!
Circular Braid
The braid looks like a braid of 4 cords. First you need to cut four laces from a strip of leather. As in the previous technique, when braiding the laces, the leather also shrinks, so it is recommended to make the blanks for the laces long. The laces should not be too wide, since the braid is already quite large, and with wide blanks it will become even larger.
Before the weaving procedure, you need to tie the ends of the threads into one knot. In order to make the work as convenient as possible, the workpiece should be attached to the work surface. It could be tape, tape, or something heavy. However, one of the more comfortable ways would be to fix the ring to the ends tied with thread; this allows you to conveniently fix the structure on the leg of a table or chair.
You can try to braid the most ordinary rope or tie woolen threads to all the laces involved in the work:
- Bring the fourth lace to the left through (from above) the second and third laces.
- Now from left to right the laces should be arranged like this: first, fourth, second, third.
- The second passes through the fourth in the same direction. Lace placement: first, second, fourth, third.
- The first goes through the second and fourth. Position: second, fourth, first, third.
» diary Website Needlewoman. Master classes: handicrafts, cooking
Written: 4.5.2017
In my opinion, children should have toys for hand puppet theaters from literally six months of age.
At first, with the help of such toys, adults can entertain the child, and later children take great pleasure in making fairy tale dramatizations themselves or simply playing role-playing games.
But in order to purchase the desired high-quality toy in the store, you need to spend enough time. And if you have minimal sewing skills, you can make a toy for your hand yourself in literally an hour.
We had leftover fleece on a knitted base in our house, and the children wanted to have a teddy bear, and besides, I saved the pattern a long time ago from some magazine.
- a piece of fleece, literally 20 cm with a width of less than a meter;
- batting or cotton wool;
- scissors;
- ready-made eyes for toys or buttons;
- half a container of chocolate eggs;
- wool thread and a thick needle for the nose;
- matching threads.
You can simply print the pattern on an A4 sheet of paper.
Cut out all the parts in the quantities indicated on the pattern, leaving seam allowances of approximately 0.5-0.7 mm (no allowances are needed for the tail).
If the fabric does not unravel or crumble (as in this case), then there is no need to overcast the parts, otherwise, pre-overcast all the parts. By the way, if you don’t have a sewing machine at hand, the toy can be easily sewn by hand.
Place the ear pieces right sides together and stitch, leaving the bottom open. Turn the ears out and stuff them loosely with batting.
Place the front parts of the head right sides together and sew along the side of the muzzle.
Place the back of the head right sides together and stitch along the back of the head.
Fold the front and back parts of the head with the right sides inward, place them between them and secure the ears inside.
Sew the head along the side seam along with the ears, turn it right side out.
Now it's time to embroider the nose with wool thread using a thick needle. If there are buttons as eyes, then they also need to be sewn on at this stage. In the process, I found ready-made eyes for toys; they can be glued on later.
Stuff your head with batting.
To make it easier to control the head, half a container from a chocolate egg is sewn inside. Install it inside the stuffed head, as shown in the photo.
Sew a small cover to the size of the container and place it inside the container.
Using a needle, hand sew the bottom of the cover and the base of the bear's head.
Glue the eyes on with superglue (if they don’t already exist) - Misha’s head is completely ready.
Place the body parts right sides facing each other. A little in the upper part of the neck must be cut to the diameter of the hole in the head. Sew side seams and hem bottom.
Without turning part of the body, put it on the bear’s neck and sew both parts from the inside out.
Turn the body inside out and the bear is almost ready.
The last “touch” remains - the tail. Sew along the perimeter of the part with a regular seam, pull it a little and stuff it a little with batting.
Tighten the thread, fasten it, and without cutting the thread, sew it to the back of the bear’s body.
The hand toy is completely ready!
Such toys seem truly alive to children and become their friends for a long time. The very next day our bear got a friend made of blue fleece, the cubs acquired scarves, and later vests. And by slightly changing the pattern, you can easily sew a hare or a fox, involving children in the sewing process.