A small basket is simply an indispensable item in a modern home. Small, cute pieces look great as decor in a hallway or bedroom. Larger baskets are ideal for storing items and organizing space. That is why we offer you several step-by-step master classes, following which you will definitely be able to make an original product with your own hands.
Rope baskets
Baskets made from thick ropes are very decorative. To work, you will need a linen or hemp version, at least five mm thick, 22-27 meters long. Step by step, the process looks like this:
- 10 pieces of 70 cm are cut;
- a frame is made from them - five and five pieces are arranged crosswise, another long one is tied in the middle. The last cut begins weaving;
- when the bottom of the desired size is made, a large jar or bowl is placed inside the product to give it shape;
- when the weaving is finished, the long thread is secured, the frame threads are tucked inward, under the edge of the product;
- the basket is ready for use.
To make the object more voluminous, the rope is wrapped with strips of fabric.
Let's get started
There are a number of techniques that you need to know, since each of them allows you to achieve a unique and inimitable result for your work. Considering these techniques in isolation from practice will not give you anything. Therefore, we suggest moving from simple products to more complex ones, learning the basics of weaving.
Veneer basket
A product made from natural veneer looks as if it were made from real solid wood. You can use another similar natural material - birch bark.
To work you will need:
- several meters of veneer;
- ruler;
- scissors;
- stapler;
- glue;
- scotch.
How to make this craft:
- the veneer is soaked in water at room temperature for an hour, then hung to let the water drain;
- the material is cut into strips - their length and width depend on the size of the future structure, quantity - 14 pieces;
- you will also need strips for the sides - there will be from three to seven of them;
- seven pieces are taken and fixed on the table with tape;
- the other seven are woven perpendicular to them to make a square;
- the edges of the strips are bent upward using a ruler;
- now a long piece of veneer is woven in to form sides, its ends are connected with glue or a stapler;
- Several more strips are woven in the same way;
- When the required height is reached, the veneer is folded inward and woven under the last horizontal strip.
Side design
The contour that determines the height of each basket is made up of two side parts sewn together into a ring. At the corners, the fabric must be cut close to the stitching so that the corners do not warp in the finished product.
After two seams are laid on the main and lining sides, the insert is made. If the selected material is too hard, then it is best to cut it into blanks, and the sides to which the handles are attached will be double. If the material is pliable, then there is no need to cut the parts.
The main fabric side panel should be laid face down on the work surface. Then, stepping back 2 centimeters from the bottom edge, you need to place rigid inserts, securing them with tailor's pins or gluing them in place with a spider web. Do not forget that the smaller sides, where the handles will be attached, must be double.
Lay out the interior fabric on the secured backing, aligning the bottom edge of the outer and inner fabric. The top edge of the outer fabric should then be folded up, removing the pins from the backing. Using a machine, carefully sew a seam along the contour of the basket, connecting all layers of the sides together.
Rare shot: Viktoria Isakova showed her grown-up daughter from Yuri Moroz (new photo)
A student at the Vietnam Police Academy shared how she takes care of her facial skin.
If there is little snow, there will be no harvest: December 16 is Ivan the Silent Day
Basket woven from twine
Twine weaving is done similarly to rope, with the only difference being that the polymer cord has a thickness of two to four mm and is available in almost any color.
What do you need:
- a small ball of twine;
- glue "Titan" or another similar one;
- plastic file;
- small bucket or jar;
- sharp scissors.
Work progress step by step:
- pieces of twine are cut into pieces 40 cm long, and “ribbons” of three threads each are laid out;
- four such ribbons are intertwined, then two more are intertwined;
- In total, eight ribbons will be needed for the bottom;
- then take a long single piece of twine, glue it or tie it in the center, and intertwine it with “ribbons”;
- Three or four circles are performed in this way, two threads are added to the field, and the weaving continues;
- when the bottom is done, another ribbon is added, the product is put on the jar;
- after reaching the required height, the ribbons are folded and hidden under the ribbon of the last row;
- the handle is made of three threads, which are braided on top;
- the finished item is decorated with twine bows of a different color.
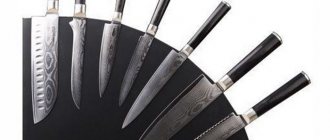
How to bend and join wire
You can make many different objects from wire - from the simplest hook to the most complex designs. Copper, iron, steel, aluminum wire and telephone cable with coatings of different colors are suitable. The wire is stored wound in circles. Tools required: hammer, small vice, file, pliers, wire cutters, pliers, pliers, round nose pliers, plumber's scissors, soldering iron.
The wire is straightened by pulling it between two pieces of wood or by pulling it tightly around a round metal rod (doorknob). It is better to straighten steel wire or thin rod metal on a hard surface with a hammer or mallet. Small parts are bent with pliers or round nose pliers. Large and hard ones are bent in a vice.
Iron and copper thin wire is cut with wire cutters and pliers. Steel - at the site of the cut, it is preheated over a fire. Strip or sheet metal is first marked, and then at the marking points it is lightly scored and chopped with strong blows. Individual pieces of wire and other metal parts are joined by bending or soldering. In the first case, several turns are made, pulling the wire onto the rod. Before soldering, the surface of the parts is thoroughly cleaned with a file or sandpaper to remove dirt and rust. The wire is soldered by putting the two ends together, having first twisted them for strength. Thin wire can be soldered using paste - tinol, which is applied in a thin layer to the soldering site and heated over a fire.
To learn how to make things from wire well and cleanly, you must first make a number of simple parts:
- Spiral spring. A wire 1-1.5 millimeters thick is wound onto a round wooden bolsan of cylindrical or cone shape (Figure 1, a).
- Rings and half rings. The spiral-spring is cut lengthwise (Figure 1, b).
- Flower. Six half rings are soldered to the ring (Figure 1, c).
- Gear. Six half rings are soldered together [Figure 1, d).
- Spiral. Use pliers to grab the end of the wire and twist it in a circle by rotating your hand (Figure 1, e).
- Openwork of three spirals (Figure 1, f).
- Openwork leaf. 4 - 5 rings are made on a cone-shaped blank (wire thickness - 0.5 - 1 millimeter). The resulting rings are given the shape shown in Figure 1g and soldered at the base.
- The trefoil is bent from one wire with pliers (Figure 1, h).
- Wave (Figure 1, i).
Star and ornamental stripe. Mark a pattern on a board of small thickness and drive in nails without heads:
Net:
Flower girl. A bracket with a spiral end is bent from a two-millimeter wire. Separately roll up the ring and fasten it, intercepting the sides. At the top, the spirals are connected by three turns of wire (Figure 4).
Furniture. Made from one and a half to two millimeter wire. Its parts are fastened together with coils. Fine-layer plywood or cardboard can serve as a seat and table top. For fastening, small holes are made in the plywood with an awl (Figure 5).
Puzzle. You should separate its parts so as not to bend the wire anywhere or compress it (Figure 6).
Horse. From two pieces of wire 2.5 - 3 millimeters thick, bend the legs and two lower spirals. From the third piece they make the head, neck and upper spiral. From the fourth - a mane that turns on the back into coils holding pieces of wire together. The mane is soldered in several places (Figure 8).
Heron. It is made from one piece of wire (cross-section - 3 millimeters) with spiral rings for a decorative vase (Figure 9).
I. Lyamin, magazine “Family and School”, 1971
From paper or cardboard
The construction of thin cardboard, paper, which must be pre-corrugated, is made easily and quickly. To do this, the top layer of corrugated cardboard is removed so that it becomes flexible and painted with gouache, watercolor, acrylic, or other paint. Next, the material is cut into strips, about three to four cm wide. The following parts are made from them: one 43 cm and 36 cm long, four 28 cm each. The first part is used to make a rim, the second – a handle, the rest are folded crosswise, forming the bottom. The elements are connected to each other with a stapler or glue. The little thing turns out to be small, suitable as an original decorative packaging for a lightweight gift. Decorate the product with paper flowers.
Rules for combining colors with each other
Do you know anything about color combinations? In fact, many plants have their own pair, for example, lilies look good with lisianthus and roses, but roses and gerberas already go poorly in a bouquet. There is no need to combine plants in the same color tone with each other. Consider the color scheme of the bouquet, the degree of blooming of the bouquets, do not place bright and large flowers at the edges of the basket, as they should be in the middle of your composition. As you can see, there is nothing complicated, and you can learn how to make baskets with flowers no worse than experienced and professional florists.
You can always buy baskets of flowers or a variety of floral materials, such as plants, dried flowers, sponges in the Orange flower shop chain. The range of products in Orange is simply huge. You can always choose your own flowerpots or flowerpots, purchase a suitable basket for creating a composition, fresh flowers are also always available, and consultants will be happy to help you with the choice of goods.
From newspaper tubes
To create such an item you will need several dozen double sheets of newspaper, a thin knitting needle, PVA glue, an empty three-liter jar or other similar round container, acrylic paints, and varnish in a can.
How it's done:
- the newspaper is cut into strips, which are wound on a knitting needle, starting from the corner, the tip is secured with glue;
- tubes are painted white, gray, brown, or any other color;
- for a basket the size of a plate you will need about a hundred of these tubes, for a larger one - 200-400 pieces;
- the tubes are folded in pairs, forming a cross, one long tube is attached to the center, folded in half, weaving is made;
- At first, the racks are braided in twos, later - each separately;
- after a few more rows, additional racks are glued between the main ones;
- the product is put on the jar and weaves along it;
- when the required height is reached, the racks are cut off, and the tubes used to weave are extended with a different color (for example, blue;
- two more working tubes are added - glued from the inside;
- Now it’s weaving like this: the leftmost tube is wound not under the nearest one, but under the fourth post from it;
- the same is done with the next tube;
- the ends of all tubes are cut off and hidden;
- To make the product rigid, it is primed with PVA glue or varnished.
Application of paper
The material is considered the most affordable, light and practical; such a basket in the interior looks very attractive and is as close as possible to the model from the store. Leather handles add drama, creating a contrast between the two types of materials.
You need to prepare the following components:
- Baking paper.
- The base is made of fiberboard.
- Skewers in the right quantity.
- Glue.
- Protective varnish.
The main blanks are made by rolling up tubes; you will need quite a lot of these elements.
After which several components are attached to the base, which should also be wrapped in paper for better contact of the surfaces with the glue, the frame of the product is formed.
Important! You must remember to insert skewers into the main elements, then the structure will gain rigidity and be as reliable as possible.
Before starting any process, you should look at a photo of a basket made of wicker, paper, thread or other materials to have an idea of the finished structure.
After completing the last rows, the height can be adjusted independently; handles are created for more convenient carrying of the product. A protective coating in the form of varnish is applied, it is better to purchase a special liquid in cans; working with a brush will not be very convenient.
Thanks to this product, the craft can be placed even in the bathroom, where temperature changes often occur and humidity rises; there is no need to worry about its integrity if the work is done efficiently.
Paper
A product woven from strips of paper is not very durable, but it is made quickly, and there are practically no material costs for its production. It is advisable to use “gray” wrapping paper - it is stronger, looks more beautiful, and simple wallpaper will also work. For work, use regular and shaped scissors, a ruler, PVA glue, paper clips, and ink for scrapbooking. You will also need cardboard to create a strong bottom. You need to start by cutting the paper into strips one or two centimeters wide and 40 cm long. You will need 12 of these.
Four more strips should have a length of 50 cm and one wider one should be 60 cm. The first 12 strips are tinted, their edges are processed with curly scissors. Then a square of 10 by 10 cm is cut out of cardboard. 15 cm are measured on one of the short strips, glued to the bottom, then another one is glued in exactly the same way, but perpendicularly. The rest are glued, intertwining with each other, filling the entire surface of the bottom. The structure is turned over, the stripes are folded up, and braided with four long parts. Afterwards the handle is glued, which, like the rest of the product, is decorated with sparkles and bows.
What you will need
DIY crafts from newspaper tubes require a competent approach to choosing the material you will be dealing with. The lighter the paper, the better, as it is easier to weave with. Give your preference to unnecessary newspapers and non-glossy magazines.
We will also need:
- A sharp stationery knife with which we will obtain strips of paper.
- Using scissors we will trim the ends of the weave.
- A knitting needle onto which strips of newspaper are wrapped; the thinner it is, the better. Wooden or metal will do, as long as it is long.
- A short wooden stick, such as a skewer, to help thread the ends of the weave through each other.
- Two types of glue: PVA for preparing the material from which we will weave and “Moment” for more complex connections in a finished structure.
- The form in which you will paint (if necessary) your tubes. There can be one or several containers.
Basket in Provence style
All items made in Provence style are usually light colors. To make it you will need:
- craft paper;
- paper twine;
- two cardboard mugs;
- jar;
- sharp scissors;
- Double-sided tape;
- pins;
- some fabric;
- a piece of lace;
- tape measure;
- glue stick.
How to do:
- cardboard circles are covered with craft paper on the outside, and on the inside with double-sided tape;
- the twine is cut into pieces of 30 cm, glued in a circle, at a distance of two cm from each other;
- stick on top, press the second circle;
- A 20-meter piece of twine is folded in half, and circular weaving in “figure eights” begins;
- a jar is placed on the bottom - you can weave along it or periodically try it on and then remove it;
- when the product is almost ready, loops are made from the rays, tucked under, and glued inside out;
- A cover consisting of a bottom and a side is sewn from light checkered or floral print fabric;
- its edges are decorated with lace;
- the cover is inserted inside so that a few centimeters of it are wrapped around the edge of the craft;
- Hearts and bows made of lace fabric are glued on the outside.
Hemming of parts
To begin, take the side panels from the main outer fabric and use an iron to turn the top edge under 1 centimeter. You can secure the hem using adhesive tape - the so-called cobweb. This work can be done using a regular student’s ruler, aligning the hem along it and ironing the fold with an iron, outlining the hem. Then a web is laid between the layers of fabric and the hem is glued with a hot iron.
Why French children behave well: eight ways to raise them
It’s good to wash often: myths about shampoo and hair care that only harm
“We are still friends”: Derevianko commented on the breakup with his wife
Willow basket
People have been weaving from willow twigs for a very long time - this material is flexible, completely natural. Willow grows along river banks; it is advisable to cut it in early spring or late autumn. The branches should be flexible and mature. Preparation is done by soaking in cold water, which is changed daily - this takes two weeks. A faster option is to boil it in boiling water for three hours. Afterwards, the branches are cleared of bark and dried.
To work you need an awl, a side cutter, pliers, and a weight. The bottom is made of eight twigs, a hole is made in four of them so that the other four can fit through - a cross is obtained. Next, four rods are encircled with two branches, making two circles. Afterwards, each rod of 16 is braided separately. When the base is almost ready, add another twig.
After the stand, the rods are bent at a right angle and woven to the desired height. The last row is decorated with a braid made of vines. To create a handle, take a thick branch and attach six thin twigs next to it, with which the handle is braided in a spiral. In two to three days the structure will dry out and become suitable for use.
In such a basket you can collect mushrooms, berries, vegetables, fruits, herbs, etc.
Round bottom
This version of the bottom is used in various crafts from candy bowls to baskets. Let's look at different ways to weave it.
Option #1
We recommend that beginners get acquainted with paper wicker weaving by watching a useful video in which Olga Lagoda explains how to start weaving a round bottom. You will also learn how to calculate the number of racks for your first product.
Option No. 2
Weaving the bottom based on a cross made of 8 tubes. Take 4 tubes, stick 4 more in the middle at right angles. The result is a cross-shaped base for weaving. To work, you will need additional tubes - working ones. Lubricate the tip of one of them with glue and insert it into the second. Bend the resulting elongated tube in half.
Hug her 4 top bases. Its ends form two working tubes at once. This method of weaving is called “rope in two tubes.”
You can start braiding the base. Place the upper working pipe behind the 4 side bases, and run the lower one over them. To avoid confusion, look at the step-by-step photos.
In this way, braid the remaining warps, making a full circle.
Braid the second circle according to the same pattern, but insert working tubes for every 2 base tubes.
Make three full circles of the bottom.
Continue weaving with a rope, braiding each tube of the base. Weave the bottom until the distance between the base posts reaches 2 cm. Now the round bottom is ready.
If its size is not enough to realize your idea, you need to add additional racks
. If this is neglected, the weaving will become too loose, untidy and will not hold its shape well.
Additional stands are needed when the distance between the base tubes exceeds 2 cm
. Near each base, open a wider hole with an awl. Insert an additional tube into the hole with the sharp end, having previously lubricated it with glue.
Having finished this work, braid a couple more rows of double racks with rope. And only after that they can be pulled apart one at a time and continued, braiding each separately. Thus weave the bottom to the desired size.
Finishing the weaving is very simple: hide the ends of the working tubes in the braid, cut off the protruding ends and glue them.
Option #3
This method also requires 8 tubes. Intertwine them to form a tight cross as shown in the photos.
Take the working tube, bend it in half and wrap it around the four base tubes.
Next, weave with a rope you already know, covering four tubes of the base.
In the second row you need to braid 2 tubes. Thus, you need to complete 2-3 rows.
When the distance between the pairs of posts reaches the cherished 2 cm, they need to be carefully moved apart and continued to be braided one at a time.
From pine roots
Baskets made from the roots of coniferous trees (pine, fir, spruce) are very durable and textured. They are obtained from relatively young plants - no older than 30 years. The thickness of suitable roots is 2-6 mm, they are usually located at a depth of about one and a half meters. Roots that are literally on the surface are not suitable for work - they are difficult to split into ribbons. The easiest way to obtain material is on the steep banks of reservoirs and cliffs. The required amount is chopped off with an ax. Cut, split the roots immediately, dry in the shade, and before starting work, soak in warm water for 20-30 minutes. Weaving is similar to that made from wicker.
The basket darkens over the years, but due to the resinous material it is stored for a very long time.
Type of basket - wicker
An interesting option is when you can make a wicker laundry basket with your own hands. This method is becoming increasingly popular and interest in it is growing all the time.
This activity helps you take a break from the daily hustle and bustle by creating something useful for your home. Time passes unnoticed and pleasantly. This is the most affordable weaving made from newspapers, which are always in stock. Additionally, you should prepare:
- trailer and glue;
- scissors;
- cardboard base;
- knitting needle 20 cm long or more.
DIY laundry basket
The laundry basket is usually located in the bathroom, so it must be made of a material that will not deteriorate under the influence of high humidity. It can be woven from polymer twine or wicker. The weave should not be too tight so that the laundry in the basket is ventilated. To ensure the stability of the product, a frame made of metal mesh is purchased or made by hand. A medium-sized product is simpler to make: take a plastic mesh bucket and glue a thick cord onto it, starting from the center of the bottom in a spiral.
Necessary materials
I use this material to weave a basket.
- Steel wire 2, 2.5 mm
- Aluminum (as it is, any diameter 1mm, 2mm and even 3mm)
- Soft wire (I use colored wire)
- Tube (corrugated or plain hose)
- A hoop to attach the handle to (I use 4 mm thick wire)
Crochet basket made of threads
The easiest way to knit a round thing. Take a thick hook and threads twice as thin as it. First, one “hard” loop is made, eight single crochets are knitted into it. In the next row four more are added, in the third - plus six, as in the fourth. Similarly, another three to five rows are knitted, after which the increases stop and the sides are made. To make handles, seven air loops are knitted on both sides, which are formed with two rows of single crochets. The sides can be decorated with colored knitted butterflies.
If you want to knit a product that is as rigid as possible, the threads should almost coincide with the thickness of the hook.
Crochet basket
Such a basket can be useful in the hallway for keys, bank cards, in the living room for the TV remote control, books and other various small items. After looking at several knitting patterns, you can come up with your own product. It's better to crochet.
Important! A knitted item can be made not only from yarn, but from old T-shirts, knitted fabric, laces, ropes.
Stylish handmade baskets have great advantages. Your basket will be exclusive and will fit perfectly into the interior. Handmade things are created not for consumers, but for connoisseurs. Don't be afraid to create! Your hands can do miracles! Good luck with your creativity!
DIY baskets for storing things / House order (1 video)
DIY baskets for the home (14 photos)
Basket for toys on a frame
There are several design options for children's rooms:
- made of fabric stretched over a frame made of a piece of linoleum;
- textile - on a frame made of rigid wire;
- made of colored threads, based on a plastic perforated bucket;
- knitted, on a wooden frame.
The product is equipped with handles on top to make it easier to move from place to place, and a lid, which also has a wire frame. If you make several of these pieces, you can put almost all the toys in them, as well as children’s things that don’t have a place in the closet.
Mini baskets as a souvenir
When looking for an answer to the question of how to make a paper basket, you can often come across the option of creating mini-baskets.
After creation, they are usually filled with cookies, sweets and other small things. The main advantage of this craft is that it can be used as a decoration on the table during a special event.
If you don’t like such table decorations, then a basket can always serve as an excellent place to store a variety of little things that no home can do without.
These include needles and threads, medications, and simply sweets that need to be hidden from children.
To create a basket, you need to prepare paper flowers that you will use as decoration, corrugated cardboard of any color you like, and scissors with glue. Such a simple set will be quite cheap.
Print a template from the Internet and carefully cut it out. After this, using the template, create a blank from cardboard and carefully bend it exactly along the fold lines. All that remains is to glue and decorate your basket.
Sweet basket as a gift from candies
As the basis for a sweet gift, they take a structure made of cardboard, wicker, or other material.
You will also need:
- sweets in shiny wrappers;
- floral wire;
- Styrofoam;
- film of two colors;
- ribbons;
- scotch;
- stapler;
- toothpicks;
- hot glue;
- scissors.
To begin with, the dark film is cut into squares with a side of 14 cm, the light film into strips 6 by 45 cm and squares of 12 cm. The handle of the basket is braided with ribbon, and a bow is attached to the side with hot glue. The inside of the product is covered with film, and polystyrene foam cut in the shape of a pyramid is placed on top. The film squares are folded to form 8 corners, and the middle is pierced with a toothpick. Next, a flower is formed and secured with tape. There are 22 of these things made, they are attached to the sides. The floral wire is bent into a loop and glued to the candy wrapper. A light film is fixed with tape around each candy, and two dark squares are added. The candy flowers are inserted into the foam - the product is ready.
Weaving walls
Two tubes are inserted into the base of the basket and braided around the posts - one goes in the front and the other in the back. Cut the part you will be inserting diagonally to continue weaving.
Press the inner paper vine with your fingernail to help it bend better. Continue this until the basket reaches the required height. If necessary, increase the guides by extending them with additional tubes.
Easter Basket Options
One of the main Easter symbols is an egg lying in a basket. Often the composition is complemented by a chicken or a bunny. This product, made for Easter, will decorate the holiday table and will appeal to children. It is made from fabric, thread, newspaper tubes, twine, and wicker. For decoration, all kinds of ribbons, dried flowers, twigs, and other natural and artificial materials are used.
Chicken basket made from newspaper tubes
A paper vine chicken is woven starting from the bottom. For this, at least eight tubes are taken, but the same number are added during the process. They are braided with a long tube folded in half. When a suitable height is reached, some of the tubes go to form the head and neck of the bird, the rest become the tail. Several rods are left on the sides, from which a handle is made. The chicken's head is decorated with a cardboard or textile comb, a beak, and small wings are glued to the sides.
The bird can be painted by hand and varnished.
Basket with fabric bunnies
To work you will need fabric of two colors, padding polyester, satin ribbons, threads, needles, scissors, beads. The lower part of the “hare” is made of dark textile; the upper part has a head with ears, cut out according to a template. The bottom is made one piece - the figures are separated from each other by machine stitching. The top is individual for each bunny; padding polyester is placed inside. The bottom of the product is made of a cardboard base with synthetic padding and covered with fabric. A soft handle is sewn on and faces are drawn on the hares. The finished craft is decorated with shiny buttons, lace, and bows.
If the craft is large enough, the bunny faces are embroidered, the eyes and noses are made from buttons, or suitable ones for making soft toys are purchased.
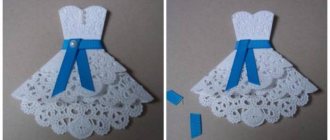
Easter made from paper
The pages of old glossy magazines will make an excellent square-shaped spring basket. A square of 30 by 30 cm is cut out, divided into nine identical pieces, the corner fragments are cut off, the center is left unchanged - this is the bottom. The side parts are cut in three to five places from the middle square, but not to the end. To weave a basket, strips are cut, then a handle is glued - it is usually made of two layers. The side is decorated with paper loops.
From a plastic cup
You can even weave a tiny basket from an ordinary plastic cup, or rather, from two, preferably of different colors. One is cut into centimeter strips from the edge downwards, the other is spirally woven into the first. The handle is made of corrugated cardboard. There is another option - the glass is cut in the same way as the first, but not to the very bottom. The strips are folded into rings and a handle is glued on. The product is decorated with tissue paper flowers, fur chickens, and colored ribbons.
From salt dough
Salt dough is easy to make from three parts flour, two parts water, one part salt. They begin to weave it from thin flour “sausages”, which must be rolled out with a rolling pin. As a base, take a jar or pan, pre-greased with oil. The dough is laid out in the mold, the product is turned over, and shaped with a pigtail handle made of the same material. Now what happened is baked in the oven for two hours at a temperature of 100-110 degrees. The finished item is painted with acrylic paints. A more complex product is decorated with voluminous flowers, leaves, bunches of grapes, also molded from dough, but this must be done before baking.
Food or other suitable coloring can be added directly when kneading the dough.
Felt
Sewing and felt weaving is a relatively new type of making things. How to make a basket-box from it:
- you will need light, as dense felt as possible, from which two squares with a side of 30 cm are cut out;
- You also need matching threads, contrasting floss, a ruler, a simple pencil, and sewing needles;
- on thick felt, measure and cut out two rectangles 28 by 9 cm, one piece for the handle - 30 by 3 cm;
- a circle with a diameter of 17.5 cm is cut out of the second piece;
- identical rectangles are sewn together with their narrow sides end-to-end, using neat straight stitches;
- the bottom is sewn in the same way, followed by the handle;
- the finished craft is decorated with embroidery, the edge and handle are covered with bright floss threads, contrasting felt roses, bird figures, etc. are sewn on.
Another way to make a basket: cut colored strips from felt, two to three cm wide, and intertwine them together. The product has a square bottom and a wide handle.
Useful tips for making a decorative basket
Here are some recommendations that may be useful:
- To eliminate gaps from unpainted areas, it is best to apply paint to the tubes rather than to the finished product.
- To ensure an even arrangement of rows of newspaper blanks when weaving a basket, beginners are recommended to use a support structure.
- Using a supporting object will help achieve symmetry and avoid distortions.
- When laying out, it is necessary to place the tubes as closely as possible to each other. This will increase the strength of the craft.