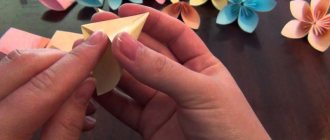
We usually put a variety of small things in our pockets: coins, keys, notes and other items. Using this simple invention of mankind is commonplace, because it is very convenient. But sometimes there are not enough pockets, and then a real hell begins with things scattered everywhere. For example, you need an additional insert for a notebook or for storing papers. There is a way out when you know how to tinker. Let's look at how to make pockets from paper, the most affordable material.
How to make paper pockets for small items
We usually put a variety of small things in our pockets: coins, keys, notes and other items. Using this simple invention of mankind is commonplace, because it is very convenient. But sometimes there are not enough pockets, and then a real hell begins with things scattered everywhere. For example, you need an additional insert for a notebook or for storing papers. There is a way out when you know how to tinker. Let's look at how to make pockets from paper, the most affordable material.
Simple envelope pocket
Made very quickly from a square sheet of paper. It is based on the principle of adding corners towards the center. Let's take a closer look.
First let's find the middle. Fold the paper in half or use a ruler. Expand the sheet. Fold the corners opposite each other to the marked line. In principle, you can wrap the edges overlapping. Half of how to make a paper pocket is already done.
Now fold another corner (bottom or top). It should lie so that it can cover the central part. Secure it to the other edges with glue or double-sided tape.
Fold the remaining corner down. Decorate the envelope as desired and secure it in its rightful place. Now you can use the pocket!
MASTERBOIL. Box of letters for preschoolers
Dimensions of the “ABC” : 24cm x 24cm (no more than 25cm!) – 6 rows of 6 pockets.
On the pockets: vowels are red, consonants and signs are black.
Letters (on thick paper or cardboard):
all vowels are red (5-6 pcs.)
consonants – blue (3-4 pcs.) and green (3-4 pcs.) colors
W, F, C – only blue (4-5 pcs.)
J, Ch, Shch – only green (4-5 pcs.)
b, b – black (b: 5-6 pcs.; b: 3-4 pcs.)
The child will practice this alphabet almost every day for two years.
Therefore, the alphabet should be durable, comfortable and beautiful.
We made the ABC and are sharing our experience with you.
Pocket width 3.8-4cm
The letters should be made of thin cardboard.
We printed colored letters on thick photo paper and covered them with transparent tape. The size of the square for letters is 3 cm .
For the inside we will need a square of fabric and adhesive measuring 25x25 cm. Also, strips of fabric or elastic 3-3.5 cm wide.
We will sew pockets for letters on the inner surface.
Source
Did you like our site? Join or subscribe (you will receive notifications about new topics by email) to our channel in MirTesen!
An original way to fold an envelope
For this craft you will also need a square sheet. Fold the paper diagonally. Bend one top corner to the outside. It should touch the edge of the sheet and not go beyond its borders. When folding, refer to the instructions in the picture, it shows how to make paper pockets.
Now take the corner from the edge. Wrap it inside. It should extend slightly beyond the top corner that was folded the first time. Do the same with the other edge. The craft at this stage should resemble a house.
Let's make a pocket that will keep the envelope closed. From the last folded part we bend a small corner to the side. Now we unfold it and form a diamond out of it.
We bend the other corner of the craft that remains at the top down and put it into the resulting diamond-shaped pocket. Decorate the envelope as desired.
How to make a paper pocket spacious
The finished pocket has the following dimensions: width – 10 centimeters, height – 15 centimeters. The parameters can, of course, be changed as desired.
On colored paper, draw a square with sides of 16 centimeters.
From below inside the square we retreat one centimeter, put points with a pencil in several places. Let's draw a line.
Now we make three such indents from the left edge. They should also be one centimeter wide. On the right side we do the same. Thanks to such allowances, the liner will be capacious. How to make paper pockets more spacious? Just draw more allowances.
Fold the side indents along the lines like an accordion on one side, then on the other. Now fold the bottom seam allowance up. And return it to its original position. On the bottom strip you can see small squares. Apply glue to them. Fold the seam allowance up again. Wait for the glue to set.
Now this pocket can be placed, for example, in a notebook. Simply apply glue to the sides of the workpiece and press it to the sheet. We admire the result!
If you are thinking about how to make paper pockets for a stand, use this method. Just don’t forget to make a semicircular slit at the top of the sheet to make the insert easier to use.
Decor options
Each cabinet and its hanging pockets are individual. To make the organizer bright, you can use fabric with checkered, striped, polka dots, flowers or stars. If you decide to stick to a plain base for the product, then the finished pockets can be decorated:
- buttons, rhinestones (it is better not to use small parts for safety reasons);
- ribbons and bows, lace;
- applique, stripes, embroidery;
- images of cartoon characters and animals;
- the base can be the same color, the pockets are decorated with a pattern.
The right combination and reasonable selection of decor is important. You should not use many small decorative elements on fabrics with a ready-made pattern. If the base is monochromatic, it can be diversified with a combination of contrasting colors.
How to make a heart-shaped pocket
This envelope can be used not only as a pocket in a notebook. You can put a small sweet present into the craft, and then give the heart to a loved one on Valentine's Day. In the process, rely on the picture, it will show how to make a beautiful pocket out of paper.
Fold the paper diagonally and then unfold it. Bend one corner to the center, and the opposite corner to the very edge.
Now lift the free edges up. Turn the workpiece over to the other side. Fold in all the sharp corners to form a heart. For reliability, the craft can be glued a little. If desired, decorate, for example, with rhinestones, paper or fabric flowers. The heart-shaped insert is ready!
Now you know how to make paper pockets in different ways. And remember that a neat bend is the key to an attractive craft.
Source
Box of letters for preschoolers
In kindergarten, we were given the task of making a box of letters according to the following parameters.
Dimensions of the “ABC” : 24cm x 24cm (no more than 25cm!) – 6 rows of 6 pockets.
On the pockets: vowels are red, consonants and signs are black.
B letters (on thick paper or cardboard):
all vowels are red (5-6 pcs.)
consonants – blue (3-4 pcs.) and green (3-4 pcs.) colors
The child will practice this alphabet almost every day for two years. Therefore, the alphabet should be durable, comfortable and beautiful.
We made the ABC and are sharing our experience with you.
Manufacturing of self-adhesive pockets for information stands from transparent plastic
Our story is about making pockets for information stands from transparent plastic, which is mistakenly called plexiglass, but in fact it is PET. Bottles for sweet gas and mineral water are also made from it (note for reference).
First, let's list what we will need in terms of tools and supplies for our needlework:
1. PET in sheets 0.5 mm thick.
2. Double-sided adhesive tape tesa A5 wide and 1 mm thick (you can take ITFOM adhesive tape 6 mm wide from an English manufacturer, we always use it for A4 and A3 size pockets).
3. Self-adhesive film ORACAL 641 strips 6 mm wide (cut on a plotter).
5. Very comfortable and high-quality cutting mat with Expert markings.
6. Squeegee for smoothing ORACAL film and double-sided tape.
7. Wooden board (you can take it from the kitchen).
8. Iron ruler 50 cm.
There is no point in writing about the sizes of pockets for information stands; you can already find this information on the Internet. We will show the manufacturing process using the example of A5 format in vertical orientation (pockets also have this).
High-quality PET plastic always has a protective film that protects both sides from scratches during transportation and, importantly, during the manufacturing process.
In our case, the film is transparent on both sides. Before sticking tape around the perimeter (for A5 tesa 4957, A4 ITFOM), pick up the corner of the protection and bend it 15 mm; it is important not to completely remove the film - this can be done immediately before installation on an information stand or a surface that you have previously degreased. The gray plastic thing is a squeegee with a felt pad; we highly recommend using it to smooth the tape after installation to avoid air getting in at the adhesion site (a clever word, but capacious).
When covering a pocket with tape, the corners can be connected at a right angle of 90 degrees. For creative types, there is an option for cutting at 45 degrees; use the markings on the Expert mat (a diagonal stripe intersecting the squares).
When gluing is completed, turn the pocket over with the tape down and check that the calculations are correct using the formula: tape + 2mm + format + 2 mm + tape = width of the PET blank. If the right size paper rests against the tape, congratulations! We cut a new piece of the correct size and go to the beginning of the article.
For those who have passed the sizing test, getting your sheet of paper out of the surface-mounted pocket will be very difficult unless you make a place where the sheet of paper is accessible for positioning.
Marking on our Expert cutting mat makes our life a lot easier; the 10*10 mm grid is very convenient for marking diagonal cuts in plastic. We selected and marked with a pen a size of 30 mm (from manufacturing experience in previous years). Make marks on the protective film if you do not want to add another operation to wash the paste from a ballpoint pen made of PET plastic (sometimes pockets can be found without edging with ORACAL film around the perimeter on the outside).
We strongly advise you not to strain the cutting mat, but to cut the plastic on a wooden board using a ruler. If the ruler slides on the plastic, you can glue PVC electrical tape on the back side. Use OLFA knives with branded blades; they make the work of the master much easier.
And here is the most beautiful photo of the project! It contains a collage of: an ORAFOL squeegee, an OLFA NOL-1 knife, an Expert rug and, of course, blanks for a transparent pocket for an A5 information sheet. But what is it? Another figure in the assembly of the semi-finished product appeared in the frame - a decorative white edging strip made of self-adhesive film ORACAL 641, 6 mm wide. Don't forget to peel back the protective film 15mm before gluing.
It is more convenient to apply with a squeegee, but for those who are doing it for the first time, you can do it with your finger.
There is nothing special to comment on here, it just shows the overlap when connecting the strips at one of the corners.
It is more convenient to trim excess film on the workpiece upside down from the side of the double-sided tape. Rest the blade against the side of the pocket and use it as a guide. When cutting, keep the film slightly taut.
cash register letters | UTILITARIAN HANDCRAFTS
In kindergarten, we were given the task of making a box of letters according to the following parameters.
Dimensions of the “ABC” : 24cm x 24cm (no more than 25cm!) – 6 rows of 6 pockets.
On the pockets: vowels are red, consonants and signs are black.
Letters (on thick paper or cardboard):
all vowels are red (5-6 pcs.)
consonants – blue (3-4 pcs.) and green (3-4 pcs.) colors
W, F, C – only blue (4-5 pcs.)
J, Ch, Shch – only green (4-5 pcs.)
b, b – black (b: 5-6 pcs.; b: 3-4 pcs.)
The child will practice this alphabet almost every day for two years. Therefore, the alphabet should be durable, comfortable and beautiful.
We made the ABC and are sharing our experience with you.
HOW TO SEW A CASH LETTERS. Details in photos and videos
For the inside we will need a square of fabric and glue measuring 25x25 cm. Also, strips of fabric or elastic 3-3.5 cm wide
LETTER POCKETS
We will sew pockets for letters on the inner surface.
Pocket width 3.8-4cm
The letters should be made of thin cardboard.
We printed colored letters on thick photo paper and covered them with transparent tape. The size of the square for letters is 3 cm .
INNER SURFACE OF CASH LETTERS
Watch on YouTube
Have questions, ask! And! If you came to the site for the first time and want to keep abreast of new articles, fill out the subscription form and we will notify you about new master classes on sewing and knitting
Come to our VKontakte group Utilitarian needlework
If you want to save information on your VKontakte or Facebook page, click on the appropriate button and save the entry.
Make your own stand with pockets
How to make an information stand with your own hands
To begin with, I have no experience yet. Cut the plastic slightly larger than the size of the printed area by 5 cm on all sides. Lay the plastic lengthwise on a smooth, hard surface. Trim the excess white margin of the printed area from the paste-on right (for a right-handed person) and bottom edge or all sides. Wipe the plastic with a damp cloth to remove dust. For the shortest print length, place the right edge of the printed area against the edge of the plastic. Pull the protective paper 5 cm from the edge to the left and roll up the edge to the full width with a roller. Holding the printed sheet at an angle of 20-30 degrees and pulling the protective layer of paper to the left to the width of the roller, roll the film onto the plastic along the entire length (width). Make sure there are no distortions or swellings.
Cut the image pasted onto the plastic using a ruler and a knife along the outer perimeter of the edging (the edging is not cut). You can clean the edges with sandpaper (zero). The stand is ready. After a couple of stands, this procedure will take you no more than 10 minutes.
How to make pockets for an information stand with your own hands
The devil is not as scary as he is painted. Let's look at how, after purchasing a digital stand mockup, you can make it yourself. Necessary materials:
Pockets are made of PET or plastic. With a cutout in the middle in the form of an oval or a corner on the left or right. For the most part, pockets are made of PET 0.7-1 mm. with corners cut off. More complex pockets are produced by specialized companies and sold at retail. We will look at the most common method of making pockets in order to reduce the cost of the stand. The dimensions of the pockets are cut out to be increased by the width of the tape. The normal size of a raw A4 pocket is 230x320 mm, so that the sheet f. A4 was freely inserted and removed.
Bend back the protective film at the edges by 2-3 cm and glue 6 mm double-sided tape. on three sides of the pocket (large right, left with a cut, lower part). When you receive a printed layout on a plotter, you are left with white space on four sides of the layout. We use it for edging pockets. Turn the pocket over, fold back the protective film and glue it with ORACAL film cut for edging pockets with a width of at least 7 mm. the same on three sides. You cut the corners at an angle, or you don’t cut them.
Place a PVC sheet with a pasted image on the table, look at how the pockets are located in the image, remove the protective film inside the pocket, and put it in its place. Place a ruler under the bottom row of pockets and align the bottom of the pockets with it. To begin, place something heavy on the ruler so that it does not move. Holding the pocket in place with your fingers (the pocket should not move) and bending the edge, remove the protective film from the tape from the long side of the pocket and glue it to the stand, then from the bottom and the short side. And so on for all the pockets on the bottom row. Move the ruler under the top row and do the same.
You don’t have to bother and buy ready-made pockets in your city. They come in plastic or PET. PET pockets should cost several times less than pockets made of transparent plastic. Thus, an information stand with pockets can be made independently and even at home.
But, if you don’t want to bother with buying a model and making a stand, you can order a ready-made stand of the same kind. Here they will make it for you with professional quality and quickly.
INNER SURFACE OF CASH LETTERS
Have questions, ask! And! If you came to the site for the first time and want to keep abreast of new articles, fill out the subscription form and we will notify you about new master classes on sewing and knitting
Come to our VKontakte group Utilitarian needlework
If you want to save information on your VKontakte or Facebook page, click on the appropriate button and save the entry.
Thank you. ❤️ For such a detailed, understandable and pleasing master class. I’ve been looking for something like this for a very long time and now: “Hurray. " - I found you! Great job! I'll try to do it myself.
