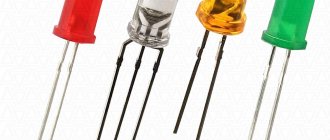
It is known that the service life of LEDs directly depends on the quality of the material used in the semiconductor, as well as the ratio of the device current to the amount of heat generated. The light output gradually decreases, and after it reaches half of its original value, the life of the LED begins to decrease. The operating life of the devices can be up to 100,000 hours, but only if it is not exposed to high temperatures.
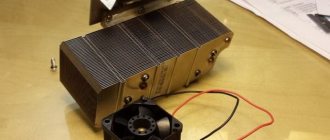
To cool devices that generate heat, radio electronics uses a device such as a radiator for LEDs. Heat removal from units to the atmosphere is achieved by two methods.
The first way to cool LEDs
This method is based on the radiation of heat waves into the atmosphere, or thermal convection. The method belongs to the category of passive cooling. Part of the energy enters the atmosphere through a radiant infrared stream, and part leaves through the circulation of heated air from the radiator.
Among LED technology, passive cooling circuits have become the most widespread. It does not have rotating mechanisms and does not require periodic maintenance.
The disadvantages of this system include the need to install a large heat sink. Its weight is quite large, and its price is high.
How to fix the LED
There are two main methods of fastening, let's consider both of them.
First way
- it's mechanical. It consists of screwing the LED with self-tapping screws or other fasteners to the radiator; for this you need a special “star” type substrate (see star). A diode, pre-lubricated with thermal paste, is soldered to it.
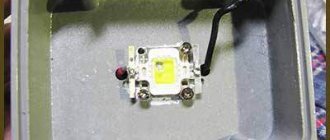
On the “belly” of the LED there is a special contact patch with the diameter of a slim cigarette. After that, power wires are soldered to this substrate, and it is screwed to the radiator. Some LEDs go on sale already mounted on an adapter plate, as in the photo.
Second way
- it's adhesive. It is suitable for mounting through a plate or without it. But it’s not always possible to attach metal to metal; how to glue an LED to a radiator? To do this, you need to purchase a special thermal conductive glue. It can be found both in hardware stores and in radio parts stores.
The result of such fastening looks like this:
Radiator manufacturing
When choosing a material, you should be guided by the following rules:
- The thermal conductivity indicator must be at least 5-10 W. Materials with a lower rating cannot transfer all the heat that the air receives.
- A thermal conductivity level above 10 W will be technically excessive, which will entail unnecessary cash costs without increasing the efficiency of the device.
For the production of radiators, as a rule, aluminum, copper and ceramics are used. They produce devices based on plastic that dissipates heat.
LED lamps with cooling radiator: types of radiators
LED lamps with a cooling radiator: types of radiators
LED lamps have firmly entered our lives, almost completely replacing incandescent lamps and energy-saving compact fluorescent lamps (CFLs). It can be assumed that the whole point is their cost-effectiveness, excellent technical characteristics (such as luminous flux, CRI, scattering angle), as well as their long service life.
Why do you need a radiator in an LED lamp?
The service life of the product is primarily influenced by the quality of the LEDs, as well as the driver, the correct operation of which directly affects the stability of the diodes.
However, during the operation of an LED lamp, its surface becomes dirty, which negatively affects the removal of the generated heat. Over time, the problem of overheating appears, which is associated with a decrease in the light output of the diodes until they fail.
To avoid this, increase the stability of the light sources. For this purpose, a radiator is provided in the design of each of them.
Types of radiators
A radiator is a structural element that serves to remove and dissipate heat from LEDs.
LED lamps with radiator cooling
LED lamps with a cooling radiator come in the following types:
- with aluminum radiator;
- ceramic;
- composite;
- plastic.
LED lamps with aluminum heatsink
These lamps belong to the standard or high class. The aluminum radiator in such products can be either a strip of metal or a structurally more complex aluminum base. Hence the division of such lamps into two types:
- with finned radiator;
- with a flat radiator.
LED lamps with finned aluminum heatsink
The most effectively protected lamps, the radiator of which is presented in the form of a multilayer structure with ventilation ducts. Due to them, the area of heat dissipation increases, which significantly increases the service life of LEDs, and also prevents their degradation over time due to overheating.
LED lamps with aluminum heatsink
Lamps with flat radiator
A flat radiator is less efficient than a finned one. Such a cooling element is used mainly in low-power lamps. Often, for more efficient heat removal, it has ventilation channels, and its dielectric surface is covered with a layer of special paint or varnish.
Composite radiator
LED lamps with a cooling radiator made of composite material are distinguished primarily by their affordable price. In such lamps, the element is a two-layer structure made of an aluminum strip coated with heat-conducting plastic.
Due to their low price, lamps with a composite radiator are the most widely represented on the market in the economy class segment.
However, such radiators cannot effectively remove heat, so the warranty period for products with them rarely exceeds 1 year.
Plastic radiator
The simplest option, it would be more correct to call it an imitation of a radiator. The element is a housing made of heat-dissipating plastic. The main differences between such lamps: low price, short warranty period, short service life (10,000-15,000 hours). In high-power lamps, to increase heat dissipation, the plastic radiator is made with additional massive fins and ventilation holes.
LED lamps with plastic radiator
Ceramic radiator
LED lamps with a ceramic cooling radiator are distinguished by high heat resistance, and the dielectric properties of the material allow LED modules to be mounted directly on the surface of such a radiator. The most common type of lamp with a ceramic radiator without a diffuser bulb is the so-called corn lamp.
LED lamps with ceramic cooling radiator
LED lamps with which cooling radiator to choose?
From all of the above, we can conclude that the quality of any LED lamp depends, among other things, on the quality of the radiator, or rather on the material from which it is made.
The most reliable, with a long actual service life, are considered to be LED lamps with an aluminum cooling radiator, as well as with a ceramic one (if such a light source does not have a diffuser bulb).
Plastic options can be preferred if such lamps will be used only occasionally and for a short time, for example, in closets and utility rooms.
Aluminum fixtures
The most popular LED heat sink is made of aluminum. The main disadvantage of the device is that it consists of a number of layers. This inevitably causes transient thermal resistance, which can be overcome with the help of additional heat-conducting materials: adhesive substances, insulating plates, materials for filling air gaps.
Aluminum radiator for LEDs is used more often than others. It is subject to pressing and does an excellent job of dissipating heat.
An active level of cooling typically requires a flat sheet of aluminum no larger than the size of the luminaire. The sheet is blown by a fan.
The suitable temperature for LED operation is 65 °C. However, the lower the temperature, the higher the efficiency level of the device and the longer its resource. The optimal temperature of the radiator surface is considered to be 45 °C, but not higher. For a 1 W diode, it must be installed on an aluminum radiator. The radiator area is 30-35 cm2. A 3 W LED radiator will require a doubling of area and will be 60-70 cm2.
An aluminum device is best suited as a radiator as it is the lightest and relatively inexpensive. When calculating a device for LED matrices, a proportion of 35 cm per 1 W is taken.
For active cooling systems, the radiator area can be 10 times smaller. A 1 W LED is enough for 3-3.5 cm2.
For example, consider a star radiator for LEDs. The device is used to remove heat from the LED and is a small radiator. It is based on a plate made of a composite material - aluminum is used, which removes heat from the LED, and copper foil with contact pads. The radiator is mounted on LEDs with a high power rating (1-3 W).
Solving the cooling problem
Low-power LEDs, for example: 3528, 5050 and the like, give off heat due to their contacts, and the power of such specimens is much less.
When the power of the device increases, the question of removing excess heat arises. For this purpose, passive or active cooling systems are used. Passive cooling is a regular radiator made of copper or aluminum. There is debate about the benefits of cooling materials. The advantage of this type of cooling is the absence of noise and the almost complete absence of the need for maintenance.
Installation of LED with passive cooling in a spotlight
Active cooling is a cooling method that uses external force to improve heat dissipation. As the simplest system, we can consider a radiator + cooler combination. The advantage is that such a system can be much more compact than a passive one, up to 10 times. The disadvantage is the noise from the cooler and the need to lubricate it.
Radiators made of plastic
Heat-dissipating devices made of plastic are attracting some interest. And this is understandable, since the cost of this material is lower than the price of aluminum, and the level of manufacturability is higher.
But the level of thermal conductivity of ordinary plastic is not higher than 0.1-0.2 W/(m K). It is possible to achieve an acceptable indicator using different fillers. When replacing an aluminum radiator with a plastic-based device (of equal size), the temperature level in the temperature supply area rises by 4-5%. Based on the fact that the thermal conductivity of heat-dissipating plastic is lower than that of aluminum (8 W/(m K) versus 220-180 W/(m K)), we conclude: plastic can compete with aluminum.
How to connect a HPS lamp
Here is a compact shield assembled with your own hands, according to the connection diagram.
You can, of course, assemble all this in the overall body of the lamp, if the dimensions allow.
It is very important, before assembling such a circuit yourself and using any components, using a conventional multimeter in the maximum resistance measurement mode, check the insulation of the inductor and capacitor. Is there a hole in the body? Is there a hole in the body?
Is there a hole in the body?
To supply and disconnect 220V power, use a two-pole input circuit breaker.
For one lamp with a power of up to 400W, a machine with a nominal value of 5-6A is quite suitable. In addition to on-off switching operations, it will also play the role of a protective device.
A circuit breaker is mounted at the very beginning of the circuit. Do not forget to also ground the entire panel body.
Two neutral wires come out of the machine. According to the diagram, one of them is connected directly to the lamp, and the second one is connected to the corresponding terminal labeled “N” on the starter.
Keep in mind that the choke must be installed only in the open phase wire going to the lamp, and not in the neutral wire.
Otherwise, you can accidentally burn the product if during operation the neutral wire after the ballast choke accidentally shorts out. Next, turn off the phase. Mount one wire from the machine to the incoming contact of the throttle.
And connect the wire from the output contact to terminal “B” (Balast) of the ballast.
After that, connect the middle terminal Lp (Lampa) to the light bulb socket.
IZU switching circuits
Let's consider the parallel launch scheme of the IZU. In such a circuit, the lamp current does not pass directly through the IZU, which virtually eliminates any power loss. The circuit of the ignition device for such inclusion is quite simple, the devices themselves are inexpensive, easy to operate and quite reliable. However, high-frequency pulses generated by the ignition device in such a circuit affect, in addition to the lamp, also the choke, which necessitates the use of chokes with increased insulation, resistant to voltages of 2–5 kV.
Since standard chokes for metal halide and sodium lamps do not support this voltage value, the parallel IZU switching circuit is used only with lamps whose ignition voltage is less than 2 kV. First of all, such lamps include high-power metal halide lamps (from 2000 to 3500 W).
Design features of radiators
Many people ask the question: which LED radiator is better?
There are two groups of modifications:
- needle-shaped;
- ribbed.
For example, a radiator for a 10W LED is represented by a ribbed LED device.
The first type is usually used for the natural method of cooling LEDs, and the second for forced cooling. With the same dimensions, the passive needle device is 70% more efficient than the ribbed type.
Radiators for high-power LEDs have a needle-shaped design. They are designed for high-power LEDs, but this does not mean that finned plate-based devices are only suitable for operation in conjunction with a fan. Depending on the geometric parameters, they are also used for passive cooling.
A radiator for LEDs of any configuration can be square, rectangular or round.
DIY cooling
The simplest example of a radiator is a “sun” cut out of tin or aluminum sheet. Such a radiator can cool 1-3W LEDs. By twisting two such sheets together through thermal paste, you can increase the heat transfer area.
This is a banal radiator made from improvised means; it turns out to be quite thin and cannot be used for more serious lamps.
It will be impossible to make a radiator for a 10W LED with your own hands this way. Therefore, you can use a radiator from the computer’s central processor for such powerful light sources.
If you leave the cooler, active cooling of the LEDs will allow you to use more powerful LEDs. This solution will create additional noise from the fan and require additional power, plus periodic maintenance of the cooler.
The radiator area for a 10W LED will be quite large - about 300cm2. A good solution would be to use finished aluminum products. You can purchase an aluminum profile at a hardware or hardware store and use it to cool high-power LEDs.
By assembling the required area from such profiles, you can get good cooling; do not forget to coat all joints with at least a thin layer of thermal paste. It is worth saying that there is a special profile for cooling, which is commercially produced in a wide variety of types.
If you do not have the opportunity to make an LED cooling radiator with your own hands, you can look for suitable copies in old electronic equipment, even in a computer. There are several located on the motherboard. They are needed for cooling chipsets and power switches of power circuits. An excellent example of such a solution is shown in the photo below. Their area is usually from 20 to 60 cm2. Which allows you to cool a 1-3 W LED.
Another interesting option for making a radiator from aluminum sheets. This method will allow you to gain almost any required cooling area. Watch the video:
How to calculate the radiator area. Methods for obtaining accurate device parameters
In this case, a number of important factors are taken as a basis:
- ambient air indicators;
- level of dispersion area;
- radiator modification;
- features of the material from which the heat exchange device is made.
But all these nuances are needed for the designer who is developing a heat sink.
As a rule, radio amateurs use used radiators as a basis. All that is required is knowledge of the maximum power dissipation of the heat exchange device.
First method
The area is calculated using the formula F = а x Сх (T1 – T2), where Ф is the heat flux, and S is the surface area of the radiator (the sum of the areas of all fins or needles and the substrate in sq. m), T1 is an indicator of the temperature of the outlet medium heat, and T2 is the temperature of the heated surface.
When calculating the area, you should also pay attention to the fact that the rib or plate has two surfaces for heat removal.
The needle surface is calculated using the circumference (π x D) multiplied by the height.
For surfaces that have not been polished, the heat transfer coefficient is 6-8 W/(m2 K).
Why is it needed?
Along with other semiconductor devices, the LED is not an ideal element with 100% efficiency. Most of the energy it consumes is dissipated into heat. The exact efficiency value depends on the type of emitting diode and its manufacturing technology. The efficiency of low-current LEDs is 10-15%, and for modern white ones with a power of more than 1 W, its value reaches 30%, which means that the remaining 70% is spent as heat. Whatever the LED, for stable and long-term operation it requires a constant removal of thermal energy from the crystal, that is, a radiator. In low-current LEDs, the radiator function is performed by the leads (anode and cathode). For example, in SMD 2835 the anode lead takes up almost half of the bottom of the element. In high-power LEDs, the absolute value of power dissipation is several orders of magnitude greater. Therefore, they cannot function normally without an additional heat sink. Constant overheating of the light-emitting crystal significantly reduces the service life of the semiconductor device and contributes to a gradual loss of brightness with a shift in the operating wavelength.
Second calculation method
There is another simple formula, which was obtained through experiments.
S = [22 – (M x 1.5)] x W, where S is the heat exchanger area, W is the supplied power (W), and M is the unused power of the LED.
For the finned type of radiator made of aluminum, you can use the data provided by engineers from Taiwan. The data is not accurate, as it is indicated in ranges with a large run-up rate. In addition, the definition is suitable for the climatic conditions of Taiwan. They can be taken as a basis only when making preliminary calculations.
Option 2
You can make a radiator for LEDs with your own hands from a fragment of an aluminum pipe with a rectangular cross-section.
Required materials:
- pipe measuring 30x15x1.5 mm;
- press washer whose diameter is 16 mm;
- thermal glue;
- thermal paste KTP-8;
- W-shaped profile 265;
- self-tapping screws
To optimize the convention, three holes are drilled with a diameter of 8 mm, and in the profile there are holes with a diameter of 3.8 mm for fastening using self-tapping screws.
The LEDs are glued to the pipe - the main part of the radiator - using thermal glue. In places where the radiator parts are connected, a layer of KTP-8 thermal paste is applied.
Then they begin to assemble the structure using self-tapping screws with a press washer.
Heat
To measure the heating of Philips Z ES LEDs, I heat the samples for 60 minutes. Unlike the original Philips Ultinon car lamps, Smart H7 also has a flexible radiator. Therefore, the service life of Smart will be approximately 2 times longer than that of real Philips Ultinon.
I take measurements near the LEDs on the plate. There were already holes for installing a temperature sensor on the copper board. I just used a file to make a groove for the thermocouple wire to come out.
The assembly and materials turned out to be very good, they did not skimp on thermal paste, this rarely happens. The diodes are on a copper plate, not an aluminum one. The thermal conductivity of copper is almost 2 times higher, and it is much more expensive than aluminum. The flexible part of the radiator is crimped with copper and placed on heat-conducting glue, so it is glued well. The petals are pressed very tightly, I tried to loosen them, but it didn’t work.
In cheap car lamps, the petals sometimes dangle, are connected to the body loosely or without thermal paste. The flexible petals even fell out of the car light bulb when trying to install them in the headlight.
For the most part, I am a supporter of a passive cooling system for LED lamps for cars. Passive cooling is more universal and is applicable not only to closed low-beam or high-beam headlights. Passive can be installed in foglights (abbreviated PTF) and other unprotected places. The simpler the cooling, the more reliable it is. Car LED lamps with a passive radiator are of course more difficult to install, but this can be solved with a set of additional covers. Enlarged rubber covers hide a massive rigid or flexible radiator without interfering with the operation of the electric corrector or hydraulic headlight angle corrector.
I have higher requirements for cooling with a fan, because problems with heat dissipation are much more common. Usually such models look decent on the outside, but when you figure it out, there are big problems inside,
Methods for attaching LEDs to a radiator
LEDs are attached to the device using two methods:
- mechanical;
- gluing.
Glue the LED with thermal glue. For this purpose, a little glue is applied to the metal surface, then an LED is placed on it. To obtain a good connection, the LED is pressed down with a weight until the adhesive completely dries. But most craftsmen prefer to use the mechanical method.
Currently, special panels are being produced, through which it is possible to install a diode in the shortest possible time. Some models provide additional clamps for secondary optics. Installation is very simple. An LED is installed on the radiator, then a panel is installed on it, which is attached to the base using self-tapping screws.
How to fix the LED
There are two main methods of fastening, let's consider both of them.
The first method is mechanical. It consists of screwing the LED with self-tapping screws or other fasteners to the radiator; for this you need a special “star” type substrate (see star). A diode, pre-lubricated with thermal paste, is soldered to it.
On the “belly” of the LED there is a special contact patch with the diameter of a slim cigarette. After that, power wires are soldered to this substrate, and it is screwed to the radiator. Some LEDs go on sale already mounted on an adapter plate, as in the photo.
The second method is glue. It is suitable for mounting through a plate or without it. But it’s not always possible to attach metal to metal; how to glue an LED to a radiator? To do this, you need to purchase a special thermal conductive glue. It can be found both in hardware stores and in radio parts stores.
The result of such fastening looks like this:

