A very fashionable ring light or circular shadowless illuminator, which is used in their work by photographers, videographers, and makeup artists, can be easily made with your own hands.
At the same time, at minimal cost, everything will look beautiful and functional. With the ability to adjust the light level and color temperature (warm, cool).
Materials for the lamp
The tape has quite high flexibility, due to this the product can be made in a wide variety of formats. But there will be general principles in the assembly for lamps of any model.
You will need to prepare the following materials:
- directly LED strip with the necessary LED parameters;
- screws;
- aluminum corner, which can be replaced with a plastic box;
- switch.
It is also worth taking care of the tools:
- drills;
- pencil with ruler;
- electric jigsaw;
- pliers.
When all the required materials and tools are ready, you can begin to assemble the future product.
Preparation of materials and parts
Before you begin, calculate the required number of LEDs, their brightness and the power of the adapter used. Depending on the purpose of the lamp, the length of the board will be:
- night light, illumination for a switch or socket - a small piece with three diodes;
- aquarium - a segment equal to the length of the wall or the perimeter of the container;
- bed lighting - several parts, the length of which corresponds to the length of the bed;
- backlight for a computer keyboard - in accordance with the length of the peripheral equipment;
- when replacing a fluorescent lamp - several parts, the length of which corresponds to the length of the lamp.
The brightness of the tape, its size and the density of the located semiconductors depend on specific conditions. The power of the unit, as noted above, should be equal to the total load with a margin of 10–15%.
You may also need wires, heat shrink and insulation tubing, a soldering iron, tin, and rosin. Instead of a soldering iron, you can use special connectors. Under no circumstances should you solder the tape with acid, which will cause oxidation and destruction of the conductors or a short circuit.
If using the board as a backlight for an aquarium, use a transparent tube, and to increase moisture protection, use silicone sealant.
Lightweight and elegant cardboard lampshade
For a paper lampshade, paper or thin cardboard is suitable. Such a lampshade can be either rectangular or square. First you need to think about the size of the lampshade; the larger the room, the wider the structure can be.
- You need to make two circles of wire of the required diameter. They are connected to each other using a fishing line, the distance between the lower and upper frames is 12 - 15 cm, the hoops are fastened with fishing line in three or four places. The larger the diameter of the base, the more connecting elements need to be made.
- On a piece of paper you can draw circles of different diameters and figures of cartoon characters. Outline drawings can be taken from the Internet and printed, then redrawn using carbon paper.
- A special ruler is suitable for drawing circles, or you can outline lids or buttons of different diameters. Some designs are cut out completely with a stationery knife, others are cut along the contour.
- The paper is tried on the base and glued with an overlap. Then glued to the wire; it can also be secured with thin wire.
- To do this, first make a hole in the paper with a thick needle or awl, then thread the wire and carefully tie it to the frame. It is advisable to glue thin paper, as it can easily be damaged.
Cardboard based
Such a homemade illuminator can literally be made for pennies. You can purchase everything you need in special stores or on the Internet. The base is made of cardboard. It’s worth noting right away that making such a lamp out of paper is not an option.
What you will need for assembly:
- insulating tape;
- pencil;
- composite material;
- wire cutters;
- ruler;
- sheets of cardboard (the thicker the better);
- masking tape;
- scissors (can be replaced with a stationery knife);
- metal wire;
- LED strip (preferably with a color temperature of 4000K), possible with different color modes;
- hot glue;
- compass.
The manufacturing scheme is as follows:
- First of all, you should decide on the diameter. For example, the following are taken: the diameter of the ring is 4 cm, the outer and inner diameters are 35 and 31 cm, respectively.
- To draw an even circle, you can use a compass. Cut two rings in this way.
- Using hot glue, attach a wire to the first ring. This will make the finished tool more durable.
- Any sufficiently thin but hard object will be suitable for the handle. It should be flat, like a large ruler, so that it is comfortable to hold in your hand. In this example, a layer of composite material is used.
- Place the composite on the first circle, as shown in the photo, and glue the second cardboard ring on top. All resulting gaps also need to be filled with hot glue.
- For convenience, as well as to hide all possible defects in the cutting, wrap it overlapping with masking tape.
- Now you need to wrap the cardboard with LEDs.
A ring of this size will require approximately 5 m of tape.
Making a cardboard lamp with an LED strip will not take much time, and it will not cause any particular difficulties. If you reduce the dimensions, then the option is perfect for a phone.
How to make a lamp from wood with your own hands
What do you need
- Branches;
- hand jigsaw or other cutting tool;
- sandpaper;
- lamp base;
- deep wide lid;
- superglue or glue gun;
- bulb.
How to do
Cut the branches into many lengths. They should differ slightly from each other in length.
Go over all the branches thoroughly with sandpaper.
Glue the lamp base into the lid.
Glue one branch vertically to the side of the lid.
Next to it, glue another one to the lid and the first branch in the same way.
Continue gluing the remaining branches in a circle.
Cover the entire base with wood. Route the wire between the branches.
Screw a light bulb into the base.
DIY lamp for the workplace
It’s also not difficult to make a small lamp yourself using an LED strip. In this case, a correctly selected housing is of great importance. A non-working fluorescent lamp is best suited for this. For example, for high-quality refreshment, a lamp 30 centimeters long will be enough.
In this case, for the lamp it is better to take an LED strip of the Waterproof SMD 5050 LED Strip type with the following basic parameters:
- current consumption – 1.2 A/m;
- supply voltage – 12 V;
- angle of light radiation – 120º.
The LED strip is attached to the inside of the lamp. You must use a purchased power supply or make one yourself.
By connecting the LED strip to the power supply, you need to check the functionality of the lamp.
During installation, it is important to properly insulate the conductive parts. If everything is done correctly, the lamp’s power supply is masked in its housing or, if it was purchased, it is carefully fixed near the place of its installation
The result is a very economical and neat design that provides high-quality lighting to the workplace.
Brightness adjustment
By the way, if the tube from which you made the ring light is of a wide enough diameter, you can glue a second row of tape next to it.
By connecting it through the second button, you get a power-adjustable ring light.
Turn on one row - one level of lighting, press the second button - the brightness increases.
Someone will think that it would be better to use dimmers. However, the use of some dimmers in this case can negatively affect the quality of lighting. When adjusting the brightness of the backlight through it, stripes begin to run across the screen.
This will especially affect when the dimmer operates to reduce the brightness parameters. The smaller it is, the more noticeable the flickering will be. At maximum values, flickering will be practically not visible.
The problem is solved by purchasing a dimmer on a PWM microcontroller with a frequency of at least 15 kHz. However, all this costs a pretty penny in the final manufacturing price. Therefore, it is better to make two independent rows of tape and get excellent quality of light.
Also, some people put the tape in a transparent thermal tube for moisture protection. This is done after gluing and soldering it.
However, do not forget that in this way you significantly reduce the heat dissipation from the LEDs and the service life of your ring flash. This option can be used if your hoop is made of aluminum and there will be no problems with overheating of powerful diodes.
Next, solder the power wires, which are located at the beginning of the LED strip, to the output connectors of the buttons.
And connect a special male-female plug to the input contact of the button.
Voltage from the power supply will be supplied through it. You can secure it to the ring light using a nylon cable tie.
In fact, that's all. The LED ring is ready.
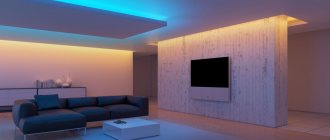
What are LED strips used for?
When placed densely on the ceiling, above the tension fabric, they will play the role of main lighting. Such a ceiling with colored LED strips will look especially beautiful. None of the classic types of lamps can achieve this effect.
LED strip structure diagram
Traditional use can already be considered additional lighting of shelves, cabinets, niches or mirrors, for example, as in this article - a suspended ceiling with lighting. By the way, this is absolutely safe, because the voltage in them is incomparable with a regular 220 V network.
A multi-level ceiling looks impressive if its steps are highlighted with LEDs. If the diode distribution scheme is loose and the brightness is not set to maximum, then it could even be a night light. In this case, blue and green lamp colors are suitable.
Types of LEDs on LED strips
Types of LED strips
Red LEDs are often used for emergency lighting. Due to the minimal consumption of these lamps, they will last a very long time.
Their excellent security allows the use of strips even for street lighting. For example, they are used to decorate the architectural features of buildings or paths from the gate to the door of the house.
LED strip power
Such lamps do not require a voltage of 220 volts, so they are very widespread in car tuning ideas. For example, to illuminate the bottom.
So, what is LED strip?
This is a lamp in the form of a thin flexible strip, which consists of LEDs. Its length can be adjusted as needed. They are produced in 5 meter lengths, but they can be reduced or increased as much as the designer’s idea requires. The width is from 8 to 10 mm, and the thickness is only 2-3 mm. Power for these lamps requires much less than the standard 220 volts: only 12 volts, in rare cases 24 volts. Most tapes have double-sided tape on the back, making them easy and quick to attach to any surface. You just need to clean it and degrease it.
Based on the colors of the glow, LED strips are divided into two types:
- Monochrome. This is a lamp that glows in only one color: red, blue, yellow, white or green.
- Universal (RGB). The color of such lamps can be changed using the control panel. There are a lot of options: from turning on one of the colors or even a mode when the color will change over the entire possible range at a certain specified speed.
Color samples
RGB LED strips, in turn, are divided into 2-3 types according to the formation of light emission:
- In the first, the strip consists of green, red and blue LEDs. They are arranged in dense rows of three along the entire length of the tape. The lamp then differs in that the color is changed by a group change in intensity. This option is most suitable for interior lighting when the strip itself is hidden from view.
- The second type of strip is characterized by the fact that three LEDs are placed together in the housing: green, blue and red. This design means that the emitters are located almost at the same point, which creates the most effective color gradation. Therefore, the lamp can be used anywhere.
- A relatively new type of strip, in which for the first time it is possible to turn on and off each individual LED. This makes it possible to realize any design idea. You can change the intensity of the glow in any area, that is, one LED lamp will emphasize the features of different elements. This is especially convenient for multi-level ceilings.
Based on the degree of protection from moisture, LED strips are divided into three types:
- Moisture resistant. This type of lamp can be used for rooms with high humidity, but without direct contact with water. For example, decorate the ceiling in the bathroom or kitchen.
- Waterproof. For example, a lamp for illuminating an aquarium, swimming pool or outdoor structures.
- Waterproof. Type suitable only for dry places.
The brightness of an LED lamp depends on the number of LEDs. Typically, it is calculated per 1 meter of length. Accordingly, the more there are, the brighter the lamp. The device of an LED strip designed for 12 volts implies from 30 to 120 diodes. A strip designed for 24 volts can include up to 240 diodes.
One meter of tape may have a different number of diodes
Number of LEDs on strip
Types and parameters
Appearance of LED strips
The range of LED strips is represented by budget and expensive analogues. They differ in power, diode brightness, luminous flux and other characteristics.
The most popular designs include the following series:
- Smd3528. The power depends on the number of diodes per linear meter. There can be 60 or 240 pieces. Power – from 5 to 16 W, luminous flux – from 5 to 9 lm.
- Smd2835 premium. This is one of the best cheap tapes with excellent performance and high brightness. 60-120 diodes are placed per 1 m. The light flux is 20-23 lm. The tape can be cut into 5 cm pieces. Can be used for spot lighting.
- Smd3014. Similar to the previous model. There are 60-120 LEDs per 1 m. The power also depends on the number - 36-72 W and luminous flux 6-11 lm.
Flexible LED strip 5050 Fiber optic L 96 (red, yellow, blue, green or white)
If your project requires a more powerful strip, it is recommended to pay attention to the following products:
- Smd5050. There are 30-120 diodes per linear meter. Light flux 50-60 lm, power 7.2 - 25 W.
- The smd5630 and smd5730 series have similar characteristics. They have increased power and high brightness of 50-60 lm. Used in LED lamps.
More original designs can also be found on sale. For example, there are high-voltage flexible boards for direct connection to a 220 V electrical network. There are also low-voltage products for 12 and 24 V, operating through a rectifier. For use in difficult climatic conditions, a model with a waterproof housing is selected.
Tapes are sold in reels of 5-10 meters. If necessary, they can be cut into small pieces along special lines. High-voltage products are sold in lengths of 100 m.
How to make a phytolamp and what is needed for this?
To make a phytolamp with your own hands you will need:
- LEDs with a special emission spectrum;
- power supply;
- cooling system;
- frame;
- auxiliary material and tools.
Chips of blue, red and purple phytoLEDs are found in different modifications: in the form of discrete SMD elements or COB matrices. All of them are suitable for making a lamp with your own hands. The easiest way to make lighting is from a ready-made LED strip for plants, cutting it into several pieces. More difficult ones are made from individual SMD chips or COB matrices, which will require correct calculation of the radiator.
The power source for LEDs and matrices is a driver with a stabilized direct current output, and for LED strips it is a +12V voltage source of appropriate power.
A passive cooling system is a must-have element of a plant light. It is responsible for ensuring the compliance of the optical characteristics of emitting diodes throughout their entire service life. The shape, dimensions and materials for making the radiator are described in a separate article. In most homemade lamps, the radiator is also the body.
In addition to the listed LEDs, phytodiodes made using USKI technology (universal blue-red radiation) can be used as light sources. They have a unique emission spectrum obtained due to the special composition of the phosphor. In this case, the phosphor acts as a selective filter, transmitting waves predominantly in the blue and red range, as well as a small part of yellow and green light. In this case, the blue region has a width of 380–480 nm with a slight transition to ultraviolet and a peak at a wavelength of 445 nm. The red region is much wider, covering the orange and infrared spectrum, the share of which reaches 50%. The total width of the red emission is approximately 570–770 nm with a maximum at 640–660 nm.
Thanks to their expanded spectral characteristics, USKI LEDs are ideal for creating DIY plant lamps. A lamp based on them will provide the plant with a full growth cycle: from vegetative development to fruit ripening and can be used to illuminate plants with an extremely low amount of solar exposure.
Application of phyto tape
To design a simple LED lamp for plants, you will need a phyto-tape with a power supply and inexpensive parts for the body, which can be used as improvised material. The lamp can have any shape and size, thanks to its flexibility and the ability to cut the tape into pieces that are multiples of 5 cm, and the adhesive base allows it to be mounted on any smooth surface.
The optimal material for the case will be a thin aluminum (in extreme cases, tin) plate, which will serve as an excellent heat sink for the light-emitting chips of the tape. You need to make mounting holes in the corners of the plate. The entire structure is suspended on two decorative chains that cling to self-tapping hooks screwed into the wall. You can adjust the height by rearranging the chain links.
Do-it-yourself powerful phytolamp with E27 base
You can make effective and economical lighting for seedlings with your own hands from several LED lamps, which are assembled from individual components. To do this, you need to buy a DIY kit (for example on Aliexpress), which includes all the necessary parts for assembling the lamp, namely:
- plastic case and collapsible metal base E27;
- aluminum radiator with self-tapping screws;
- board for SMD LEDs;
- lenses with a dispersion angle of 90° and a holder for them.
Separately purchase blue and red smd leds, a driver of suitable power, low-melting solder and thermal paste. Assembly begins by mounting the LEDs on the board using a hair dryer and a soldering iron heated to a temperature of 280°C. After this, the wires from the driver are soldered to the board and the circuit is checked for functionality by briefly turning it on. After making sure that all the chips are glowing, they proceed to assembling the case.
A thin layer of thermal paste is applied to the contact points between the board and the heatsink and pressed with self-tapping screws. Lenses are installed above all LEDs, which are secured with a holder with screws. A driver is placed inside the plastic case, the output wires of which are soldered to the board, and the input wires are pressed against the central and side parts of the base.
One such phytolamp is capable of providing full additional light in the evening to several indoor flowers or seedlings planted on an area of up to 0.25 m2.
Pros and cons of a ring lamp
The advantages of a ring lamp include:
- Creating natural light.
- Elimination of various visual imperfections and defects.
- Ability to shoot at night.
- High range of glow temperatures, which makes it possible to regulate the warmth of the light.
- The ring lamp does not heat up and does not flicker even after prolonged use.
Among the disadvantages it is worth highlighting:
- Service life of 2000-4000 days. Cheap Chinese products lose 30-50% of their brightness within a year, and after 2-3 years their service life ends completely.
- A good ring-shaped lamp has many fakes. For example, a table lamp may be passed off as a large floor lamp, and a product with 500 LEDs or more may be recommended for purchase, which shines worse than a similar one with 240 LEDs.
- Availability in stores of old models with light sources of the previous generation.
- USB powered. As practice shows, such a lamp cannot be considered a full-fledged working tool. It is best to choose models with an external power supply.
Installation of LED curtain lighting
The installation procedure for ice lighting for curtains consists of three main stages:
- A box/cornice with a cavity facing the curtain is installed on the ceiling opposite the curtain. It is necessary for hidden installation of tape, wiring and transformer.
- The transformer itself is attached to the surface of the wall or ceiling using self-tapping screws or dowels (using clamps if there are no special holes in the housing), depending on the location of the box and curtains, as well as the architectural features of the room.
- All conductors are connected and connected according to the electrical diagram, observing the polarity of the contacts (V+ and V-). The power supply is turned on and the functioning of the installed curtain lighting is checked.
Concept and scope of application
LED lamps have a lot of advantages, but the main disadvantage is still too high a cost. The latter is offset by low power consumption and a long working life, but it is still much cheaper to build your own lighting device by separately purchasing cheap flexible boards and LEDs. The cost of one linear meter of LED strip is about 100–250 rubles.
If you want to save money, then buy the tape in 10 m rolls, carefully choosing the required class of LEDs. These devices are used in all spheres of life, at facilities where artificial lighting is required.
Compared to incandescent lamps, flexible light sources based on LED diodes have a huge number of advantages:
- high efficiency;
- long service life;
- availability;
- possibility of choosing forms;
- safety;
- flexibility.
The applications of LED strip are endless. It is used as lighting for an aquarium, ceiling, furniture and other interior items, work areas, shop windows (usually neon strips). It is impossible to list all possible options. The main thing here is to learn how to choose the right LED strip depending on the specific task, focusing on technical and operational characteristics.
The use of multi-colored flexible boards on stretch ceilings is due to the glossy surface, which perfectly reflects the incident light rays, which allows you to achieve interesting effects - from visually enlarging the room to creating an unforgettable romantic atmosphere. Doing this with a classic chandelier or spotlights is much more difficult.
In general, LED strip is the most versatile light source. You can create unique designs and shapes from it, and almost any materials can be used to make it yourself. The most common are devices made of plastic and polyvinyl chloride.
How to make a simple LED chandelier from LED strip
Let's consider an easy-to-use option - a square-shaped outline. Dimensions are selected according to the size of the room. This chandelier can be used not only as illumination, but also as main lighting.
For assembly you will need:
- ice strip running on 12 volts (preferably with LEDs arranged in 2 rows - it will be brighter);
- power supply for connecting to the network;
- U-shaped aluminum profile with plastic cover;
- pieces of PCB (for example, from unnecessary boards);
- short screws;
- pencil;
- screwdriver;
- soldering iron
First, the frame is assembled. The profile is divided according to the size of the side of the square (you will need 4 identical parts), the ends are filed at 45°. Cut out the textolite with the letter “G”. The thickness should be such that the pieces fit into the corners of the frame. The squares are assembled with screws.
The diode strip is cut to size. Remove the protective layer and glue it inside the body. Solder the wires or use special connectors for connection. For a square design, corner ones will be required.
The ends are pulled out and connected to an adapter that converts 220V AC to 12V DC. The power supply is usually hidden in a niche, above a cabinet, or in another inconspicuous place. The length of the wire is selected taking into account the distance from this point to the lamp.
The plastic cover is trimmed at an angle of 45°. Insert into frame. The chandelier is ready.
Types of LED diodes used
When creating a homemade strip that glows in one color, semiconductors such as SMD 3028 or SMD 5050 are suitable. In the second case, three crystals are used, so the glow will be the brightest, but the electricity consumption will also be higher. Also, brightness depends on the number of elements located per 1 linear line. m.
The number of LEDs per conventional meter affects the total load of the product:
- 30 elements of SMD 5050 type - 7.2 W;
- 60 SMD Z528 - 4.8 W;
- 60 SMD 5050 - 15 W;
- 120 SMD Z528 - 9.6 W;
- 120 SMD 5050 - 25 W;
- 240 SMD Z528 - 19.2 W;
Boards with semiconductors arranged in several rows are called multi-row. In such cases, RGB technology is usually used, which allows you to get a multi-colored glow.
Due to the existence of several standards, manufacturers produce tape that operates from a 12 or 24 V DC source, or directly from a 220 V AC power supply.
Types of garlands
You definitely won’t encounter a paucity of choice in this matter; there are very, very many varieties of garlands and lighting structures that can be used to illuminate curtains. Let's list some of them.
An additional light source that consumes minimal electricity visually enlarges the room.
- universal linear garland (lamps arranged in series on a long wire)
- curtain garland (long wires not connected to each other)
- fringe garland (branches of different lengths from the main wire)
- mesh (looks almost like a fishing net, only with small lamps)
- duralight (flexible cord with LEDs, especially suitable if you need to give the light picture a certain shape)
Cozy and comfortable rooms in small spaces will become much more spacious and brighter thanks to LED lighting.
Application areas of LED lamps
The main areas of use of LED lamps are:
- street lighting;
- industrial facilities;
- office lighting;
- architectural structures;
- decorative ceiling lighting in residential buildings, shopping malls, public catering outlets, hotels;
- decorative floor lighting on roads, pedestrian areas, stairs;
- wall lighting in residential premises, public catering establishments, and cultural heritage sites;
- spot LED lighting: paintings, cornices, various art objects;
- transport facilities;
- emergency lighting during evacuation operations and when lighting the most dangerous places;
- explosion-proof lighting: oil and gas and mining facilities, gas stations;
- lighting of premises with increased requirements for cleanliness: medical laboratories, treatment rooms, clinics, hospitals.
LED strip lamp
Before you start upgrading or manufacturing a lamp from LED strip, you need to study the properties of LEDs:
They dazzle the human eye, so they should be mounted under frosted glass or in niches. The location for installing the controller and power supply of the tape is selected in advance during the project
These elements are necessary to maintain the performance of LEDs. The tape is based on adhesive double-sided tape, which allows it to be securely attached to the installation site. When assembling the chandelier, care must be taken as the tape can be easily damaged.
What you will need
To assemble and upgrade the lamp with your own hands, you need to prepare the following materials:
- We purchase LED strip of the required length.
- Select the power supply and controller.
- For assembly it is necessary to use stranded wires with a cross-section of 1 mm2.
- Glue gun and hand tools.
Step-by-step instruction
The modernization will be carried out on the basis of a fluorescent lamp consisting of four lamps for suspended ceilings in the following order:
- The lamp attachments are being dismantled.
- Installation of LED strip, controller and power supply.
- Installation of frosted glass and ceiling mounting.
The Thomas Superleds channel demonstrates the modernization of the Armstrong lamp.
Build process
Today, there are a large number of options for how to make a lamp using LED strip. The assembly method will depend on what type of lighting fixture you ultimately want:
- horizontal;
- vertical;
- on legs.
Making holes
Let's look at some of them in more detail. Half of the steps that need to be completed during the assembly process do not depend on the luminaire version. Therefore they will match. The LED strip product is assembled as follows:
- first measure the length of the corner required for assembly;
- We drill holes in it, with the help of which the device will be attached to the surface. Screws should be used as fastening elements here;
Note! It is also necessary to cut out a place in the corner to place the microswitch in it.
- we fix the corner in the place we need;
- we install the switch in the sawn place and solder the wires to the tape at the place where it is cut into separate pieces;
- degrease the LED strip with acetone;
Connection diagram
- then we attach the LED strip to the installed corner. In order for it to stick evenly, it needs to be attached lightly to the surface and then leveled. After this, you can run your hand along the tape, finally securing it in the chosen place;
- Next, we connect the wires to an adapter or power supply that has the power we need. Typically the power is 12V.
Note! Only with the help of an adapter/power supply will it be possible to connect the lamp to a standard power line, which has a power of 220V.
As can be seen from the assembly instructions, the final result should be a lighting device with a horizontal installation method. It can be effectively used in the kitchen to illuminate the cooking area, countertop or hob. Also, such a lamp will be relevant in a children’s room. Here it would be appropriate to place it above the desk under a hanging shelf or cabinet. But remember that the maximum lighting efficiency of such a device is achieved at a height of 70-80 cm above the working surface. At the same time, the light will not dazzle or irritate your eyes.
Butterfly chandelier
There are two ways to create such a lamp:
- One big butterfly.
- A “swarm” of small moths of different sizes.
Individual parts of the lamp can be lowered up to one and a half meters from the ceiling.
- An old lampshade or its frame is used as the basis.
- If there are no such blanks, then you can use a rim made of metal or wood or thick wire twisted into a circle.
- You need to prepare sheets with butterfly templates to select butterflies of the required sizes and shapes.
- It is recommended to make moths of at least five different sizes.
- Then the structure will be visually larger.
- Butterflies are cut out with small scissors or a stationery knife.
- It is advisable that the paper be thick.
- The cut out figures are painted with different colors and decorated with sparkles, but on some templates the butterflies may already be colored.
- To finish the product, the butterflies are fixed on fishing lines and attached to the base.
How to replace the ring lamp?
As an alternative to this lamp, you can use the already mentioned softbox. Thanks to it you can get soft shadows and achieve high detail in shadowed areas. Another solution is a ring flash. We are talking about an impulsive photo illuminator that has the shape of a circle. It is placed around the camera lens and used in macro photography, such as portrait and studio work. Like a ring table lamp, this fixture can create an interesting reflection around the model's pupils.
How to make a moon lamp out of paper with your own hands
What do you need
- Paper napkins, towels or toilet paper;
- PVA glue;
- water;
- brush;
- plastic ball;
- White paint;
- black paint;
- sponge;
- lamp base;
- plastic bucket with lid;
- glue gun;
- knife;
- bulb;
- pencil;
- wire.
How to do
- Separate napkins, towels or toilet paper into single-layer pieces. Start gluing them to the ball by coating it with glue lightly mixed with water.
- Place the pieces of paper on top of each other and also coat the top with glue.
Thus, glue the entire ball in several layers. Dry the paper completely.
Cover the figure with white paint and let dry. Mix white paint with a little black to create a gray color. Use a sponge to make gray spots on the ball.
Glue the lamp base to the back of the cover using hot glue. Cut a large hole in the bottom of the bucket. Connect the lid and bucket and screw in the light bulb.
Draw a circle on the ball with a pencil. You can circle a glass or some other object. Cut along the marked line and remove the plastic.
Place the ball on the light bulb. For reliability, you can glue the figure to the base.
Making a ring light
This homemade device will create unusual lighting for taking wonderful portraits.
You will need:
Materials:
- Household cable with a core cross-section of 2 mm2 (about 3 meters)
- Lamp sockets – 12 pcs.
- Plywood 61 x 61 cm
- Switch
- 12 lamps. Suitable for both compact fluorescent, LED and conventional 40-watt lamps
- Power cable
- Cable twists
- Cable ties
- Bracket and mount for fixing the light fixture on a stand
- Insulation tape
- Junction box
Tools:
- Jigsaw.
- Drill.
- Stripper nippers
- Screwdriver
- Pliers
- Stationery knife
- Roulette
- Pencil
- Rope
Instructions:
Find and mark the center of a piece of plywood. Secure the rope in the center. Place the lamp socket against one of the edges of the plywood and mark where the inner edge ends.
Attach the pencil to the string so that it stands on the mark you made. The length of the rope is the radius of the inner circle that will be cut. Draw a complete circle with a pencil. Then secure the pencil so that it rests against the edge of the plywood. Draw the outer circle.
Use a jigsaw to cut out the inner and outer circles. When working with the outer circle, do not cut off one of the corners of the plywood - this will be where the switch and bracket will be attached. You should end up with a drop-shaped piece, with a hole in the middle.
Place 12 equidistant dots on the outer circle - this is where the lamp sockets will be located. Drill holes in these places with a drill of approx. Ø11 mm, so that 4 wires pass through this hole.
Now you need to strip the wires. Remove the top sheath from the cable and cut pieces of black and white cores 20-25 cm long. In total you will need 12 of these black and white pairs. Then strip the ends of each wire about 2cm and use pliers to make hooks on each stripped end. After this, thread 4 wires into each of the 12 drilled holes and connect each socket in parallel.
Be careful with polarity. Make sure that two white wires go to one terminal, two black wires to the other. Also make sure that the wires are secured to the terminals in a clockwise direction so that when you tighten the screw, they do not slip off. Recheck all connections again.
Once you have secured all 12 cartridges, you will be left with two loose wires - black and white. They need to be connected to the switch according to the instructions for it.
The white wire goes directly to the power cord, the black wire goes to the switch. The ground wire from the switch goes to the ground wire on the power cord.
Secure the wire connections with cable twists and wrap with electrical tape. Now check if everything works. To do this, screw the lamp into the last socket and flip the switch. The lamp should light up. If not, then you need to double-check the connections of all wires.
When you are sure that everything works, unplug the structure from the outlet and drill small holes for the ties. With their help, you need to secure all the parts on the plywood base - cartridges, switch, bracket. Make sure there are no exposed wires sticking out of the sockets or the switch. You can also cut off the sharp tip of the “drop” for mounting on a stand.
Attach the light to the stand, screw in the lamps and make sure everything works as it should.
It will take approximately 1-3 hours to make the ring. As you can see, making a light is not difficult, but be careful when working with electricity. If you are not confident in your abilities, ask a specialist for help. If connected incorrectly, you may receive an electric shock, so be careful and take all necessary precautions.
LED lighting for aquarium
There are many options for LED lamps that are installed to illuminate an aquarium. Let's consider the process of making a simple model. The following materials will be useful to you:
- Diode tape.
- A flask or other container to ensure the tape is waterproof.
- Power supply and connectors for it.
- Soldering iron, silicone, awl, knife.
It is necessary to remove the back part from the connector for connecting to the power supply and strip the wires. These wires need to be prepared for the soldering process with the contacts of the diode strip.
The wires are placed in a glass flask with a stopper. To do this, a hole is pierced in the bulb plug with an awl, through which the connector wires are passed and sealed there with the contacts of the tape. Next, the puncture in the cork is sealed with a silicone compound.
The coating covering the adhesive layer is removed from the tape and the tape itself is glued to the wall of the flask. After this, the flask is tightly closed and additionally sealed with silicone on both sides. All you have to do is connect the finished lamp to the power supply, and then place it in the aquarium.
Which is better - a ring lamp or a softbox?
This question worries many professionals, amateurs and bloggers. A bright ring light produces a perfect, constant, even stream of diffused light, while a softbox produces a limited, concentrated beam of light. This especially applies to long and narrow lamps - strip boxes. Often, to create a good picture you need several such sources - drawing and filling light.
Not every master has the opportunity to purchase several softboxes at once, and also to set them up correctly. A ring lamp with a tripod can be rotated at any angle, raised and lowered, and you can also install a phone or camera inside it, which is what many bloggers use. In addition, such a lamp can be controlled from the remote control without getting close to it.
Features and stages of installation work
To create an unusual lamp from a diode strip, a variety of objects are suitable - from a standard incandescent lamp base to the body of a fluorescent light source.
Such procedures are accompanied by numerous requirements, the main of which are:
- When connecting a homemade device, you need to use multi-core wiring. One end is equipped with a tip with a cross section of 0.75 mm and is connected to the controller, and the other is soldered to the ends of the LED board. To increase fixation, heat shrink tubing should be used.
- If the device is mounted on suspended ceilings, it is advisable to use self-adhesive tape. Before gluing, first clean and degrease the surface of the ceiling, allowing it to dry thoroughly. The protective film on the back of the flexible board must be removed immediately before installation. The slightest dirt or dust deposited on the adhesive layer will lead to poor adhesion. The presence of moisture also has a negative effect on adhesion. If the tape is installed in a room with high humidity, then ventilation must be provided. Outdoors, such actions should be performed exclusively in dry weather.
- If the distance is more than 7 m between the power supply and the homemade tape, you need to increase the cross-section of the wire.
The adapter is connected in compliance with the polarity and terminals:
- for single-color tapes, the technology is as simple as possible - “plus” is soldered to “plus”, and “minus” to “minus”;
- Multi-colored tapes have their own markings - V+ (voltage), R, G, B to switch colors (to the controller).
Additionally, multi-colored LED boards are equipped with dimmers designed to change the brightness and change the color of the glow. They come with a remote control. Low-voltage equipment for 12 or 24 V is an ideal solution for a home or apartment, high-voltage flexible boards are for organizing street lighting.
By following a number of technical recommendations and safety rules, you can easily create unusual lighting for interior items, an aquarium, a swimming pool, a ceiling, etc. The cost of lamps made using this principle with your own hands is much lower than factory LED devices.
LED strip for ceiling lighting is a popular type of lighting in an apartment, with which you can add a spirit of comfort and romanticism to a room. Instructions and photographs of the process will help you install the tape yourself.
LED strip is most suitable for suspended and plasterboard ceilings.
Materials
Here's what you'll need to buy to make your own LED ring:
- metal-plastic pipe with a diameter of 25mm
The optimal pipe length for photo and video shooting is 2 meters. It will need to be bent and made into a ring with a diameter of 60cm.
The bigger the better option is not universal here. The specificity of the ring light is such that as the diameter increases, a shadow may appear in the central part.
And this is not acceptable. It’s not for nothing that such a ring flash was nicknamed the “shadow killer.”
For makeup artists, you need a smaller ring - 30-40cm. Stores often sell already rounded sections; ask the sellers.
By the way, you can also buy a children's hoop. The circle on it will be ideal from the very beginning and you won’t have to worry about bending a rigid pipe.
However, the thickness of the tube on it will be less, and this will not allow the implementation of some of the ideas discussed in the article later.
- buttons - one or two pieces
- LED strip SMD 5630 (60 led/meter) or more powerful 5730
Most importantly, when choosing an LED strip, pay attention to the color rendering index - CRI. For high-quality shooting, the CRI should be greater than 80, and preferably 90.
1 of 2
You can even order such high-quality ice tape from the Chinese. Where exactly, see the links at the end of the article.
If you are going to frequently transport your lighting or use it outdoors, then it would be logical to buy a waterproof tape with protection IP54, 65, etc. This model will withstand harsh working conditions much better than its counterparts.
However, due to the fact that the LED tape will still have to be cut into pieces, then the sealant will have to be cut off from the solder joints, the whole point of moisture protection is lost.
You can, of course, stick it not to the end of the ring, but to the inner rim in one piece, but the backlight in this case will be completely different and will lose all its advantages.
- power supply or Power Bank 12 volts
- plug connector
- Soldering iron and tin
- Nylon ties or clamps - if the quality of the adhesive base of the tape is not important
Making small spotlights
When making such a lamp, you need to take into account that the light emanating from the LED blinds a person. It is best to hide such light sources in niches or behind ceiling plinths. Only frosted glass is suitable for creating a lamp
It is important to choose a suitable housing to which the LEDs will be attached. For this purpose, you can use an old fluorescent lamp or an unnecessary incandescent lamp
Remote control
For operation, capacitors marked 400 nF and 10 μF are required, the first is used to control the current strength, and the second so that the light from the lamp does not blink, but is uniform. You will also need a resistor operating with a resistance of 100 ohms, which will protect the system from possible voltage surges. We use an old light bulb as a base.
It must be carefully disassembled without damaging the base. Carefully clean and degrease the surface
Next, capacitors and a resistor are placed in the base. After which you can solder the rectifier, this must also be done very carefully. Assembly adhesive is well suited for insulation; it will fill the space of the base and securely fasten all the parts of the lamp.
General connection diagram
At the next stage of work, you need to solder the board to the capacitor. We must try to ensure that the boards are evenly spaced, this will ensure uniform lighting in all directions. Next, insulation is carried out again using mounting adhesive. Then a resistor (100 Ohm) and a capacitor are soldered to any board and everything is also insulated with glue. The resulting light source can be inserted into a chandelier - it will turn out very beautiful.
What is a ring lamp for?
As already mentioned, you can use it to adjust the warmth of the light. A ring lamp for a phone provides the opportunity to take high-quality photos and videos without imperfections, skin defects, or other unwanted blemishes. Bloggers have a high price for the effect of “angel” eyes, when you can see the reflection of a burning lamp in them. A ring lamp for a makeup artist is an opportunity to correctly select and apply shades for evening, home or office makeup. She helps the photographer in creating the ideal color palette, correct lines without asymmetry.
How to make a paper pendant lamp
In order to add brightness to your interior design, you can make a beautiful and unusual paper lamp.
It should be taken into account that only LED lamps must be used, since paper lamps tend to ignite when heated.
What you will need
You can use an old chandelier to make a paper chandelier.
The following tools and materials must be used:
- parchment paper;
- PVA glue;
- thin thread and wire;
- scissors;
- cartridge E27 and light bulb;
- sewing machine.
Step-by-step instruction
The assembly proceeds as follows:
- We remove the frame from the old chandelier and clear it of jewelry.
- Iron the parchment paper and cut into circles with a diameter of 8 cm.
- All cut circles should be sewn together using a sewing machine.
- The connection must be made in the central part of the circle.
- We attach the sewn circles to the frame of the chandelier using wire.
After assembling all the elements, you need to screw in the LED lamp and install the chandelier in place.
The principle of making a lamp from paper can be seen in the video from the Roman Tkachev channel.
Lamp assembly
Having carefully thought through the design of the lamp, collecting the necessary tools and materials, you can begin to manufacture it. In some cases, the whole process consists of simply gluing the board to some kind of base - for example, to a keyboard. In other situations, partial or complete redesign of the light source may be required.
When installing such a lamp, you need to consider several additional factors:
- The power supply used to reduce the voltage should be placed as close as possible to the diodes. As the length of the wiring increases, voltage losses increase, which will lead to a decrease in the lighting level.
- When placed on a metal base, a layer of insulation must be laid between the strip and the LEDs.
- If the tape is connected to a 220 V industrial network through a capacitor, then it must be coated with silicone sealant. Preferably in two layers.
Important! The tape connected through the power supply is characterized by increased electrical and fire safety, which cannot be said about item 3 from the previous list. Work on such a board should be carried out with the voltage completely turned off.
What will you need?
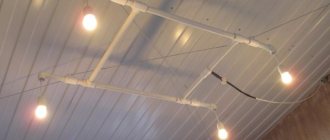
Due to its high flexibility, a lighting device based on LED strip can have a wide variety of formats. However, the basic principles of manufacturing such a lamp remain unchanged, therefore, in addition to the diode strip itself, it is expected to prepare materials and basic tools, presented:
- screws;
- aluminum corner 10x10 mm;
- small-sized switch;
- electric drill;
- marker;
- ruler;
- electric jigsaw;
- pliers.
If necessary, the aluminum corner can be replaced with a standard plastic electrical box. The functionality and quality characteristics of the manufactured lighting device, in this case, will not be affected.
Warm or cool light
It is important to determine in advance which option is best. It all depends on the characteristics of photography and the surrounding environment. There are three main options:
- Cold light. Used by makeup artists and stylists, also suitable for food photography. Can be used in modern photography, but distorts colors, making them cooler.
- Warm light. It has a yellow tint and can be used in some cases.
- Natural light. A universal solution that provides natural color rendering and is close to sunlight. Can be used almost anywhere.
By the way! Using multi-color LEDs to adjust color temperature is not the best solution. They do not provide quality light.
Main conclusions
You can make a lamp yourself using improvised means and inexpensive radio products. Also, this will require direct LED elements - lamps or strips. They can be both low-power and strong. When choosing a material for the body, you need to proceed from the parameters of their heat transfer. To connect such a device to a network without a power supply, you will need to make a driver with a quenching capacitor, having previously calculated it using the formula.
Using the proposed technology, it is possible to produce lamps of any shape and parameters for installation as the main or decorative source of lighting. You can mount them with your own hands on the ceiling and walls in lampshades, chandeliers and table lamps, as well as in any other specially made artistic design.
Previous LEDs Formula and example of calculating the limiting resistor for an LED Next LEDsDetails about the characteristics of LED lamps
Advantages over studio lighting
The ring light is a mobile and compact lighting source. Unlike stationary studio light, you can take it and use it anywhere - at home, on the street, in clubs, discos, weddings.
Another advantage is the speed of setup. Turned it on and you can shoot right away.
This circular light also makes it easier to photograph with children.
The ring attracts attention and the child becomes quiet and interested in the process taking place around him.