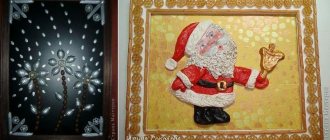
New Year's holidays are just around the corner, it's time to think about nice souvenirs for friends and relatives. Why, for example, buy a postcard if it is very simple and pleasant to make it yourself. Making a card won't take much of your time, but everyone will love this gift. You and your child will still have time to make these children's cards for the New Year with your own hands. Children's crafts are made quickly and are very popular with grandparents. Here, for example, are options for children's cards from Anna Shishlevskaya and our readers.
Receiving cards from loved ones is always a pleasure, and cards that you make with your own hands are doubly pleasant. Make New Year cards for your friends and relatives, they will be very pleased.
New Year card with applique
The easiest way to make a postcard with your own hands is applique. It can be any thematic applique: snowflake, Christmas tree, snowman, Santa Claus and other winter motifs.
Snowman applique
Let's make an applique postcard for the New Year. Take a white sheet and draw a circle. You can use a compass or circle a glass. Cut out three circles of different diameters. Paint the edges blue with a sponge. Cut out a small blue rectangle with curly scissors. Glue the largest circle in the center. Then, attach the medium and small ones. Glue two red stripes as a scarf. We draw eyes and long arms. We make white snowflakes and glue them to the background. Making an unusual postcard with a snowman is suitable for children 4 years old.
Applique Christmas tree and gifts - step-by-step MK
The next version of the New Year's card is interesting using the origami technique. Let's take three green squares. We make bends along two diagonals. We bend the opposite triangles inward. We bend the right and left corners towards the center. It is necessary to repeat these steps with all squares. When all the triangles are ready, glue the white rectangle onto a blue sheet of cardboard. Place the Christmas tree on the right side of the card. Cut squares and rectangles from colored paper. We glue different ribbons to them and place them on the left side of the applique. All that remains is to add the inscription “Happy New Year!” and your handmade New Year's card is ready!
Ideas for New Year cards with applique
New Year cards for kindergarten for children 3-4 years old and 5-6 years old
Here are some good ideas that will not be difficult to implement in your kindergarten. Most often, children at this age make crafts for their parents, and not for competitions or anything else, so you can ignore certain flaws. Here are some examples:
- Postcards made from cotton pads. Cotton pads or pieces of them are glued onto a cardboard base as decoration. Most often, the elements are put together to make an impromptu snowman - it’s not difficult and fits perfectly into the theme. You can cut the disks in half and assemble a Christmas tree from them, or roll the blanks and form a Christmas tree.
- New Year's ball. Another simple solution that can be done in the garden. A circle of colored paper is glued onto a cardboard base, which can first be decorated with patterns of paper of a different color. A string is drawn on the cardboard, as if a ball is hanging. You can write a congratulation inside or paste a finished one.
- Mitten. In this case, it is better to make templates for New Year’s cards with your own hands in advance. Children must trace them on cardboard and cut them out, then decorate them in any way - draw patterns, stick on elements from colored paper or paint with watercolors.
- Christmas balls. For kindergarten, the easiest way is to cut out round blanks in advance; children will not be able to do it perfectly evenly. And then decorate them by analogy with the previous point - the way every child wants.
- With buttons. Everything is simple here - the postcard can be almost anything, although you can choose a specific design option to make it easier for children. Then the buttons need to be sewn or glued to the cardboard in a certain order. It is advisable to add other types of decor.
- With cocktail straws. In this case, you can lay out shapes from blanks of different lengths to form a Christmas tree or something else. Or cut them into small pieces, and smear the silhouette of a Christmas tree on the card with glue and cover the surface with elements to get an attractive result.
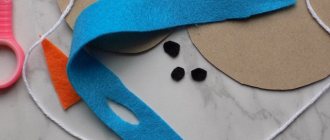
- Felt postcard. It’s better to immediately choose a shape and cut out the blanks so that the children can connect them. The second solution is to glue the felt decoration onto a cardboard base, this also looks good.
- Snowman. An interesting craft that is easy to make. Glue white paper onto a base of colored cardboard so that a margin of 1-1.5 cm remains around the perimeter. In the upper part, glue two dots - eyes and slightly smaller ones to form a mouth. The red elongated triangle will be the spout. Below, glue a scarf made of stripes of red or another color. Next come horizontal black dots - buttons.
By the way!
You can use other ideas, this is just a small part of what is easy to do in kindergarten.
Hand-drawn New Year cards
Hand-drawn postcards look original. For drawing, you can use colored pencils, felt-tip pens, and paints. Even if you don’t know how to draw at all, with our step-by-step MKs you can create beautiful handmade crafts.
DIY watercolor New Year card
Let's consider different options for watercolor works and patterns suitable for postcards.
Beautiful patterns for postcards step by step
It is very easy to decorate a postcard with a simple lettering. On white paper we mark the place where the inscription will be located. Use a pencil to outline the word “merry” and add volume to the letters. Erase all the extra lines and start coloring. Carefully paint over all the letters with different colors. To make the picture more interesting, you can add splashes. We take watercolor with a small amount of water onto a brush and splash it onto the drawing.
You can also draw a simple wreath that will look good on any New Year's card. Using a simple pencil, draw an even circle. On the line we draw five circles, equidistant from each other. We paint them in different colors. Add brown twigs and cover them with green needles.
Another interesting idea is a New Year's garland. Draw a chaotic curved line and three large light bulbs. We paint the line and bases of the light bulbs green, and the light bulbs themselves pink, yellow and blue. Don't forget to leave highlights on the lamps and make shadows on the other side.
Let's draw a Christmas tree. On a piece of paper we show a tree with three tiers. Add brown stump. Draw a yellow circle on the top of the tree. We make a glow by gradually reducing the paint and adding more water. Between the tiers we add colored Christmas balls.
Any card can be decorated with a New Year's print, such as Christmas trees, red ribbons or a simple geometric pattern.
How to draw a New Year's lantern with watercolors step by step
Let's make a postcard using the “wet on” watercolor technique. We build the lantern and outline the branches. Using a wide brush, cover the entire sheet with water. While the paper is still wet, add bright yellow watercolor to the center. You can add a little orange around the edges. Cover the background with blue watercolor. You can sprinkle sea salt on damp paper to create beautiful stains. Draw the outline of the lantern in black with the addition of orange. For realism, we make the flashlight handle fuzzy. At the top of the picture we draw branches. Let's complete the details. The result was a fabulous New Year's card.
Drawing Christmas tree decorations in watercolors - step-by-step instructions
Using a simple pencil, draw three Christmas balls. We make the inscription and patterns. First, paint all the yellow parts. We add green and red colors. Now, you need to carefully cover the entire sheet except the balls with water. Add blue watercolor to the wet paper. You need to let the watercolor spread across the entire sheet. We complete the details with a black pen. The New Year's themed craft is ready.
Ready-made watercolor cards for inspiration
DIY gouache postcard for the New Year
If you don’t have watercolor paints, you can paint the card with ink.
Drawing a snowflake with gouache - master class
Take thick paper and seal the edges with tape. Cut out a snowflake from a notebook sheet. Place it in the center of the paper. We place the sponge in the blue gouache and, using driving movements, cover the entire sheet with gouache. Removing the snowflake. Cover the design with glue in the required places and sprinkle with glitter. We make an inscription and draw stars. All that remains is to fix the craft with hairspray. Making children's New Year's crafts is very exciting, and the work itself can be submitted to a competition.
Drawing a spruce forest with gouache - step-by-step instructions
The following craft can be done both for school and kindergarten. We draw several Christmas trees with green gouache. Cut them out and glue them onto white paper. We make gifts and stars for Christmas trees from colored paper. We make bows from black thread. We attach all the details and your creative DIY postcard is ready.
Ready-made New Year cards drawn in gouache for inspiration
DIY New Year's card in pencil
We make a sketch with a simple pencil. A small still life will consist of sweets, tangerines and gifts. Erase the extra lines and outline everything with a liner. To make the drawing seem realistic and interesting, we will use different shades. Paint the tangerines light orange in the center and darken the edges. We cover the leaves with light green and light green. We draw tangerine branches using different shades of brown. We color the gifts red and purple. We cover the remaining elements with blue and gold. Fill the background with blue, turning into dark blue. Draw shadow areas in black. Drawing this card is quite difficult, but if you put in all the effort, it will definitely work out!
Ready-made New Year cards for inspiration, drawn in pencil
DIY postcard with markers for the New Year
We draw a triangle to indicate where the future tree will be. Create a silhouette of a tree. Add Christmas balls, ribbons and a star. We finish drawing the gifts under the Christmas tree. We outline the picture with a black liner and erase the pencil lines. Color the tree with a green marker. Use a slightly darker shade to highlight individual branches. Paint over the balls, star and ribbons. Add color to the trunk and gifts.
Ideas for inspiration
DIY New Year card with felt-tip pens
You can also draw a postcard with felt-tip pens. The drawing will turn out bright and colorful, but you can’t make mistakes; you won’t be able to erase the extra line!
Drawing a gnome with felt-tip pens step by step
Let's draw a gnome on a New Year's card. To maintain proportions, mark the lines on the sheet. We fit the body and head of the gnome into the central rectangle. A little lower we draw the legs. Add a tall hat, a voluminous head and a face. We finish drawing such small details as stripes on the legs, boots and mittens. We paint the original gnome's clothes red. Add green and yellow elements. A cool gnome is ready for the New Year.
How to draw a polar bear step by step
Let's make a winter bear. We draw the outlines of the bear's body and head. Draw the hat and muzzle. Use a blue felt-tip pen to color the background, and a red marker to color the header. It turned out to be a cute New Year's card.
Finished works
Bullfinch using papier-mâché technique
The papier-mâché technique is based on creating figures from chewed paper. Crafts made from papier-mâché are practiced in classes in kindergarten groups. Working with your hands adds positive emotions, relieves internal instability, and children also like to watch how figures of men or fantasy animals appear from a wet wad of paper.
The following will be useful for work:
- paper torn into shreds, cardboard egg trays, old newspapers will do;
- PVA glue, water, brush;
- scissors;
- Kinder surprise egg, any blank of a suitable shape;
- thread, tape, masking tape.
The job description looks like this:
- Tear the paper material into small pieces and place them in a large container.
- Glue the workpiece with paper and newspaper pieces with PVA glue diluted in water.
- Form a tail and head from a wad of newspaper.
- Glue the tail to the body.
- Wrap your head with threads.
- Attach the head to the body using tape.
- Wrap the workpiece with masking tape and use it to form a small beak on the head.
- Perform another layer, coat the workpiece with paper pulp, which was previously soaked in water.
- Wait until it dries.
- Paint the bullfinch with acrylic paint.
- For the eyes, make small holes and insert beads; you can glue store-bought eyes.
- Cover the figure with matte varnish.
The bullfinch is ready. In this technique it turns out to be especially realistic.
The work of making a bullfinch is not difficult, but painstaking; it helps to instill in the child patience, perseverance, and diligence. We use improvised materials that are found in every home. Children always react with delight to crafts made with their own hands, give them to their loved ones or place them in a prominent place in their home.
How to make a card with a New Year's garland with your own hands
Postcards with images of New Year's garlands are especially popular. And this is not surprising, because even a child can draw it with his own hands! In our MKs you will find two cool ideas for a New Year's card with a garland!
Draw a garland with felt-tip pens
First, we draw a garland. We outline it with a black felt-tip pen. All that remains is to paint it in any colors. This craft can be made for kindergarten.
Glowing garland using crayons - master class
For the next option you will need black paper and colored crayons. Using a white charcoal pencil we outline a curved line and bases for the light bulbs. Cut out the paper in the shape of a light bulb and apply it to the desired location. We paint around the template with chalk. Rub it with a cotton pad. We remove the template and repeat this with all the light bulbs. It turns out to be a cool garland.
DIY Santa Claus postcard
A postcard with a picture of Santa Claus will also be relevant. You can draw it or make an applique from colored paper.
Application from colored paper Santa Claus step by step
Let's make a postcard with Santa Claus. Cut out the white base. We make mustaches from the same paper. We glue red clothes and grandfather's beard onto the blue sheet. Add the face, hat, belt and head decoration. All that remains is to sign the postcard on the back side.
Application made of white and red paper - MK with photo
Children will really enjoy creating the next version of the postcard. We need to cut out two parts of the beard, the fur for the hat and the hat itself. We attach all the elements to craft paper. We bend the hat and beard. Glue on the eyes, nose and pompom.
New Year's Deer postcard - how to make it yourself
Another option for a New Year's card is with the image of a deer. As in the case of Santa Claus, the deer can be drawn or made in the form of an applique, flat or three-dimensional.
Simple New Year's card Deer for kids - MK with photo
The method of making this deer is similar to the previous one. Glue two eyes, paper horns and a nose onto a white background. The nose can be made from fabric or thread. The funny card is ready.
Applique postcard Deer made of colored paper step by step
You can make funny New Year's reindeers. Let's take two sheets of equal size. Cut out a brown triangle the same length as the first sheet. Glue it onto the blue background and bend the top corner down. Attach paper horns, eyes and nose. You can experiment and come up with your own design for such deer. For example, cut a bow or wrap a garland around the deer’s neck.
DIY New Year's Mitten postcard
Another cool option for a New Year’s card is a mitten card. We have two MKs: a postcard in the shape of a mitten and with a mitten decor.
New Year's card in the shape of a mitten step by step
Fold the red cardboard in half. Draw a mitten and cut it out. You should get a postcard in the form of a folding mitten. We decorate it with fur, leaves and an inscription. The craft can be sent as an invitation.
New Year's card with mittens - step-by-step MK
The next New Year's card will be made in scrapbooking style. We cut out the central part of the card and give it an aged effect. To do this, you can use a sponge and brown paint. Cut out the blue mittens and also cover the edges with brown. We place the printed paper on plain cardboard. Place the white part in the center. Glue the mittens on top. It is advisable to use bulk tape so that the card does not seem too flat. We complement the craft with beads, ribbons and seals.
Postcard in scrapbooking style - first option
Do-it-yourself voluminous postcards in scrapbooking style are very similar to purchased products and will really amaze the recipient for the New Year 2022 in the good sense of the word. The most difficult thing in this matter is to come up with a design, but when something comes to mind, implementing it is as easy as shelling pears. With the help of photos that show the step-by-step process of creating such postcards, making them yourself will not be difficult. To make a postcard in scrapbooking style, you need to stock up on the following materials and auxiliary items:
• A4 paper – 2 pcs.; • scissors; • golden sparkles; • brush; • decorative cardboard; • stationery knife; • congratulations; • template in the form of a cardboard star; • PVA glue; • rhinestones, beads and sequins; • red felt; • velvet paper. Making a postcard: 1. One A4 sheet makes two postcards. Fold the sheet in half and cut. Fold the resulting halves in half again. 2. Print the congratulation on a sheet of suitable size or write it by hand, designing it beautifully. 3. Trace the star template onto felt and cut it out. Draw a second star in the center of the star, cut through it, but do not throw it away. It will need to be used for decoration. 4. Cut out a deer from cardboard and coat it with glue. Sprinkle gold glitter on top and leave to dry for a while. 5. Draw identical patterns on white paper and red felt and cut them out using a stationery knife. Place the details on the cards in the order shown in the photo. 6. Assemble the parts of the postcard and layer the levels on top of each other.
New Year's card Snowman
Another idea for a postcard with an image of a themed winter character – the Snowman. Again, the card itself can be in the shape of a snowman, a character can be drawn or an applique can be made.
Volumetric postcard with snowman applique - step-by-step master class
First, you need to draw a snowman. We color it with pencils, outline it with a liner and cut it out. Making a frame with ice patterns. Place it on a blue background and attach a snowman. We decorate the New Year's card with rhinestones, branches and stickers.
New Year's card with a three-dimensional snowman step by step
For this card, cut out three white circles. We glue them onto the blue background using double-sided tape. We complement the New Year's snowman with a hat, snowflakes and a face.
Children's drawings
You can draw a New Year's card yourself. Senior preschoolers and younger schoolchildren can draw a picture on their own or use pictures for sketching from the Internet.
Ideas for New Year's drawings that can be used to make New Year's cards:
DIY Christmas tree card
To complete the ideas for postcards depicting New Year's attributes - a postcard with a Christmas tree. We have two MKs: applique and pop-up.
Application made from ribbons and corrugated paper
We will need corrugated paper and cardboard. We cut colored strips and glue them onto cardboard parallel to each other. Cut out a cardboard triangle and wrap it with satin ribbons. We attach it to the background and decorate it with rhinestones.
Postcard with 3D Christmas tree - step-by-step manufacturing instructions
Let's look at another interesting option for a New Year's card. Divide the paper into strips with a pencil. We bend it like an accordion. Now, let's cut the strips. Fold the white cardboard in half. Place the accordions in the center and glue them. We decorate the card with gifts and snowflakes.
Handmade New Year cards. Christmas tree made of corrugated paper.
You will need:
- thick colored paper or colored cardboard
- corrugated paper
- scissors
- decorations, optional
1.
Fold a sheet of thick paper in half.
2.
Mark the place where you will glue the corrugated paper, or simply draw the outline of the Christmas tree with a simple pencil.
3.
Cut out several rectangles of different sizes from corrugated paper.
4.
Glue each rectangle as shown in the image.
* If you wish, you can decorate the card with a star (finished or cut out of paper), stickers, glitter, etc.
New Year's card made of felt - step-by-step MKs
You can use pieces of felt as material for a New Year's card. It will give the product an unusual look, and working with the material is easy and simple.
Postcard with original felt Christmas tree
Glue the printed fabric onto the cardboard. We make a frame from blue ribbon. Cut out the template in the shape of a drop. We trace it onto green felt. We will need about 25 of these parts. We place them on the fabric, starting from the bottom. Attach a button and rhinestones to the tree. The result is a textile postcard.
Postcard with felt applique “Herringbone”
Fold white cardboard in half. Glue paper with Christmas trees to the front side. Cut out a Christmas tree from felt. We embroider a garland on it. We glue the cardboard on the back side and place the Christmas tree on the card. We decorate with beads, ribbon and a congratulations inscription.
New Year card from foamiran
Let's figure out how to make a simple card with a Christmas ball. We draw and cut out a circle from foamiran. Attach it to the red background and place a bow on top. The New Year's ball is ready.
New Year card made from cotton pads
You can use cotton pads for appliqués on cards. They are perfect for winter crafts: white and airy as snow!
Postcard with 3D “Herringbone” applique made from cotton pads
Take ten cotton pads and roll them in the shape of bells. At the bottom of the blue paper we place four disks. Add three more on top of them. Next, glue two more disks. We place the latter at the very top. We decorate the craft with a shiny star, rhinestones and New Year's snowflakes.
Postcard with three-dimensional applique “Christmas balls” made of cotton pads
For this option you will need liquid glitter. We circle the cotton pads with glitter. We depict snowflakes inside. We place three disks on a blue background and glue bows and ribbons.
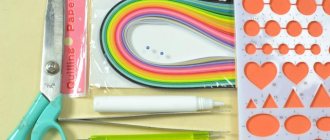
New Year's card using quilling technique - step-by-step MKs with photos
If you want to make an original card for the New Year, we recommend paying attention to the quilling technique. Fancy patterns made from ordinary paper strips will make a lasting impression on the recipient.
Unusual card with applique using quilling technique
Let's make a beautiful New Year's card using the quilling technique. Fold the printed paper diagonally and glue it to another sheet. We roll the corrugated ribbons into circles and form them into petals. We make a flower from six petals. Place folded gray ribbons inside the petals. Glue the flower to the card. Add another flower and folded ribbons.
Card with snowflake quilling
We roll the ribbons into circles with a diameter of 12 millimeters. We bend them with our fingers. We fasten the eight blue petals to form a flower. Glue eight more white ones around. We place the flower on pale blue paper. Add additional elements and an inscription.
What materials will you need?
Let's prepare everything you might need to make a postcard for the New Year of the Tiger with your own hands. We will need:
- colored cardboard or paper;
- textile;
- threads;
- glue;
- scissors;
- decorative elements (rhinestones, beads, eye details, etc.).
Remember that the colors of the materials depend on what kind of New Year's composition you will make.
“You can make original cards for the New Year 2022 with your own hands from what is at hand. There is no need to run to the store to buy anything. These are budget options for New Year's gifts. The main thing you have to use is creativity and ingenuity!”
DIY New Year's card - step-by-step master class
Cut out two identical squares from craft paper. Let's prepare embossed New Year's stickers in the form of snowflakes, a man or an angel. We cover them with red stamp paint, turn them over and press them onto the craft. We print the person on white paper, cut it out and glue it to thick tape. Glue the craft onto cardboard and bend it. Handmade postcard is ready.
Ideas for postcards from the website Country of Masters from all sorts of things: photo
Authentic postcards are made by beginners and experienced craftsmen.
Not only paper and cardboard are used in the work. Burlap, dry spruce cones, photographs, newspapers and much more will come in handy. After drinking tea, do you have a lot of candy wrappers left? Use them to create a Christmas tree or small decorative stars.
A postcard made from green cardboard according to the template comes out as purchased. Prepare a lot of small rhinestones for decoration.
Some craftswomen create original cards from pieces of wallpaper. You will need wallpaper with different prints. You should draw a template for the postcard step by step. Attach a pattern cut from a different color to the workpiece. Decorate your work with ribbons and beads.
The combination of beads of different diameters creates a unique magic. You can easily and quickly make cards for all your friends yourself. Take pieces of wallpaper or special art paper for creativity as a basis.
Use braid, cotton pads, or even long, hollow pasta.
Trace the outline of the image along the fabric. The pattern will be voluminous.
The craftswoman glued pieces of a paper capsule to a piece of colored cardboard. Do you love homemade cakes? Similar capsules can be found in your kitchen.
Another artist uses knitted napkins in the shape of snowflakes. Great idea for those who love to crochet. Is this about you? Get started on your craft!
An example of a do-it-yourself postcard using improvised materials - tubes rolled from pieces of paper. Together they create an interesting winter house on it.
The most original DIY postcard is made from pieces of denim. Do you still have unnecessary jeans, but it’s a shame to throw it away? Make a craft from scraps like one of the craftswomen of the Country of Masters.
We suggest you try making your own greeting cards. You will surprise your friends and family with unique gifts. Be sure to like and share with your friends on social media. networks with New Year's ideas!
Volumetric New Year's card with a Christmas tree made of ribbons - how to make it yourself
Cut out a triangle for the base of the Christmas tree. We make short strips of satin ribbon. We bend the strips in half and burn them with a lighter. This way the ribbons are held together and do not unravel. We begin to cover the Christmas tree with ribbons. We glue the double-sided tape and lay out the first layer. Place the next layer on top of the first. We continue until the entire tree is covered with ribbons. Glue the tree to colored paper. Decorate the top with a star. Now, let's make a bow from a small ribbon. Twist it around the fork. We pass the right end between the second and third teeth. We wrap it around the central part of the bow. We pull out the end and remove the homemade bow from the fork. We make a shiny frame and glue all the elements. The New Year's craft is ready.
DIY Pop-up card for the New Year
Let’s look at the scheme for making a modern postcard in the “pop up” style, which translates from English as “appear suddenly.” It is necessary to prepare a drop-down Christmas tree. You can make it yourself from a large number of identical parts. Fold the green leaf in half. Glue the Christmas tree into the middle. When everything is dry, paint a gold star on the top and decorate the background with stars. The result is an original 3D craft.
Origami New Year card
Fold the square in half and diagonally. We turn the corners inward. We bend the right and left corners towards the middle. Using scissors, we make equal cuts along the entire bottom of the triangle to create a fringe. Glue three triangles onto a white background. Use a hole punch to cut out holes in the shape of snowflakes. We decorate the Christmas tree with hearts. The New Year's craft is ready.
At MK we analyzed the schemes for making all the postcards. You can use other ideas, for example, depicting New Year's houses, a penguin, making a postcard with a mini clock, or using the decoupage technique. It is not necessary to repeat all the steps exactly - you can add your own edits and then you will get an original New Year's card.
What New Year cards to make with your children
If you decide to make a card with a child, you should choose simpler options in order to cope with the work without problems. Choose beginner descriptions that require a minimum set of skills.
Card with snowflakes
One of the simplest solutions that both adults and children enjoy doing. At the same time, the postcard turns out beautiful and is often indistinguishable from purchased products. To begin, prepare:
- a piece of thick paper;
- foamiran of small thickness or felt;
- scissors and templates of small snowflakes;
- Styrofoam;
- PVA glue.
Manufacturing instructions:
- Cut out a few snowflakes using templates or simply draw them. The size should be such that the elements look normal on the postcard. 3-5 pieces are enough, no more needed. You can place them either in a row or randomly.
- The surface of the card can be painted or a congratulatory inscription can be made on it. There are no restrictions.
- Cut small pieces of foam to place the snowflakes on. First, glue them to the card, and then fix the decor on top.
- Sign inside and you can give the original product as a gift.
Advice! This way you can glue not only snowflakes, but also elements of any other shape.
Spruce branch
A very interesting solution that will definitely be appreciated by those to whom you give it. Expensive materials are not needed to make it:
- small spruce branch;
- buttons of different colors and sizes;
- glue gun or superglue gel;
- paper snowflakes.
Step-by-step production:
- Write an inscription on the card if needed. You can download a stencil, cut out the letters and stick them on, or paint the surface from an aerosol can gold or silver.
- Glue a piece of snowflake in the lower left and upper right corners. Simply cut a quarter and place it neatly on the front side.
- The buttons will serve as Christmas tree decorations. First, glue 3-5 pieces of different colors and shapes. Then draw on the threads all the way to the edge of the card and small knots near the buttons.
- Trim the spruce branch to position it normally on the left edge. Glue it with a gun in 2-3 places to ensure a secure fit.
It is better to make such options shortly before the New Year holidays. If they lie for a long time, the needles from the branch will begin to fall off and the appearance will suffer greatly. If there are artificial branches, it is better to adapt them - they will not fall off.
