Home » Decor
DIY decor
Alyona
56277 Views 1 comment
A popular way to decorate the interior is to weave baskets from newspaper tubes: a simple task will allow you to create real works of art.
Basket weaving involves the use of rope techniques, which can be used to create beautiful products for home decor. These baskets are convenient for storing knitting threads, handicrafts and other accessories. The finished basket is not particularly strong, so you should not place heavy objects in it.
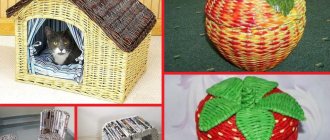
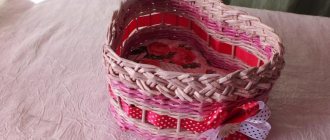
Basket made of newspaper tubes
Tip A newspaper basket is well suited for storing decorative fruits in the kitchen: it serves more as an interior item than as a means of carrying things.
To make your own basket with your own hands at home, you can take advantage of the master class for beginner needlewomen. All you need is to prepare the necessary materials and follow the suggested step-by-step instructions with photos. The process is so exciting that it will allow even children aged 7 years and older to participate.
To work you will need:
- paper - it is better to take newspapers with a solid base: advertising leaflets or magazines are good;
- knitting needle - it is useful for twisting the tubes themselves: the thicker the knitting needle, the thicker the tubes will be, so it is better to take a size from 2.5 to 4 mm;
- PVA glue – for assembling the base;
- scissors;
- acrylic paint, varnish or stain - for finishing the finished product;
- accessories for decorating a basket.
Having prepared all the necessary materials, we get to work.
To begin with, we will cut the magazine into strips 5-7 cm wide, from which we will later twist the tubes.
Take a knitting needle and attach the end of the strip to it, gradually twisting it around the axis: we get the first tube, which must be secured with a drop of glue at the end.
Depending on the size of the future product, the number of tubes will be determined. For example, for a basket with a diameter of 14 cm you will need from 40 to 50 paper blanks. By increasing the height of the basket, it is necessary to increase the number of workpieces.
At the next stage we move on to creating the base for the bottom part.
Place 4 by 4 tubes across, forming a cross. For strength, it is recommended to coat the cross with PVA glue to make the base more reliable. The cross is considered one of the easiest ways to make a base, so it is often used in weaving workshops for beginners.
Next we move on to weaving the bottom.
- Take one tube and fold it in half, forming a loop. We put it on the resulting 4 tubes as shown in the photo. After this, we proceed to weaving using a rope method.
- Rope weaving is carried out in this order of work: the tube located in the front is twisted back, and the one in the back, on the contrary, is twisted forward. So it is necessary to braid several rows until the sticks run out. When they run out, make an extension - just insert a new piece into the hole of the old one and secure with glue.
- After making 2 rows of 4 tubes, they need to be divided and weaving continued every 2 newspaper sticks. This will give the base extra strength. The next stage will be braiding 1 divided tube at a time, as shown in the photo: in the end, the number of rows will depend on the future diameter of the bottom.
- We cut off the paper blanks involved in weaving and bend them inward, glue the bottom itself at the end points and fix it with clothespins until completely dry. After this, we begin lifting the walls of the basket to begin making the side parts.
Next we proceed to weaving the wall.
- Again we make a loop from the blank, put it on the wall tube and braid it with a rope in the same way as we worked with the bottom.
- The number of rows depends on the height: in order for the basket to keep its shape, we place a jar on the bottom and braid it.
- To finish the weaving, we also cut off the ends and bend the workpiece inward, flavoring it with glue.
Beautiful decor
Let's start weaving the handle.
- To do this, you need to leave 3 tubes on opposite sides of the basket and braid them.
- Weaving must be done on both sides of the product at once, gradually narrowing it towards the center of the basket.
- At the top, the ends are connected with tape and disguised as the base of the handle.
- The final stage is finishing the product: mix a little white acrylic paint, water and glue and brush this mixture around the perimeter of the walls.
- It is also necessary to paint the bottom of the product. To dry the basket, turn it upside down and leave it for several hours.
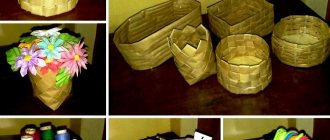
The final decoration of the finished product occurs according to your imagination. Do not forget to open the workpiece with varnish to ensure reliable connections. Decorate the basket with ribbons, decorative flowers, rhinestones or using the decoupage technique: a masterpiece will delight the eye and give a great mood.
Necessary tools and materials for work
To make a basket from newspaper tubes with your own hands, you will need the following materials:
- old newspapers, magazines or advertising leaflets;
- scissors;
- universal glue or glue stick;
- stationery knife;
- water-based brush and stain;
- cardboard or thick paper for making the bottom;
- scotch;
- an oblong knitting needle with a diameter of 2.5 mm or a thin kebab skewer;
- clamps for strong fixation;
- container for diluting paint;
- ruler;
- pencil;
- varnish;
- heaviness for oppression.
Let's spin
To prepare the tubes, you must first cut the paper into pieces of the desired size. We cut newspaper strips or magazine spreads into several parts. Aspect ratio - 1:3 or 1:4 (for example, 27 * 9 cm, 35 * 10 cm). The exact dimensions are not important.
Divide the page into several parts so that they are approximately the same aspect ratio as above.
Take a knitting needle and a strip of paper. We twist the corner of the paper around the knitting needle, and gradually, layer by layer, roll it into a tube. Secure the edge of the strip with a drop of glue. To make the tube the desired density, we lay the paper at 45° relative to the knitting needle.
Then it will be quite dense, but at the same time it will bend well.
- We take out the knitting needle. The tube is not too long; to work, you will have to splice them together. If everything is done correctly, one edge will be thin, the other will be thick and hollow from the inside.
- To connect two newspaper tubes, drop a few drops of PVA glue into the thick part and insert the second tube with a thin edge. Now we wait until it dries.
How to make newspaper tubes
Paper vine can be made as follows:
- cut strips of 7-10 by 30 cm from the starting material with a stationery knife;
- lay the strip vertically and begin to twist it diagonally using a knitting needle located at the bottom left at an angle of 30 degrees. Having reached the end, you need to glue the corner to the base of the workpiece;
- pull out the knitting needle and leave the tubes to dry for 15-25 minutes;
- When folding strands, it is advisable to make one end slightly wider than the other to lengthen them during the working process.
There is an even simpler option for making newspaper vines without twisting. It is necessary to cut strips, as for forming tubes. And fold them several times lengthwise to form edges of equal width. They can become material for ordinary wicker, which will serve as the bottom of the basket.
Decorative balls
To make openwork balls for a garland or decoration, take colored tubes from newspaper, pre-painted with acrylic. Place them on a flat surface and roll them well with a rolling pin so that they are flat. Stay a little short of the edges to build up the tubes as you go.
To make the balloons the same, make blanks from balloons. Start wrapping the first piece with a flat tube and glue the joints with PVA or wood glue. The main thing is to make the base frame even, because the balls can become deformed in the process.
Photo: izhevsk.ru
First, make meridians for further winding - like tangerine slices. Then use the free end to walk around the ball in a circle, covering all connections and joints. In the process, hide the first tip, and then tuck the last one under other layers.
Do not overuse the number of tubes so that the ball is not too rough and massive. When the blanks are dry, carefully pierce and pull out the balloon, straighten the shape and leave them to dry completely. At the end, prime the balls in a bucket with primer, dry and clean with a dry brush to remove any smudges.
Did you like the post? Subscribe to our channel in Yandex.Zen, it really helps us in our development!
Staining the tubes
You can easily paint a basket made from newspaper tubes with your own hands. You can paint both the finished product and paper blanks.
For strength, the created craft must be thoroughly soaked in PVA glue and allowed to dry.
It is better to dilute it with a small amount of water and apply with a brush. Then they paint with acrylic paint or stain in several layers for an even shade. If desired, you can add different dyes or colors - paste. To get an even tone, you must first coat it with any product that has a coloring pigment: brilliant green, iodine, food coloring, gouache, tonic.
It is better to paint newspaper blanks before starting work, since unpainted gaps will not be visible. A special fabric dye, water-based acrylic polymers, stain and food coloring agents are used. The stain is suitable for painting white tubes; they look like natural vines. The main shades are oak, coffee, mahogany and walnut.
To paint long workpieces, you need to make a device from a piece of large-diameter polypropylene pipe.
Both ends must be cut off and a plug (plastic jar) glued to one of them with PVA glue, which will prevent liquid from leaking out.
Then you need to pour the coloring agent into the pipe, not reaching the top a little, and place it on a special stand.
Next, you need to take several tubes and lower them into the solution. After impregnation, they should be pulled out and immersed in the coloring liquid with the other side. During the dyeing process, it is advisable to add emulsion to the container for good dyeing of the source material. At the end, all the workpieces are laid out on a level place and dried in the shade in the air.
Short strands are painted in a bottle with a spacious neck. It is necessary not to completely fill the container with dye. Then lower several tubes there and shake them for uniform painting, then turn them over and repeat the maneuver. Place on a smooth surface, dry and paint a second time to achieve a rich color.
To prevent the workpieces from becoming wrinkled, you should lay a piece of thick paper around the circumference of the bottle or pipe.
What to paint with?
It is better to color the tubes in advance. To do this, you need to immerse them in a container of shallow depth, and then fill them with the selected dye, water-based wood stain will do, for 3-5 minutes. Dry the products on a wire rack or mesh. A brush will help distribute the paint evenly. It is easier to tint finished baskets using a spray bottle.
You can get a blue tint using regular blue dissolved in a water-alcohol base. The color can be varied individually. When using wood stain, the color match will be as follows:
- maple - red-orange;
- oak - brown-red;
- ebony gives a dark gray tone;
- larch – yellow;
- fern – green;
- mahogany – pink.
When using stain, the easiest way to paint the workpieces is to dip them directly into the container with the composition, from each end. This way the products will also be painted on the inside. The paper has time to become saturated with color, but does not get wet.
It is better not to pre-tint newspaper tubes. During initial painting, they still retain visible remnants of printing ink. When repeated, they become brittle. The problem can be solved by applying varnish tinted in the desired colors after weaving, in 2-3 layers.
Methods of weaving from newspaper tubes
A do-it-yourself basket from newspaper tubes can be woven in two ways: solid and openwork.
In addition, there are different types of weaving, the main ones of which are:
- Simple weaving. Consists of making a frame of rigid paper tubes.
First, the narrow tip of the workpiece is fixed to one of the twigs of the frame and braided with a newspaper vine through one around the remaining parts of the frame at the back and front. You can use several lines and alternate twisting through 1-3 warp rods. - Layer weaving . Allows you to create a dense and reliable craft. It is necessary to wrap the cord around the first four supports and leave it sticking out to the side. Place another rope near the last braided post and braid the next 4 parts of the frame with it. It is necessary to add new tubes until the place where the wrapping began is reached.
- Openwork weaving . The technique is selected based on the intended pattern: columns, diamonds, stars. Most often, this type of twisting serves as a decoration for other types of work, forming carved holes.
- Rope weaving (spiral) . The principle is to wrap the vines not only around the supports, but also to intertwine them with each other. For a simple design, you need to take two tubes and braid the first post at the back, and the second at the front. The next support should be done in reverse, and the third one the same as the first. Then alternate in the same sequence.
Herringbone
A Christmas tree is a themed decoration for any room. It can also be made from paper wicker. You should first prepare 100-150 tubes and a mold. To do this, a sheet of thick paper is rolled up and secured into a cone. The weaving pattern is as follows:
- Three rods are folded like a snowflake. Place a cardboard cone over the intersection. Under the base there was a “sun” of 6 rays.
- Taking an additional tube, place it on top of two adjacent rays. The right one covers an additional tube, pressing it to the base cone.
- Then the work proceeds in a spiral. Alternately, the lower rod is laid on top of the newly laid beam and pressed against the base.
- When the first row ends, the tail from the first additional tube will remain intact. It will stick or be cut off at the very end.
- Each new row shifts towards the center from the previous one, the work becomes narrower. The mold should be removed 1-2 cm before the end of the cone, because... the weaving sits on it very tightly. To do this, the interlacing of the rays from the bottom of the tree needs to be cut and glued inside.
The finished Christmas tree is painted in a variety of colors. Classic green is no longer so relevant for a modern Christmas tree: it can be completely brown or purple.
Miniature toys and small candies are easily attached to the spiral coils with thread or glue. Such a tree can stand on legs in boots or be “planted” in a pot. A red cap with a bubo or bell is often worn on the top of the head.
Weaving baskets of different shapes
Baskets made from newspaper tubes have different shapes. Even beginners can weave various configurations with their own hands.
Square basket
Sequence of making a square basket:
- You should start by forming the bottom. To do this, take a cardboard strip and bend it in half. Punch holes in the cardboard at a distance of no more than 2 cm. Insert an extended “work cord” into the resulting holes.
- A long vine should be woven near the cardboard. Having reached the edge, turn and weave in the opposite direction. To extend the “working cord” it is necessary to re-glue the paper blanks. The bottom width may become narrower and should be adjusted to the desired size.
- Then the side walls of the braid are formed. An oblong newspaper rope is required, which is bent in half and both ends are threaded into the bottom. The tails that appear from the bottom of the bottom must be bent upward and secured. The “working cord” must be made to the desired size depending on the required height.
- To fix the sides, you need to place a heavy thing in the center , similar to the shape of the future basket. Then attach the frame tubes to it using an elastic band.
- Start weaving from the bottom of the craft. Using a long piece, weave it into one side, alternating the placement of vertical strands, placing them at the back and in front.
- At the beginning of work, the tip of the “working cord” remains, which can later be used as one of the components of the frame . It allows you to form an odd number of vertical blanks. After the next row, the unoccupied edge should be braided. The procedure of weaving the sides is carried out in a circle until a basket of the required size is obtained.
Rectangular basket
To form the bottom of a rectangular basket, you need to cut out a template of the intended size from cardboard, place it along the edge of a twisted tube, and secure the structure with clothespins. Then lay newspaper blanks across the base so that each bundle in turn goes from below or above the base, and adheres to the desired grouping of weaving.
For some period, the craft should be covered with another paper cord and secured with clips. The bottom will become like a comb, and then you need to weave in new pieces, observing a checkerboard pattern and forming the desired density. If the bottom becomes strong enough, you can remove the clothespins because it can hold its shape on its own.
When the base is woven, ray-like strips remain, which in the future will be used as the basis of the frame, and with their help you can form frame walls. If the tube runs out, you need to add a new one. When decorating the edges, unnecessary ends are cut off and glued inside.
Punnet
To create a round-shaped product using the rope method, you need to follow the following steps:
- Take six strips of newspaper and use clothespins to make a solid surface.
- Repeat this manipulation again and fold both parts crosswise.
- Then put the paper vine into the work. Bend the workpiece in half and place its tip in the place where the cross is formed.
- Next, a circular bottom is woven. The work cord must be bent with each turn, which is made at an angle of 90 degrees. This maneuver, which forms a ring, should be repeated 4 times, and then fixed with clamps.
- The sides are woven in pairs. Place an oblong double paper vine exactly under the created bottom. The ends of the paired strands should be secured to the basket.
Oval basket
An easy way to create a basket:
- to create the bottom you need to take several newspaper blanks and weave them together in the form of an oval.
- fasten them by tying them together
- Having formed the base, you need to weave it according to the usual method.
- Having made the desired diameter of the bottom, wrap it and lift the tubes up.
- Secure the strands with clamps and continue weaving.
- After finishing the work, secure the edges in the usual way.
Corner basket
When weaving corner crafts from newspaper bundles, it is advisable to follow these rules:
- To make stands, it is advisable to use a vine from a whole sheet of paper for printing or use magazine source material. Soft blanks will not be able to withstand the braid.
- When designing a basket, to form a uniform bottom, you should place a weight on it, paying special attention to the corners of the product.
- For painting, it is necessary to accurately calculate the required amount of acrylic coating, because if you add another shade, the color will be far from ideal.
Cardboard base
For beginners, it is more convenient to decorate a basket of newspaper tubes on a cardboard base. To make the bottom of the craft durable, they mainly use packaging corrugated cardboard in one or two layers. Draw the desired geometric shape on the sheet and cut out the part with scissors. Stepping 1 cm from the edge of the cardboard, use an awl to make holes at regular intervals. In our sample it is 2 cm. Then insert a newspaper tube into each hole to the middle and bend it in half, pointing upward.
The first row of weaving begins from the corner of the future basket, if it is square or rectangular. Pull a piece bent in half onto the outermost newspaper tube and twist it in an “X” shape, alternately along the entire perimeter of the bottom, going around each piece sticking up. Change the position of the halves all the time: one in front, the other at the back of the canvas. The next step is done in reverse. When you run out of paper, attach another tube to the two ends using PVA glue and continue working until the desired height of the basket. This is the simplest weaving option, which can be handled by craftsmen who are taking on such work for the first time.
Master class: a simple basket made from newspaper tubes
A simple model of a basket made from newspaper tubes is created with your own hands in this way:
- Use a knitting needle to twist 30 strands of newspaper strips, 10 cm wide.
- Using a jar, cut out 2 circles from cardboard. Flatten the tubes for the frame on one edge by 3 cm and glue them to one of the circles with the flattened side.
- Glue the second circle on top of the first so that the ends of the paper cords are between them. Raise the blanks up and secure with an elastic band.
- Next, you should take the newspaper edge flattened on one side and pass it behind the tube located next to the right, pulling the edge further and bringing it in front of the next paper strip. To form the bottom row, you need to alternate the workpieces in this way, putting others into the hole when they are finished.
- Weave to the desired level, then trim off the excess ends and treat the basket with glue.
Second bottom option
In the second case, we place an odd number of paired guides on the table and begin to braid them with two tubes, one of which is threaded from above, and the second from below.
Having reached the end, the tube is bent, and then the following guides are inserted into the edges. When inserting the guides, help yourself with scissors by cutting one of its ends.
A complex basket made of newspapers. Step-by-step instruction
A low, practical basket is made as follows:
- For the bottom you will need 13 newspaper tubes. 5 of them need to be placed side by side, and the remaining 8 should be laid out crosswise on top.
- Next, we braid the top in the form of a braid with one piece of paper.
- When the paper rope runs out, it should be extended.
- Weave the bottom in this way to the required size.
- Having completed forming the base, you should bend the tubes upward and braid them again.
- Having created 4 rows of walls of the future product, fix the main strips on the sides with clothespins and then form the basket. The entire craft is braided in two pieces.
- At the end, the edge is made with a figured volumetric weave.
- Hide and glue the excess ends.
- Pull out the clothespins, paint and varnish the basket.
Rows
It is also performed on a simple basis, but three or more tubes are used as workers. They work alternately. When the length of one tube runs out, they do not extend it, but start working on a new one, but not from the first, but from the second base post.
They work in this way until the desired height of the product is reached. The principle is reminiscent of weaving a wreath of flowers.
Edge decoration
When the basket is the desired height, it is advisable to hide the ends of the tubes that form the frame, secure and hide the workpiece. To do this you will need an extended knitting needle. It should be threaded through the hole near the stand in the middle for 3 rows. Repeat the same action in the other direction, then throw the stand over it and thread it down.
This will ensure that all the posts can bend. After finishing the work, you can get the finished edge. Lubricate the places where the racks hit with glue and let dry, then cut off all the excess ends of the workpieces. Carefully hide the sections among newspaper strips.
Twisting
The workpiece is twisted tightly and evenly, moving diagonally from the corner. Wrapping is usually done on a knitting needle, which is placed at an angle of 45-60 degrees relative to the edge of the paper sheet. The ends of the winding and in several places in the middle are fastened with glue.
Having twisted the entire sheet, the knitting needle is removed. Dry the tube thoroughly. This will be the main material for weaving products.
Craft mug: 135 photos and video master class on how to make beautiful crafts with your own hands- Crafts from spoons - 125 photos and videos, tips and tricks with step-by-step instructions on how to make crafts
Crafts from cotton pads - 125 photos of beautiful crafts, features and videos of new cotton crafts
How to make a pen
The easiest way to make a handle for a basket:
- You will need 4 long flexible ropes. For elasticity, it is worth spraying them with a spray bottle.
- Use clothespins to mark the places on the basket where the handle will be attached.
- Pass the tubes through the rows already made so that they are of equal length.
- Having obtained two rows of four strands, you should cross the parts. As a result, an even braid-curl should form.
- Make spirals until you get a handle of the desired length.
- Thread the braid through the braided model.
Spiral
This method stands apart; it is often isolated as a separate type. It is in many ways reminiscent of another paper craft technique - quilling.
The point is that the tubes are flattened and a spiral is twisted from flat newspaper strips, then, if necessary, they are given a convex shape and the spirals are connected to each other.
In a similar way, children of the 20th century made various toys from New Year's paper streamers.
Newspaper basket lid
The lid for the craft is made similar to the bottom, and should be slightly larger than the size of the top of the original.
To make it you need:
- in the side surface of strong and even cardboard you need to make small indentations with a knife;
- thread a piece of paper through the holes on each side;
- wrap around the edges of the product, bending one element after another;
- Finally, hide the free edges under the lid;
- for handles, insert 2 pairs of tubes along the two upper edges;
- stretch them to the middle, bend them and intertwine them with each other;
- coat the edges with glue and fasten with clothespins;
- for a neat appearance, they should be lubricated with PVA again and rewound with paper.
forest owl
For the owl, you need to prepare five dark tubes and two of any other color in advance.
- Form small spirals of a centimeter in length from two light tubes and, without cutting them, glue them to the base - the eyes are ready.
- Place the spirals next to each other so that the base of each of them is in different directions from each other.
- Bend one dark tube slightly into a semicircle and place it above your eyes, then take a second strip and glue its ends to the middle. You should get a kind of figure eight. Place it above the owl's head, next to the existing blanks.
- Slide another one under all the tubes so that its middle is located directly under the eyes and begin to wrap around each side. As a result, you should get wings, so make a couple of turns around them, do not do this anymore, concentrating only on the body.
- If desired, the owl can be decorated with a nose and slightly fluffed tassels in the head area.
Decorating a newspaper basket
You can beautifully decorate a basket of newspaper tubes with your own hands in the following ways::
- Through repainting . It is advisable to use moisture-resistant acrylic paints. The best option is to cover it in two layers, and the color saturation can be controlled by covering the craft with additional layers. You can decorate a multi-colored basket with several shades, or apply any thematic images to the surface of the basket.
- Using multi-colored satin ribbons. To do this, you need to leave room for them during the weaving process. It is advisable not to braid the craft at a level that corresponds to the width of the decorative components. After completing the formation of the basket, you just need to lay a ribbon between the paper blanks and secure it with glue or thread.
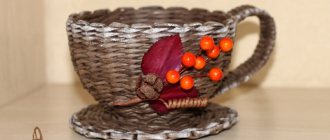
A basket made from newspaper tubes with your own hands can be made in any shape, decorated with various ribbons, flowers and other interesting details. - Pasta in the form of various figures . Before gluing, they must be treated with an aerosol of a golden or metallic hue.
- Leather flowers . To make them, you need to take artificial material and cut out drop-shaped parts for the petals and oval, sharp-angled parts for the leaves. To bend the components of the flower, it is advisable to hold them over the fire using tweezers.
- decorated using the decoupage technique will look like a real masterpiece. To fix the image, varnish is used.
A DIY basket made from newspaper tubes will be an excellent decor for any room, be it a bathroom, living room or dining room. The main thing is to create with positive thoughts and love. The creative process of making newspaper crafts helps relieve stress after everyday life and redirect attention, and the created models will decorate any interior.
Layer-by-layer
The technique of execution is similar to simple, but denser without gaps. In addition to the main working tube, additional ones are used, which are also actively involved in weaving. They work according to a certain scheme.
If you use additional tubes in contrasting colors, you get noticeable decorative layers.